2020 GMC SIERRA ground
[x] Cancel search: groundPage 276 of 502

GMC Sierra/Sierra Denali Owner Manual (GMNA-Localizing-U.S./Canada/
Mexico-13337776) - 2020 - CRC - 4/4/19
Driving and Operating 275
Warning (Continued)
provide alerts when changing
lanes under all driving conditions.
Failure to use proper care when
changing lanes may result in
injury, death, or vehicle damage.
Before making a lane change,
always check mirrors, glance over
your shoulder, and use the turn
signals.
LCA Detection Zones
1. SBZA Detection Zone
2. LCA Detection Zone
The LCA sensor covers a zone of
approximately one lane over from
both sides of the vehicle, or 3.5 m (11 ft). The height of the zone is
approximately between 0.5 m (1.5 ft)
and 2 m (6 ft) off the ground. The
Side Blind Zone Alert (SBZA)
warning area starts at approximately
the middle of the vehicle and goes
back 5 m (16 ft). Drivers are also
warned of vehicles rapidly
approaching from up to 25 m (82 ft)
behind the vehicle.
How the System Works
The LCA symbol lights up in the
side mirrors when the system
detects a moving vehicle in the next
lane over that is in the side blind
zone or rapidly approaching that
zone from behind. A lit LCA symbol
indicates it may be unsafe to
change lanes. Before making a lane
change, check the LCA display,
check mirrors, glance over your
shoulder, and use the turn signals.
Left Side Mirror
DisplayRight Side Mirror Display
When the vehicle is started, both
outside mirror LCA displays will
briefly come on to indicate the
system is operating. When the
vehicle is in a forward gear, the left
or right side mirror display will light
up if a moving vehicle is detected in
the next lane over in that blind zone
or rapidly approaching that zone.
If the turn signal is activated in the
same direction as a detected
vehicle, this display will flash as an
extra warning not to change lanes.
LCA is disabled when the trailer
connection status is displayed.
A DIC message may display. The
SBZA system still operates.
LCA can be disabled through
vehicle personalization. When you
disable LCA, SBZA is also disabled.
Page 287 of 502

GMC Sierra/Sierra Denali Owner Manual (GMNA-Localizing-U.S./Canada/
Mexico-13337776) - 2020 - CRC - 4/4/19
286 Driving and Operating
{Warning
If a fire starts while you are
refueling, do not remove the fill
nozzle. Shut off the flow of fuel by
shutting off the pump or by
notifying the station attendant.
Leave the area immediately.
Caution
If a new fuel cap is needed, get
the right type of cap from your
dealer. The wrong type of fuel cap
may not fit properly, may turn on
the malfunction indicator lamp,
and could damage the fuel
system and emissions system.
SeeMalfunction Indicator Lamp
(Check Engine Light) 0138.
Filling a Portable Fuel
Container
{Warning
Never fill a portable fuel container
while it is in the vehicle. Static
electricity discharge from the
container can ignite the fuel
vapor. You or others could be
badly burned and the vehicle
could be damaged. To help avoid
injury to you and others:
. Dispense fuel only into
approved containers.
. Do not fill a container while
it is inside a vehicle, in a
vehicle's trunk, in a pickup
bed, or on any surface other
than the ground.
. Bring the fill nozzle in
contact with the inside of
the fill opening before
operating the nozzle.
Maintain contact until filling
is complete.
(Continued)
Warning (Continued)
.Keep sparks, flames, and
smoking materials away
from fuel.
. Do not use electronic
devices while pumping fuel.
Page 291 of 502

GMC Sierra/Sierra Denali Owner Manual (GMNA-Localizing-U.S./Canada/
Mexico-13337776) - 2020 - CRC - 4/4/19
290 Driving and Operating
The vehicle can tow in D (Drive).
Shift the transmission to a lower
gear if the transmission shifts too
often under heavy loads and/or hilly
conditions.
When towing at higher altitudes,
engine coolant will boil at a lower
temperature than at lower altitudes.
If the engine is turned off
immediately after towing at high
altitude on steep uphill grades, the
vehicle could show signs similar to
engine overheating. To avoid this,
let the engine run, preferably on
level ground, with the transmission
in P (Park) for a few minutes before
turning the engine off. If the
overheat warning comes on, see
Engine Overheating0351.
Viewing Systems
If equipped, the viewing systems on
the vehicle can improve visibility
while hitching, backing, and driving
with a trailer. See Driver Assistance
Systems 0256.
Parking on Hills
{Warning
To prevent serious injury or death,
always park your vehicle and
trailer on a level surface when
possible.
When parking your vehicle and your
trailer on a hill: 1. Press the brake pedal, but do not shift into P (Park) yet. Turn
the wheels into the curb if
facing downhill or into traffic if
facing uphill.
2. Have someone place chocks under the trailer wheels.
3. Gradually release the brake pedal to allow the chocks to
absorb the load of the trailer.
4. Reapply the brake pedal. Then apply the parking brake and
shift into P (Park).
5. Release the brake pedal.
Leaving After Parking on a Hill
1. Apply and hold the brake pedal.
.Start the engine.
. Shift into a gear.
. Release the parking brake.
2. Let up on the brake pedal.
3. Drive slowly until the trailer is clear of the chocks.
4. Stop and have someone pick up and store the chocks.
Launching and Retrieving
a Boat
Backing the Trailer into the Water
{Warning
.Have all passengers get out
of the vehicle before
backing onto the sloped part
of the ramp. Lower the
driver and passenger side
windows before backing
onto the ramp. This will
(Continued)
Page 299 of 502

GMC Sierra/Sierra Denali Owner Manual (GMNA-Localizing-U.S./Canada/
Mexico-13337776) - 2020 - CRC - 4/4/19
298 Driving and Operating
Vehicle SeriesTrailer WeightWeight-Distributing Hitch
Usage Hitch Distribution
1500 Up to 3 175 kg (7,000 lb) Not Required 50%
1500 Over 3 175 kg (7,000 lb) Required50%
2500/3500 Up to 9 080 kg (20,000 lb) Not Required 25%
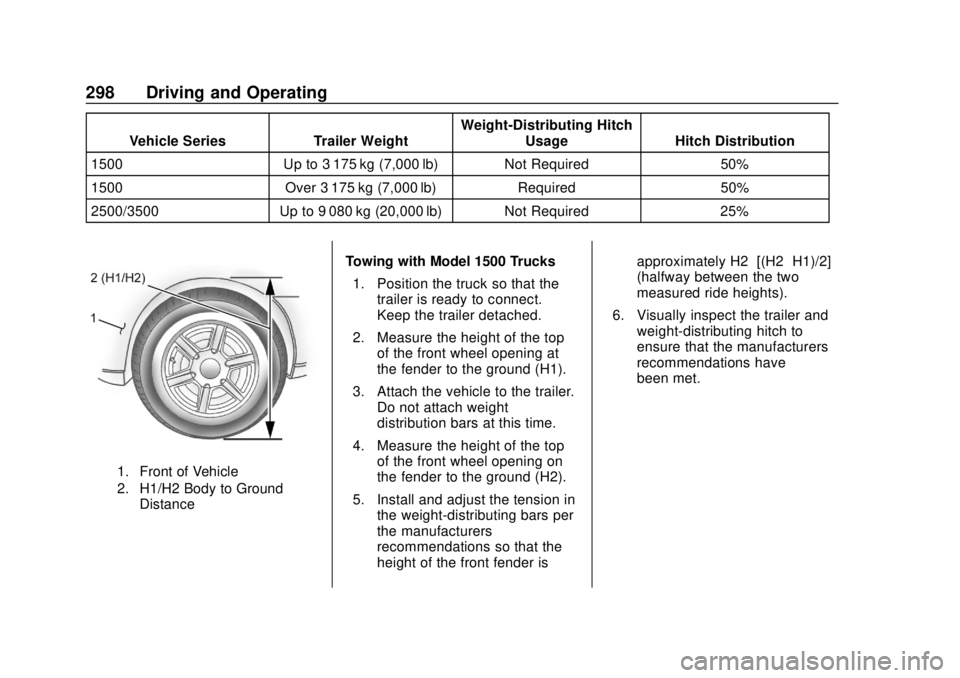
1. Front of Vehicle
2. H1/H2 Body to Ground
Distance
Towing with Model 1500 Trucks
1. Position the truck so that the trailer is ready to connect.
Keep the trailer detached.
2. Measure the height of the top of the front wheel opening at
the fender to the ground (H1).
3. Attach the vehicle to the trailer. Do not attach weight
distribution bars at this time.
4. Measure the height of the top of the front wheel opening on
the fender to the ground (H2).
5. Install and adjust the tension in the weight-distributing bars per
the manufacturers’
recommendations so that the
height of the front fender is approximately H2−[(H2−H1)/2]
(halfway between the two
measured ride heights).
6. Visually inspect the trailer and weight-distributing hitch to
ensure that the manufacturers’
recommendations have
been met.
Page 300 of 502

GMC Sierra/Sierra Denali Owner Manual (GMNA-Localizing-U.S./Canada/
Mexico-13337776) - 2020 - CRC - 4/4/19
Driving and Operating 299
MeasurementHeight Example 1500 (mm)
H1 1 000
H2 1 050
H2−H1 50
(H2−H1)/2 25
H2−[(H2−H1)/2] 1 025
Towing with Model 2500/3500
Trucks 1. Position the truck so that the trailer is ready to connect.
Keep the trailer detached.
2. Measure the height of the top of the front wheel opening at
the fender to the ground (H1).
3. Attach the vehicle to the trailer. Do not attach weight
distribution bars at this time.
4. Measure the height of the top of the front wheel opening on
the fender to the ground (H2).
5. Install and adjust the tension in the weight-distributing bars per
the manufacturers’ recommendations so that the
height of the front fender is
approximately H2−[(H2−H1)/4]
(1/4 the difference between the
two measured ride heights,
below the secondary ride
height {H2}).
6. Visually inspect the trailer and weight-distributing hitch to
ensure that the manufacturers’
recommendations have
been met.
Page 302 of 502

GMC Sierra/Sierra Denali Owner Manual (GMNA-Localizing-U.S./Canada/
Mexico-13337776) - 2020 - CRC - 4/4/19
Driving and Operating 301
attaching points on the bumper;
otherwise, safety chains should be
attached to holes on the trailer hitch.
Cross the safety chains under the
tongue of the trailer to help prevent
the tongue from contacting the road
if it becomes separated from the
hitch. Always leave enough slack in
the safety chains to allow the
combination to turn. Never allow
safety chains to drag on the ground.
Trailer Brakes
Loaded trailers over 900 kg
(2,000 lb) must be equipped with
brake systems and with brakes for
each axle. Trailer braking equipment
conforming to Canadian Standards
Association (CSA) requirement
CAN3-D313, or its equivalent, is
recommended.
State or local regulations may
require trailers to have their own
braking system if the loaded weight
of the trailer exceeds certain
minimums that can vary from state
to state. Read and follow the
instructions for the trailer brakes so
they are installed, adjusted, andmaintained properly. Never attempt
to tap into your vehicle's hydraulic
brake system. If you do, both the
vehicle antilock brakes and the
trailer brakes may not function,
which could result in a crash.
Auxiliary Battery
If equipped, the vehicle's auxiliary
battery can be used to supply
electrical power to additional
equipment that may be added, such
as a slide-in camper.
Locate the auxiliary battery
connector under the hood on the
driver side of the vehicle, next to the
engine compartment fuse block.
Follow the proper installation
instructions included with any
electrical equipment that is installed.
Caution
To prevent draining the auxiliary
battery, always turn off electrical
equipment when not in use and
do not use any equipment that
(Continued)
Caution (Continued)
may exceed the
maximum amperage rating of
30 amps.
Trailer Wiring Harness
Basic Trailer Wiring
If the vehicle is not equipped with a
trailer connector on the rear bumper,
a 7-wire trailering harness is tied to
the vehicles frame. The harness
requires the installation of a trailer
connector, which is available
through your dealer.
Use only a round, seven-wire
connector with flat blade terminals
meeting SAE J2863 specifications
for proper electrical connectivity.
Page 303 of 502

GMC Sierra/Sierra Denali Owner Manual (GMNA-Localizing-U.S./Canada/
Mexico-13337776) - 2020 - CRC - 4/4/19
302 Driving and Operating
The seven-wire harness contains
the following trailer circuits:Stop/Turn
Signal Left Yellow/Blue
Stop/Turn
Signal Right Green/Violet
Tail/Parking
Lamps Gray/Brown
Reverse Lamps White/Green
Battery Feed Red/Green
Ground White
Electric Trailer
Brake Blue Heavy-Duty
Trailer Wiring
Harness Package
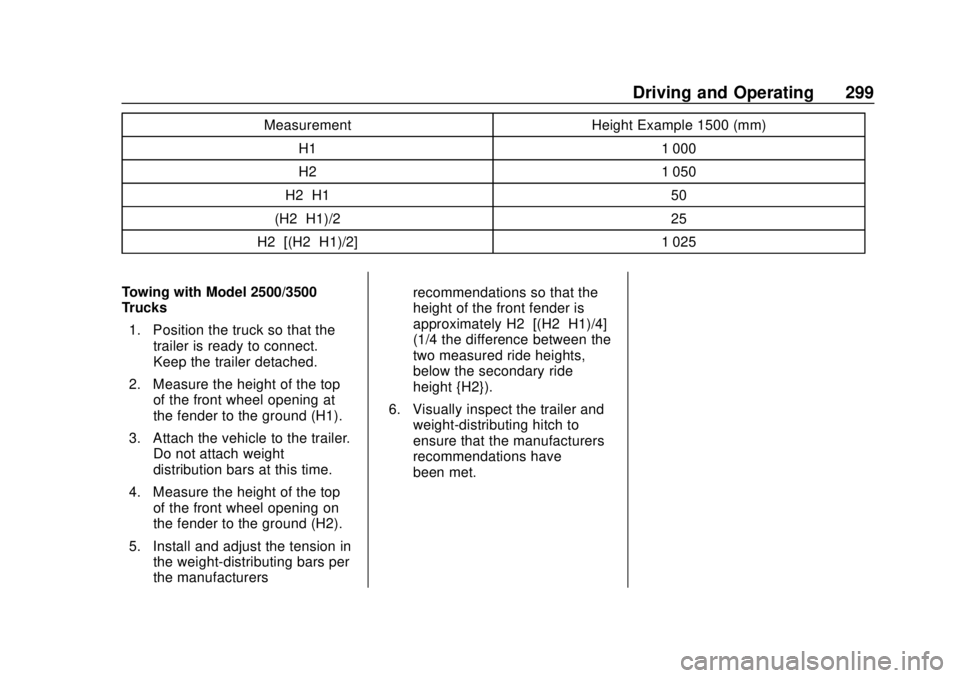
If equipped, the trailer wiring
harness, with a 7-pin connector and
a
4-pin connector, is mounted on
the vehicle's rear bumper.
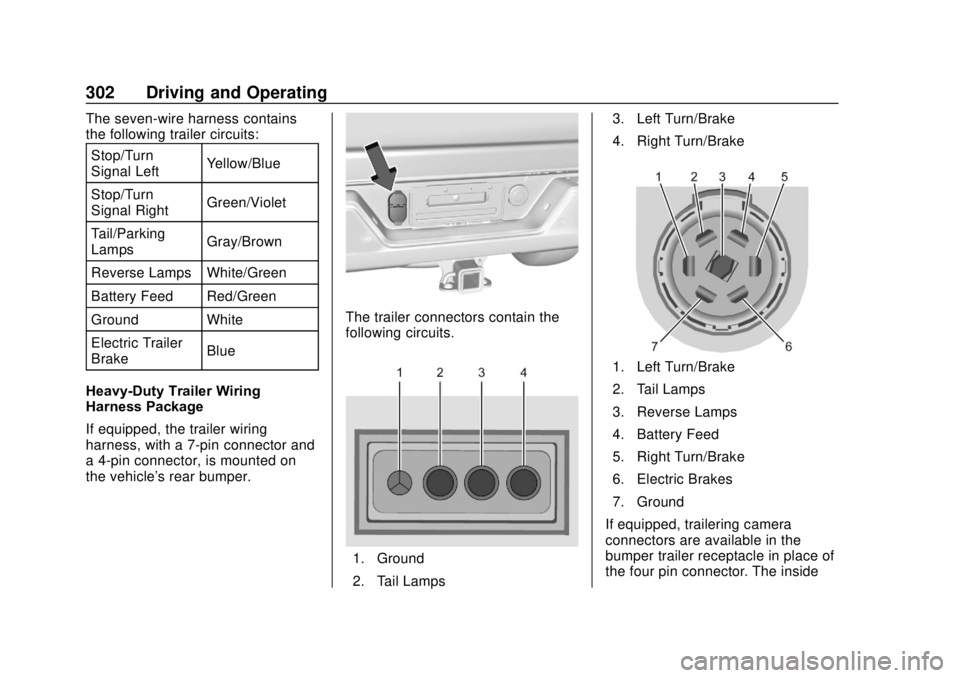
The trailer connectors contain the
following circuits.
1. Ground
2. Tail Lamps3. Left Turn/Brake
4. Right Turn/Brake
1. Left Turn/Brake
2. Tail Lamps
3. Reverse Lamps
4. Battery Feed
5. Right Turn/Brake
6. Electric Brakes
7. Ground
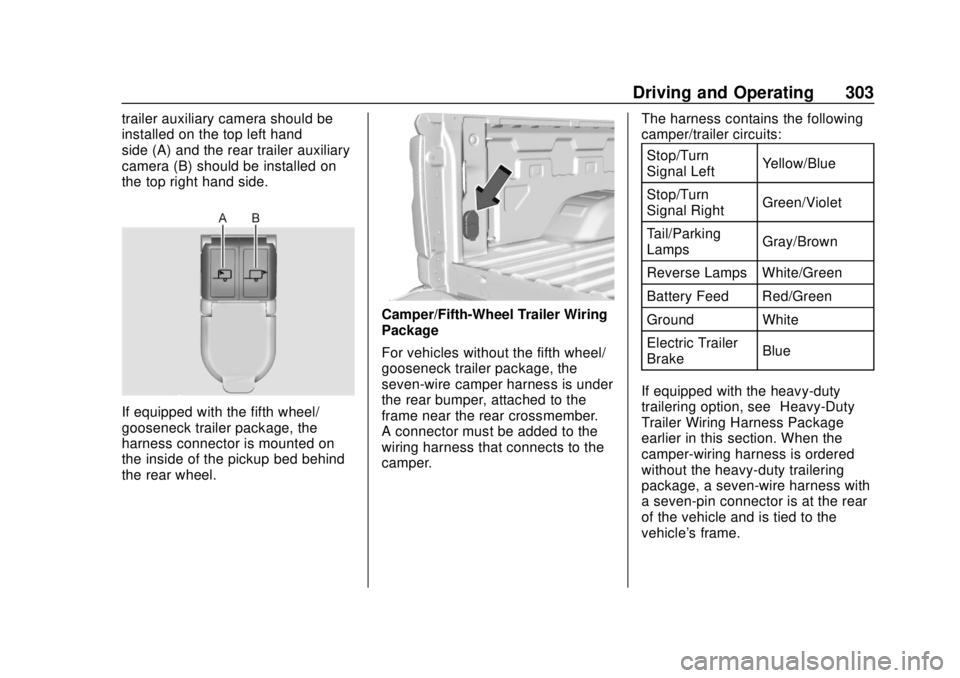
If equipped, trailering camera
connectors are available in the
bumper trailer receptacle in place of
the four pin connector. The inside
Page 304 of 502

GMC Sierra/Sierra Denali Owner Manual (GMNA-Localizing-U.S./Canada/
Mexico-13337776) - 2020 - CRC - 4/4/19
Driving and Operating 303
trailer auxiliary camera should be
installed on the top left hand
side (A) and the rear trailer auxiliary
camera (B) should be installed on
the top right hand side.
If equipped with the fifth wheel/
gooseneck trailer package, the
harness connector is mounted on
the inside of the pickup bed behind
the rear wheel.
Camper/Fifth-Wheel Trailer Wiring
Package
For vehicles without the fifth wheel/
gooseneck trailer package, the
seven-wire camper harness is under
the rear bumper, attached to the
frame near the rear crossmember.
A connector must be added to the
wiring harness that connects to the
camper.The harness contains the following
camper/trailer circuits:
Stop/Turn
Signal Left Yellow/Blue
Stop/Turn
Signal Right Green/Violet
Tail/Parking
Lamps Gray/Brown
Reverse Lamps White/Green
Battery Feed Red/Green
Ground White
Electric Trailer
Brake Blue
If equipped with the heavy-duty
trailering option, see “Heavy-Duty
Trailer Wiring Harness Package”
earlier in this section. When the
camper-wiring harness is ordered
without the heavy-duty trailering
package, a seven-wire harness with
a seven-pin connector is at the rear
of the vehicle and is tied to the
vehicle's frame.