2020 GMC SIERRA DENALI ignition
[x] Cancel search: ignitionPage 328 of 501

GMC Sierra/Sierra Denali Owner Manual (GMNA-Localizing-U.S./Canada/
Mexico-13337776) - 2020 - CRC - 8/27/19
Vehicle Care 327
Vehicle Care
General Information
General Information . . . . . . . . . . 328
California Proposition65 Warning . . . . . . . . . . . . . . . . . 329
California Perchlorate Materials Requirements . . . . . 329
Accessories and Modifications . . . . . . . . . . . . . . . . 329
Vehicle Checks
Doing Your OwnService Work . . . . . . . . . . . . . . . 330
Hood . . . . . . . . . . . . . . . . . . . . . . . . . 330
Engine Compartment Overview . . . . . . . . . . . . . . . . . . . . 332
Engine Oil . . . . . . . . . . . . . . . . . . . . 339
Engine Oil Life System . . . . . . . 341
Automatic Transmission Fluid . . . . . . . . . . . . . . . . . . . . . . . . 343
Engine Air Filter Life System . . . . . . . . . . . . . . . . . . . . . . 343
Engine Air Cleaner/Filter . . . . . . 344
Cooling System . . . . . . . . . . . . . . 346
Engine Overheating . . . . . . . . . . 351
Overheated Engine Protection Operating Mode . . . . . . . . . . . . . 352
Engine Fan . . . . . . . . . . . . . . . . . . . 353 Power Steering Fluid . . . . . . . . . 354
Washer Fluid . . . . . . . . . . . . . . . . . 354
Brakes . . . . . . . . . . . . . . . . . . . . . . . 355
Brake Pad Life System . . . . . . . 356
Brake Fluid . . . . . . . . . . . . . . . . . . . 357
Battery - North America . . . . . . 358
Four-Wheel Drive . . . . . . . . . . . . . 361
Front Axle . . . . . . . . . . . . . . . . . . . . 361
Rear Axle . . . . . . . . . . . . . . . . . . . . 362
Noise Control System . . . . . . . . 362
Starter Switch Check . . . . . . . . . 363
Automatic Transmission Shift
Lock Control Function
Check . . . . . . . . . . . . . . . . . . . . . . . 363
Ignition Transmission Lock Check . . . . . . . . . . . . . . . . . . . . . . . 363
Park Brake and P (Park) Mechanism Check . . . . . . . . . . 364
Wiper Blade Replacement . . . . 364
Windshield Replacement . . . . . 365
Gas Strut(s) . . . . . . . . . . . . . . . . . . 365
Headlamp Aiming
Front Headlamp Aiming . . . . . . 366
Bulb Replacement
Bulb Replacement . . . . . . . . . . . . 367
Halogen Bulbs . . . . . . . . . . . . . . . . 367
LED Lighting . . . . . . . . . . . . . . . . . 367 Headlamps, Front Turn Signal,
Sidemarker, and Parking
Lamps . . . . . . . . . . . . . . . . . . . . . . 367
Taillamps, Turn Signal, Stoplamps, and Back-Up
Lamps . . . . . . . . . . . . . . . . . . . . . . 368
Center High-Mounted Stoplamp (CHMSL) and
Cargo Lamp . . . . . . . . . . . . . . . . . 369
License Plate Lamp . . . . . . . . . . 369
Electrical System
Electrical System Overload . . . 370
Fuses and Circuit Breakers . . . 370
Engine Compartment Fuse Block . . . . . . . . . . . . . . . . . . . . . . . . 371
Instrument Panel Fuse
Block (Left) . . . . . . . . . . . . . . . . . 374
Instrument Panel Fuse Block (Right) . . . . . . . . . . . . . . . . . . . . . . 376
Wheels and Tires
Tires . . . . . . . . . . . . . . . . . . . . . . . . . . 379
All-Season Tires . . . . . . . . . . . . . . 379
Winter Tires . . . . . . . . . . . . . . . . . . 380
Low-Profile Tires . . . . . . . . . . . . . 380
All-Terrain Tires . . . . . . . . . . . . . . . 381
Tire Sidewall Labeling . . . . . . . . 381
Tire Designations . . . . . . . . . . . . . 383
Tire Terminology andDefinitions . . . . . . . . . . . . . . . . . . 385
Page 350 of 501

GMC Sierra/Sierra Denali Owner Manual (GMNA-Localizing-U.S./Canada/
Mexico-13337776) - 2020 - CRC - 8/27/19
Vehicle Care 349
Automatic Coolant Service Fill
Instructions (L3B Engine)
See 3.0L Duramax Diesel
supplement for the diesel engine
procedure.
If equipped, this feature assists in
filling and removing air from the
cooling system after service of
components or when coolant is
added after being too low.
To activate the fill and air removal
process:1. With a cold system, add coolant to the indicated mark
on the surge tank.
2. Replace the cap on the surge tank.
3. Connect the vehicle to a battery charger.
4. Set the ignition to Service or Accessory Mode. See Ignition
Positions (Keyless Access)
0 208 or
Ignition Positions (Key Access)
0 210.
5. Turn off the air conditioning. 6. Set the parking brake.
7. At the same time, press the
accelerator and the brake for
automatic transmission
vehicles for two seconds, then
release.
At the end of the cycle, check the
coolant level in the surge tank and
add coolant if it is low. Turn off the
vehicle, allow the Electronic Control
Module (ECM) to go to sleep, about
two minutes, and repeat Steps 3–7.
Listen for pump activation and
movement of the control valves
while watching the level of the
coolant in the surge tank. If the tank
empties, turn the ignition off,
carefully remove the surge tank cap,
refill to the indicated mark, and
repeat Steps 3–6. The fill and air
removal process will run for
approximately 10 minutes.
How to Add Coolant to the
Coolant Surge Tank for
Gasoline Engines Except L3B
If the vehicle has a diesel engine,
see “Cooling System” in the
Duramax diesel supplement for the
proper coolant fill procedure.
{Warning
Spilling coolant on hot engine
parts can burn you. Coolant
contains ethylene glycol and it will
burn if the engine parts are hot
enough.
{Warning
Plain water, or other liquids such
as alcohol, can boil before the
proper coolant mixture will. With
plain water or the wrong mixture,
the engine could get too hot but
there would not be an overheat
(Continued)
Page 355 of 501

GMC Sierra/Sierra Denali Owner Manual (GMNA-Localizing-U.S./Canada/
Mexico-13337776) - 2020 - CRC - 8/27/19
354 Vehicle Care
Power Steering Fluid
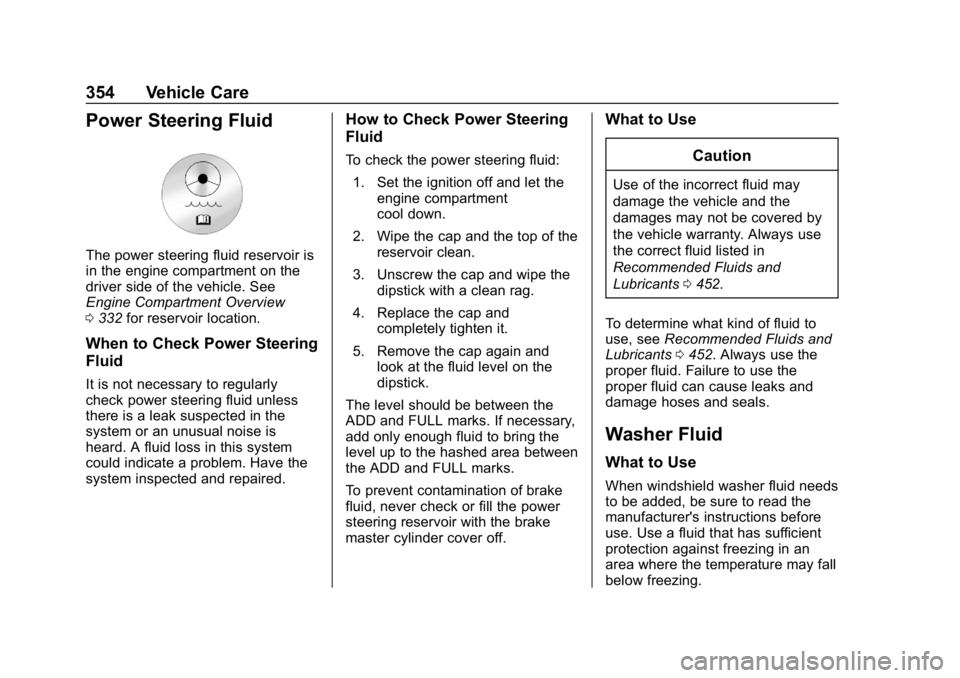
The power steering fluid reservoir is
in the engine compartment on the
driver side of the vehicle. See
Engine Compartment Overview
0332 for reservoir location.
When to Check Power Steering
Fluid
It is not necessary to regularly
check power steering fluid unless
there is a leak suspected in the
system or an unusual noise is
heard. A fluid loss in this system
could indicate a problem. Have the
system inspected and repaired.
How to Check Power Steering
Fluid
To check the power steering fluid:
1. Set the ignition off and let the engine compartment
cool down.
2. Wipe the cap and the top of the reservoir clean.
3. Unscrew the cap and wipe the dipstick with a clean rag.
4. Replace the cap and completely tighten it.
5. Remove the cap again and look at the fluid level on the
dipstick.
The level should be between the
ADD and FULL marks. If necessary,
add only enough fluid to bring the
level up to the hashed area between
the ADD and FULL marks.
To prevent contamination of brake
fluid, never check or fill the power
steering reservoir with the brake
master cylinder cover off.
What to Use
Caution
Use of the incorrect fluid may
damage the vehicle and the
damages may not be covered by
the vehicle warranty. Always use
the correct fluid listed in
Recommended Fluids and
Lubricants0452.
To determine what kind of fluid to
use, see Recommended Fluids and
Lubricants 0452. Always use the
proper fluid. Failure to use the
proper fluid can cause leaks and
damage hoses and seals.
Washer Fluid
What to Use
When windshield washer fluid needs
to be added, be sure to read the
manufacturer's instructions before
use. Use a fluid that has sufficient
protection against freezing in an
area where the temperature may fall
below freezing.
Page 356 of 501

GMC Sierra/Sierra Denali Owner Manual (GMNA-Localizing-U.S./Canada/
Mexico-13337776) - 2020 - CRC - 8/27/19
Vehicle Care 355
Adding Washer Fluid
The vehicle has a low washer fluid
message on the DIC that comes on
when the washer fluid is low. The
message is displayed for
15 seconds at the start of each
ignition cycle. When the WASHER
FLUID LOW ADD FLUID message
displays, washer fluid will need to
be added to the windshield washer
fluid reservoir.
Open the cap with the washer
symbol on it. Add washer fluid until
the tank is full. SeeEngine
Compartment Overview 0332 for
reservoir location.
Caution
. Do not use washer fluid that
contains any type of water
repellent coating. This can
cause the wiper blades to
chatter or skip.
. Do not use engine coolant
(antifreeze) in the
windshield washer. It can
damage the windshield
washer system and paint.
. Do not mix water with
ready-to-use washer fluid.
Water can cause the
solution to freeze and
damage the washer fluid
tank and other parts of the
washer system.
. When using concentrated
washer fluid, follow the
manufacturer instructions for
adding water.
. Fill the washer fluid tank
only three-quarters full when
it is very cold. This allows
(Continued)
Caution (Continued)
for fluid expansion if
freezing occurs, which could
damage the tank if it is
completely full.
Brakes
Disc brake pads have built-in wear
indicators that make a high-pitched
warning sound when the brake pads
are worn and new pads are needed.
The sound can come and go or be
heard all the time the vehicle is
moving, except when applying the
brake pedal firmly.
{Warning
The brake wear warning sound
means that soon the brakes will
not work well. That could lead to
a crash. When the brake wear
warning sound is heard, have the
vehicle serviced.
Page 357 of 501

GMC Sierra/Sierra Denali Owner Manual (GMNA-Localizing-U.S./Canada/
Mexico-13337776) - 2020 - CRC - 8/27/19
356 Vehicle Care
Caution
Continuing to drive with worn-out
brake pads could result in costly
brake repair.
Some driving conditions or climates
can cause a brake squeal when the
brakes are first applied or lightly
applied. This does not mean
something is wrong with the brakes.
Properly torqued wheel nuts are
necessary to help prevent brake
pulsation. When tires are rotated,
inspect brake pads for wear and
evenly tighten wheel nuts in the
proper sequence to torque
specifications in Capacities and
Specifications 0458.
Brake linings should always be
replaced as complete axle sets.
Brake Pedal Travel
See your dealer if the brake pedal
does not return to normal height,
or if there is a rapid increase in
pedal travel. This could be a sign
that brake service may be required.
Replacing Brake System Parts
Always replace brake system parts
with new, approved replacement
parts. If this is not done, the brakes
may not work properly. The braking
performance expected can change
in many other ways if the wrong
replacement brake parts are
installed or parts are improperly
installed.
Brake Pad Life System
When to Change Brake Pads
This vehicle has a system that
estimates the remaining life of the
front and rear brake pads. Brake
pad life is displayed in the Driver
Information Center (DIC), along with
a percentage for each axle. The
system must be reset every time the
brake pads are changed.
When the system has determined
that the brake pads need to be
replaced, a message will display,
which may include mileage
remaining. Brake pads should always be
replaced as complete axle sets.
How to Reset the Brake Pad
Life System
The system will automatically detect
when significantly worn brake pads
are replaced. When the ignition is
turned on after new pads and wear
sensors are installed, a message
will display. Follow the prompts to
reset the system.
The brake pad life system can also
be manually reset:
1. Display Brake Pad Life on the DIC. See Driver Information
Center (DIC) (Base Level)
0 147 or
Driver Information Center (DIC)
(Midlevel and Uplevel) 0148.
2. Press the thumbwheel or the trip odometer reset stem if the
vehicle does not have DIC
buttons. Select front or rear
pads as appropriate.
3. Select YES on the confirmation message, or press the trip
odometer reset stem on a base
Page 360 of 501

GMC Sierra/Sierra Denali Owner Manual (GMNA-Localizing-U.S./Canada/
Mexico-13337776) - 2020 - CRC - 8/27/19
Vehicle Care 359
{Warning
WARNING:Battery posts,
terminals, and related
accessories contain lead and lead
compounds, chemicals known to
the State of California to cause
cancer and birth defects or other
reproductive harm. Batteries also
contain other chemicals known to
the State of California to cause
cancer. WASH HANDS AFTER
HANDLING. For more information
go to www.P65Warnings.ca.gov/
passenger-vehicle.
See California Proposition
65 Warning 0329 and the back
cover.
Vehicle Storage
{Warning
Batteries have acid that can burn
you and gas that can explode.
You can be badly hurt if you are
not careful. See Jump Starting -
North America 0419 for tips on
working around a battery without
getting hurt.
Infrequent Usage: Remove the
black, negative (−) cable from the
battery to keep the battery from
running down.
Extended Storage: Remove the
black, negative (−) cable from the
battery or use a battery trickle
charger.
Negative Battery Cable
Disconnection
{Warning
Before disconnecting the negative
battery cable, turn off all features,
turn the ignition off, and remove
the key, if equipped, from the
vehicle. If this is not done, you or
others could be injured, and the
vehicle could be damaged.
Caution
If the battery is disconnected with
the ignition on or the vehicle in
Retained Accessory Power
(RAP), the OnStar back-up
battery will be permanently
discharged and will need to be
replaced.
1. Make sure the lamps, features, and accessories are turned off.
2. Turn the ignition off and remove the key, if equipped.
Page 362 of 501

GMC Sierra/Sierra Denali Owner Manual (GMNA-Localizing-U.S./Canada/
Mexico-13337776) - 2020 - CRC - 8/27/19
Vehicle Care 361
For vehicles equipped with the Stop/
Start system:1. Install the negative battery cable to the battery
sensor stud.
2. Install the negative battery cable nut to the battery sensor
stud and tighten.
3. Turn the ignition on.
For vehicles not equipped with the
Stop/Start system: 1. Install the negative battery cable clamp to the negative
battery post.
2. Tighten the negative battery cable nut.
3. Turn the ignition on.
Four-Wheel Drive
Transfer Case
When to Check Lubricant
Refer to Maintenance Schedule
0 441 to determine when to check
the lubricant.
1. Fill Plug
2. Drain Plug
To get an accurate reading, the
vehicle should be on a level
surface.
If the level is below the bottom of
the fill plug (1) hole, located on the
transfer case, some lubricant will
need to be added. Add enough
lubricant to raise the level to the
bottom of the fill plug (1) hole. Use
care not to overtighten the plug. When to Change Lubricant
Refer to
Maintenance Schedule
0 441 to determine how often to
change the lubricant.
What to Use
Refer to Recommended Fluids and
Lubricants 0452 to determine what
kind of lubricant to use.
Front Axle
When to Check Lubricant
It is not necessary to regularly
check the front axle fluid unless a
leak is suspected or an unusual
noise is heard. A fluid loss could
indicate a problem. Have it
inspected and repaired. This service
can be complex. See your dealer.
Do not directly power wash the
transfer case and/or front/rear axle
output seals. High pressure water
can overcome the seals and
contaminate the fluid. Contaminated
fluid will decrease the life of the
transfer case and/or drive axles and
should be replaced.
Page 364 of 501

GMC Sierra/Sierra Denali Owner Manual (GMNA-Localizing-U.S./Canada/
Mexico-13337776) - 2020 - CRC - 8/27/19
Vehicle Care 363
Fan and Drive:
.Removal of fan clutch or
rendering clutch inoperative.
. Removal of the fan shroud.
Air Intake:
. Removal of air cleaner silencer.
. Reversing air cleaner cover.
Exhaust:
. Removal of muffler, catalytic
converter, and/or resonator.
. Removal of exhaust pipes and
exhaust pipe clamps.
Starter Switch Check
{Warning
When you are doing this
inspection, the vehicle could
move suddenly. If the vehicle
moves, you or others could be
injured. 1. Before starting this check, be
sure there is enough room
around the vehicle.
2. Apply both the parking brake and the regular brake.
Do not use the accelerator
pedal, and be ready to turn off
the engine immediately if it
starts.
3. Try to start the engine in each gear. The vehicle should start
only in P (Park) or N (Neutral).
If the vehicle starts in any other
position, contact your dealer for
service.
Automatic Transmission
Shift Lock Control
Function Check
{Warning
When you are doing this
inspection, the vehicle could
move suddenly. If the vehicle
moves, you or others could be
injured. 1. Before starting this check, be
sure there is enough room
around the vehicle. It should be
parked on a level surface.
2. Apply the parking brake. Be ready to apply the regular
brake immediately if the vehicle
begins to move.
3. With the engine off, turn the ignition on, but do not start the
engine. Without applying the
regular brake, try to move the
shift lever out of P (Park) with
normal effort. If the shift lever
moves out of P (Park), contact
your dealer for service.
Ignition Transmission
Lock Check
If equipped with Key Access
ignition, while parked, and with the
parking brake set, try to turn the
ignition off in each shift lever
position. The ignition should turn to
off only when the shift lever is in
P (Park).