2020 FORD F250 SUPER DUTY ECO mode
[x] Cancel search: ECO modePage 147 of 633
Setting the Blower Motor Speed
Press and release + or - to adjust
the volume of air circulated in
the vehicle.
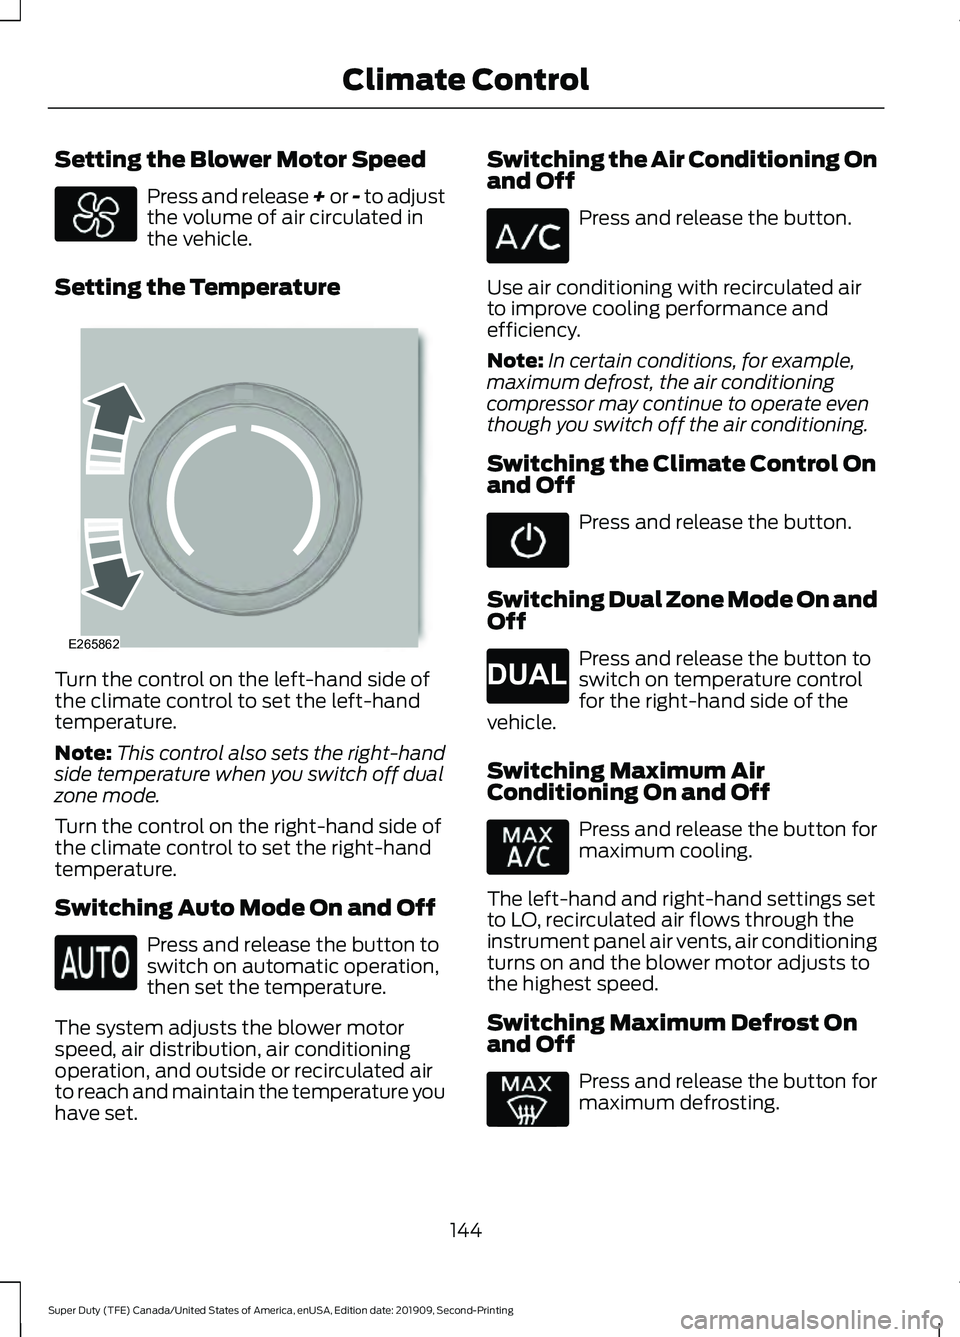
Setting the Temperature Turn the control on the left-hand side of
the climate control to set the left-hand
temperature.
Note:
This control also sets the right-hand
side temperature when you switch off dual
zone mode.
Turn the control on the right-hand side of
the climate control to set the right-hand
temperature.
Switching Auto Mode On and Off Press and release the button to
switch on automatic operation,
then set the temperature.
The system adjusts the blower motor
speed, air distribution, air conditioning
operation, and outside or recirculated air
to reach and maintain the temperature you
have set. Switching the Air Conditioning On
and Off Press and release the button.
Use air conditioning with recirculated air
to improve cooling performance and
efficiency.
Note: In certain conditions, for example,
maximum defrost, the air conditioning
compressor may continue to operate even
though you switch off the air conditioning.
Switching the Climate Control On
and Off Press and release the button.
Switching Dual Zone Mode On and
Off Press and release the button to
switch on temperature control
for the right-hand side of the
vehicle.
Switching Maximum Air
Conditioning On and Off Press and release the button for
maximum cooling.
The left-hand and right-hand settings set
to LO, recirculated air flows through the
instrument panel air vents, air conditioning
turns on and the blower motor adjusts to
the highest speed.
Switching Maximum Defrost On
and Off Press and release the button for
maximum defrosting.
144
Super Duty (TFE) Canada/United States of America, enUSA, Edition date: 201909, Second-Printing Climate Control E265862 E265280
Page 148 of 633
The left-hand and right-hand settings set
to HI, air flows through the windshield air
vents, and the blower motor adjusts to the
highest speed.
You can also use this setting to defog and
clear the windshield of a thin covering of
ice.
Note:
To prevent window fogging, you
cannot select recirculated air when
maximum defrost is on.
Note: The heated rear window also turns
on when you select maximum defrost.
Switching Recirculated Air On and
Off Press and release the button to
switch between outside air and
recirculated air.
The air currently in the passenger
compartment recirculates. This may
reduce the time needed to cool the interior,
when used with A/C, and reduce unwanted
odors from entering your vehicle.
Note: Recirculated air may turn off, or
prevent you from switching it on, in all air
flow modes except MAX A/C to reduce the
risk of fogging. Recirculation may also turn
on and off in various air distribution control
combinations during hot weather in order
to improve cooling efficiency.
HINTS ON CONTROLLING THE
INTERIOR CLIMATE -
VEHICLES WITH: AUTOMATIC
TEMPERATURE CONTROL
General Hints
Note: Prolonged use of recirculated air may
cause the windows to fog up.
Note: You may feel a small amount of air
from the footwell air vents regardless of the
air distribution setting. Note:
To reduce humidity build-up inside
your vehicle, do not drive with the system
switched off or with recirculated air always
switched on.
Note: Do not place objects under the front
seats as this may interfere with the airflow
to the rear seats.
Note: Remove any snow, ice or leaves from
the air intake area at the base of the
windshield.
Note: To improve the time to reach a
comfortable temperature in hot weather,
drive with the windows open until you feel
cold air through the air vents.
Automatic Climate Control
Note: Adjusting the settings when your
vehicle interior is extremely hot or cold is
not necessary. Automatic mode is best
recommended to maintain set temperature.
Note: The system adjusts to heat or cool
the interior to the temperature you select
as quickly as possible.
Note: For the system to function efficiently,
the instrument panel and side air vents
should be fully open.
Note: If you select AUTO during cold
outside temperatures, the system directs
air flow to the windshield and side window
air vents. In addition, the blower motor may
run at a slower speed until the engine warms
up.
Note: If you select
AUTO during hot
temperatures and the inside of the vehicle
is hot, the system uses recirculated air to
maximize interior cooling. Blower motor
speed may also reduce until the air cools.
Quickly Heating the Interior
1. Press and release
AUTO.
2. Adjust the temperature function to the
setting you prefer.
145
Super Duty (TFE) Canada/United States of America, enUSA, Edition date: 201909, Second-Printing Climate Control
Page 151 of 633
•
Heated steering wheel.
• Heated mirrors.
• Heated rear window.
Automatic Settings
In hot weather, the system sets to 72°F
(22°C). The cooled seats are set to high,
if available, and AUTO is on in the
information display.
In moderate weather, the system either
heats or cools, based on pre-selected
settings. The rear defroster, heated mirrors
and heated or cooled seats do not turn on.
In cold weather, the system sets to
72°F
(22°C). The heated seats are set to high,
if available, and AUTO is on in the
information display. The heated rear
window and heated mirrors turn on.
148
Super Duty (TFE) Canada/United States of America, enUSA, Edition date: 201909, Second-Printing Climate Control
Page 157 of 633
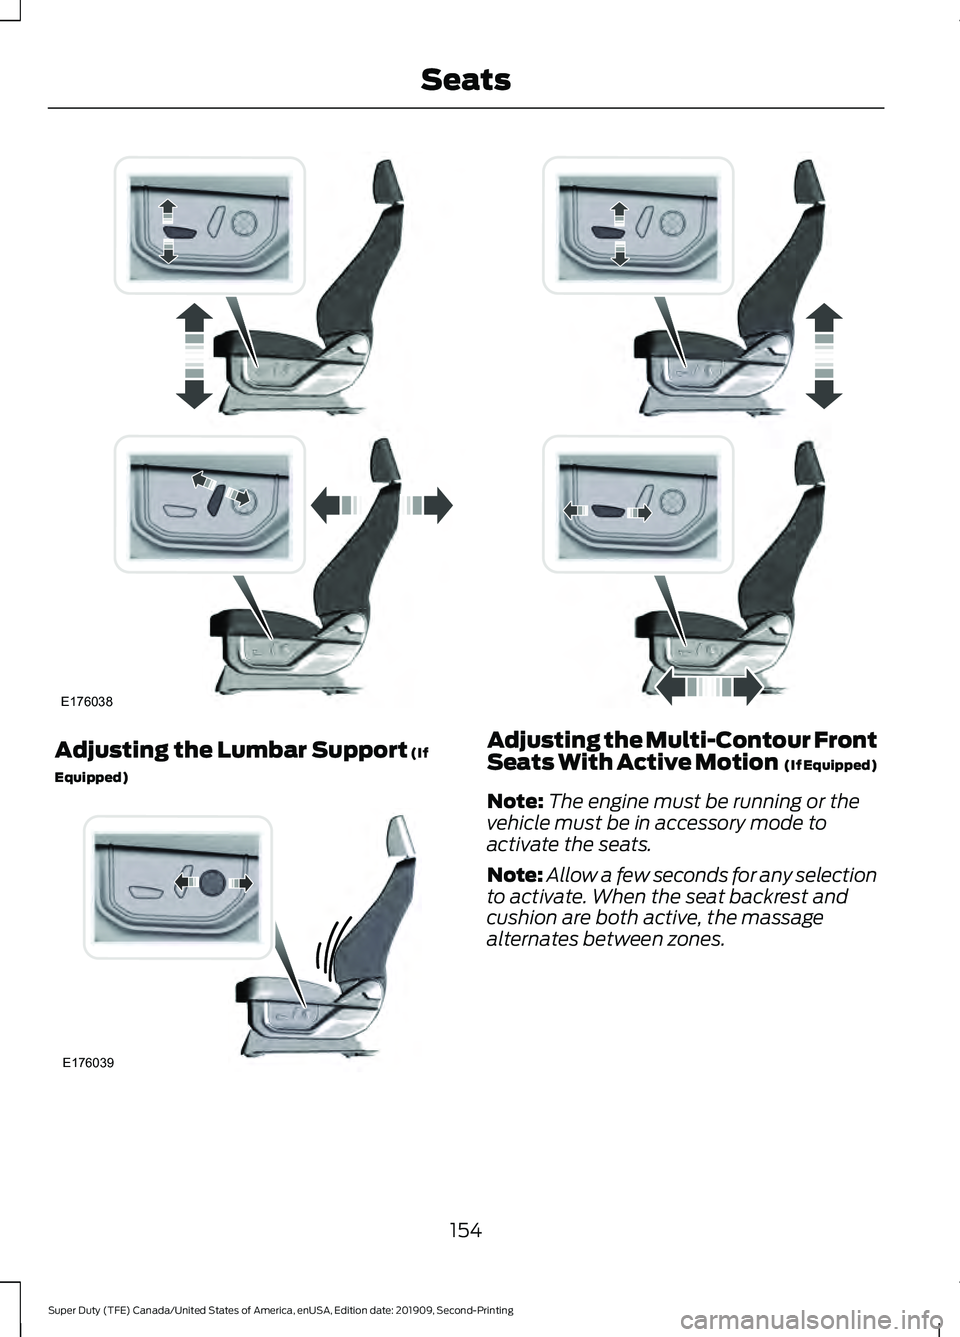
Adjusting the Lumbar Support (If
Equipped) Adjusting the Multi-Contour Front
Seats With Active Motion (If Equipped)
Note: The engine must be running or the
vehicle must be in accessory mode to
activate the seats.
Note: Allow a few seconds for any selection
to activate. When the seat backrest and
cushion are both active, the massage
alternates between zones.
154
Super Duty (TFE) Canada/United States of America, enUSA, Edition date: 201909, Second-Printing SeatsE176038 E176039
Page 158 of 633
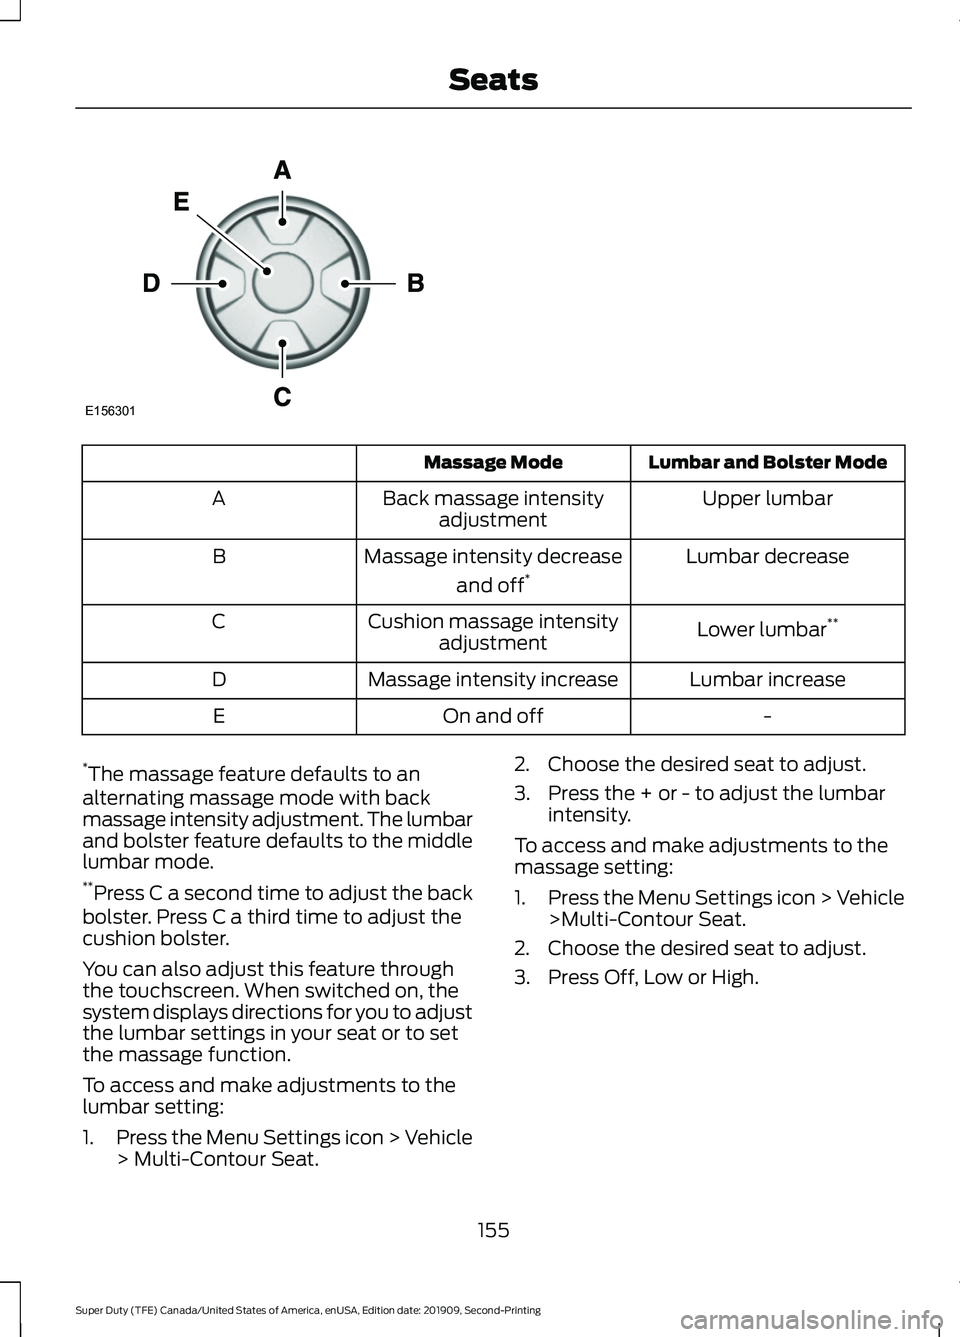
Lumbar and Bolster Mode
Massage Mode
Upper lumbar
Back massage intensity
adjustment
A
Lumbar decrease
Massage intensity decrease
and off*
B
Lower lumbar**
Cushion massage intensity
adjustment
C
Lumbar increase
Massage intensity increase
D
-
On and off
E
* The massage feature defaults to an
alternating massage mode with back
massage intensity adjustment. The lumbar
and bolster feature defaults to the middle
lumbar mode.
** Press C a second time to adjust the back
bolster. Press C a third time to adjust the
cushion bolster.
You can also adjust this feature through
the touchscreen. When switched on, the
system displays directions for you to adjust
the lumbar settings in your seat or to set
the massage function.
To access and make adjustments to the
lumbar setting:
1. Press the Menu Settings icon > Vehicle
> Multi-Contour Seat. 2. Choose the desired seat to adjust.
3. Press the + or - to adjust the lumbar
intensity.
To access and make adjustments to the
massage setting:
1. Press the Menu Settings icon > Vehicle
>Multi-Contour Seat.
2. Choose the desired seat to adjust.
3. Press Off, Low or High.
155
Super Duty (TFE) Canada/United States of America, enUSA, Edition date: 201909, Second-Printing SeatsE156301
Page 163 of 633
Press the heated seat symbol to cycle
through the various heat settings and off.
More indicator lights indicate warmer
settings.
The heated seat module resets at every
ignition run cycle. While the ignition is in
the on position, press the heated seat
switch to enable heating mode. When
activated, they turn off automatically when
you switch off the engine.
VENTILATED SEATS (IF EQUIPPED)
Note: The ventilated seats may remain on
after you remote start your vehicle, based
on your remote start settings. The ventilated
seats may also turn on when you start your
vehicle if they were on when you switched
your vehicle off.
Do not do the following:
• Spill liquid on the front seats. This may
cause the air vent holes to become
blocked and not work properly.
• Place cargo or objects under the seats.
They may block the air intake causing
the air vents to not work properly.
The engine must be running to use this
feature. Press this symbol to cycle through the
various ventilation settings and off. More
indicator lights indicate higher fan speeds.
If the engine falls below 350 RPM while
the ventilated seats are on, the feature
turns itself off. You need to reactivate it.
Note:
To improve comfort, use the
ventilated seats along with the vehicle ’s air
conditioning system.
160
Super Duty (TFE) Canada/United States of America, enUSA, Edition date: 201909, Second-Printing SeatsE146322 E224689
Page 170 of 633
12 V DC Power Point
WARNING: Do not plug optional
electrical accessories into the cigar
lighter socket. Incorrect use of the cigar
lighter can cause damage not covered
by the vehicle warranty, and can result
in fire or serious injury.
Note: When you switch the ignition on, you
can use the socket to power
12 V appliances
with a maximum current rating of 20 A20
amps.
Note: Do not plug in any device that
supplies power to the vehicle through the
power points, this may result in damage to
vehicle systems.
Note: Do not hang any accessory from the
accessory plug.
Note: Do not use the power point over the
vehicle capacity of 12 V DC 240 W or a fuse
may blow.
Note: Always keep the power point caps
closed when not in use.
Do not insert objects other than an
accessory plug into the power point. This
damages the power point and may blow
the fuse.
Run the vehicle for full capacity use of the
power point.
To prevent the battery from running out of
charge:
• Do not use the power point longer than
necessary when the engine is off.
• Do not leave devices plugged in
overnight or when you park your vehicle
for extended periods. 110 V 400 Watt AC Power Point
(If
Equipped) WARNING:
Do not keep electrical
devices plugged in the power point
whenever the device is not in use. Do not
use any extension cord with the 110 volt
AC power point, since it will defeat the
safety protection design. Doing so may
cause the power point to overload due
to powering multiple devices that can
reach beyond the 400 watt load limit
and could result in fire or serious injury.
Note: This feature works only when you
have the ignition switched on.
Note: This feature has a maximum output
of 400 watts when the vehicle is in park (P).
Note: While in drive (D), the maximum
outlet output is 300 watts.
Note: When powering electric devices that
require more than 10 watts in vehicles
equipped with keyless start, the engine must
remain running. If the engine is turned off or
you switch the ignition to accessory mode,
plugged in devices will not be charged.
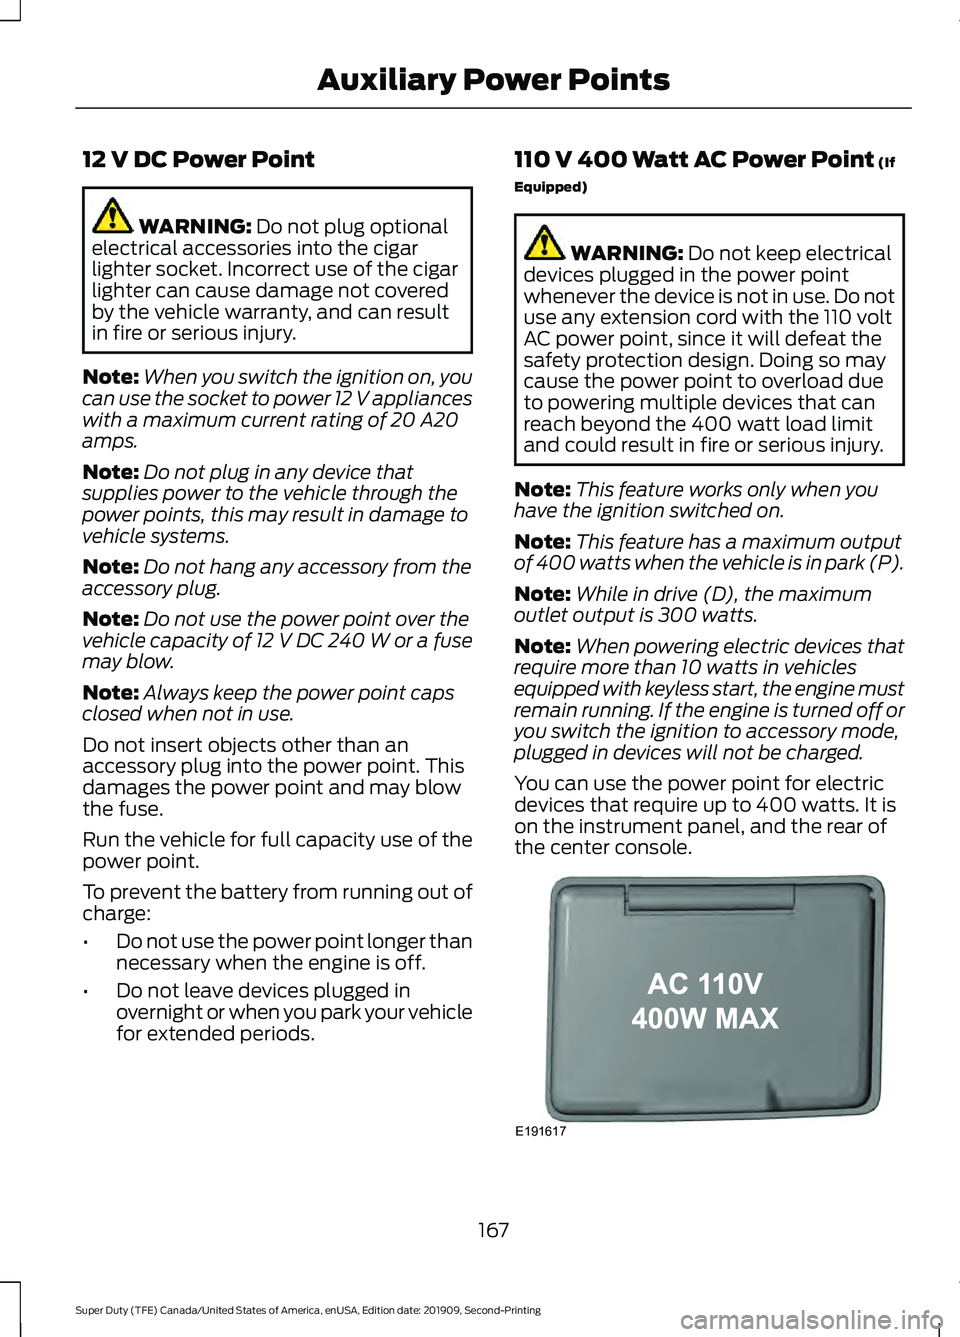
You can use the power point for electric
devices that require up to 400 watts. It is
on the instrument panel, and the rear of
the center console. 167
Super Duty (TFE) Canada/United States of America, enUSA, Edition date: 201909, Second-Printing Auxiliary Power PointsE191617
Page 171 of 633

When the indicator light on the power point
is:
•
On: The power point is working, the
ignition is on and a device is plugged
in.
• Off: The power point is off, the ignition
is off or no device is plugged in.
• Flashing: The power point is in fault
mode.
The power outlet temporarily turns off
power when in fault mode if the device
exceeds the 400 watt limit. Unplug your
device and switch the ignition off. Switch
the ignition back on, but do not plug your
device back in. Let the system cool off and
switch the ignition off to reset the fault
mode. Switch the ignition back on and
make sure the indicator light remains on.
You can use the 400 watt power outlet for
these types of electric devices:
• Electric hand drills.
• Rechargeable power tools.
• Video games.
• Laptops.
• Televisions.
Note: Max 400W - when the vehicle is
parked and 300W - when the vehicle is
driving.
Do not use the power point for certain
electric devices, including:
• Cathode-ray, tube-type televisions.
• Motor loads, such as vacuum cleaners,
electric saws and other electric power
tools or compressor-driven
refrigerators.
• Measuring devices, which process
precise data, such as medical
equipment or measuring equipment.
• Other appliances requiring an
extremely stable power supply such as
microcomputer-controlled electric
blankets or touch-sensor lamps. Locations
Note:
Timed power points remain on for 30
minutes if the vehicle is in accessory mode.
If you switch the vehicle off, the timed
power points remain on for 75 minutes.
Power points may be in the following
locations:
• On the instrument panel.
• Inside the center console.
• On the rear of the center console.
• In the seat bin.
WIRELESS ACCESSORY
CHARGING (IF EQUIPPED) WARNING:
Wireless charging
devices can affect the operation of
implanted medical devices, including
cardiac pacemakers. If you have any
implanted medical devices, we
recommend that you consult with your
physician. WARNING:
Changes or
modifications not expressively approved
by the party responsible for compliance
could void the user's authority to operate
the equipment. The term "IC:" before the
radio certification number only signifies
that Industry Canada technical
specifications were met.
Note: Devices without built-in Qi wireless
charging receivers require an additional Qi
receiver or sleeve.
Note: For compatible devices with built-in
Qi wireless charging capability, the charging
performance may be affected if your device
is in a case. It may be necessary to remove
the case to wirelessly charge your device.
168
Super Duty (TFE) Canada/United States of America, enUSA, Edition date: 201909, Second-Printing Auxiliary Power Points