2020 FORD F250 SUPER DUTY ECO mode
[x] Cancel search: ECO modePage 423 of 633
11.
Set all four tires to the recommended
air pressure as indicated on the
Safety Compliance Certification
Label, affixed to either the door hinge
pillar, door-latch post, or the door
edge that meets the door-latch post,
next to the driver seating position or
Tire Label located on the B-Pillar or
the edge of the driver door.
Performing the System Reset Procedure
- Dual Rear Wheel
For further information see
Understanding Your Tire Pressure
Monitoring System and refer to Dual
Rear Wheel, earlier in this section.
Read the entire procedure before
attempting.
1. Drive the vehicle above
20 mph
(32 km/h) for at least two minutes,
then park in a safe location where you
can easily get to all six tires and have
access to an air pump.
2. Place the ignition in the off position and
keep the key in the ignition.
3. Cycle the ignition to the on position with the engine off.
4. Turn the hazard flashers on then off three times. You must accomplish this
within 10 seconds. If you successfully
enter the reset mode, the horn sounds
once, the system indicator flashes and
a message shows in the information
display. If this does not occur, please
try again starting at step 2. If after
repeated attempts to enter the reset
mode, the horn does not sound, the
system indicator does not flash and no
message shows in the information
display, seek service from your
authorized dealer. 5. Train the tire pressure monitoring
system sensors in the tires using the
following system reset sequence
starting with the left front tire in the
following order: Left front - driver side
front tire, Right front - passenger side
front tire, Right outer rear -passenger
side rear outer tire, Right inner rear -
passenger side rear inner tire, Left outer
rear - driver side rear outer tire, Left
inner rear - driver side rear inner tire.
6. Remove the valve cap from the valve stem on the left front tire. Decrease the
air pressure until the horn sounds.
Note: The single horn chirp confirms that
the sensor identification code has been
learned by the module for this position. If a
double horn is heard, the reset procedure
was unsuccessful, and you must repeat it.
7. Remove the valve cap from the valve stem on the right front tire. Decrease
the air pressure until the horn sounds.
8. Remove the valve cap from the valve stem on the right outer rear tire.
Decrease the air pressure until the horn
sounds.
9. Remove the valve cap from the valve stem on the right inner rear tire.
Decrease the air pressure until the horn
sounds.
10. Remove the valve cap from the valve
stem on the left outer rear tire.
Decrease the air pressure until the
horn sounds.
11. Remove the valve cap from the valve
stem on the left inner rear tire.
Decrease the air pressure until the
horn sounds. Training is complete
after the horn sounds for the last tire
trained, the system indicator stops
flashing, and a message is shown in
the information display.
420
Super Duty (TFE) Canada/United States of America, enUSA, Edition date: 201909, Second-Printing Wheels and Tires
Page 425 of 633
The trailer tire pressure monitoring system
can be reset through the menu in the
information display. See General
Information (page 112). Performing the
trailer setup process also resets the trailer
tire pressure monitoring system.
CHANGING A ROAD WHEEL WARNING:
If the tire pressure
monitor sensor becomes damaged it
may not function.
Note: If your vehicle is equipped with the
tire pressure monitoring system, the
indicator light illuminates when the spare
tire is in use. To restore the full function of
the monitoring system, all road wheels
equipped with tire pressure monitoring
sensors must be mounted on the vehicle.
Note: You should only use tire sealants in
roadside emergencies as they may cause
damage to the tire pressure monitoring
system sensor.
If you get a flat tire when driving, do not
apply the brake heavily. Instead, gradually
decrease your speed. Hold the steering
wheel firmly and slowly move to a safe
place on the side of the road.
If your vehicle is equipped with the tire
pressure monitoring system, have a flat
serviced by an authorized dealer in order
to prevent damage to the system sensors.
See
Tire Pressure Monitoring System
(page 414). Replace the spare tire with a
road tire as soon as possible. During
repairing or replacing of the flat tire, have
the authorized dealer inspect the system
sensor for damage. Dissimilar Spare Wheel and Tire
Assembly Information WARNING:
Failure to follow these
guidelines could result in an increased
risk of loss of vehicle control, injury or
death.
If you have a dissimilar spare wheel and
tire, then it is intended for temporary use
only. This means that if you need to use it,
you should replace it as soon as possible
with a road wheel and tire assembly that
is the same size and type as the road tires
and wheels that were originally provided
by Ford. If the dissimilar spare tire or wheel
is damaged, it should be replaced rather
than repaired.
A dissimilar spare wheel and tire assembly
is defined as a spare wheel and tire
assembly that is different in brand, size or
appearance from the road tires and
wheels.
Full-size dissimilar spare
When driving with the full-size dissimilar
spare wheel and tire assembly, do not:
• Exceed
70 mph (113 km/h).
• Use more than one dissimilar spare
wheel and tire assembly at a time.
• Use snow chains on the end of the
vehicle with the dissimilar spare wheel
and tire assembly.
When driving with the full-size dissimilar
spare wheel and tire assembly, 4WD
functionality may be limited. You may
experience the following:
• Additional noise from the transfer case
or other drive components.
• Difficulty shifting out of a mechanically
locked 4WD mode.
422
Super Duty (TFE) Canada/United States of America, enUSA, Edition date: 201909, Second-Printing Wheels and Tires
Page 442 of 633
VEHICLE IDENTIFICATION
NUMBER
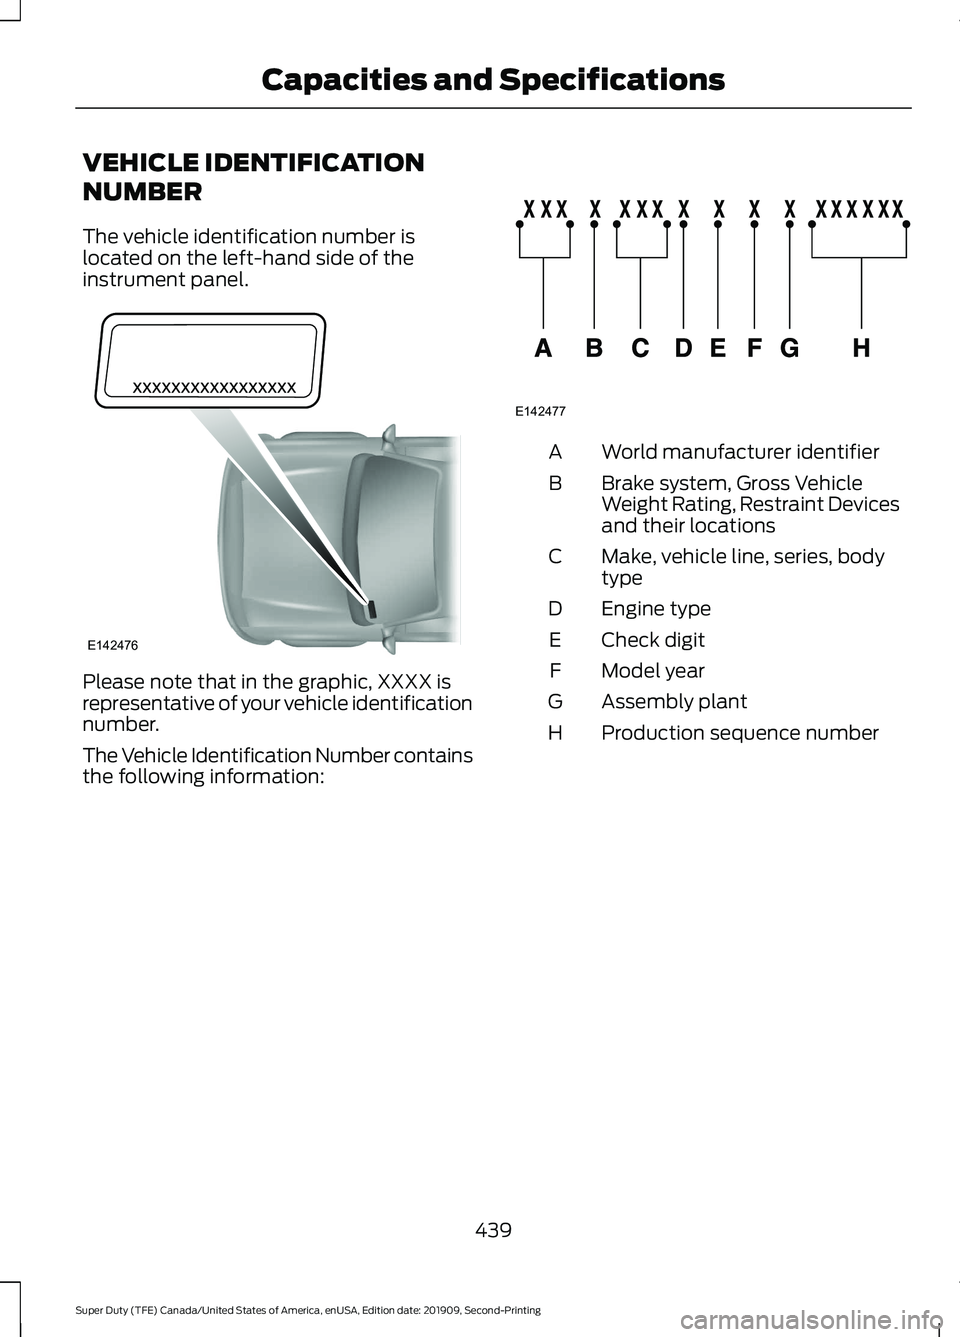
The vehicle identification number is
located on the left-hand side of the
instrument panel.
Please note that in the graphic, XXXX is
representative of your vehicle identification
number.
The Vehicle Identification Number contains
the following information: World manufacturer identifier
A
Brake system, Gross Vehicle
Weight Rating, Restraint Devices
and their locations
B
Make, vehicle line, series, body
type
C
Engine type
D
Check digit
E
Model year
F
Assembly plant
G
Production sequence number
H
439
Super Duty (TFE) Canada/United States of America, enUSA, Edition date: 201909, Second-Printing Capacities and SpecificationsE142476 E142477
Page 477 of 633
CONNECTING THE VEHICLE TO
A MOBILE NETWORK
What Is the Modem
The modem allows you to connect your
vehicle to the Internet to use when you are
on the road.
If you enable the modem using the
FordPass app, you can access the
following services:
•
Locating and remotely starting, locking
and unlocking your vehicle. See the
information in FordPass app.
• Automatic system updates.
Enabling the Modem Using
FordPass
1. Open the FordPass app on your device
and log in. 2. Select your vehicle.
3. Select the option for vehicle details.
4. Select the option to activate your
vehicle.
5. Switch the ignition on.
6. Make sure that the name on the screen
matches the name shown in your
FordPass account.
7. Confirm the association of your vehicle
with your FordPass account.
Enabling the Modem Using the
Touchscreen Select the settings option on the
feature bar.
1. Select FordPass Connect.
2. Select
Connectivity Settings.
3. Switch connectivity features on.
474
Super Duty (TFE) Canada/United States of America, enUSA, Edition date: 201909, Second-Printing Network Connectivity
(If Equipped)
Page 479 of 633
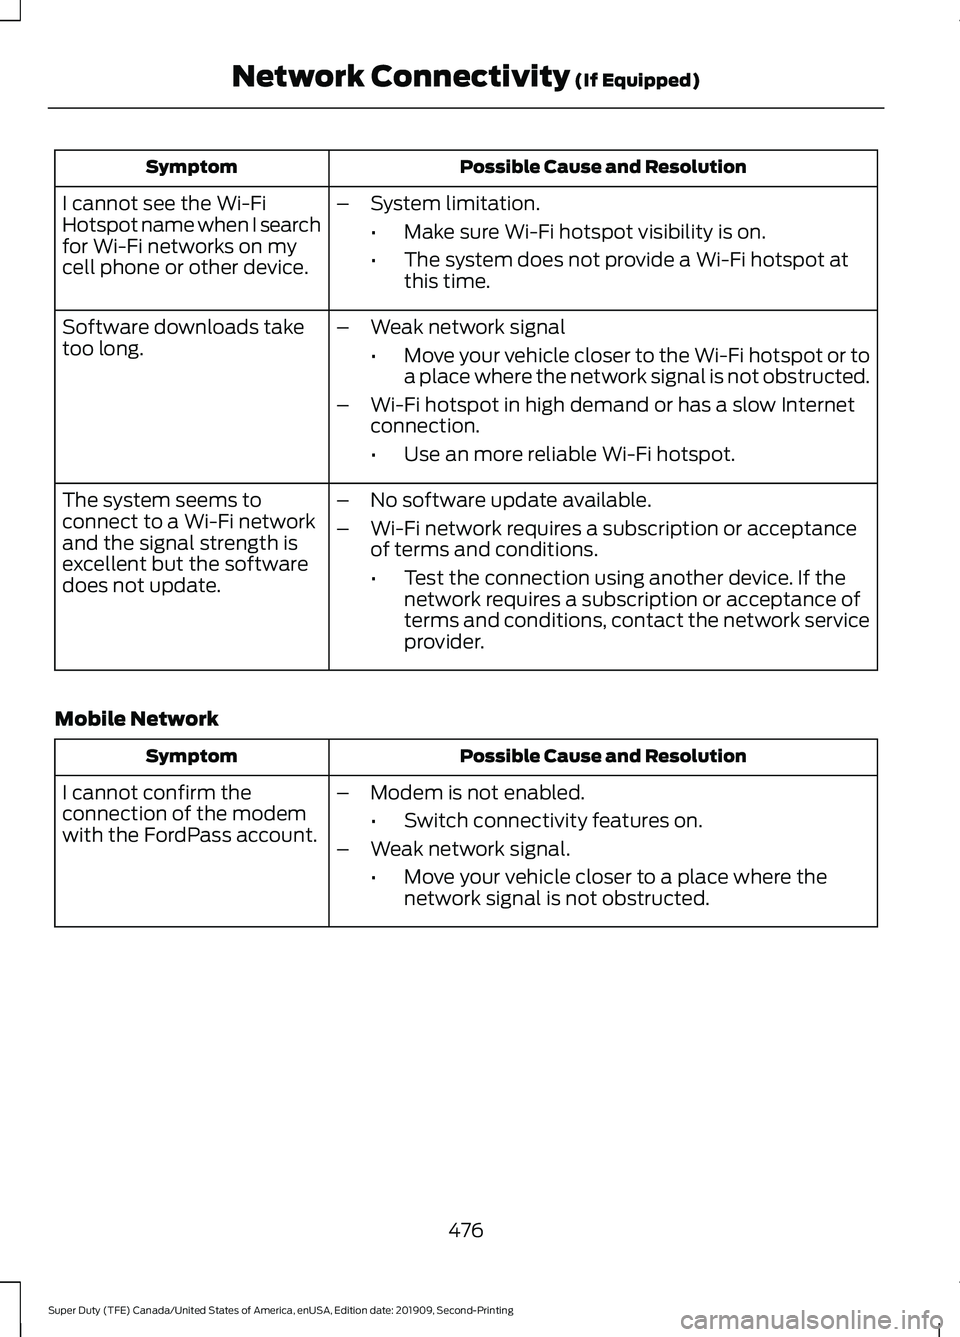
Possible Cause and Resolution
Symptom
I cannot see the Wi-Fi
Hotspot name when I search
for Wi-Fi networks on my
cell phone or other device. –
System limitation.
•Make sure Wi-Fi hotspot visibility is on.
• The system does not provide a Wi-Fi hotspot at
this time.
– Weak network signal
•Move your vehicle closer to the Wi-Fi hotspot or to
a place where the network signal is not obstructed.
– Wi-Fi hotspot in high demand or has a slow Internet
connection.
•Use an more reliable Wi-Fi hotspot.
Software downloads take
too long.
–No software update available.
– Wi-Fi network requires a subscription or acceptance
of terms and conditions.
•Test the connection using another device. If the
network requires a subscription or acceptance of
terms and conditions, contact the network service
provider.
The system seems to
connect to a Wi-Fi network
and the signal strength is
excellent but the software
does not update.
Mobile Network Possible Cause and Resolution
Symptom
–Modem is not enabled.
•Switch connectivity features on.
– Weak network signal.
•Move your vehicle closer to a place where the
network signal is not obstructed.
I cannot confirm the
connection of the modem
with the FordPass account.
476
Super Duty (TFE) Canada/United States of America, enUSA, Edition date: 201909, Second-Printing Network Connectivity (If Equipped)
Page 482 of 633
Note:
Some features, such as satellite
radio, may not be available in your location.
Check with an authorized dealer.
Note: The touchscreen system controls
most of the audio features.
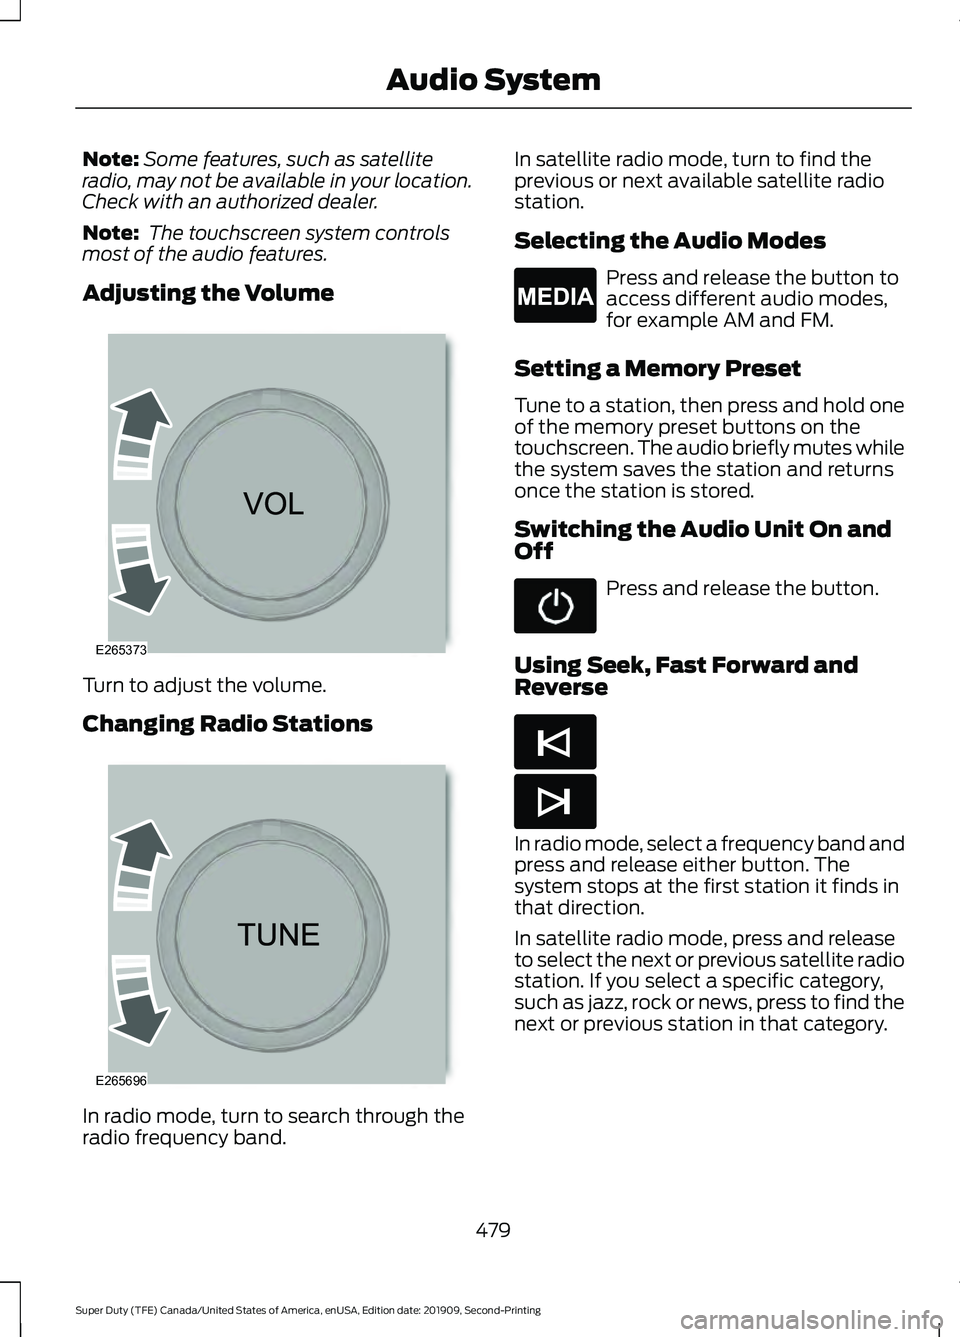
Adjusting the Volume Turn to adjust the volume.
Changing Radio Stations
In radio mode, turn to search through the
radio frequency band. In satellite radio mode, turn to find the
previous or next available satellite radio
station.
Selecting the Audio Modes Press and release the button to
access different audio modes,
for example AM and FM.
Setting a Memory Preset
Tune to a station, then press and hold one
of the memory preset buttons on the
touchscreen. The audio briefly mutes while
the system saves the station and returns
once the station is stored.
Switching the Audio Unit On and
Off Press and release the button.
Using Seek, Fast Forward and
Reverse In radio mode, select a frequency band and
press and release either button. The
system stops at the first station it finds in
that direction.
In satellite radio mode, press and release
to select the next or previous satellite radio
station. If you select a specific category,
such as jazz, rock or news, press to find the
next or previous station in that category.
479
Super Duty (TFE) Canada/United States of America, enUSA, Edition date: 201909, Second-Printing Audio SystemE265373 E265696 E265035 E265045 E265044
Page 484 of 633
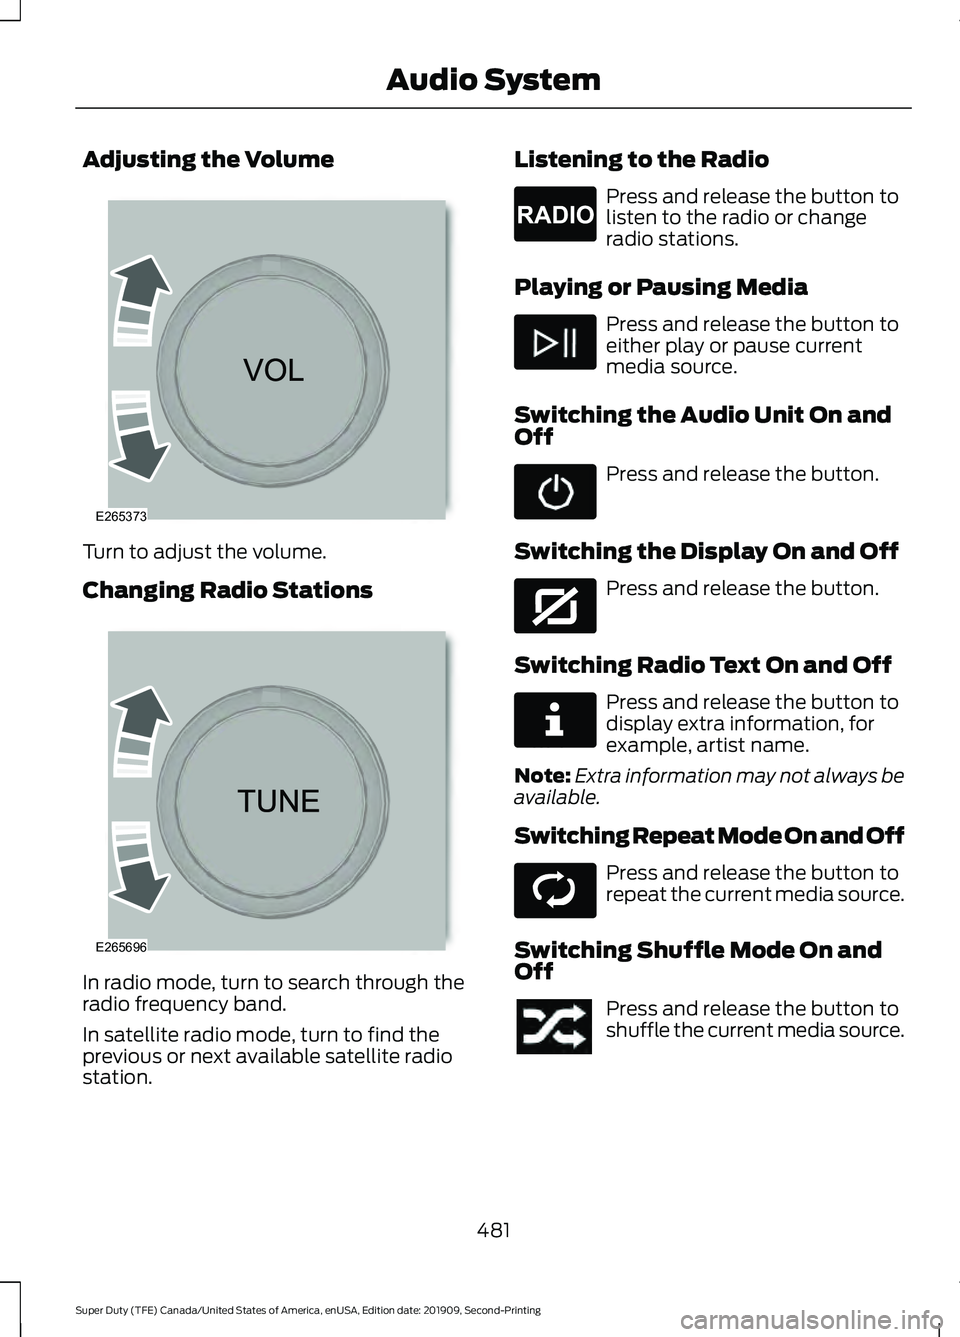
Adjusting the Volume
Turn to adjust the volume.
Changing Radio Stations
In radio mode, turn to search through the
radio frequency band.
In satellite radio mode, turn to find the
previous or next available satellite radio
station. Listening to the Radio Press and release the button to
listen to the radio or change
radio stations.
Playing or Pausing Media Press and release the button to
either play or pause current
media source.
Switching the Audio Unit On and
Off Press and release the button.
Switching the Display On and Off Press and release the button.
Switching Radio Text On and Off Press and release the button to
display extra information, for
example, artist name.
Note: Extra information may not always be
available.
Switching Repeat Mode On and Off Press and release the button to
repeat the current media source.
Switching Shuffle Mode On and
Off Press and release the button to
shuffle the current media source.
481
Super Duty (TFE) Canada/United States of America, enUSA, Edition date: 201909, Second-Printing Audio SystemE265373 E265696 E265033 E272035 E268570 E268569
Page 485 of 633
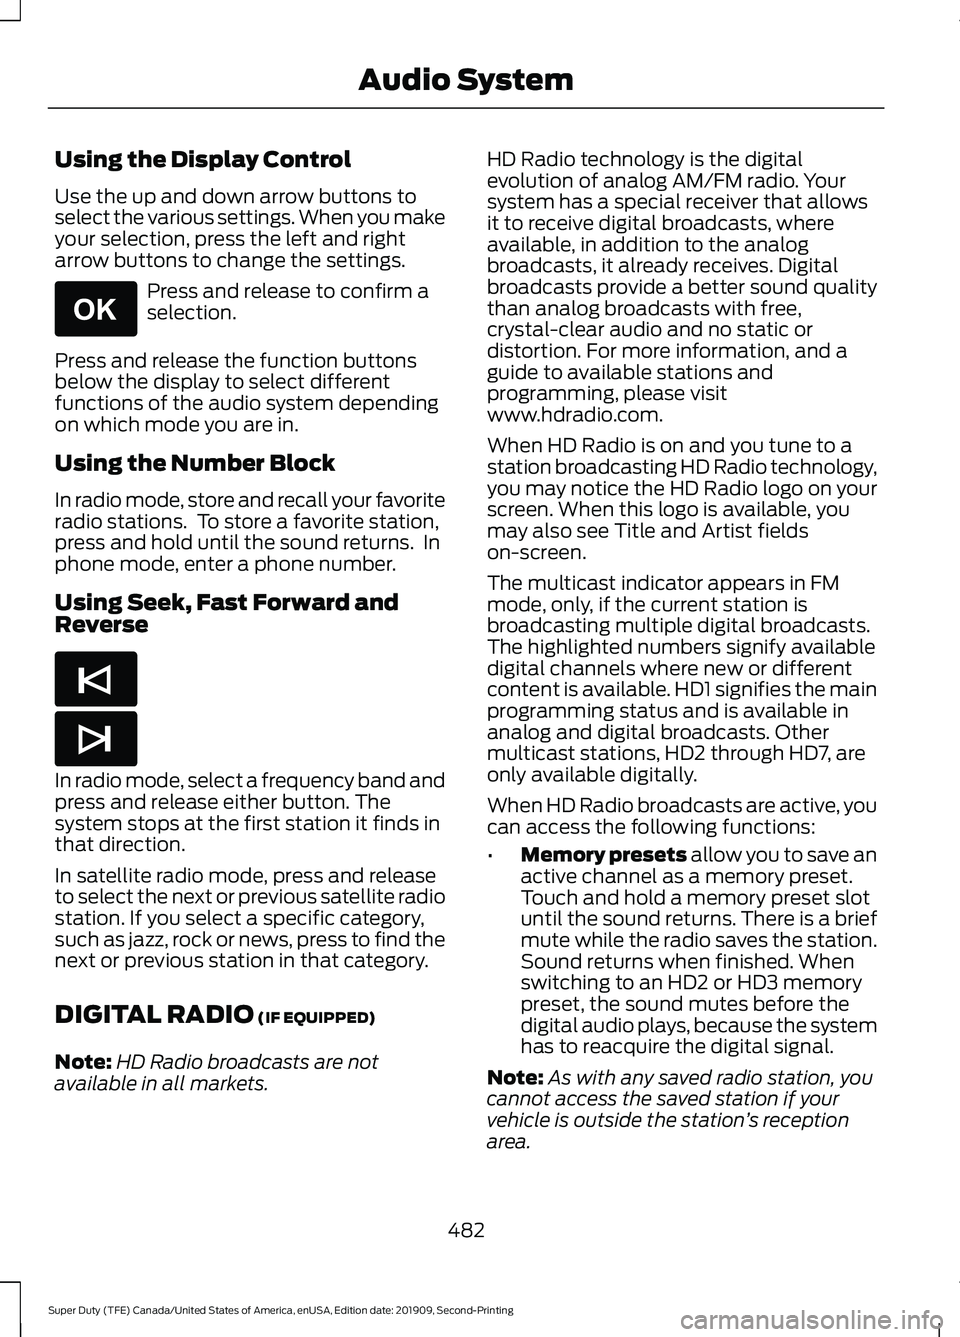
Using the Display Control
Use the up and down arrow buttons to
select the various settings. When you make
your selection, press the left and right
arrow buttons to change the settings.
Press and release to confirm a
selection.
Press and release the function buttons
below the display to select different
functions of the audio system depending
on which mode you are in.
Using the Number Block
In radio mode, store and recall your favorite
radio stations. To store a favorite station,
press and hold until the sound returns. In
phone mode, enter a phone number.
Using Seek, Fast Forward and
Reverse In radio mode, select a frequency band and
press and release either button. The
system stops at the first station it finds in
that direction.
In satellite radio mode, press and release
to select the next or previous satellite radio
station. If you select a specific category,
such as jazz, rock or news, press to find the
next or previous station in that category.
DIGITAL RADIO (IF EQUIPPED)
Note: HD Radio broadcasts are not
available in all markets. HD Radio technology is the digital
evolution of analog AM/FM radio. Your
system has a special receiver that allows
it to receive digital broadcasts, where
available, in addition to the analog
broadcasts, it already receives. Digital
broadcasts provide a better sound quality
than analog broadcasts with free,
crystal-clear audio and no static or
distortion. For more information, and a
guide to available stations and
programming, please visit
www.hdradio.com.
When HD Radio is on and you tune to a
station broadcasting HD Radio technology,
you may notice the HD Radio logo on your
screen. When this logo is available, you
may also see Title and Artist fields
on-screen.
The multicast indicator appears in FM
mode, only, if the current station is
broadcasting multiple digital broadcasts.
The highlighted numbers signify available
digital channels where new or different
content is available. HD1 signifies the main
programming status and is available in
analog and digital broadcasts. Other
multicast stations, HD2 through HD7, are
only available digitally.
When HD Radio broadcasts are active, you
can access the following functions:
•
Memory presets
allow you to save an
active channel as a memory preset.
Touch and hold a memory preset slot
until the sound returns. There is a brief
mute while the radio saves the station.
Sound returns when finished. When
switching to an HD2 or HD3 memory
preset, the sound mutes before the
digital audio plays, because the system
has to reacquire the digital signal.
Note: As with any saved radio station, you
cannot access the saved station if your
vehicle is outside the station ’s reception
area.
482
Super Duty (TFE) Canada/United States of America, enUSA, Edition date: 201909, Second-Printing Audio SystemE265041 E265045 E265044