2020 FORD F-350 warning
[x] Cancel search: warningPage 74 of 631

REMOVING THE TAILGATE
WARNING: Always properly secure
cargo to prevent shifting cargo or cargo
falling from the vehicle. Failure to do so
could result in compromised vehicle
stability and serious personal injury to
vehicle occupants or others.
You can remove the tailgate for more
loading room.
1. Obtain the tailgate removal kit from the glove box. 2. Locate and disconnect the frame
connections. They are on the left-hand
side of the vehicle.
Note: Your vehicle may have up to three
frame connections.
3. Install the caps from the tailgate removal kit on the in-line connectors
that remain on the vehicle.
Note: If you do not install the caps on the
connectors, some features may not operate
as intended.
4. Partially lower the tailgate. Carefully feed the tailgate harness up through
the bumper and place it out of the way.
5. Lower the tailgate. 6. Use a screwdriver to gently pry the
spring clip on each connector past the
head of the support screw. Disconnect
the cable.
7. Disconnect the other cable.
8. Lift the tailgate to a 45 degree angle from horizontal.
9. Lift the right side off its hinge.
10. Lift the tailgate to an 80 degree angle
from horizontal.
11. Remove the tailgate from the left side
hinge by sliding it to the right.
Reverse the steps to reinstall the tailgate.
TAILGATE STEP (IF EQUIPPED)
Use the step to make entering the truck
bed easier.
To reduce the risk of falling:
• Only operate the step when your
vehicle is on a level surface.
• Only operate the step in areas with
sufficient lighting.
• Always open the step panel to widen
the step.
• Always use the grab handle when
climbing on the step.
• Do not use the step with bare feet.
71
Super Duty (TFE), enUSA, Edition date: 201909, Third-Printing- Tailgate
(If Equipped)E248384 E163092
Page 80 of 631

USING POWER RUNNING
BOARDS
WARNING: In extreme climates,
excessive ice buildup may occur, causing
the running boards not to deploy. Make
sure that the running boards have
deployed, and have finished moving
before attempting to step on them. The
running boards will resume normal
function once the blockage is cleared. WARNING:
Switch off the running
boards before jacking or placing any
object under your vehicle. Never place
your hand between the extended running
board and your vehicle. A moving running
board may cause injury.
Note: Do not use the running boards, front
and rear hinge assemblies, running board
motors, or the running board underbody
mounts to lift your vehicle when jacking.
Always use proper jacking points.
Note: The running boards may operate
more slowly in cool temperatures.
Note: The running board mechanism may
trap debris such as mud, dirt, snow, ice and
salt. This may cause unwanted noise. If this
happens, manually set the running boards
to the deployed position. Then, wash the
system, in particular the front and rear hinge
arms, with a high-pressure car wash wand. Automatic Power Deploy The running boards extend down and out
when you open the door. This can help you
enter and exit your vehicle.
Automatic Power Stow
When you close the doors, the running
boards return to the stowed position after
a two-second delay.
Manual Power Deploy
You can manually operate the running
boards in the information display.
1. Select
Settings.
2. Select
Advanced Settings.
3. Select
Vehicle.
4. Select
Power Running Boards.
5. Select your desired power running board setting.
Set the running boards in the deployed
position to access the roof.
The running boards return to the stowed
position and enter automatic mode when
the vehicle speed exceeds 3 mph (5 km/h).
Enabling and Disabling
You can enable and disable the power
running board feature in the information
display.
77
Super Duty (TFE), enUSA, Edition date: 201909, Third-Printing- Power Running Boards
(If Equipped)E166682
Page 82 of 631

ADJUSTING THE STEERING
WHEEL - VEHICLES WITH:
MANUAL ADJUSTABLE
STEERING COLUMN
A
djus ting the S t e ering W he el
WARNING: Do not adjust the
steering wheel when your vehicle is
moving.
Note: Make sure that you are sitting in the
correct position. See
Sitting in the Correct
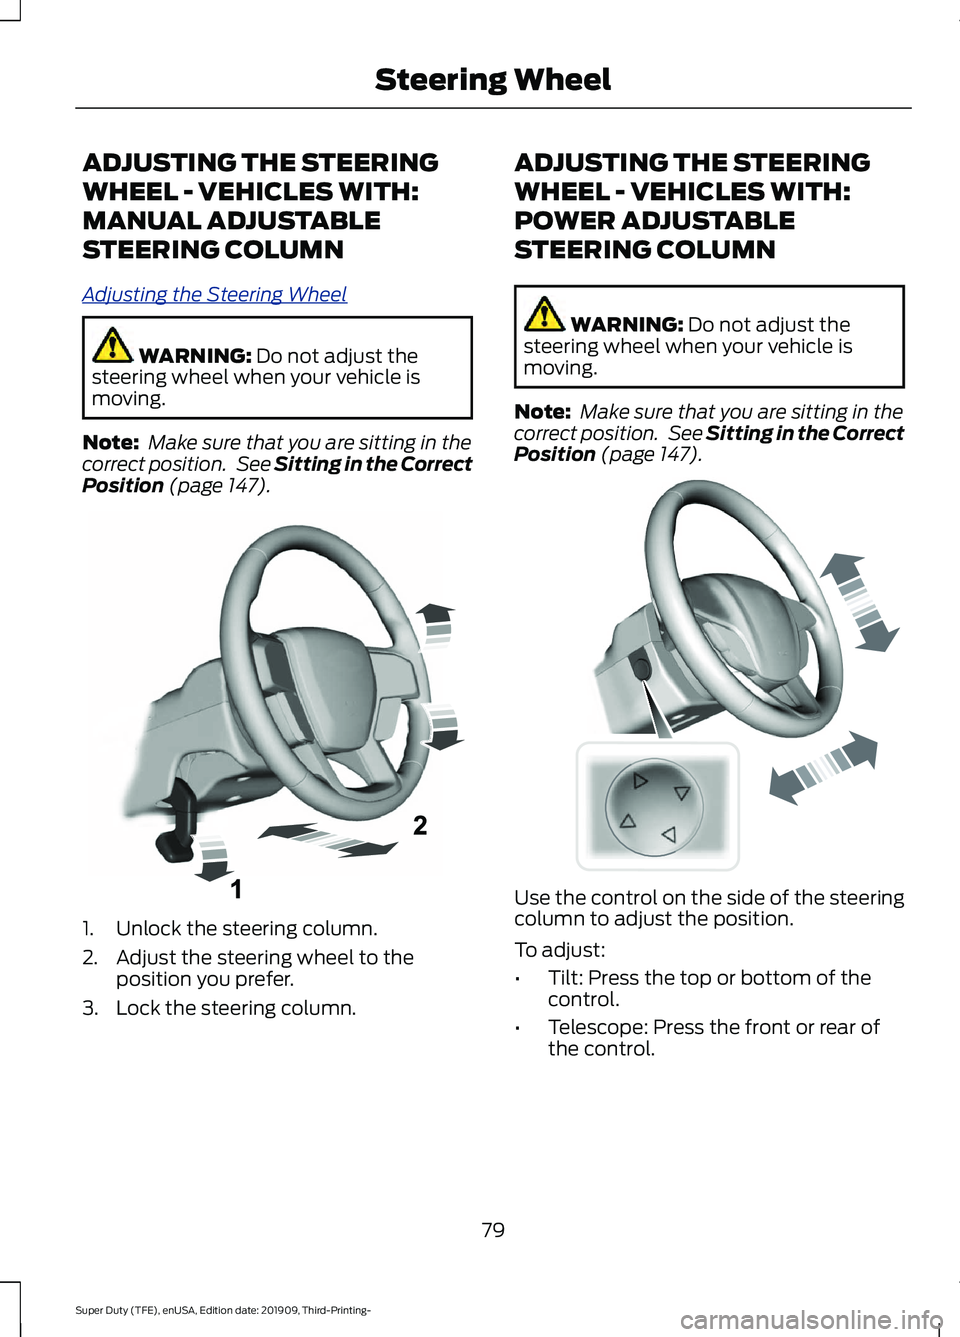
Position (page 147). 1. Unlock the steering column.
2. Adjust the steering wheel to the
position you prefer.
3. Lock the steering column. ADJUSTING THE STEERING
WHEEL - VEHICLES WITH:
POWER ADJUSTABLE
STEERING COLUMN WARNING:
Do not adjust the
steering wheel when your vehicle is
moving.
Note: Make sure that you are sitting in the
correct position. See
Sitting in the Correct
Position (page 147). Use the control on the side of the steering
column to adjust the position.
To adjust:
•
Tilt: Press the top or bottom of the
control.
• Telescope: Press the front or rear of
the control.
79
Super Duty (TFE), enUSA, Edition date: 201909, Third-Printing- Steering WheelE261502 E261582
Page 86 of 631

ADJUSTING THE PEDALS
WARNING: Never use the pedal
adjustment controls when your feet are
on the accelerator or brake pedal when
the vehicle is moving.
Note: Adjust the pedals only when your
vehicle is in park (P).
Depending on your vehicle and equipment
level, the shape and location of your
power-adjustable pedal control can vary.
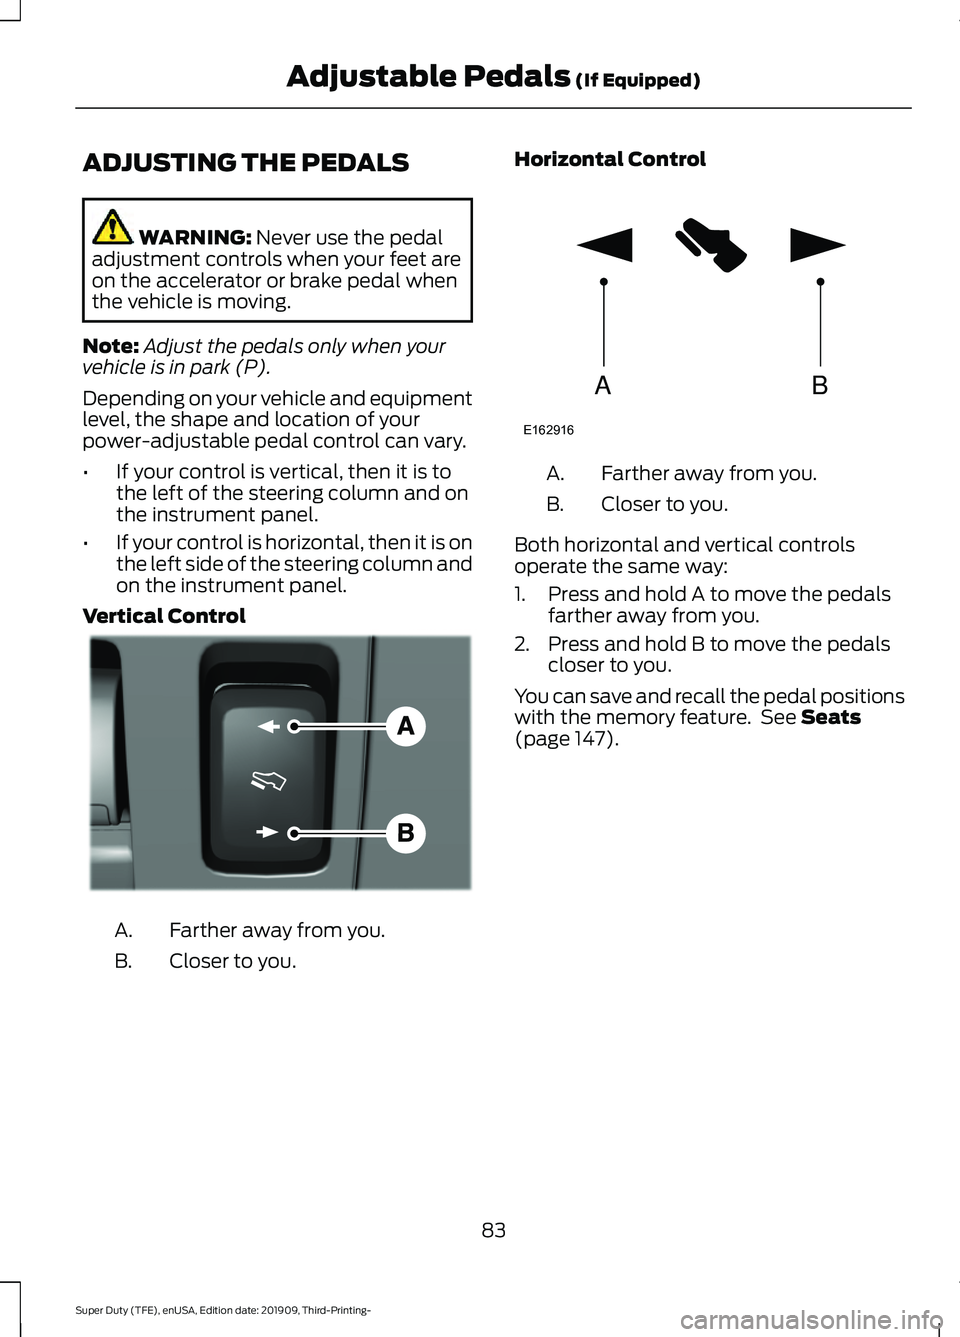
• If your control is vertical, then it is to
the left of the steering column and on
the instrument panel.
• If your control is horizontal, then it is on
the left side of the steering column and
on the instrument panel.
Vertical Control Farther away from you.
A.
Closer to you.
B. Horizontal Control Farther away from you.
A.
Closer to you.
B.
Both horizontal and vertical controls
operate the same way:
1. Press and hold A to move the pedals farther away from you.
2. Press and hold B to move the pedals closer to you.
You can save and recall the pedal positions
with the memory feature. See
Seats
(page 147).
83
Super Duty (TFE), enUSA, Edition date: 201909, Third-Printing- Adjustable Pedals
(If Equipped)E176213 AB
E162916
Page 90 of 631

Flashing the Headlamp High Beam
Slightly pull the lever toward you and
release it to flash the headlamps.
AUTOLAMPS
WARNING: The system does not
relieve you of your responsibility to drive
with due care and attention. You may
need to override the system if it does not
turn the headlamps on in low visibility
conditions, for example daytime fog.
Autolamps turn the headlamps on in low
light situations or when the wipers operate. Switch the lighting control to the
autolamps position.
The headlamps remain on for a period of
time after you switch the ignition off. Use
the information display controls to adjust
the period of time that the headlamps
remain on.
Note: If you switch the autolamps on, you
cannot switch the high beams on until the
system turns the low beams on. Windshield Wiper Activated
Headlamps
When you switch the autolamps on, the
headlamps turn on within 10 seconds of
switching the wipers on. They turn off
approximately 60 seconds after you switch
the windshield wipers off.
The headlamps do not turn on with the
wipers:
•
During a single wipe.
• When using the windshield washers.
• If the wipers are in intermittent mode.
Note: If you switch the autolamps and the
autowipers on, the headlamps turn on when
the windshield wipers continuously operate.
INSTRUMENT LIGHTING
DIMMER
The instrument lighting dimmer buttons
are on the lighting control. Repeatedly press one of the
buttons to adjust the brightness.
DAYTIME RUNNING LAMPS -
VEHICLES WITH:
CONFIGURABLE DAYTIME
RUNNING LAMPS WARNING:
The daytime running
lamps system does not activate the rear
lamps and may not provide adequate
lighting during low visibility driving
conditions. Make sure you switch the
headlamps on, as appropriate, during all
low visibility conditions. Failure to do so
may result in a crash.
87
Super Duty (TFE), enUSA, Edition date: 201909, Third-Printing- LightingE311233 E291299 E291298
Page 91 of 631

Switch the daytime running lamps on or
off using the information display. See
General Information (page 109).
The daytime running lamps turn on when:
1. The lamps are on in the information display.
2. You switch the ignition on.
3. The transmission is not in park (P) for vehicles with automatic transmissions
or you release the parking brake for
vehicles with manual transmissions.
4. The lighting control is in the autolamps
position.
5. The headlamps are off.
The other lighting control switch positions
do not turn on the daytime running lamps.
If the daytime running lamps are off in the
information display, the lamps stay off in
all switch positions.
DAYTIME RUNNING LAMPS -
VEHICLES WITH: DAYTIME
RUNNING LAMPS (DRL) WARNING:
The daytime running
lamps system does not activate the rear
lamps and may not provide adequate
lighting during low visibility driving
conditions. Make sure you switch the
headlamps on, as appropriate, during all
low visibility conditions. Failure to do so
may result in a crash.
The system turns the lamps on in daylight
conditions.
To switch the system on, switch the
lighting control to any position except
headlamps. FRONT FOG LAMPS
(IF EQUIPPED)
Switching the Front Fog Lamps On
or Off
Only switch the front fog lamps on during
reduced visibility.
You can switch the front fog lamps on if
any of the following occur:
• You set the lighting control to the
parking lamps position.
• You set the lighting control to the
headlamps position.
• You set the lighting control to the
autolamps position and the headlamps
are on.
The front fog lamp button is on the lighting
control. Press the button to switch the
front fog lamps on or off.
Note: The brightness of the daytime running
lamps may decrease when the front fog
lamps are switched on.
Front Fog Lamp Indicator It illuminates when you switch
the front fog lamps on.
88
Super Duty (TFE), enUSA, Edition date: 201909, Third-Printing- Lighting
Page 95 of 631

WHAT IS AUTOMATIC HIGH
BEAM CONTROL
The system turns on high beams if it is dark
enough and no other traffic is present. If it
detects an approaching vehicle
’s
headlamps or tail lamps, or street lighting
ahead, the system turns the high beams
off. Low beams remain on.
A camera sensor, centrally mounted
behind the windshield of your vehicle,
continuously monitors conditions to turn
the high beams on and off.
SWITCHING AUTOMATIC HIGH
BEAM CONTROL ON AND OFF
Switch the system on or off using the
information display. See General
Information (page 109).
Activating the Automatic High
Beam Control Switch the lighting control to the
autolamps position to activate.
See
Autolamps (page 87).
Note: Automatic high beams are not
available when autolamps are not turned
on.
When active, the high beams turn on if:
• The ambient light level is low enough.
• There is no traffic in front of your
vehicle.
• The vehicle speed is greater than
approximately
32 mph (52 km/h).
When active, the high beams turn off if:
• The ambient light level is high enough
that high beams are not required.
• The system detects an approaching
vehicle's headlamps or tail lamps.
• The system detects severe rain, snow
or fog. •
The camera is blocked.
• The vehicle speed falls below
approximately
27 mph (44 km/h).
Note: The deactivation speed is lower on
curves.
Note: High beam reactivation may be
delayed in certain curvy road situations.
Note: The system may not operate properly
if the sensor is blocked. Keep the windshield
free from obstruction or damage.
Note: The system may not operate properly
in cold or inclement conditions. You can
switch on the high beams by overriding the
system.
Note: If the system detects a blockage, for
example bird droppings, bug splatter, snow
or ice, the system goes into low beam mode
until you clear the blockage. A message may
appear in the information display if the
camera is blocked.
Note: Using much larger tires or equipping
vehicle accessories such as snowplows can
modify your vehicle's ride height and
degrade automatic high beam control
performance.
AUTOMATIC HIGH BEAM
CONTROL INDICATORS The indicator illuminates to
confirm when the system is
ready to assist.
OVERRIDING AUTOMATIC
HIGH BEAM CONTROL WARNING:
The system does not
relieve you of your responsibility to drive
with due care and attention. You may
need to override the system if it does not
turn the high beams on or off.
92
Super Duty (TFE), enUSA, Edition date: 201909, Third-Printing- Automatic High Beam Control
(If Equipped)
Page 96 of 631

WARNING: You may need to
override the system when approaching
other road users. WARNING:
You may need to
override the system during inclement
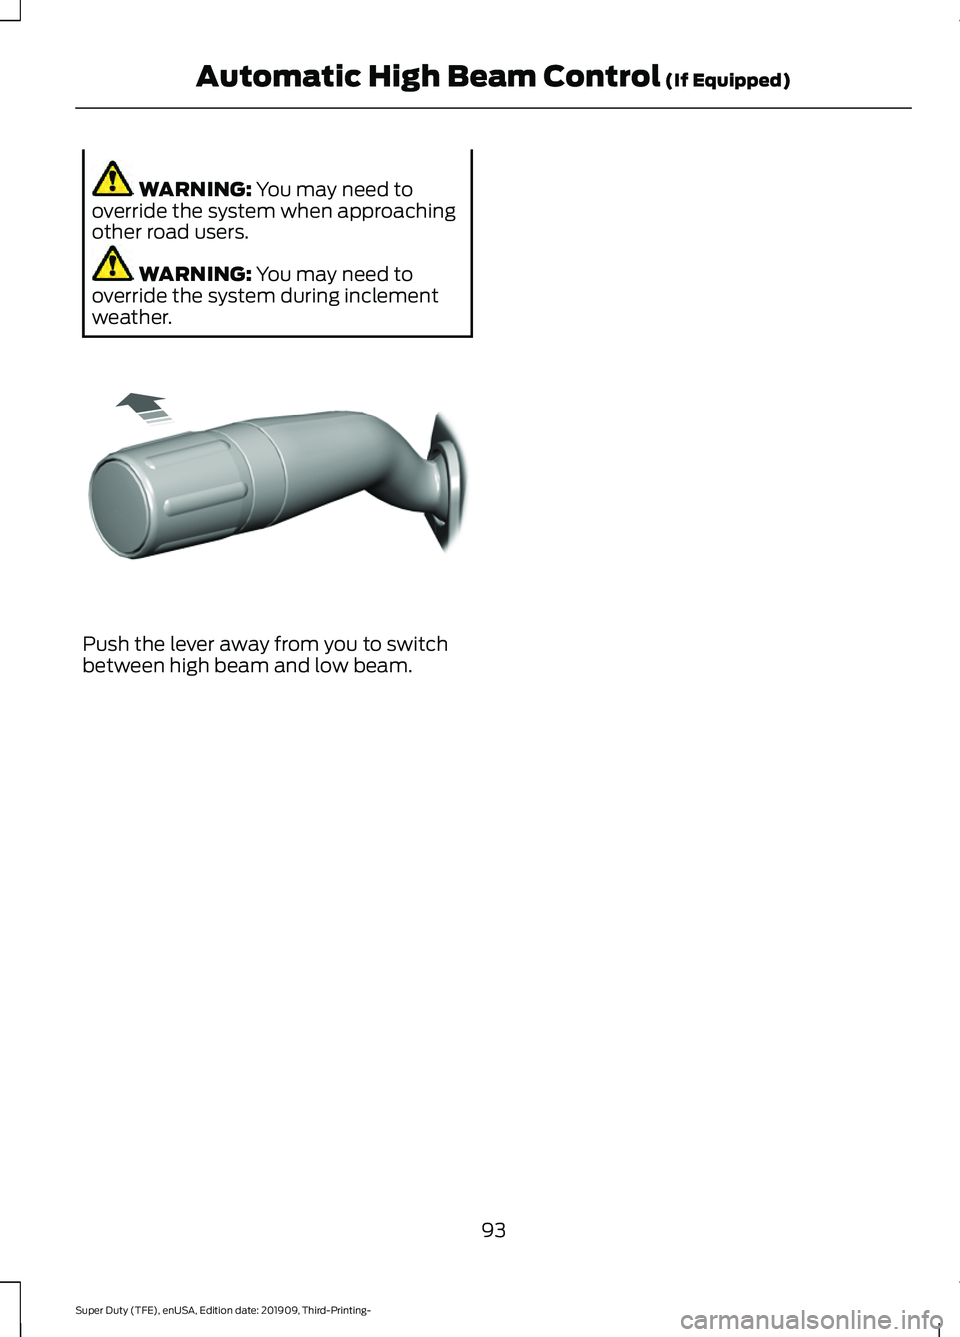
weather. Push the lever away from you to switch
between high beam and low beam.
93
Super Duty (TFE), enUSA, Edition date: 201909, Third-Printing- Automatic High Beam Control
(If Equipped)E308790