2020 FORD F-350 towing
[x] Cancel search: towingPage 255 of 631

System Operation
If you select a trailer in the display screen
prior to connecting the trailer, the system
will load that configuration and the
information cluster displays a message
when the trailer is connected. A second
message appears stating Cross Traffic
Alert has been turned off; the Blind Spot
Information System with Trailer Tow still
functions normally when driving forward.
If no trailer has been set up and a trailer is
connected, the instrument cluster provides
a message indicating a trailer is connected
followed by a message asking to select a
trailer from the existing list of trailers or to
add a trailer. In order for the Blind Spot
Information System with Trailer Tow to
function, an existing trailer must be
selected or a new trailer must be added. If
the request is ignored or if you exit the
screen, a message appears prompting you
that the system has been turned off due
to a trailer connect. This message may not
appear until your vehicle speed reaches
22 mph (35 km/h).
The Blind Spot Information System with
Trailer Tow activates when driving forward
for that particular trailer set up. If the
ignition is cycled, the Blind Spot
Information System with Trailer Tow
continues to function using the last trailer
selected.
Trailer Considerations
The Blind Spot Information System with
Trailer Tow is designed to work with any
trailer whose front width is
8.5 ft (2.6 m)
or less and total length from the trailer
hitch ball to the rear of the trailer is
33 ft
(10.1 m) or less. Different trailers may
cause a slight change in performance as
outlined below. Large box trailers may cause false alerts
to trigger when driving next to buildings or
near parking cars. A false alert may also
occur while making a 90-degree turn.
Trailers that are
8.5 ft (2.6 m) wide at the
front and have a total length greater than
20 ft (6 m)
may have delayed alerts from
passing vehicles when the vehicle is
passing at high speed.
A box trailer whose front width is
8.5 ft
(2.6 m) may cause early alerts when you
are over taking a vehicle.
When towing a clam shell or V-Nose box
trailer with a front width of
8.5 ft (2.6 m),
delayed alerts on merging vehicles that are
traveling the same speed as your vehicle
may occur.
System Errors
If the system senses a problem with the
left or right sensor, the telltale illuminates
and a message appears in the display
screen. See
Information Messages
(page 120).
Switching the System Off and On
You can temporarily switch the Blind Spot
Information System off in the display
screen. See
General Information (page
109). When the Blind Spot Information
System switches off, you do not receive
alerts and the display screen shows a
system off message. The telltale in the
cluster also illuminates. When you switch
the Blind Spot Information System on or
off, the alert indicators flash twice.
Note: The Blind Spot Information System
remembers the last selected on or off
setting.
You can also have the Blind Spot
Information System switched off
permanently at an authorized dealer. Once
switched off permanently, the system can
only be switched back on at an authorized
dealer.
252
Super Duty (TFE), enUSA, Edition date: 201909, Third-Printing- Driving Aids
Page 258 of 631

Cross Traffic Alert Behavior When
Trailer is Attached
Note:
The system may not correctly operate
when towing a trailer. For vehicles with an
approved trailer tow module and tow bar,
the system turns off when you attach a
trailer. For vehicles with an aftermarket
trailer tow module or tow bar, we
recommend that you switch the system off
when you attach a trailer.
Cross traffic alert remains on when you
attach a trailer in vehicles that come with
blind spot information system with trailer
tow under the following conditions:
• You connect a trailer.
• The trailer is a bike rack or cargo rack
with a maximum length of 3 ft (1 m).
• You set the trailer length to
3 ft (1 m)
in the information display.
See
Blind Spot Information System
(page 248).
Switching the System On and Off
To switch the system on or off, adjust the
setting. Depending on your vehicle options,
the setting could be in the following: •
Information display.
See General
Information (page 109).
• Touchscreen. See Settings (page 531).
Note: The system turns on every time you
switch the ignition on. To permanently
switch the system off, contact an authorized
dealer.
Cross Traffic Alert Indicator When the system detects an
approaching vehicle, a tone
sounds, a warning lamp
illuminates in the relevant exterior mirror
and arrows appear in the information
display to show which side the
approaching vehicle is coming from.
Note: If arrows do not display, a message
appears in the information display.
If the system malfunctions, a warning lamp
illuminates in the instrument cluster and
a message appears in the information
display. Have your vehicle checked as soon
as possible.
Note: In exceptional conditions, the system
could alert you, even when there is nothing
in the detection zone, for example a vehicle
passing further away from your vehicle.
Cross Traffic Alert Information Messages Action
Message
Displays instead of indication arrows when the system
detects a vehicle. Check for approaching traffic.
Cross Traffic Alert
Indicates blocked cross traffic alert system sensors. Clean
the sensors. If the message continues to appear, have your
vehicle checked as soon as possible.
Cross Traffic Not Avail-
able Sensor Blocked See
Manual
The system has malfunctioned. Have your vehicle checked
as soon as possible.
Cross Traffic System
Fault
Displays if you attach a trailer to your vehicle.
Cross Traffic Alert Deac-
tivated Trailer Attached
255
Super Duty (TFE), enUSA, Edition date: 201909, Third-Printing- Driving AidsE268294
Page 261 of 631

Note:
During parking maneuvers, the
adaptive steering system balances the driver
work load for various steering wheel inputs
and vehicle loading conditions. Under
extreme operating conditions the system
locking device may engage. This strategy
prevents overheating and permanent
damage to the adaptive steering system.
Typical steering and driving maneuvers
allow the system to cool and return to
normal operation.
PRE-COLLISION ASSIST (IF
EQUIPPED) WARNING: You are responsible for
controlling your vehicle at all times. The
system is designed to be an aid and does
not relieve you of your responsibility to
drive with due care and attention. Failure
to follow this instruction could result in
the loss of control of your vehicle,
personal injury or death. WARNING:
The system does not
detect vehicles that are driving in a
different direction, cyclists or animals.
Apply the brakes when necessary. Failure
to follow this instruction could result in
the loss of control of your vehicle,
personal injury or death. WARNING:
The system does not
operate during hard acceleration or
steering. Failure to take care may lead
to a crash or personal injury. WARNING: The system may fail or
operate with reduced function during
cold and severe weather conditions.
Snow, ice, rain, spray and fog can
adversely affect the system. Keep the
front camera and radar free of snow and
ice. Failure to take care may result in the
loss of control of your vehicle, serious
personal injury or death. WARNING:
Some situations and
objects prevent hazard detection. For
example low or direct sunlight, inclement
weather, unconventional vehicle types,
and pedestrians. Apply the brakes when
necessary. Failure to follow this
instruction could result in the loss of
control of your vehicle, personal injury or
death. WARNING:
Take additional care if
your vehicle is heavily loaded or you are
towing a trailer. These conditions could
result in reduced performance of this
system. Failure to follow this instruction
could result in the loss of control of your
vehicle, personal injury or death. WARNING:
The system cannot
help prevent all crashes. Do not rely on
this system to replace driver judgment
and the need to maintain a safe distance
and speed.
Using the Pre-Collision Assist
System
The Pre-Collision Assist system is active
at speeds above approximately
3 mph
(5 km/h) and pedestrian detection is active
at speeds up to
50 mph (80 km/h). 258
Super Duty (TFE), enUSA, Edition date: 201909, Third-Printing- Driving AidsE156130
Page 266 of 631
•
Electronic stability control and traction
control maintains your vehicle control
in adverse conditions or
high-performance driving.
• Electronic throttle control enhances
the powertrain response to your inputs.
• Transmission controls are optimized
with shift schedules tuned to each
terrain.
Using the System
The system tailors your vehicle
configuration for each mode you select.
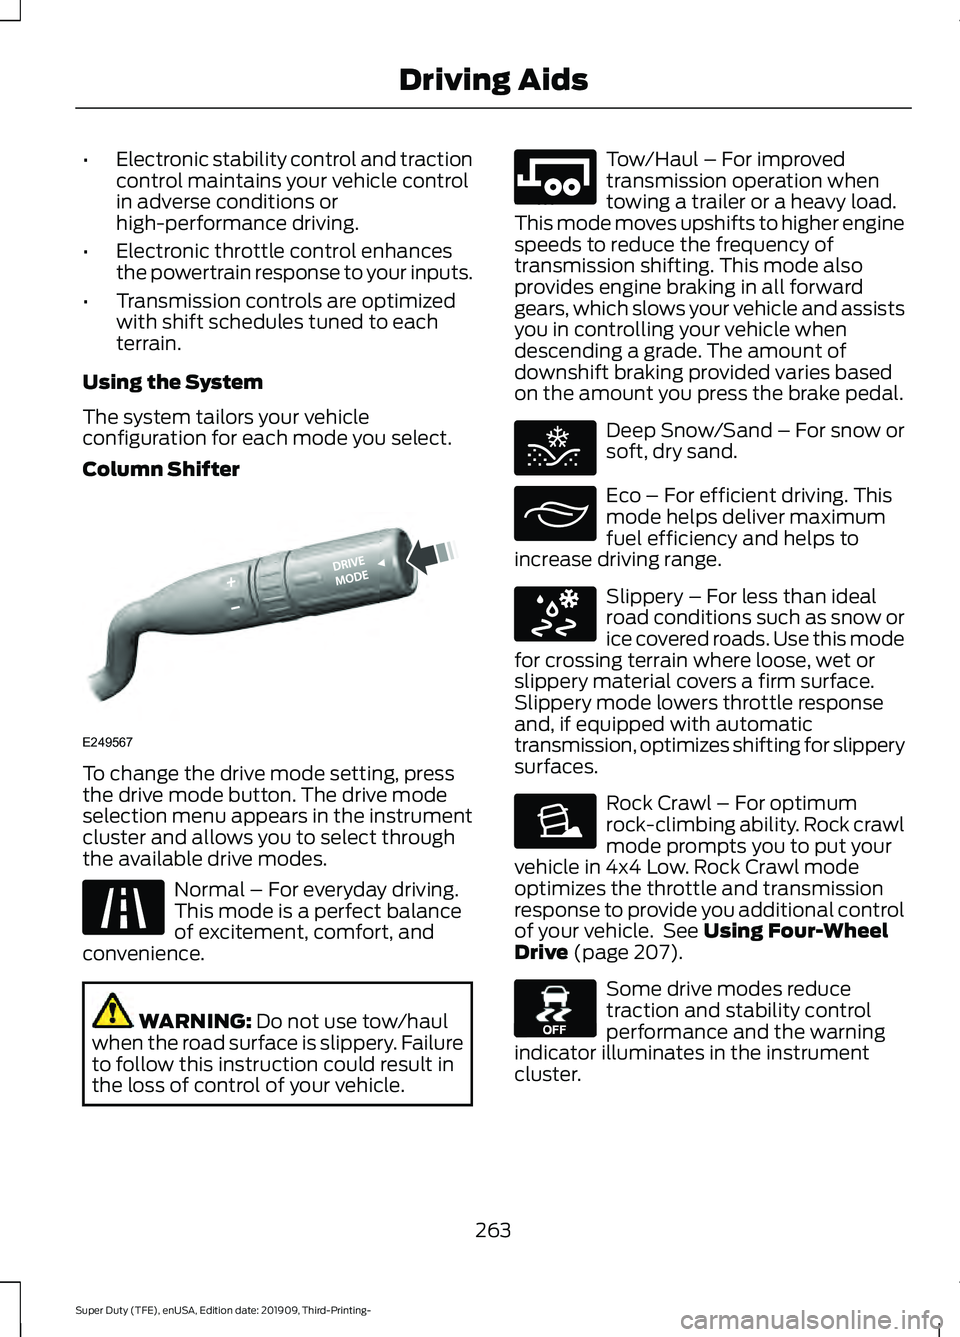
Column Shifter To change the drive mode setting, press
the drive mode button. The drive mode
selection menu appears in the instrument
cluster and allows you to select through
the available drive modes.
Normal – For everyday driving.
This mode is a perfect balance
of excitement, comfort, and
convenience. WARNING: Do not use tow/haul
when the road surface is slippery. Failure
to follow this instruction could result in
the loss of control of your vehicle. Tow/Haul – For improved
transmission operation when
towing a trailer or a heavy load.
This mode moves upshifts to higher engine
speeds to reduce the frequency of
transmission shifting. This mode also
provides engine braking in all forward
gears, which slows your vehicle and assists
you in controlling your vehicle when
descending a grade. The amount of
downshift braking provided varies based
on the amount you press the brake pedal. Deep Snow/Sand – For snow or
soft, dry sand.
Eco – For efficient driving. This
mode helps deliver maximum
fuel efficiency and helps to
increase driving range. Slippery – For less than ideal
road conditions such as snow or
ice covered roads. Use this mode
for crossing terrain where loose, wet or
slippery material covers a firm surface.
Slippery mode lowers throttle response
and, if equipped with automatic
transmission, optimizes shifting for slippery
surfaces. Rock Crawl – For optimum
rock-climbing ability. Rock crawl
mode prompts you to put your
vehicle in 4x4 Low. Rock Crawl mode
optimizes the throttle and transmission
response to provide you additional control
of your vehicle. See
Using Four-Wheel
Drive (page 207). Some drive modes reduce
traction and stability control
performance and the warning
indicator illuminates in the instrument
cluster.
263
Super Duty (TFE), enUSA, Edition date: 201909, Third-Printing- Driving AidsE249567 E225310 E246592 E295420 E295413 E295414 E225315 E130458
Page 269 of 631
is the maximum payload for your
vehicle as built by the assembly
plant. If you install any additional
equipment on your vehicle, you
must determine the new payload.
Subtract the weight of the
equipment from the payload listed
on the Tire and Loading label.
When towing, trailer tongue
weight or king pin weight is also
part of payload.
WARNING: The
appropriate loading capacity of
your vehicle can be limited either
by volume capacity (how much
space is available) or by payload
capacity (how much weight the
vehicle should carry). Once you
have reached the maximum
payload of your vehicle, do not
add more cargo, even if there is
space available. Overloading or
improperly loading your vehicle
can contribute to loss of vehicle
control and vehicle rollover.
GAWR (Gross Axle Weight
Rating)
GAWR is the maximum allowable
weight that a single axle (front or
rear) can carry. These numbers
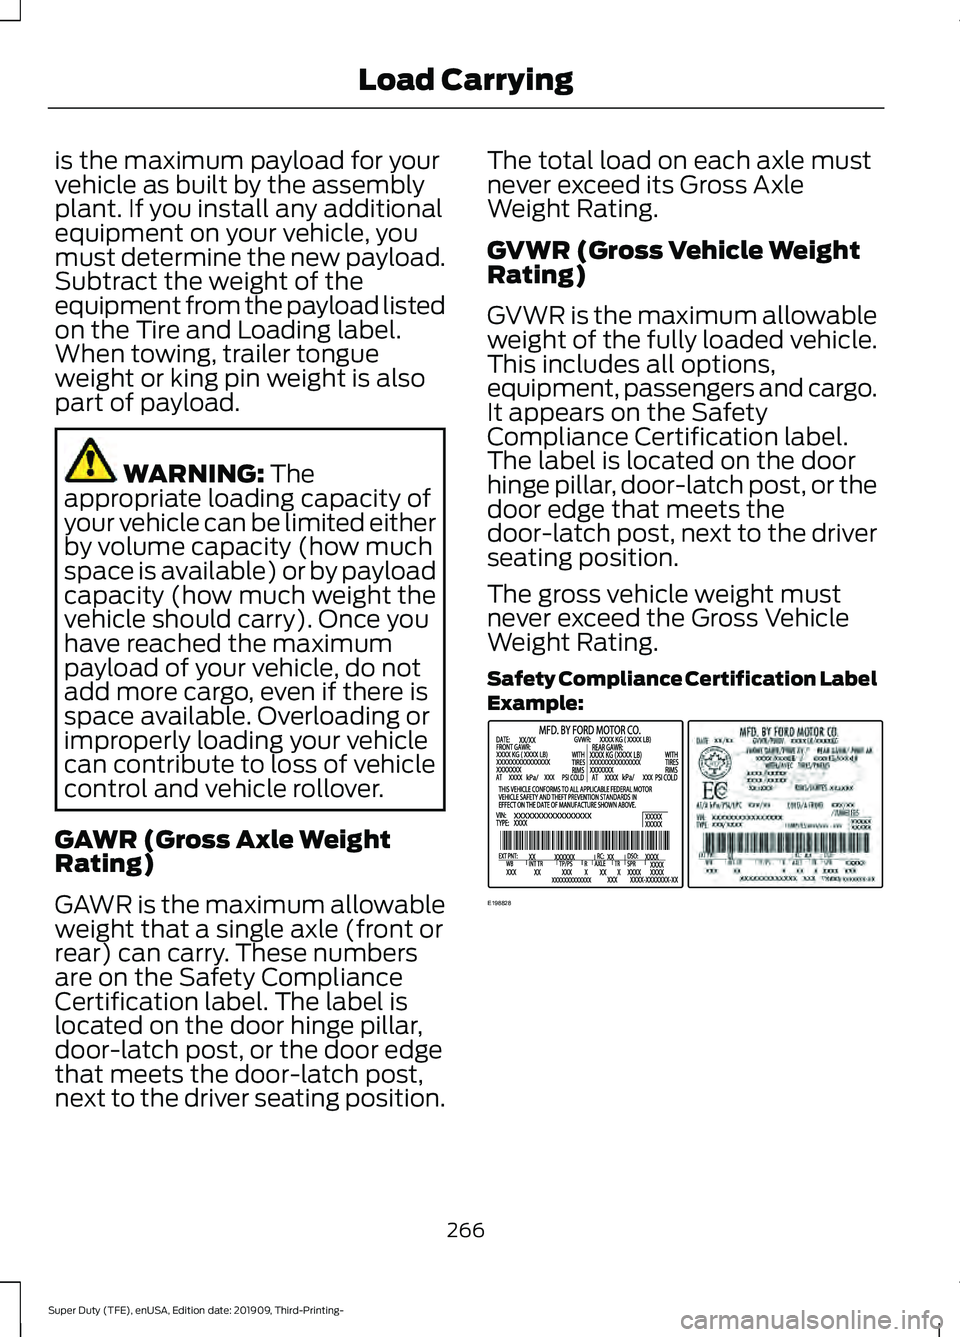
are on the Safety Compliance
Certification label. The label is
located on the door hinge pillar,
door-latch post, or the door edge
that meets the door-latch post,
next to the driver seating position. The total load on each axle must
never exceed its Gross Axle
Weight Rating.
GVWR (Gross Vehicle Weight
Rating)
GVWR is the maximum allowable
weight of the fully loaded vehicle.
This includes all options,
equipment, passengers and cargo.
It appears on the Safety
Compliance Certification label.
The label is located on the door
hinge pillar, door-latch post, or the
door edge that meets the
door-latch post, next to the driver
seating position.
The gross vehicle weight must
never exceed the Gross Vehicle
Weight Rating.
Safety Compliance Certification Label
Example:
266
Super Duty (TFE), enUSA, Edition date: 201909, Third-Printing- Load CarryingE198828
Page 270 of 631
WARNING: Exceeding the
Safety Compliance Certification
label vehicle weight limits can
adversely affect the
performance and handling of
your vehicle, cause vehicle
damage and can result in the
loss of control of your vehicle,
serious personal injury or death.
Maximum Loaded Trailer
Weight
Maximum loaded trailer weight is
the highest possible weight of a
fully loaded trailer the vehicle can
tow. Consult an authorized dealer
(or the RV and Trailer Towing
Guide available at an authorized
dealer) for more detailed
information.
GCWR (Gross Combined
Weight Rating)
GCWR is the maximum allowable
weight of the vehicle and the
loaded trailer, including all cargo
and passengers, that the vehicle
can handle without risking
damage. (Important: The towing
vehicle ’s braking system is rated
for operation at Gross Vehicle
Weight Rating, not at Gross
Combined Weight Rating.)
Separate functional brakes should be used for safe control of towed
vehicles and for trailers where the
Gross Combined Weight of the
towing vehicle plus the trailer
exceed the Gross Vehicle Weight
Rating of the towing vehicle.
The gross combined weight must
never exceed the Gross Combined
Weight Rating.
Note:
For trailer towing
information refer to the RV and
Trailer Towing Guide available at
an authorized dealer. WARNING:
Do not exceed
the GVWR or the GAWR
specified on the certification
label. WARNING:
Do not use
replacement tires with lower
load carrying capacities than the
original tires because they may
lower your vehicle's GVWR and
GAWR limitations. Replacement
tires with a higher limit than the
original tires do not increase the
GVWR and GAWR limitations. WARNING: Exceeding any
vehicle weight rating can
adversely affect the
performance and handling of
your vehicle, cause vehicle
damage and can result in the
loss of control of your vehicle,
serious personal injury or death.
267
Super Duty (TFE), enUSA, Edition date: 201909, Third-Printing- Load Carrying
Page 271 of 631
Steps for determining the
correct load limit:
1. Locate the statement "The
combined weight of occupants
and cargo should never exceed
XXX kg or XXX lb." on your
vehicle ’s Tire and Loading
label.
2. Determine the combined
weight of the driver and
passengers that will be riding
in your vehicle.
3. Subtract the combined weight
of the driver and passengers
from XXX kg or XXX lb.
4. The resulting figure equals the
available amount of cargo and
luggage load capacity. For
example, if the “XXX” amount
equals 1,400 lb. and there will
be five 150 lb. passengers in
your vehicle, the amount of
available cargo and luggage
load capacity is 650 lb.
(1400-750 (5 x 150) = 650 lb.)
5. Determine the combined
weight of luggage and cargo
being loaded on the vehicle.
That weight may not safely
exceed the available cargo and
luggage load capacity
calculated in Step 4.
6. If your vehicle will be towing a
trailer, load from your trailer
will be transferred to your
vehicle. Consult this manual to
determine how this reduces the
available cargo and luggage
load capacity of your vehicle. Helpful examples for calculating
the available amount of cargo
and luggage load capacity
Suppose your vehicle has a
1400-pound (635-kilogram) cargo
and luggage capacity. You decide
to go golfing. Is there enough load
capacity to carry you, four of your
friends and all the golf bags? You
and four friends average 220
pounds (99 kilograms) each and
the golf bags weigh approximately
30 pounds (13.5 kilograms) each.
The calculation would be: 1400 -
(5 x 220) - (5 x 30) = 1400 - 1100
- 150 = 150 pounds. Yes, you have
enough load capacity in your
vehicle to transport four friends
and your golf bags. In metric units,
the calculation would be: 635
kilograms - (5 x 99 kilograms) -
(5 x 13.5 kilograms) = 635 - 495 -
67.5 = 72.5 kilograms.
Suppose your vehicle has a
1400-pound (635-kilogram) cargo
and luggage capacity. You and
one of your friends decide to pick
up cement from the local home
improvement store to finish that
patio you have been planning for
the past two years. Measuring the
inside of the vehicle with the rear
seat folded down, you have room
for twelve 100-pound
(45-kilogram) bags of cement. Do
you have enough load capacity to
transport the cement to your
home? If you and your friend each
weigh 220 pounds (99 kilograms),
the calculation would be: 1400 -
(2 x 220) - (12 x 100) = 1400 - 440
268
Super Duty (TFE), enUSA, Edition date: 201909, Third-Printing- Load Carrying
Page 274 of 631
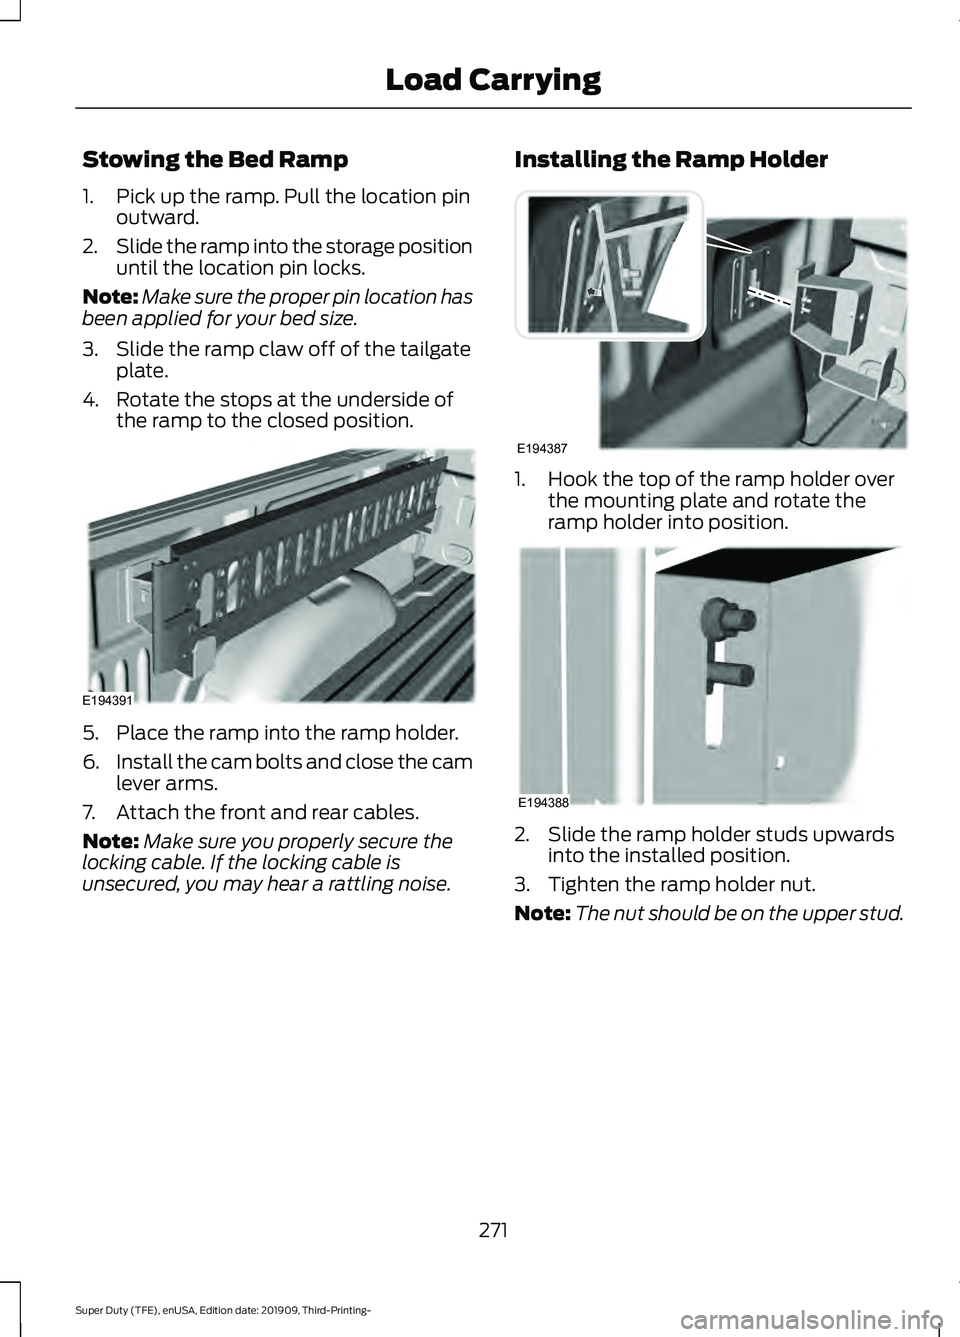
Stowing the Bed Ramp
1. Pick up the ramp. Pull the location pin
outward.
2. Slide the ramp into the storage position
until the location pin locks.
Note: Make sure the proper pin location has
been applied for your bed size.
3. Slide the ramp claw off of the tailgate plate.
4. Rotate the stops at the underside of the ramp to the closed position. 5. Place the ramp into the ramp holder.
6.
Install the cam bolts and close the cam
lever arms.
7. Attach the front and rear cables.
Note: Make sure you properly secure the
locking cable. If the locking cable is
unsecured, you may hear a rattling noise. Installing the Ramp Holder 1. Hook the top of the ramp holder over
the mounting plate and rotate the
ramp holder into position. 2. Slide the ramp holder studs upwards
into the installed position.
3. Tighten the ramp holder nut.
Note: The nut should be on the upper stud.
271
Super Duty (TFE), enUSA, Edition date: 201909, Third-Printing- Load CarryingE194391 E194387 E194388