2020 FORD F-350 Tail lamp
[x] Cancel search: Tail lampPage 4 of 631

Introduction
About This Manual
..........................................7
Symbols Glossary ............................................
8
Data Recording ...............................................
10
Perchlorate .......................................................
14
Ford Credit ........................................................
14
Replacement Parts Recommendation ........................................................................\
...
14
Special Notices ...............................................
15
Mobile Communications Equipment ........................................................................\
...
16
Export Unique Options ................................
16
Environment
Protecting the Environment .......................
17
At a Glance
Instrument Panel ...........................................
18
Child Safety
General Information .....................................
20
Installing Child Restraints ..........................
22
Booster Seats ..................................................
31
Child Restraint Positioning ........................
33
Child Safety Locks ........................................
35
Seatbelts
Principle of Operation .................................
36
Fastening the Seatbelts ..............................
37
Seatbelt Height Adjustment ....................
40
Seatbelt Warning Lamp and Indicator Chime ............................................................
40
Seatbelt Reminder ........................................
41
Child Restraint and Seatbelt Maintenance ...............................................
42
Seatbelt Extensions .....................................
42
Supplementary Restraints System
Principle of Operation .................................
43Driver and Passenger Airbags
..................
44
Side Airbags ....................................................
49
Safety Canopy ™...........................................
50
Crash Sensors and Airbag Indicator ........
51
Airbag Disposal ..............................................
52
Keys and Remote Controls
General Information on Radio Frequencies .................................................
53
Remote Control .............................................
53
Replacing a Lost Key or Remote Control ........................................................................\
..
59
MyKey ™
Principle of Operation .................................
60
Creating a MyKey ...........................................
61
Clearing All MyKeys ......................................
62
Checking MyKey System Status ..............
63
Using MyKey With Remote Start Systems ........................................................
63
MyKey – Troubleshooting ..........................
63
Doors and Locks
Locking and Unlocking ................................
65
Keyless Entry ..................................................
68
Tailgate
Tailgate Lock ...................................................
70
Electronic Tailgate ........................................
70
Removing the Tailgate ..................................
71
Tailgate Step ....................................................
71
Bed Extender ...................................................
72
Security
Passive Anti-Theft System ........................
75
Anti-Theft Alarm ...........................................
75
Power Running Boards
Using Power Running Boards ....................
77
1
Super Duty (TFE), enUSA, Edition date: 201909, Third-Printing- Table of Contents
Page 72 of 631

The anti-scan feature will turn off after:
•
One minute of keypad inactivity.
• Pressing the unlock button on the
remote control.
• Switching the ignition on.
• Unlocking the vehicle using intelligent
access.
Unlocking and Locking the Doors
To Unlock the Driver Door
Enter the factory-set five-digit code or your
personal code. You must press each
number within five seconds of each other.
The interior lamps illuminate.
Note: All doors unlock if you disable the
two-stage unlocking feature. See General
Information (page 109).
To Unlock All Doors
Enter the factory-set code or your personal
code, then press
3·4 control within five
seconds.
To Lock All Doors
Press and hold
7·8 and 9·0 at the same
time with the driver door closed. You do
not need to enter the keypad code first.
To Release the Tailgate (If Equipped)
Enter the factory-set code or your personal
code, then press
5·6 control within five
seconds.
69
Super Duty (TFE), enUSA, Edition date: 201909, Third-Printing- Doors and Locks
Page 94 of 631

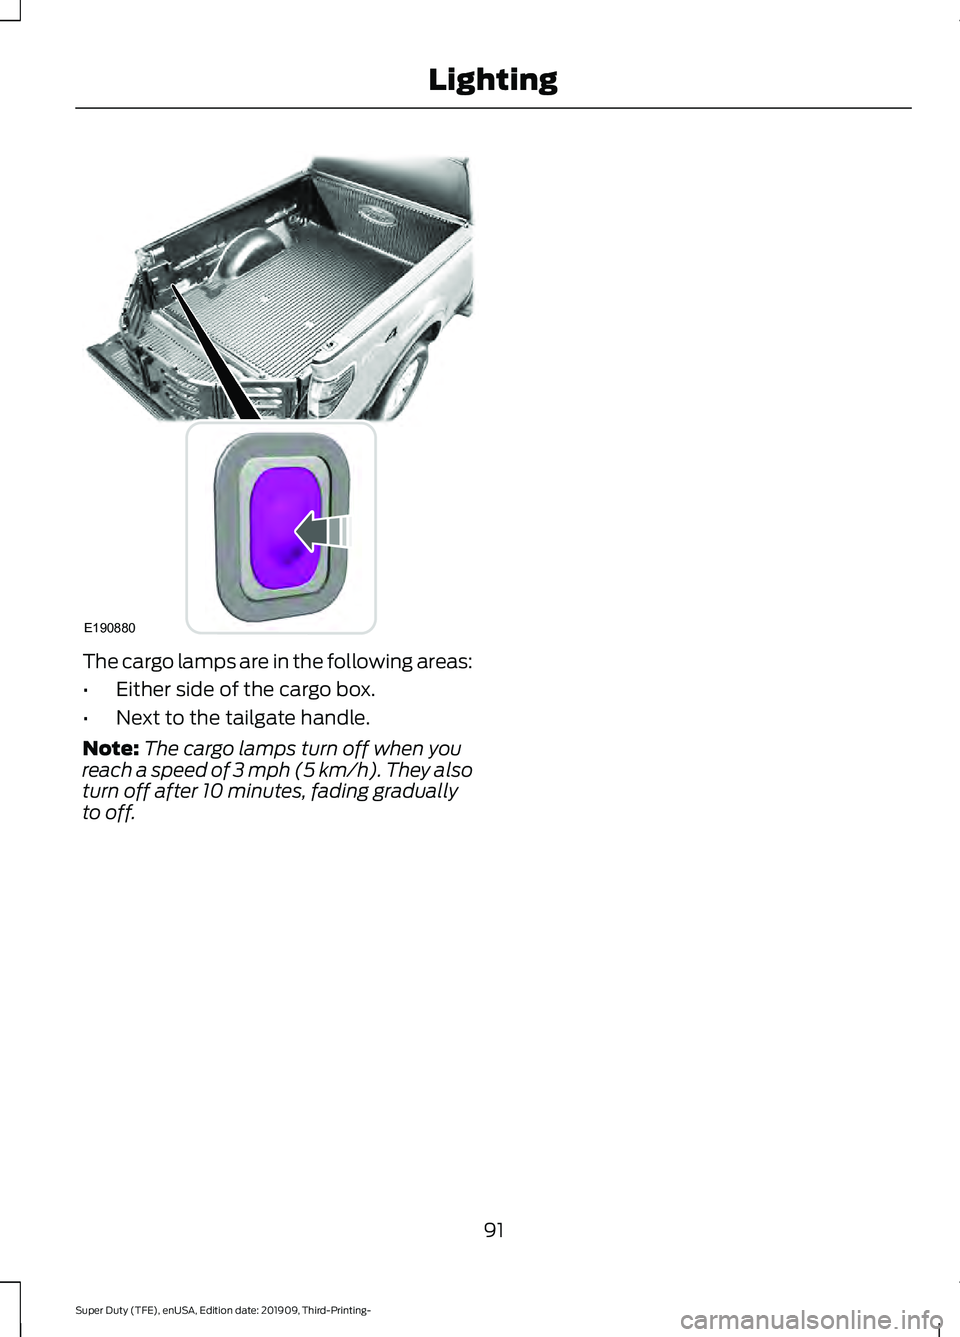
The cargo lamps are in the following areas:
•
Either side of the cargo box.
• Next to the tailgate handle.
Note: The cargo lamps turn off when you
reach a speed of 3 mph (5 km/h). They also
turn off after 10 minutes, fading gradually
to off.
91
Super Duty (TFE), enUSA, Edition date: 201909, Third-Printing- LightingE190880
Page 95 of 631

WHAT IS AUTOMATIC HIGH
BEAM CONTROL
The system turns on high beams if it is dark
enough and no other traffic is present. If it
detects an approaching vehicle
’s
headlamps or tail lamps, or street lighting
ahead, the system turns the high beams
off. Low beams remain on.
A camera sensor, centrally mounted
behind the windshield of your vehicle,
continuously monitors conditions to turn
the high beams on and off.
SWITCHING AUTOMATIC HIGH
BEAM CONTROL ON AND OFF
Switch the system on or off using the
information display. See General
Information (page 109).
Activating the Automatic High
Beam Control Switch the lighting control to the
autolamps position to activate.
See
Autolamps (page 87).
Note: Automatic high beams are not
available when autolamps are not turned
on.
When active, the high beams turn on if:
• The ambient light level is low enough.
• There is no traffic in front of your
vehicle.
• The vehicle speed is greater than
approximately
32 mph (52 km/h).
When active, the high beams turn off if:
• The ambient light level is high enough
that high beams are not required.
• The system detects an approaching
vehicle's headlamps or tail lamps.
• The system detects severe rain, snow
or fog. •
The camera is blocked.
• The vehicle speed falls below
approximately
27 mph (44 km/h).
Note: The deactivation speed is lower on
curves.
Note: High beam reactivation may be
delayed in certain curvy road situations.
Note: The system may not operate properly
if the sensor is blocked. Keep the windshield
free from obstruction or damage.
Note: The system may not operate properly
in cold or inclement conditions. You can
switch on the high beams by overriding the
system.
Note: If the system detects a blockage, for
example bird droppings, bug splatter, snow
or ice, the system goes into low beam mode
until you clear the blockage. A message may
appear in the information display if the
camera is blocked.
Note: Using much larger tires or equipping
vehicle accessories such as snowplows can
modify your vehicle's ride height and
degrade automatic high beam control
performance.
AUTOMATIC HIGH BEAM
CONTROL INDICATORS The indicator illuminates to
confirm when the system is
ready to assist.
OVERRIDING AUTOMATIC
HIGH BEAM CONTROL WARNING:
The system does not
relieve you of your responsibility to drive
with due care and attention. You may
need to override the system if it does not
turn the high beams on or off.
92
Super Duty (TFE), enUSA, Edition date: 201909, Third-Printing- Automatic High Beam Control
(If Equipped)
Page 202 of 631

How to Start Operator Commanded
Regeneration
WARNING: Stay clear of the
exhaust tailpipe during regeneration. Hot
exhaust gases can burn you badly.
Note: You cannot use the operator
commanded regeneration until the diesel
particulate filter load percentage has
reached 100%. The diesel particulate filter
load percentage fluctuates up and down
when driving your vehicle due to active and
passive regenerations.
Note: During the use of operator
commanded regeneration, you may observe
a light amount of white smoke. This is
normal. You may not be able to use
operator commanded
regeneration if the service engine
soon warning lamp appears in the
information display
Information Display Procedure
Start with your vehicle engine and when it
has reached the normal operating
temperature, press the information display
control button on the steering wheel. See
Information Display Control
(page 81).
If a message advising that the exhaust
filter is full appears in the information
display, press the OK button as instructed.
Answer yes to this prompt and then follow
the next prompts regarding the exhaust
position required to initiate operator
commanded regeneration. Be sure to
understand each prompt. If you are not
sure what is being asked by each prompt,
contact an authorized dealer. The display
confirms the operation has started and
when it has finished. If the diesel particulate filter is near or at
saturation, a message requesting
permission to initiate filter cleaning
appears in the information display. See
Information Messages
(page 120).
Answer yes to this prompt and then follow
the next prompts regarding exhaust
position required to initiate operator
commanded regeneration. Be sure to
understand each prompt. If you are not
sure what is being asked by each prompt,
contact an authorized dealer. The display
confirms the operation has started and
when it has finished. You can also drive to
clean the filter. When the system is at the point
of oversaturation, the service
engine warning lamp illuminates
and a message appears in the information
display. You cannot initiate filter cleaning.
You must have your vehicle checked as
soon as possible.
Once operator commanded regeneration
starts, engine speed increases to
approximately 1600 rpm and the cooling
fan speed increases. You will hear a
change in audible sound due to engine
speed and cooling fan speed increases.
It is not necessary to open the hood on the
engine compartment. Once operator
commanded regeneration completes, the
engine speed returns to normal idling. The
exhaust system remains very hot for
several minutes even after regeneration is
complete. Do not reposition the vehicle
over materials that could burn until the
exhaust system has had sufficient time to
cool. Depending on the amount of soot
collected by the diesel particulate filter,
ambient temperature and altitude,
operator commanded regeneration lasts
approximately 30 minutes.
199
Super Duty (TFE), enUSA, Edition date: 201909, Third-Printing- Engine Emission Control
Page 203 of 631

Operator Commanded Regeneration
with Automatic Regeneration Control
(If Equipped)
If your vehicle is operated with significant
stationary operation, low speed drive
cycles less than 25 mph (40 km/h), short
drive cycles, drive time less than 15 minutes
or the vehicle does not fully warm up,
passive and active regeneration may not
sufficiently clean the diesel particulate
filter system. You can switch off automatic
regeneration until better driving conditions
are available, for example steady high
speed driving. You can then switch
automatic regeneration back on to clean
the diesel particulate filter.
Switching Automatic Regeneration
Control On and Off
To switch operator commanded
regeneration on and off, use the
information display control on the steering
wheel. See Information Display Control
(page
81). Scroll to the exhaust cleaning
message, a check in the box indicates the
feature is enabled, and unchecked
indicates the feature is disabled.
How to Interrupt or Cancel Operator
Commanded Regeneration
If you need to cancel the operator
commanded regeneration, pressing the
brake, accelerator or switching the engine
off stops the procedure. Depending on the
amount of time you allowed the operator
commanded regeneration to operate, soot
may not have had sufficient time to be fully
eliminated, but the exhaust system and
exhaust gas may still be hot. If you shut
your vehicle off during operator
commanded regeneration, you may notice
turbo flutter. This is a normal consequence
caused by shutting off a diesel engine
during boosted operation and is considered
normal. Filter Service and Maintenance
Over time, a slight amount of ash builds
up in the diesel particulate filter, which is
not removed during the regeneration
process. The filter may need to be replaced
with a new or remanufactured part at
approximately 250,000 mi (400,000 km).
Actual mileage varies depending on engine
and vehicle operating conditions.
If filter service is required, the
engine control system warning
lamp illuminates in the
information display. If there are any issues with the
diesel particulate filter system,
the engine control system
warning lamp and a service
engine soon warning lamp
illuminate to inform you that
your vehicle requires service. Have your
vehicle checked as soon as possible.
Resonator and Tailpipe Assembly
Maintenance
Aftermarket devices or modifications to
the exhaust system may reduce the
effectiveness of the exhaust system as
well as cause damage to the exhaust
system or engine. This may also degrade
vehicle performance and could lead to
engine damage that may not be covered
by the vehicle Warranty.
200
Super Duty (TFE), enUSA, Edition date: 201909, Third-Printing- Engine Emission Control
Page 233 of 631

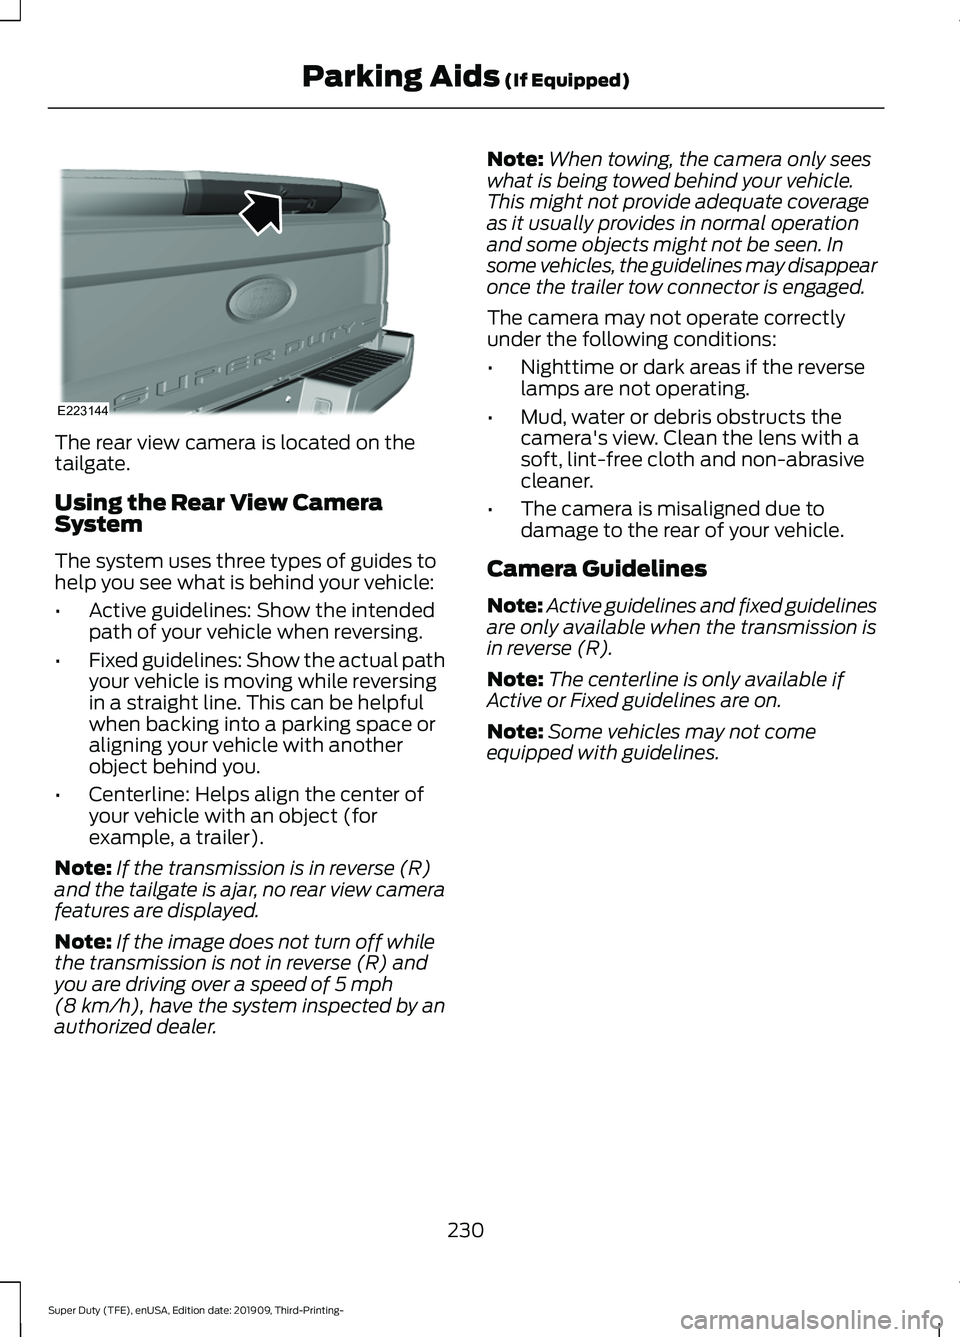
The rear view camera is located on the
tailgate.
Using the Rear View Camera
System
The system uses three types of guides to
help you see what is behind your vehicle:
•
Active guidelines: Show the intended
path of your vehicle when reversing.
• Fixed guidelines: Show the actual path
your vehicle is moving while reversing
in a straight line. This can be helpful
when backing into a parking space or
aligning your vehicle with another
object behind you.
• Centerline: Helps align the center of
your vehicle with an object (for
example, a trailer).
Note: If the transmission is in reverse (R)
and the tailgate is ajar, no rear view camera
features are displayed.
Note: If the image does not turn off while
the transmission is not in reverse (R) and
you are driving over a speed of 5 mph
(8 km/h), have the system inspected by an
authorized dealer. Note:
When towing, the camera only sees
what is being towed behind your vehicle.
This might not provide adequate coverage
as it usually provides in normal operation
and some objects might not be seen. In
some vehicles, the guidelines may disappear
once the trailer tow connector is engaged.
The camera may not operate correctly
under the following conditions:
• Nighttime or dark areas if the reverse
lamps are not operating.
• Mud, water or debris obstructs the
camera's view. Clean the lens with a
soft, lint-free cloth and non-abrasive
cleaner.
• The camera is misaligned due to
damage to the rear of your vehicle.
Camera Guidelines
Note: Active guidelines and fixed guidelines
are only available when the transmission is
in reverse (R).
Note: The centerline is only available if
Active or Fixed guidelines are on.
Note: Some vehicles may not come
equipped with guidelines.
230
Super Duty (TFE), enUSA, Edition date: 201909, Third-Printing- Parking Aids
(If Equipped)E223144
Page 253 of 631

The system uses radar sensors that are
located inside the tail lamp on each side
of your vehicle. Any dirt, mud and snow in
front of the sensors or driving in heavy rain
can cause system degradation. Also, other
types of obstructions in front of the sensor
can cause system degradation. This is
referred to as a
‘blocked ’ condition.
Note: Do not apply bumper stickers and/or
repair compound to these areas, this can
cause degraded system performance.
If the system detects a degraded
performance condition, a message warning
appears in the display screen. The alert
indicators remain ON and the system no
longer provides any warnings. You can
clear the warning but the alert indicators
remain illuminated.
A "blocked" condition can be cleared in
two ways:
• After the blockage in front of the
sensors is removed or the
rainfall/snowfall rate decreases or
stops, drive for a few minutes in traffic
to allow the sensors to detect passing
vehicles.
• By cycling the ignition from ON to OFF
and then back ON.
Note: If your vehicle has a tow bar with a
factory equipped trailer tow module and it
is towing a trailer, the sensors will
automatically turn the Blind Spot
Information System off. If your vehicle has
a tow bar but no factory equipped trailer
tow module, it is recommended to turn the
Blind Spot Information System off
manually. Operating the Blind Spot
Information System without the Blind Spot
Trailer Tow package and a trailer attached
will cause poor system performance. Blind Spot Information System
with Trailer Tow (If Equipped)
The Blind Spot Information System with
Trailer Tow is designed to aid you in
detecting vehicles that may have entered
the detection area zone (A). The detection
area is on both sides of your vehicle and
trailer, extending rearward from the
exterior mirrors to the end of your trailer.
When a trailer is attached and the
customer has set up a Blind Spot Trailer,
the Blind Spot Information System with
Trailer Tow becomes active when driving
forward above
6 mph (10 km/h). See
Trailer Reversing Aids (page 274).
The Blind Spot Information System with
Trailer Tow can be turned off in the
instrument cluster. If the Blind Spot
Information System is turned off, then the
Blind Spot Information System with Trailer
Tow automatically turns off.
250
Super Duty (TFE), enUSA, Edition date: 201909, Third-Printing- Driving AidsE225007