Page 423 of 631

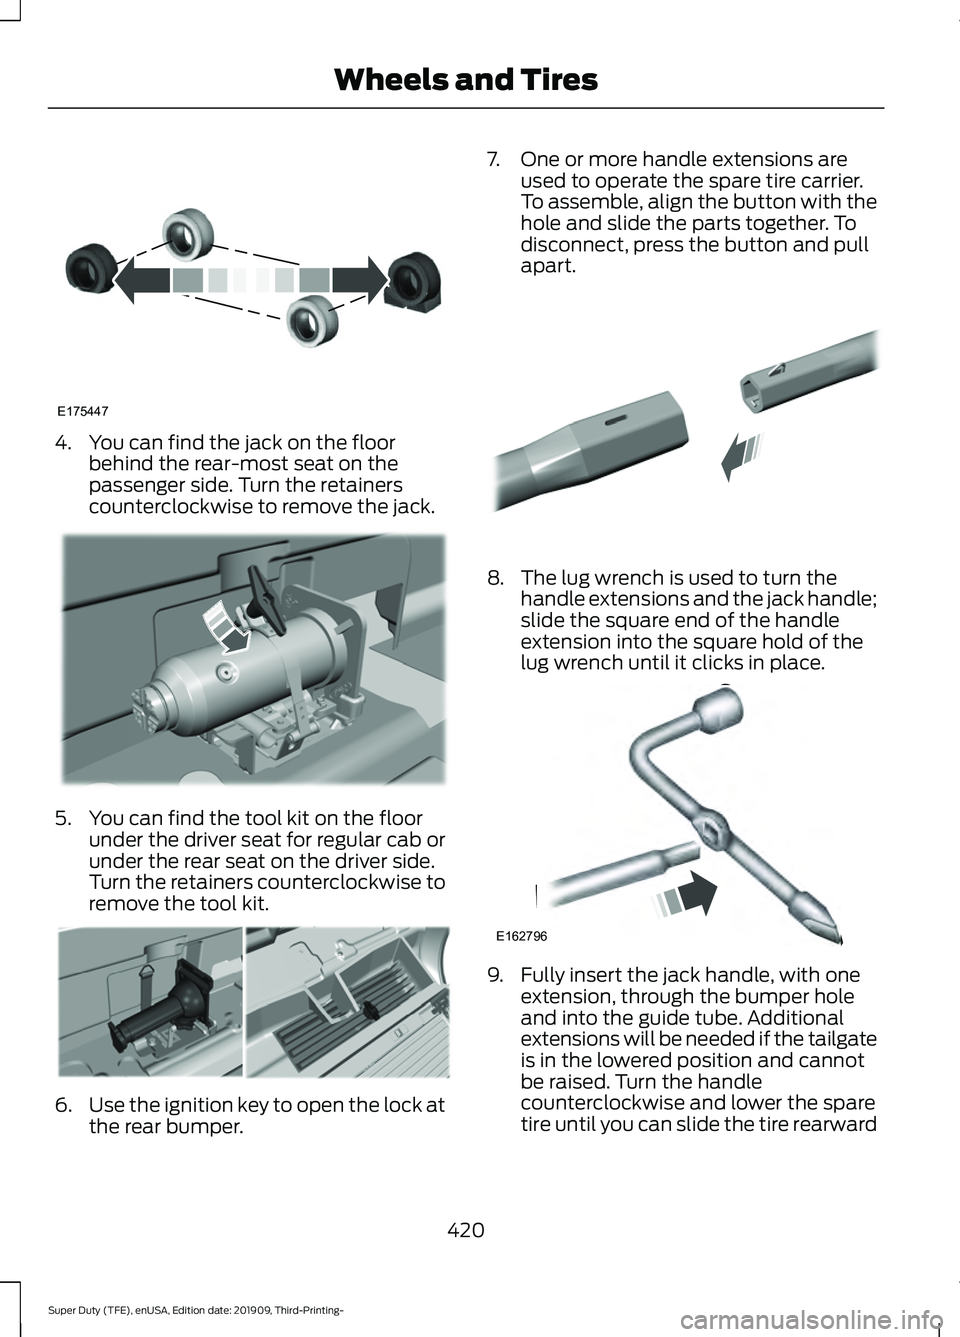
4. You can find the jack on the floor
behind the rear-most seat on the
passenger side. Turn the retainers
counterclockwise to remove the jack. 5. You can find the tool kit on the floor
under the driver seat for regular cab or
under the rear seat on the driver side.
Turn the retainers counterclockwise to
remove the tool kit. 6.
Use the ignition key to open the lock at
the rear bumper. 7. One or more handle extensions are
used to operate the spare tire carrier.
To assemble, align the button with the
hole and slide the parts together. To
disconnect, press the button and pull
apart. 8. The lug wrench is used to turn the
handle extensions and the jack handle;
slide the square end of the handle
extension into the square hold of the
lug wrench until it clicks in place. 9. Fully insert the jack handle, with one
extension, through the bumper hole
and into the guide tube. Additional
extensions will be needed if the tailgate
is in the lowered position and cannot
be raised. Turn the handle
counterclockwise and lower the spare
tire until you can slide the tire rearward
420
Super Duty (TFE), enUSA, Edition date: 201909, Third-Printing- Wheels and TiresE175447 E309424 E309795 E308882 E162796
Page 424 of 631

and the cable is slack. You will feel
some resistance when you turn the jack
handle assembly. If not replacing the
spare or flat tire to the underbody
storage area, raise the wheel retainer
up into the installed position.
10. Slide the retainer through the center of the spare tire wheel and remove
the spare tire. 11. Remove the wheel trim with the lug
wrench tip, or use the wheel trim tool
described later in this section.
12. Loosen each wheel lug nut one-half turn counterclockwise, but do not
remove them until the wheel is raised
off the ground. For dual rear wheel,
assemble the lug wrench and
extension tool together to access the
lug nuts. 13. Position the jack under the correct
jacking points according to following
pictures.
Removing Wheel Trim With Single
Wheels
1. Insert the flat end of the lug wrench between the wheel rim and the wheel
trim.
2. Carefully remove the wheel trim.
Vehicles With Dual Rear Alloy Wheels 421
Super Duty (TFE), enUSA, Edition date: 201909, Third-Printing- Wheels and TiresE310417 E309794 E338541
Page 427 of 631
Front passenger side (4x4): F-350 dual
rear wheel
Front driver side (4x4): F-350 dual rear
wheel
Note:
Make sure the jack fits onto the flat
area on the outboard side of the differential
housing. Rear: F-350 dual rear wheel
Front: F-450 and F-550
Rear: F-450 and F-550
Insert the hooked end of the jack handle
into the jack and turn the jack handle
clockwise. For hydraulic jacks, operate the
handle up-and-down until the wheel is
completely off the ground and high enough
to install the spare tire.
Note:
Hydraulic jacks have a pressure relief
valve that prevents lifting loads which
exceed the jack's rated capacity.
F-250 and F-350 Single Rear Wheel
Vehicles
424
Super Duty (TFE), enUSA, Edition date: 201909, Third-Printing- Wheels and TiresE162815 E162814 E162817 E162816 E162818
Page 428 of 631

F-350 Dual Rear Wheel Vehicles
Remove the lug nuts with the lug wrench,
replace the flat tire with the spare, making
sure the valve stem of the spare is facing
outward when replacing a front wheel. For
the rear wheel position on vehicles with
single rear wheel fitments, install the spare
with the valve stem facing outward. For
vehicles with dual rear wheels, the valve
stem of the spare must face outward when
replacing an inner wheel, but must face
inward when replacing an outboard wheel.
Reinstall the lug nuts until the wheel is
snug against the hub. Do not fully tighten
the lug nuts until the wheel has been
lowered.
Lower the vehicle completely by turning
the jack handle counterclockwise until the
vehicle is completely lowered. Note:
For F-350 Dual Rear Wheel, F-450
and F-550 Vehicles, insert the notched end
of the jack handle to the release valve, open
the release valve slightly by turning the
handle counterclockwise. Stop turning the
release valve when vehicle start to lower.
Make sure to close the valve when you
completely lower your vehicle.
F-350 Dual Rear Wheel, F-450 and
F-550 Vehicles. Installing the lug Nuts and Ornaments
8-lug nut torque sequence
425
Super Duty (TFE), enUSA, Edition date: 201909, Third-Printing- Wheels and TiresE162811 E162819 E162812 E161441
13
4
27
6
5
8
Page 430 of 631

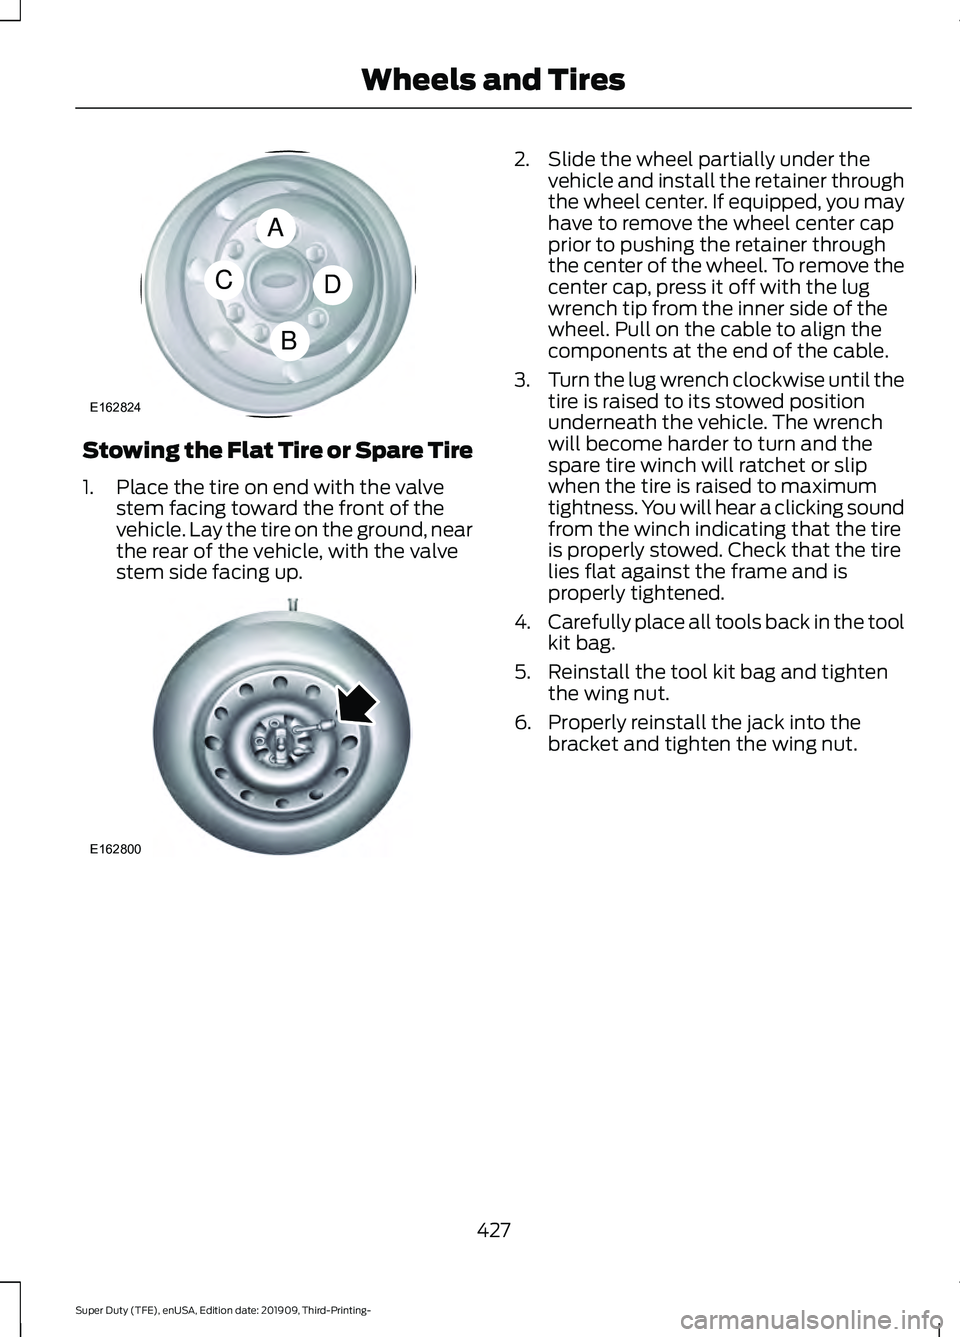
Stowing the Flat Tire or Spare Tire
1. Place the tire on end with the valve
stem facing toward the front of the
vehicle. Lay the tire on the ground, near
the rear of the vehicle, with the valve
stem side facing up. 2. Slide the wheel partially under the
vehicle and install the retainer through
the wheel center. If equipped, you may
have to remove the wheel center cap
prior to pushing the retainer through
the center of the wheel. To remove the
center cap, press it off with the lug
wrench tip from the inner side of the
wheel. Pull on the cable to align the
components at the end of the cable.
3. Turn the lug wrench clockwise until the
tire is raised to its stowed position
underneath the vehicle. The wrench
will become harder to turn and the
spare tire winch will ratchet or slip
when the tire is raised to maximum
tightness. You will hear a clicking sound
from the winch indicating that the tire
is properly stowed. Check that the tire
lies flat against the frame and is
properly tightened.
4. Carefully place all tools back in the tool
kit bag.
5. Reinstall the tool kit bag and tighten the wing nut.
6. Properly reinstall the jack into the bracket and tighten the wing nut.
427
Super Duty (TFE), enUSA, Edition date: 201909, Third-Printing- Wheels and TiresA
C
B
D
E162824 E162800
Page 479 of 631

AUDIO UNIT - VEHICLES WITH:
SYNC
WARNING: Driving while distracted
can result in loss of vehicle control, crash
and injury. We strongly recommend that
you use extreme caution when using any
device that may take your focus off the
road. Your primary responsibility is the
safe operation of your vehicle. We
recommend against the use of any
hand-held device while driving and
encourage the use of voice-operated
systems when possible. Make sure you
are aware of all applicable local laws
that may affect the use of electronic
devices while driving. Note:
Depending on your vehicle option
package, the controls may look different
from what you see here.
Note: Some features, such as satellite
radio, may not be available in your location.
Check with an authorized dealer. Accessing the Apps Menu Press and release the button to
access the apps menu. Follow
the on-screen prompts to make
your selection.
Accessing the Clock Settings Press and release the button to
access the clock setting.
Use the center arrow controls to
change the hours and minutes.
Accessing the Media Source Menu Press and release the button to
open the media source menu.
You can press this multiple times to
change to a SYNC-Media device or scroll
through the media sources using the arrow
buttons. Press OK to select a source.
Accessing the Phone Features Press and release the button to
access the phone features of the
SYNC system.
Accessing the Sound Settings Press and release the button to
access settings for Treble,
Midrange, Bass, Fade and
Balance.
Accessing the Settings Menu Press and release the button to
access the settings menu.
Follow the on-screen prompts
to make your selection.
476
Super Duty (TFE), enUSA, Edition date: 201909, Third-Printing- Audio SystemE291383 E265036 E265035 E280315 E142607
Page 504 of 631

GENERAL INFORMATION
WARNING: Driving while distracted
can result in loss of vehicle control, crash
and injury. We strongly recommend that
you use extreme caution when using any
device that may take your focus off the
road. Your primary responsibility is the
safe operation of your vehicle. We
recommend against the use of any
hand-held device while driving and
encourage the use of voice-operated
systems when possible. Make sure you
are aware of all applicable local laws
that may affect the use of electronic
devices while driving.
About SYNC
The system allows you to interact with the
entertainment, information and
communication systems on your vehicle
using voice commands and a touchscreen.
The system provides easy interaction with
audio, phone, navigation, mobile apps and
settings.
Note: You can switch the system on and
use it for up to an hour without switching
the ignition on.
Note: You can use the system after you
switch the ignition off for up to 10 minutes
or until you open a door.
Note: For your safety, some features are
speed-dependent. Their use is limited to
when your vehicle speed is less than 3 mph
(5 km/h). Using the Touchscreen
Status bar.
A
Home screen.
B
Clock. See
Settings (page 531).
C
Outside air temperature.
D
Feature bar.
E
Status Bar Cell phone microphone muted.
Audio system muted.
Software update installed.
Wi-Fi connected.
Cell phone roaming.
Text message received.
501
Super Duty (TFE), enUSA, Edition date: 201909, Third-Printing- SYNC™ 3
(If Equipped)E293823
Page 534 of 631

Action and Description
Menu Item
Select to choose from a listing of
weather locations.
Area
Touch this button to view scores and schedules from a variety
of sports. You can also save up to 10 favorite teams for easier
access. The score automatically refreshes when a game is in
progress.
Sports Info
Touch this button to view ski conditions for a specific area.
Ski Conditions
SETTINGS Press the button to enter the
settings menu.
Once you select a tile, press the
button next to a menu item to
view an explanation of the
feature or setting.
Sound
Select this tile to adjust the sound settings.
Clock
Select this tile to adjust the clock settings.
Bluetooth
Select this tile to switch Bluetooth on and
off and adjust the settings.
Phone
Select this tile to connect, disconnect, and
manage the connected device settings.
Audio
Select this tile to adjust the audio settings. Driver Assist (If Equipped)
Select this tile to adjust Driver Assist
features like Parking Aids, Lane Keeping
System, Pedestrian Detection, and
Auto-Start-Stop.
Vehicle
Select this tile to adjust vehicle settings
like windows, alarm, lighting, and MyKey
settings.
FordPass
Select this tile to adjust the FordPass
settings
General
Select this tile to adjust settings like
language, measurement units, or to reset
the system.
911 Assist
(If Equipped)
Select this tile to switch 911 Assist on and
off.
Automatic Updates
Select this tile to adjust the automatic
update settings.
Mobile Apps
Select this tile to adjust permissions,
enable, disable, and update mobile apps.
531
Super Duty (TFE), enUSA, Edition date: 201909, Third-Printing- SYNC™ 3
(If Equipped)E280315 E268570