2020 CITROEN RELAY Mode function
[x] Cancel search: Mode functionPage 85 of 196

83
Driving
6Blind Spot Monitoring
System with trailer
detection
Refer to the General recommendations on the
use of driving and manoeuvring aids .
This system includes sensors, placed on the
sides of the rear bumper, which monitor the blind
spot areas.
It warns the driver of the presence of another
vehicle (car, truck, motorcycle) in the areas
hidden from their field of vision, while driving and
reversing.
If a trailer is hitched to the vehicle, the detection
area is enlarged by the length of the trailer.
The warning is given by a fixed warning lamp
that appears in the door mirror on the side in
question. Depending on the configuration, an
audible warning may sound.
Activation/Deactivation
The function can be activated or deactivated using the MODE button in the
Blind spot menu.
For more information on Vehicle configuration
(MODE), refer to the corresponding section.
Two modes of activation are available:
– VISUAL: visual warning. While driving, a
warning lamp appears in the door mirror on the
side where a vehicle is detected.
– VISUAL and AUDIBLE: visual and audible
warning. While driving, a warning lamp appears
in the door mirror on the side in question. If the
direction indicator is activated on the side where
the vehicle is detected, an audible warning will
sound.
When starting the vehicle, the warning lamp
comes on in each mirror to indicate that the
system is activated.
The status of the system remains in the memory
when the ignition is switched off.
Reverse gear
The system assists the driver during their
manoeuvres in reverse (e.g. exit from a parking
space).
It detects vehicles arriving to the left or right of
the vehicle at a speed of between approximately
1 and 22 mph (1 and 35 km/h).
When a vehicle is detected, a warning lamp
comes on in the mirror on the side in question,
supplemented by an audible warning.
Trailer detection
The system detects the presence and length of a
trailer. The vehicle detection area in blind spots
is extended by the length of the trailer.
The trailer detection mode is set via the MODE button.
For more information on Vehicle configuration
(MODE), refer to the corresponding section.
Two modes are available:
– Max: for a trailer length greater than 9 metres.
Page 86 of 196
84
Driving
– Auto: for an automatic detection of the trailer
length (3 m, 6 m or 9 m).
In Auto mode, an icon appears in the instrument
panel indicating the length detected by the
system.
It may be necessary to make a 90° turn
to allow the system to detect the length
of the trailer.
When a trailer is detected, vehicle detection
when reversing is deactivated.
Operating conditions
– All vehicles are moving in the same direction
and in adjacent lanes.
– The speed of your vehicle is 6 mph (10 km/h)
minimum.
– When you overtake a vehicle, the speed
difference is less than 16 mph (25 km/h).
– When another vehicle overtakes you, the
speed difference is less than 31 mph (50 km/h).
Active Safety Brake with Collision Risk Alert and
Intelligent emergency
braking assistance
Refer to the General recommendations on the
use of driving and manoeuvring aids .
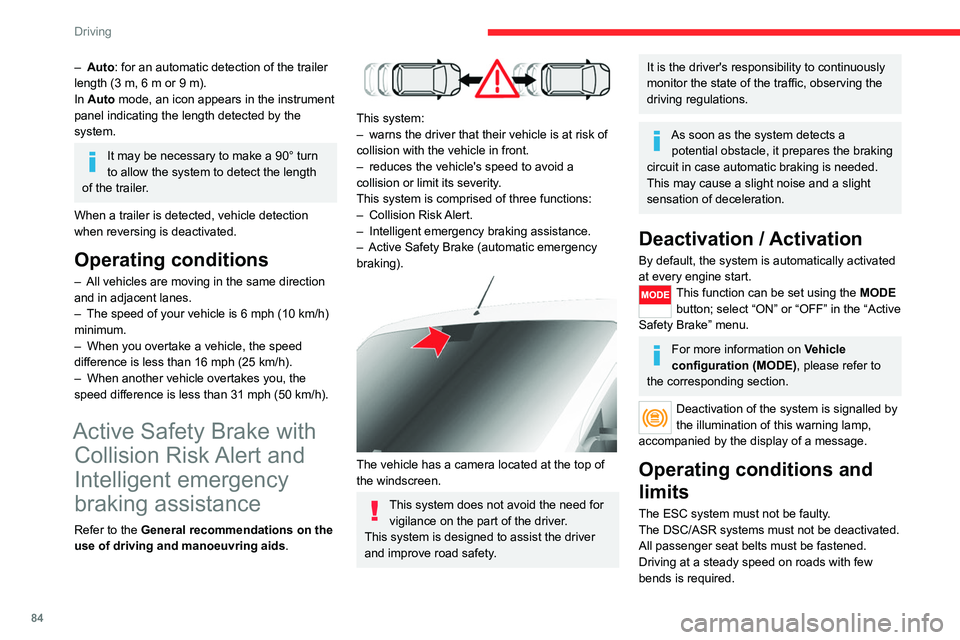
This system:
– warns the driver that their vehicle is at risk of
collision with the vehicle in front.
– reduces the vehicle's speed to avoid a
collision or limit its severity.
This system is comprised of three functions:
– Collision Risk Alert.
– Intelligent emergency braking assistance.
– Active Safety Brake (automatic emergency
braking).
The vehicle has a camera located at the top of
the windscreen.
This system does not avoid the need for vigilance on the part of the driver.
This system is designed to assist the driver
and improve road safety.
It is the driver's responsibility to continuously
monitor the state of the traffic, observing the
driving regulations.
As soon as the system detects a potential obstacle, it prepares the braking
circuit in case automatic braking is needed.
This may cause a slight noise and a slight
sensation of deceleration.
Deactivation / Activation
By default, the system is automatically activated
at every engine start.
This function can be set using the MODE button; select “ON” or “OFF” in the “Active
Safety Brake” menu.
For more information on Vehicle
configuration (MODE) , please refer to
the corresponding section.
Deactivation of the system is signalled by
the illumination of this warning lamp,
accompanied by the display of a message.
Operating conditions and
limits
The ESC system must not be faulty.
The DSC/ASR systems must not be deactivated.
All passenger seat belts must be fastened.
Driving at a steady speed on roads with few
bends is required.
In the following cases, deactivating the system
via the vehicle's configuration menu is advised:
– towing a trailer,
– carrying long objects on roof bars or roof rack,
– with snow chains fitted,
– before using an automatic car wash, with the
engine running,
– before placing the vehicle on a rolling road in
a workshop,
– towed vehicle, engine running,
– following an impact to the windscreen close to
the detection camera.
It is automatically deactivated after
detection of a fault with the brake pedal
switch or with at least two brake lamps.
After an impact, the function automatically stops operating. Contact a
CITROËN dealer or a qualified workshop to
have the system checked.
It is possible that warnings are not given,
are given too late or seem unjustified.
The driver must always stay in control of their
vehicle and be prepared to react at any time
to avoid an accident.
Cases of non-detection by the system:
– Pedestrians, cyclists, animals, objects on the
road.
– Vehicles crossing your lane.
– Vehicles driving in the opposite direction.
Page 92 of 196

90
Practical information
For other versions, the second button is
replaced by a fuse; contact a CITROËN
dealer or a qualified workshop.
Compatibility of fuels
Diesel fuels conforming to the EN590, EN16734
and EN16709 standards and containing up to
7%, 10%, 20% and 30% fatty acid methyl ester
respectively. The use of B20 or B30 fuels, even
occasionally, imposes special maintenance
conditions referred to as "Arduous conditions".
Paraffinic Diesel fuel conforming to the EN15940
standard.
The use of any other type of (bio) fuel (vegetable or animal oils, pure or diluted,
domestic fuel, etc.) is strictly prohibited (risk
of damage to the engine and fuel system).
The only Diesel fuel additives authorised for use are those that meet the B715000
standard.
Diesel at low temperature
At temperatures below 0 °C (+32 °F), the
formation of paraffins in summer-type Diesel
Fuel
The capacity of the tank is about 90 litres.
Fuel tanks of different capacities may be fitted,
60 and 120 litres, depending on the engine.
Low fuel level
When the low fuel tank level E (Empty) is
reached, this warning lamp comes on.
At this moment, you have approximately 10 or
12 litres left in the reserve, depending on the
capacity of your tank and the engine.
You must refuel as soon as possible to avoid
running out of fuel.
Refuelling
The fuel tank must be filled with the engine off.
► Open the fuel filler flap.
► Hold the black filler cap with one hand.
► With the other hand, insert the key and turn it
anti-clockwise.
► Remove the black filler cap and hang it on
the hook located on the inside of the filler flap.
A label inside the fuel filler flap indicates the type
of fuel to use.
Do not continue past the 3
rd cut-off of the nozzle.
This may cause malfunctions.
► After filling the fuel tank, lock the black filler
cap and close the filler flap.
With the Stop & Start system, never
refuel with the engine in STOP mode;
you must switch off the ignition using the key.
Fuel system cut off
In the event of an impact, a device automatically
cuts off the fuel supply to the engine and the
vehicle's power supply.
It triggers the hazard warning lamps and the
courtesy lamps, as well as the unlocking of the
doors.
After the impact and before restoring these power supplies, check that there
are no fuel leaks or sparks to avoid any risk of
fire.
► To restore the fuel supply, press the first
button, located on the front right-hand side.
► To then restore the power supply, press
the second button, located in the battery
compartment under the floor (Minibus).
Page 153 of 196
151
Audio system
11Audio system
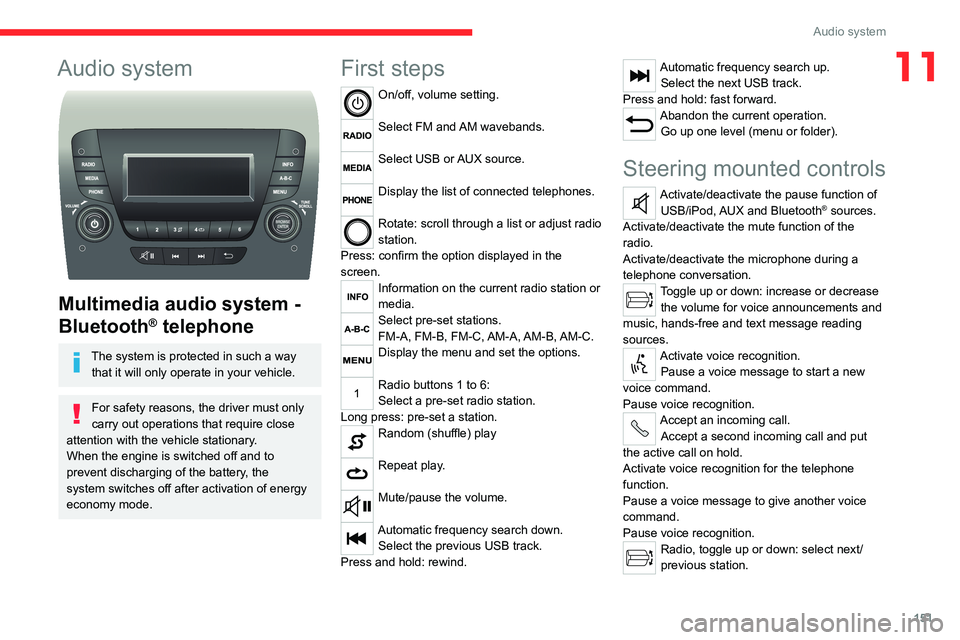
Multimedia audio system -
Bluetooth
® telephone
The system is protected in such a way
that it will only operate in your vehicle.
For safety reasons, the driver must only
carry out operations that require close
attention with the vehicle stationary.
When the engine is switched off and to
prevent discharging of the battery, the
system switches off after activation of energy
economy mode.
First steps
On/off, volume setting.
Select FM and AM wavebands.
Select USB or AUX source.
Display the list of connected telephones.
Rotate: scroll through a list or adjust radio
station.
Press: confirm the option displayed in the
screen.
Information on the current radio station or
media.
Select pre-set stations.
FM-A, FM-B, FM-C, AM-A, AM-B, AM-C.
Display the menu and set the options.
Radio buttons 1 to 6:
Select a pre-set radio station.
Long press: pre-set a station.
Random (shuffle) play
Repeat play.
Mute/pause the volume.
Automatic frequency search down. Select the previous USB track.
Press and hold: rewind.
Automatic frequency search up. Select the next USB track.
Press and hold: fast forward.
Abandon the current operation. Go up one level (menu or folder).
Steering mounted controls
Activate/deactivate the pause function of USB/iPod, AUX and Bluetooth® sources.
Activate/deactivate the mute function of the
radio.
Activate/deactivate the microphone during a
telephone conversation.
Toggle up or down: increase or decrease the volume for voice announcements and
music, hands-free and text message reading
sources.
Activate voice recognition. Pause a voice message to start a new
voice command.
Pause voice recognition.
Accept an incoming call. Accept a second incoming call and put
the active call on hold.
Activate voice recognition for the telephone
function.
Pause a voice message to give another voice
command.
Pause voice recognition.
Radio, toggle up or down: select next/
previous station.
Page 154 of 196
152
Audio system
To protect the system, do not use a USB hub.
The system builds playlists (in temporary
memory); this operation can take from a
few seconds to several minutes at the first
connection.
Reduce the number of non-music files and the
number of folders to reduce the waiting time.
The playlists are updated every time the ignition
is switched off or a USB memory stick is
connected. The lists are memorised: if they are
not modified, the subsequent loading time will
be shorter.
USB socket
Located on the central console, this
socket is used only to power and
recharge the connected portable device.
Auxiliary socket (AUX)
Connect a portable device (MP3 player,
etc.) to the auxiliary jack socket using an
audio cable (not supplied).
First adjust the volume on your portable device
(to a high level). Then adjust the volume on your
audio system.
Controls are managed via the portable device.
The functions of the device connected to the
“AUX” socket are managed directly by this
device: it is therefore not possible to change the
track/folder/playlist or manipulate the playback
Radio, toggle up or down continuously: scan up/
down frequencies until you release the button.
Media, toggle up or down: select next/previous
track.
Media, toggle up or down continuously: fast
forward/rewind until you release the button.
Refuse an incoming call.
End the call in progress.
Radio
Selecting a station
The exterior environment (hills, buildings, tunnels, car parks, underground location,
etc.) may block reception, including in RDS
mode.
This behaviour is normal in the propagation of
radio waves and does not indicate any fault
with the audio system.
Press the "RADIO" button to select the
FM or AM waveband.
Briefly press one of the buttons to
automatically search for a lower/
higher frequency.
Turn the knob to manually search for a lower/higher frequency.
Press the knob to display the list of
stations received locally.
Turn the knob to select a station and press to
select it.
Memorising a station
Press the "RADIO" button to select the
FM or AM waveband.
Press the "A-B-C" button to select one of
the three memorised station levels.
Press and hold a button to memorise the
station being listened to.
The name of the station is displayed and an
audible signal confirms the memorisation.
Press "INFO" to display the information of
the station being listened to.
RDS
RDS, if displayed, allows you to continue
listening to the same station by
automatically retuning to alternative
frequencies. However, in certain conditions,
following this RDS station is not guaranteed
over the whole country, because radio
stations do not cover 100% of the area. When
the reception is weak, the frequency switches
to a regional station.
Press the "MENU" button.
Select "Regional" then press to activate
or deactivate RDS.
Alternative frequency (AF)
Select "Alternative frequency (AF)" then
press to activate or deactivate the
frequency.
When the "Regional” function is
activated, the system is therefore able to
search at any time for the best available
frequency.
Playing TA messages
The TA (Traffic Announcement) function gives priority to TA alert messages. To
operate, this function needs good reception of
a radio station that carries this type of
message. While traffic information is being
broadcast, the current media is automatically
interrupted so that the TA message can be
heard. Normal play of the previously playing
media resumes at the end of the message.
Press the "MENU" button.
Select "Traffic announcement (TA)" then
press to activate or deactivate the
reception of traffic announcements.
Media
USB socket
Insert the USB memory stick or connect
the device to the USB socket in the
central storage space , provided for transferring
data to the system, using a suitable cable (not
supplied).
Page 160 of 196
158
Touch screen audio and telematics system
Touch screen audio and telematics system
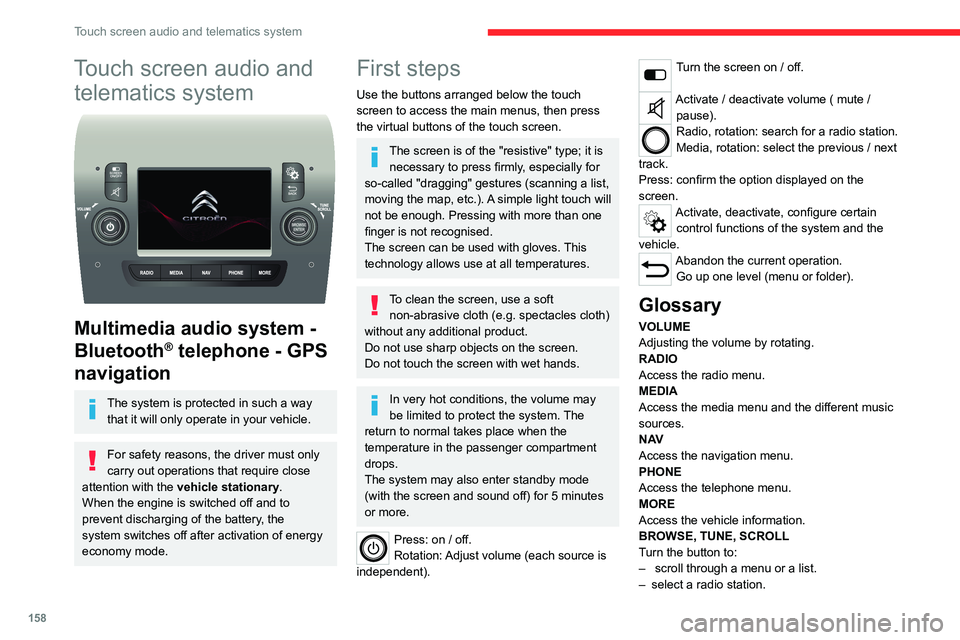
Multimedia audio system -
Bluetooth
® telephone - GPS
navigation
The system is protected in such a way
that it will only operate in your vehicle.
For safety reasons, the driver must only
carry out operations that require close
attention with the vehicle stationary.
When the engine is switched off and to
prevent discharging of the battery, the
system switches off after activation of energy
economy mode.
First steps
Use the buttons arranged below the touch
screen to access the main menus, then press
the virtual buttons of the touch screen.
The screen is of the "resistive" type; it is necessary to press firmly, especially for
so-called "dragging" gestures (scanning a list,
moving the map, etc.). A simple light touch will
not be enough. Pressing with more than one
finger is not recognised.
The screen can be used with gloves. This
technology allows use at all temperatures.
To clean the screen, use a soft non-abrasive cloth (e.g. spectacles cloth)
without any additional product.
Do not use sharp objects on the screen.
Do not touch the screen with wet hands.
In very hot conditions, the volume may
be limited to protect the system. The
return to normal takes place when the
temperature in the passenger compartment
drops.
The system may also enter standby mode
(with the screen and sound off) for 5 minutes
or more.
Press: on / off.
Rotation: Adjust volume (each source is
independent).
Turn the screen on / off.
Activate / deactivate volume ( mute / pause).
Radio, rotation: search for a radio station.
Media, rotation: select the previous / next
track.
Press: confirm the option displayed on the
screen.
Activate, deactivate, configure certain control functions of the system and the
vehicle.
Abandon the current operation. Go up one level (menu or folder).
Glossary
VOLUME
Adjusting the volume by rotating.
RADIO
Access the radio menu.
MEDIA
Access the media menu and the different music
sources.
N AV
Access the navigation menu.
PHONE
Access the telephone menu.
MORE
Access the vehicle information.
BROWSE, TUNE, SCROLL
Turn the button to:
– scroll through a menu or a list.
– select a radio station.
ENTER
Confirm an option displayed on the screen by
pressing.
Steering mounted controls
Activate / deactivate the pause function of USB/iPod and Bluetooth® sources.
Activate / deactivate the mute function of the
radio.
Activate / deactivate the microphone during a
telephone conversation.
Toggle up or down: increase or decrease volume for voice announcements, and
music sources, hands-free, and text message
reader.
Activate voice recognition. Pause a voice message to start a new
voice command.
Pause voice recognition.
Accept an incoming call. Accept a second incoming call and put
the active call on hold.
Activate voice recognition for the telephone
function.
Pause a voice message to give another voice
command.
Pause voice recognition.
Radio, toggle up or down: select next /
previous station.
Radio, toggle up or down continuously: scan up /
down frequencies until you release the button.
Page 169 of 196
167
Touch screen audio and telematics system
12system or confirm the PIN displayed on the
mobile phone.
During pairing, a screen page is displayed
showing the progress of the operation.
If the pairing procedure fails, it is
recommended that you deactivate and
then reactivate the Bluetooth function on your
telephone.
Once the pairing procedure is complete, a
screen page appears:
– answer "Yes" to the question; the mobile
phone is registered as the favourite (the mobile
phone will have priority over other mobile
phones, which may be registered later).
– if no other device is associated, the system
considers the first associated device as the
favourite.
For mobile phones that are not set as
favourites, priority is determined by the
connection order. The last phone
connected will have the highest priority.
The services available depend on the
network, the SIM card and the compatibility
of the Bluetooth
® devices used. Refer to your
telephone’s user guide and your service provider
to check which services you are able to access.
When you return to the vehicle, the last
phone connected reconnects automatically,
within approximately 30 seconds of switching the
ignition on (with Bluetooth
® activated).
To change the automatic connection profile,
select the phone from the list then select the
desired parameters.
The profiles compatible with the system are:
HFP, OPP, PBAP, A2DP, AVRCP, MAP.
Automatic reconnection
When the ignition is switched on, the telephone
connected when the ignition was last switched
off reconnects automatically, if this connection
mode had been set during the pairing procedure
(see previous pages).
The connection is confirmed by the display of a
message and the name of the telephone.
Managing paired telephones
This function allows a device to be connected or disconnected, as well as a
pairing to be deleted.
Press "Settings".
Select “Telephone/Bluetooth
®” then select the
telephone from the list of paired devices.
Select “Connect” or “Disconnect”, “Delete
device” or “Add device”, “Memorise
Favourite”, “Text on”, “Download ” from the list
of available options.
Receiving a call
An incoming call is announced by a ring and a
display overlaid on the screen.
Make a short press on this steering-
mounted button to accept an incoming
call.
or
Press the "Answer“ button displayed on the
screen.
If two calls are in progress (one in progress and
one on hold), it is possible to switch from one to
the other by pressing the " Call toggle” button or
unite the two calls in a conference by pressing
the "Confer." button.
Ending a call
To refuse a call, press this steering- mounted button.
or
Press the “Ignore” button displayed on the
screen.
Making a call
Calling a new number
You are strongly advised NOT to use the telephone while driving. We recommend
that you park safely or make use of the
steering-mounted controls.
Press “PHONE".
Press the keypad button.