2020 CITROEN DISPATCH SPACETOURER DAG heating
[x] Cancel search: heatingPage 4 of 324

2
.
.
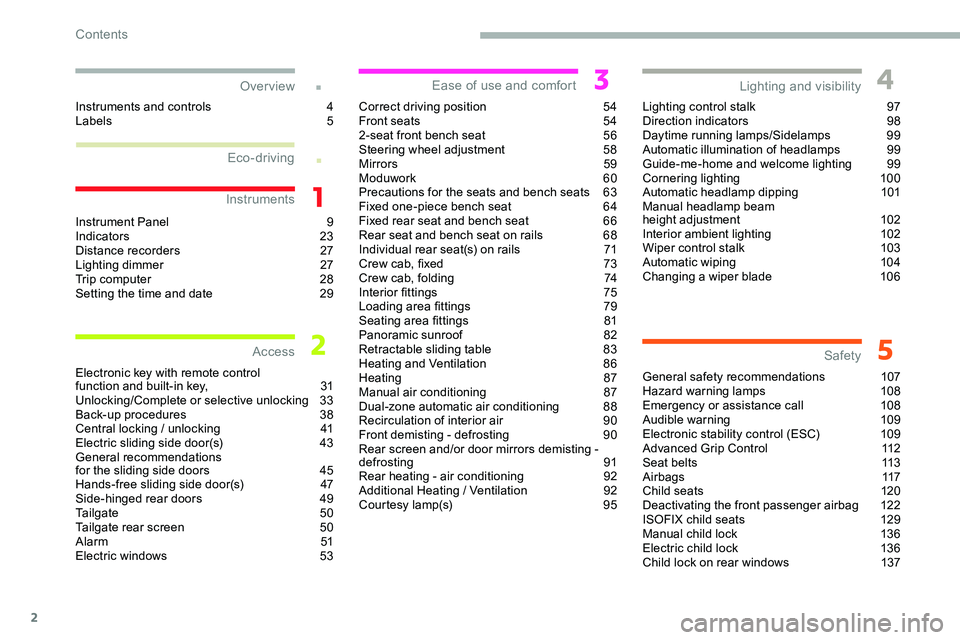
Instrument Panel 9
I ndicators 23
Distance recorders
2
7
Lighting dimmer
2
7
Trip computer
2
8
Setting the time and date
2
9
Electronic key with remote control
function and built-in key,
3
1
Unlocking/Complete or selective unlocking
3
3
Back-up procedures
3
8
Central locking
/ unlocking
4
1
Electric sliding side door(s)
4
3
General recommendations
for the sliding side doors
4
5
Hands-free sliding side door(s)
4
7
Side-hinged rear doors
4
9
Tailgate
5
0
Tailgate rear screen
5
0
Alarm
51
Electric windows
5
3Correct driving position
5
4
Front seats
5
4
2-seat front bench seat
5
6
Steering wheel adjustment
5
8
Mirrors 59
Moduwork
6
0
Precautions for the seats and bench seats
6
3
Fixed one-piece bench seat 6 4
Fixed rear seat and bench seat 6 6
Rear seat and bench seat on rails 6 8
Individual rear seat(s) on rails
7
1
Crew cab, fixed
7
3
Crew cab, folding
7
4
Interior fittings
7
5
Loading area fittings
7
9
Seating area fittings
8
1
Panoramic sunroof
8
2
Retractable sliding table
8
3
Heating and Ventilation
8
6
Heating
87
Manual air conditioning
8
7
Dual-zone automatic air conditioning
8
8
Recirculation of interior air
9
0
Front demisting - defrosting
9
0
Rear screen and/or door mirrors demisting -
defrosting
91
Rear heating - air conditioning
9
2
Additional Heating
/ Ventilation
9
2
Courtesy lamp(s)
9
5Lighting control stalk
9
7
Direction indicators
9
8
Daytime running lamps/Sidelamps
9
9
Automatic illumination of headlamps
9
9
Guide-me-home and welcome lighting
9
9
Cornering lighting
1
00
Automatic headlamp dipping
1
01
Manual headlamp beam
height adjustment 1 02
Interior ambient lighting 1 02
Wiper control stalk
1
03
Automatic wiping
1
04
Changing a wiper blade
1
06
General safety recommendations
1
07
Hazard warning lamps
1
08
Emergency or assistance call
1
08
Audible warning
1
09
Electronic stability control (ESC)
1
09
Advanced Grip Control
1
12
Seat belts
1
13
Airbags
117
Child seats
1
20
Deactivating the front passenger airbag
1
22
ISOFIX child seats
1
29
Manual child lock
1
36
Electric child lock
1
36
Child lock on rear windows
1
37
Over view
Instruments
Access Ease of use and comfort
Safety
Lighting and visibility
Instruments and controls 4
L abels 5
Eco-driving
Contents
Page 6 of 324

4
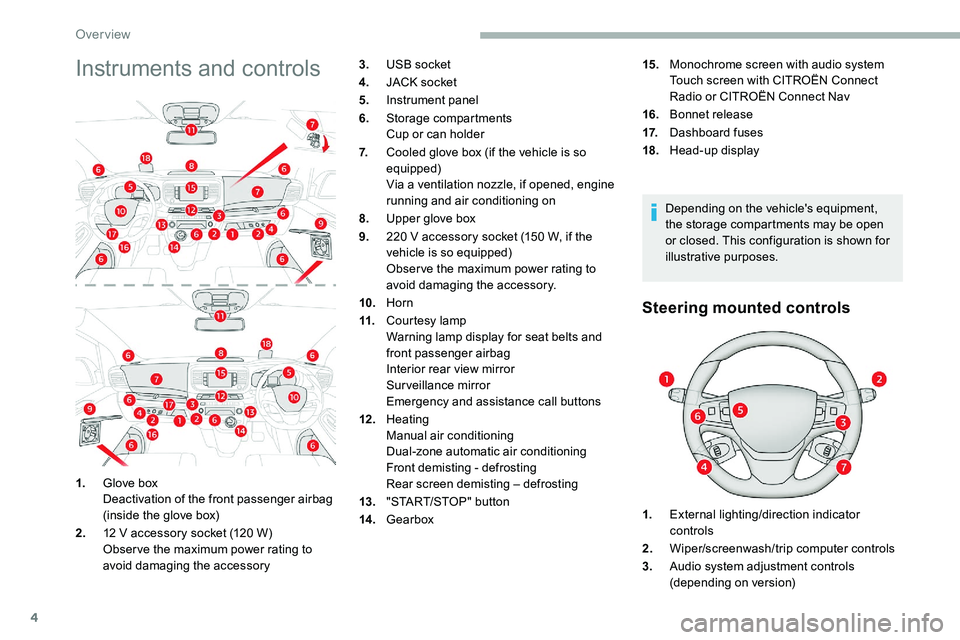
Instruments and controls
Depending on the vehicle's equipment,
the storage compartments may be open
or closed. This configuration is shown for
illustrative purposes.
Steering mounted controls
1.Glove box
Deactivation of the front passenger airbag
(inside the glove box)
2. 12
V accessory socket (120 W)
Obser ve the maximum power rating to
avoid damaging the accessory 3.
USB socket
4. JACK socket
5. Instrument panel
6. Storage compartments
Cup or can holder
7. Cooled glove box (if the vehicle is so
equipped)
Via a ventilation nozzle, if opened, engine
running and air conditioning on
8. Upper glove box
9. 220 V accessory socket (150 W, if the
vehicle is so equipped)
Obser ve the maximum power rating to
avoid damaging the accessory.
10. Horn
11. Courtesy lamp
Warning lamp display for seat belts and
front passenger airbag
Interior rear view mirror
Surveillance mirror
Emergency and assistance call buttons
12 . Heating
Manual air conditioning
Dual-zone automatic air conditioning
Front demisting - defrosting
Rear screen demisting – defrosting
13. "START/STOP" button
14 . Gearbox 15.
Monochrome screen with audio system
Touch screen with CITROËN Connect
Radio or CITROËN Connect Nav
16. Bonnet release
17. Dashboard fuses
18. Head-up display
1. External lighting/direction indicator
controls
2. Wiper/screenwash/trip computer controls
3. Audio system adjustment controls
(depending on version)
Over view
Page 7 of 324

5
4.Controls for speed limiter/cruise control/
adaptive cruise control
5. Instrument panel display mode selection
wheel
6. Voice synthesis control (depending on
ve r s i o n)
Volume adjustment (depending on
ve r s i o n)
7. Audio system adjustment controls
(depending on version)
Central switch panel
1.Locking/unlocking from the inside
2. Left-hand electric sliding side door
3. Electric child lock
4. Right-hand electric sliding side door
5. Cab/loading area selectivity
6. Hazard warning lamps
7. DSC/ASR system
8. Tyre under-inflation detection
9. Stop & Start
10. Heated windscreen
Side control bar
1.Grip control
2. Head-up display
3. Parking sensors
4. Additional Heating
/ Ventilation
5. Alarm
6. Manual headlamp beam height
adjustment
7. Lane departure warning system
8. Blind spot monitoring system
9. Automatic headlamp dipping
Labels
Side-hinged rear doors section.
Moduwork section.
.
Over view
Page 8 of 324

6
Rear seat and bench seat on rails section.
Precautions for the seats and bench seats
section.
Retractable sliding table section.Additional heating/ventilation
section.
Deactivating the front passenger airbag
section.
ISOFIX child seats section.
Manual child lock section. Bonnet
section.
12 V batter y section.
Temporary puncture repair kit , Spare wheel
and Identification markings sections.
Over view
Page 20 of 324

18
Warning / indicator lamp State Cause Actions / Observations
Under-inflation Fixed, accompanied
by an audible signal
and a message. The pressure in one or more tyres is
too low.
Check the pressure of the tyres as soon as possible.
Reinitialise the detection system after adjusting the
pressure.
+ Under-inflation
warning lamp flashing
then fixed and Ser vice
warning lamp fixed.The system is faulty: tyre pressures
are no longer monitored.
Under-inflation detection is no longer assured.
As soon as possible, check the pressure of the tyres
and carry out (3).
Diesel engine
pre-heating Temporarily on.
When switching on the ignition, if the
weather conditions and the engine
temperature make it necessary. Wait until the warning lamp goes off before starting.
If the engine does not start, switch the ignition off and
then on, wait until the indicator lamp goes off again,
then start the engine.
Front passenger
airbag (ON) Fixed.
The front passenger airbag is
activated.
The control is in the "ON" position. In this case, do NOT install a "rear ward facing"
child seat on the front passenger seat - Risk of
serious injury!
Front passenger
airbag(OFF) Fixed.
The front passenger airbag is
deactivated.
The control is in the "OFF" position. You can install a "rear ward facing" child seat, unless
there is a fault with the airbags (airbag warning lamp
o n).
Airbags Fixed. One of the airbags or seat belt
pretensioners is faulty. Carry out (3).
Instruments
Page 53 of 324

51
Alarm
(Depending on version)
System which protects and provides a deterrent
against theft and break-ins.
Exterior perimeter monitoring
The system checks for opening of the vehicle.
The alarm is triggered if anyone tries, for
example, to open a door, the boot or the
bonnet.
Interior volumetric monitoring
The system only checks for the
variation in volume inside the cab .
The alarm is triggered if anyone
breaks a window or enters the
vehicle's cab but will not be
triggered if someone enters the
loading area . The system checks for any
variation in the volume in the
passenger compartment.
The alarm is triggered if anyone
breaks a window, enters the
passenger compartment or moves
inside the vehicle.
Self-protection function
The system checks for the putting out of
ser vice of its components.
The alarm is triggered if the battery, the central
control or the siren wiring is put out of ser vice
or damaged.
For all work on the alarm system,
contact a CITROËN dealer or a qualified
workshop.
If your vehicle is fitted with Additional
Heating
/ Ventilation, volumetric
monitoring is not compatible with this
system.
For more information on Additional
Heating
/ Ventilation, refer to the
corresponding section.
Locking the vehicle with full
alarm system
Activation
F Turn the ignition off and exit the vehicle. The exterior perimeter monitoring is activated
after 5 seconds and the interior volumetric
monitoring after 45 seconds.
If an opening (door, tailgate or hinged
doors, bonnet, etc.) is incorrectly closed,
the vehicle is not locked, but the exterior
perimeter monitoring will be activated
after 45 seconds, at the same time as the
interior volumetric monitoring.
Deactivation
F Lock or deadlock the vehicle using the remote control or the
"Keyless Entry and Starting"
system.
When the monitoring system is active, the
indicator lamp in the button flashes once per
second and the direction indicators come on for
about 2 seconds.
F
P
ress the remote control
unlocking button.
or
F
U
nlock the vehicle with the "Keyless Entry
and Starting" system.
The monitoring system is deactivated: the
indicator lamp in the button goes off and the
direction indicators flash for about 2 seconds.
2
Access
Page 59 of 324

57
If the vehicle is so equipped, a storage space is
provided under the seat.
F
P
ull the strap towards you to tip the seat
cushion.
Armrest
The armrest has notches.
F
P
ull the armrest fully up
F
L
ower it fully down.
F
R
aise the armrest to the desired position.
Heated seat and bench
seat
If fitted to the vehicle.
F W ith the engine running, use the adjustment
wheel to switch on and select the desired
level of heating from 0
(off) to 3 (h i g h).Prolonged use of the heated seats is not
recommended for those with sensitive
skin.
There is a risk of burns for people whose
perception of heat is impaired (illness,
taking medication, etc.).
To keep the heated pad intact and to
prevent a short circuit:
-
d
o not place sharp or heavy objects on
the seat,
-
d
o not kneel or stand on the seat,
-
d
o not spill liquids onto the seat,
-
n
ever use the heating function if the
seat is wet.
Do not use the function when the seat is
not occupied.
Reduce the intensity of the heating as
soon as possible.
When the seat and passenger
compartment have reached an adequate
temperature, stop the function ; reducing
the consumption of electrical current
reduces fuel consumption.
3
Ease of use and comfort
Page 83 of 324

81
Seating area fittings
High load retaining net
This allows the use of the entire loading
capacity, up to the roof:
-
b
ehind the front seats in row 1, when the
rear seats (and bench seats) in rows 2 and 3
are folded or removed,
-
b
ehind the rear seats (and bench seats)
in row 2, when the rear seats (and bench
seats) in row 3 are folded or removed.
Upper fixings Lower fixings (behind row 1)
If your vehicle has fixed
one-piece bench seats
or seats and bench seats:
If your vehicle has seats and bench seats or
individual seats on rails :
Lower fixings (behind row 2)
Fit the net
F Unclip the anchorage cover in the roof on each side. F
O
n each side in row 2, insert the fixings in
the floor anchorages (as shown above). F
O
n each side in row 2, insert the fixings
in the floor anchorages then turn them a
quarter turn to lock them in place (as shown
a b ove).
Place them as close as possible to the end of
the rail.
F
U
se the stowing rings.
Unclip the upper fixing covers and secure the
lower fixings (as previously described).
F
F
old (table position) the seats and bench
seats in rows 2 and 3 (according to
equipment).
F
C
lose the rear heating and air conditioning
vents (depending on the equipment you
h ave).
F
U
nroll the high load retaining net.
3
Ease of use and comfort