2020 CITROEN DISPATCH SPACETOURER DAG instrument
[x] Cancel search: instrumentPage 152 of 324

150
Operating fault
When the ignition is on, a message appears
in the instrument panel screen to indicate a
gearbox fault.
In this case, the gearbox switches to back-up
mode and is locked in 3
rd gear. You may feel
a substantial knock when changing from P
to R and from N to R. This will not cause any
damage to the gearbox.
Do not exceed 60 mph (100
km/h), local speed
restrictions permitting.
Have it checked by a CITROËN dealer or a
qualified workshop.
There is a risk of damage to the gearbox:
-
i
f you press the accelerator and brake
pedals at the same time (braking or
acceleration must be done only with
the right foot),
-
i
f you force the selector from position P
to another position when the battery is
flat.
To reduce fuel consumption when
stationary for long periods with the
engine running (traffic jam, etc.), position
the selector on N and apply the parking
brake. If your vehicle has an automatic gearbox,
do not try to start the engine by pushing
the vehicle.
Electronic gearbox
Electronic gearbox with 6 speeds, with
electronic management of gear changes. It
also offers a manual mode with sequential gear
changes via control paddles situated behind
the steering wheel.
Gear selector
To safely operate the gear selector, it is
recommended that you keep your foot on
the brake pedal.
Steering mounted controls
R.
Reverse.
N. Neutral. A.
Auto (automatic operation).
M. Manual (manual operation with sequential
changing of gears).
F
P
ull the right-hand "
+" or left-hand " -"
control paddle towards you to change up or
down.
The steering mounted controls do not
allow neutral to be selected and reverse
gear to be engaged or disengaged.
Driving
Page 153 of 324

151
Displays in the instrument
panel
Starting the vehicle
F Select position N.
F F ull depress the brake pedal.
F
S
tart the engine. N appears in the instrument panel
screen.
If the engine does not star t:
If N flashes in the instrument panel,
accompanied by an audible signal and
a message, move the gear selector to
position A then to position N .F
Sel
ect automatic operation (position A
),
manual operation (position M ), or reverse
(position R ).
F
R
elease the parking brake.
F
P
rogressively take your foot off the brake
pedal ; the vehicle then moves off.
Automatic operation
F After starting the engine, select position A
for automatic gear changes.
AUTO and the gear engaged are
displayed in the instrument panel.
The gearbox then operates in auto-adaptive
mode, without any action needed from the
driver. It continuously selects the gear best
adapted to the following parameters:
-
d
riving style,
-
p
rofile of the road. For optimum acceleration, for
example when overtaking another
vehicle, press the accelerator
pedal fully down.
Temporary manual control of
gear changes
It is possible to temporarily take control of the
gear changes using the " +" and " -" steering
mounted controls. The gear change instruction
is acted on if the engine speed permits.
This function allows you to anticipate certain
situations, such as overtaking another vehicle
or approaching a bend in the road.
After a few moments with no action on the
control paddles, the gearbox returns to
automatic operation.
Manual operation
F After starting the engine, select position M for sequential gear changes.
When the selector is moved, the indicator lamp
and the corresponding gear are displayed in
the instrument panel.
When "
-" is displayed, the value is invalid.
If the Foot on the brake warning
lamp comes in the instrument
panel, accompanied by an audible
signal and a "Foot on the brake"
message, press the brake pedal
more firmly. F
O
perate the " +" or " -" steering mounted
controls.
It is only possible to change from one gear
to another if the vehicle speed and engine
speed permit
; other wise, the gearbox will
operate temporarily in automatic mode. AUTO
disappears and the gears
engaged are displayed successively
in the instrument panel.
6
Driving
Page 156 of 324

154
Engine restarting (START mode)
The engine automatically restarts as soon as
the driver indicates the intention of moving off
again.
With a manual gearbox: with the clutch pedal
fully depressed.
With an automatic gearbox :
-
W
ith the selector in position D or M : with the
brake pedal released.
-
W
ith the selector in position N and the brake
pedal released: with the selector at D or M .
-
W
ith the selector in position P and the brake
pedal depressed: with the selector at R , N,
D or M .
-
R
everse gear engaged.
With an electronic gearbox :
-
W
ith the selector in position A or M : with the
brake pedal released.
-
W
ith the selector in position N and the brake
pedal released: with the selector at A or M .
-
R
everse gear engaged.
Special cases
The engine restarts automatically if all the
operating conditions are met again and in the
following cases.
-
W
ith a manual gearbox : vehicle speed
exceeds 16
mph (25 km/h) or 2 mph
(3
km/h) (depending on engine).
-
W
ith an automatic gearbox : vehicle speed
exceeds 2.5
mph (3 km/h). In these cases, this indicator lamp
flashes for a few seconds, then goes
of f.
Malfunctions
Depending on the vehicle’s equipment:
F
H
ave the vehicle checked by a CITROËN
dealer or a qualified workshop.
The vehicle stalls in STOP mode
All of the instrument panel warning lamps come
on if this fault occurs.
Depending on version, a warning message may
also be displayed, asking you to place the gear
selector in position N and to press the brake
pedal.
F
Switch off the ignition then start the engine again with the key or the " START/STOP"
button. The Stop & Start system requires a
12
V battery of specific technology and
specification.
All work concerning the battery must be
carried out only by a CITROËN dealer or a
qualified workshop.
In the event of a fault with the system,
this warning lamp flashes in the
instrument panel.
The warning lamp in this button
flashes and a message appears,
accompanied by an audible signal.
Tyre under-inflation
detection
This system automatically checks the
pressures of the tyres while driving.
It compares the information given by the wheel
speed sensors with reference values, which
must be reinitialised ever y time the tyre
pressures are adjusted or a wheel changed .
The system triggers an alert as soon as it
detects a drop in the inflation pressure of one
or more tyres.
Driving
Page 159 of 324
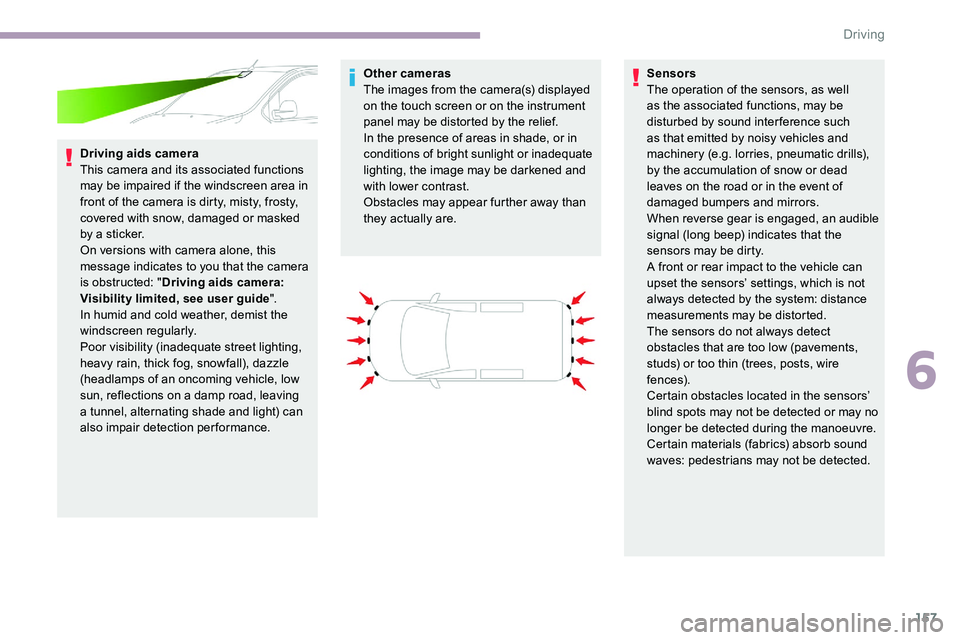
157
Driving aids camera
This camera and its associated functions
may be impaired if the windscreen area in
front of the camera is dirty, misty, frosty,
covered with snow, damaged or masked
by a sticker.
On versions with camera alone, this
message indicates to you that the camera
is obstructed: "Driving aids camera:
Visibility limited, see user guide".
In humid and cold weather, demist the
windscreen regularly.
Poor visibility (inadequate street lighting,
heavy rain, thick fog, snowfall), dazzle
(headlamps of an oncoming vehicle, low
sun, reflections on a damp road, leaving
a tunnel, alternating shade and light) can
also impair detection performance. Other cameras
The images from the camera(s) displayed
on the touch screen or on the instrument
panel may be distorted by the relief.
In the presence of areas in shade, or in
conditions of bright sunlight or inadequate
lighting, the image may be darkened and
with lower contrast.
Obstacles may appear further away than
they actually are.
Sensors
The operation of the sensors, as well
as the associated functions, may be
disturbed by sound inter ference such
as that emitted by noisy vehicles and
machinery (e.g. lorries, pneumatic drills),
by the accumulation of snow or dead
leaves on the road or in the event of
damaged bumpers and mirrors.
When reverse gear is engaged, an audible
signal (long beep) indicates that the
sensors may be dirty.
A front or rear impact to the vehicle can
upset the sensors’ settings, which is not
always detected by the system: distance
measurements may be distorted.
The sensors do not always detect
obstacles that are too low (pavements,
studs) or too thin (trees, posts, wire
fe n c e s).
Certain obstacles located in the sensors’
blind spots may not be detected or may no
longer be detected during the manoeuvre.
Certain materials (fabrics) absorb sound
waves: pedestrians may not be detected.
6
Driving
Page 160 of 324

158
Maintenance
Clean the bumpers and door mirrors and
the field of vision of the cameras regularly.
When washing your vehicle at high
pressure, direct the spray from at least
30 cm away from the radar, sensors and
cameras.
Mats
The use of mats not approved by
CITROËN may inter fere with the operation
of the speed limiter or cruise control.
To avoid any risk of jamming the pedals:
F
e
nsure that the mat is secured
c o r r e c t l y,
F
n
ever fit one mat on top of another.
Units of speed
Ensure that the units of speed displayed
on the instrument panel (mph or
km/h) are
those for the country you are driving in.
If this is not the case, when the vehicle is
stationary, set the display to the required
units of speed so that it complies with
what is authorised locally.
In case of doubt, contact a CITROËN
dealer or a qualified workshop.Head-up display
System which projects various information onto
a smoked blade in the driver's field of vision so
that they do not have to take their eyes off the
road.
Displays during operation
Once the system has been activated, the
following information is grouped together in the
head-up display: For more information on Navigation
, refer
to the Audio equipment and telematics
section.
Buttons
A. The speed of your vehicle.
B. Cruise control/speed limiter information.
C. If your vehicle is so equipped, inter-
vehicle distance information, automatic
emergency braking alerts and navigation
instructions.
D. If your vehicle is so equipped, speed limit
information. 1.
On.
2. Off (long press).
3. Brightness adjustment.
4. Display height adjustment.
Activation/Deactivation
F With the engine running, press button 1 to
activate the system and deploy the blade.
Driving
Page 162 of 324

160
F Enter the new value using the numerical keypad and confirm.
F
C
onfirm to record the changes and quit the
menu.
Memorised speeds are recalled
by pressing this button.
F
P
ress the button corresponding to the
speed setting you want to change.
Speed Limit recognition
and recommendation
Refer to the General recommendations on
the use of driving and manoeuvring aids .
This system displays the maximum authorised
speed in the instrument panel, according to
the speed limits in the country in which you are
driving, using: -
S
peed limit details from the navigation
system mapping.
You should update your navigation
mapping regularly in order to receive
accurate speed limit information from the
system.
The units for the speed limit (mph or km/h)
depend on the country you are driving in.
This should be taken into account so that
you obser ve the speed limit.
For the system to operate correctly when
you change country, the units for speed in
the instrument panel must be those for the
country you are driving in.
The automatic reading of road signs is a
driving aid system and does not always
display speed limits correctly.
The speed limit signs present on the road
always take priority over the display by the
system.
The system is designed to detect signs
that conform to the Vienna Convention on
road signs.
Activation/Deactivation
Activation or deactivation is done in
the vehicle configuration menu.
Displays in the instrument
panel
- Speed limit signs detected by the camera. 1.Speed limit indication.
Head-up display
Driving
Page 164 of 324

162
Displays in the instrument panel
Head-up display
3.Speed limit indication.
4. Speed memorisation request.
5. Current speed setting.
Memorising the speed
On detection of a sign offering a new speed
limit, the system displays the value and " MEM"
flashes for a few seconds to offer to make it a
new speed setting.
If there is a difference of less than 6 mph
(9
km/h) between the speed setting and
the speed displayed by the Speed Limit
recognition and recommendation, the
" MEM " symbol is not displayed.
Depending on the road conditions, several
speeds may be displayed.
F
P
ress button 2 once to save the suggested
speed value.
A message is displayed to confirm the request.
F
P
ress button 2 again to confirm and save
the new speed setting.
After a predetermined period, the screen
returns to the current display. F
S
witch on the speed limiter/cruise control.
The speed limiter/cruise control information is
displayed.
Speed limiter
Refer to the General recommendations on
the use of driving and manoeuvring aids .
This system prevents the vehicle
from exceeding the speed
programmed by the driver (speed
setting).
The speed limiter is switched on manually.
The minimum speed setting is 19 mph
(30
km/h).
The speed setting remains in the system
memory when the ignition is switched off.
For more information on this
button and the Adaptive
cruise control , refer to the
corresponding section.
For more information on
Memorising speeds , refer to the
corresponding section.
For more information on Speed limit
recognition and memorising the
speed limit in particular, refer to the
corresponding section.
Driving
Page 165 of 324

163
Steering mounted controlFor more information on Memorising speeds
or on the Speed Limit recognition and
recommendation , refer to the corresponding
sections.
Displays in the instrument
panel
Head-up display
6. Speed limiter on/pause indication.
7. Speed limiter mode selection indication.
8. Value of the speed setting.
Switching on / pausing
Adjusting the Speed
Limit recognition and
recommendation setting
You do not have to switch the speed limiter on
in order to set the speed.
To modify the limit speed setting from the
current speed of the vehicle :
F
i
n steps of +/- 1 mph (km/h), make
successive short presses on button 2 or 3 ,
F
c
ontinuously, in steps of +/- 5 mph (km/h),
press and hold button 2 or 3 .
To modify the limit speed setting using
memorised speeds and from the touch screen:
F
p
ress button 5 to display the memorised
speed settings,
F
p
ress the button for the desired speed
setting.
1.
ON (LIMIT position)/OFF ( 0 position).
2. Reduce the speed setting.
3. Increase the speed setting.
4. Pause/resume speed limiter with the
speed setting previously stored.
5. Depending on version:
Display of speed thresholds recorded
using Memorising speeds.
or
Use the speed suggested by the Speed
Limit recognition and recommendation
(MEM display).
6. Display and adjustment of the
programmed inter-vehicle distance. F
T
urn the thumbwheel 1 to the LIMIT
position
to select the speed limiter ; the function is
paused.
F
I
f the speed setting is suitable (last speed
setting programmed in the system), press
button 4 to switch the speed limiter on.
F
P
ressing button 4 again temporarily
interrupts the function (pause).
6
Driving