2020 CITROEN C5 AIRCROSS maintenance
[x] Cancel search: maintenancePage 3 of 292

1
Welcome
Thank you for choosing a Citroën C5 AIRCROSS.
Y our vehicle will be fitted with only some of the equipment described in
this document, depending on its trim level, version and the specification
for the country in which it was sold.
The descriptions and illustrations are given as indications only.
Automobiles CITROËN reser ves the right to modify the technical
specifications, equipment and accessories without having to update this
edition of the guide.
If ownership of your vehicle is transferred, please ensure this
Handbook is passed on to the new owner.
All of the instructions and operating recommendations are presented
here to make the most of the vehicle. It is strongly recommended that
you familiarise yourself with it as well as the Maintenance and Warranty
Guide, informing about warranties, servicing and roadside assistance
associated with the vehicle.
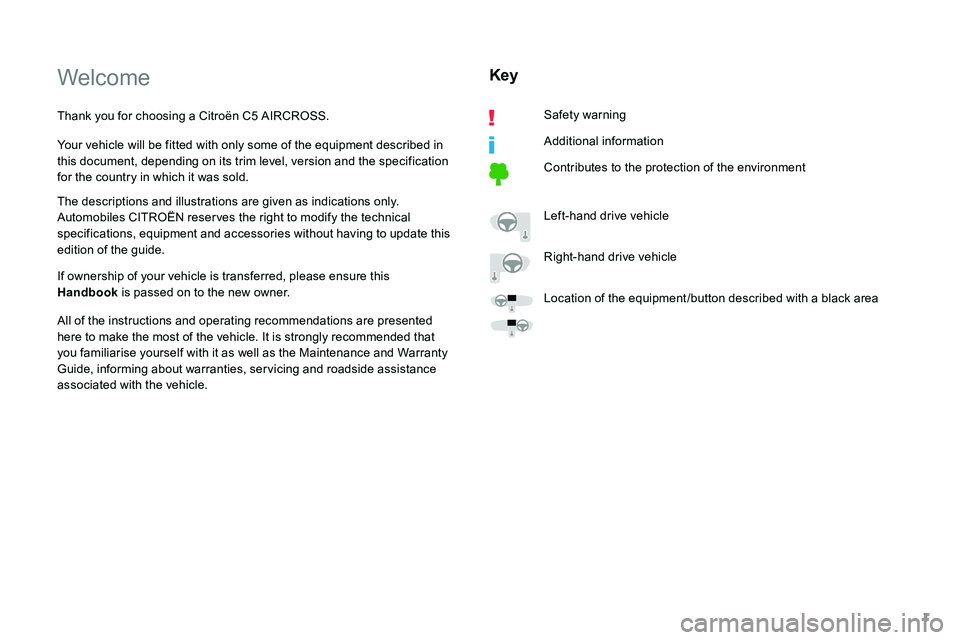
Key
Safety warning
Additional information
Contributes to the protection of the environment
Left-hand drive vehicle
Right-hand drive vehicle
Location of the equipment /button described with a
black area
Page 5 of 292

3
.
.
Driving recommendations 116
Anti-theft protection 1 18
Starting/Switching off the engine with the key
1
18
Starting/Switching off the engine with Keyless
Entry and Starting
1
20
Electric parking brake
1
21
Manual gearbox
1
25
Automatic gearbox
1
25
Driving mode
1
29
Hill start assist
1
29
Gear efficiency indicator
1
30
Stop & Start
1
30
Tyre under-inflation detection
1
32
CITROËN ConnectedCAM
® 13 4
Driving and manoeuvring aids – General
recommendations
135
Speed Limit recognition and recommendation
1
37
Programmable speed limiter
1
42
Cruise control – particular recommendations
1
44
Programmable cruise control
1
44
Memorising speeds
1
46
Highway Driver Assist
1
47
Adaptive Cruise Control
1
47
Active Lane Keeping Assist
1
51
Active Safety Brake with Collision Risk Alert and
Intelligent emergency braking assistance
1
56
Fatigue detection system
1
59
Active Lane Departure Warning System
1
61
Active Blind Spot Monitoring System
1
64
Parking sensors
1
67
Top Rear Vision – Top 360
Vision
1
68
Park Assist
1
73Fuel tank
1
80
Compatibility of fuels
1
81
Towing device
1
82
Towing device with quickly detachable towball
1
83
Energy economy mode
1
86
Snow chains
1
86
Fitting roof bars
1
87
Bonnet
188
Engine compartment
1
89
Checking levels
1
89
Checks
192
Advice on care and maintenance
1
94
AdBlue
® (BlueHDi) 1 94
Warning triangle
1
97
Running out of fuel (Diesel)
1
97
Tool kit
1
98
Temporary puncture repair kit
1
99
Spare wheel
20
3
Changing a
bulb
2
06
Changing a
fuse
2
12
12
V battery
2
15
Towing the vehicle
2
19Dimensions
221
Identification markings
2
21
Engine technical data and towed loads
2
22
Engines and towed loads – Petrol
2
23
Engines and towed loads – Diesel
2
24
Driving
Practical information
In the event of a breakdown Technical data
Alphabetical index
Access to additional videos
bit.ly/helpPSA
Audio equipment and telematics
CITROËN Connect Radio
CITROËN Connect Nav
.
Contents
Page 9 of 292

7
Limit the causes of excess
consumption
Spread loads throughout the vehicle; place
the heaviest items at the back of the boot, as
close as possible to the rear seats.
Limit the loads carried in the vehicle and
reduce wind resistance (roof bars, roof rack,
bicycle carrier, trailer, etc.). Preferably, use
a roof box.
Remove roof bars and roof racks after use.
At the end of winter, remove snow tyres and
refit your summer tyres.
Obser ve the recommendations on
maintenance
Check the tyre pressures regularly, when cold,
referring to the label in the door aperture,
driver's side.
Carry out this check in particular:
-
b
efore a long journey,
-
a
t each change of season,
-
a
fter a long period out of use.
Do not forget the spare wheel and the tyres on
any trailer or caravan.
Have your vehicle ser viced regularly (engine
oil, oil filter, air filter, cabin filter, etc.) and
obser ve the schedule of operations in the
manufacturer's service schedule. When filling the tank, do not continue after the
3
rd cut-off of the nozzle to avoid over flow.
At the wheel of your new vehicle, it is only
after the first 1,900
miles (3,000 kilometres)
that you will see the fuel consumption settle
down to a
consistent average.
With a
BlueHDi Diesel engine, if the SCR
system is faulty, your vehicle becomes
polluting. Visit a CITROËN dealer or
a
qualified workshop as soon as possible to
bring your vehicle's nitrogen oxides emissions
back in line with regulations.
.
Eco-driving
Page 65 of 292

63
Servicing the ventilation and air
conditioning system
F
E
nsure that the cabin filter is in good
condition and have the filter elements
replaced regularly.
We recommend the use of a
combined
cabin filter. Thanks to its special active
additive, it contributes to the purification of
the air breathed by the occupants and the
cleanliness of the passenger compartment
(reduction of allergic symptoms, bad
odours and greasy deposits).
F
T
o ensure correct operation of the air
conditioning system, have it checked
according to the recommendations in
the Maintenance and Warranty Guide.
Stop & Star t
The heating and air conditioning systems
only work when the engine is running.
Temporarily deactivate the Stop &
Start system to maintain a
comfortable
temperature in the passenger
compartment.
For more information on Stop & Star t ,
refer to the corresponding section.Manual air conditioning
Press the Air conditioning menu
button located under the touch
screen to display the system
controls page. The air conditioning system operates only with
the engine running.
Temperature adjustment
F Press one of the arrows 6
t o decrease (blue)
or increase (red) the value.
The value indicated corresponds to a
level of
comfort and not to a
precise temperature.
For maximum cooling or heating of the
passenger compartment, press the
temperature setting button down or up
until LO or HI is displayed.
Air flow adjustment
F Press one of the buttons 5 to increase (+) or
decrease ( -) the speed of the ventilation fan.
The air flow symbol (a fan) is filled in
progressively as the speed of the fan is
increased.
By reducing the air flow to a
minimum, you are
stopping ventilation.
Avoid driving for too long without
ventilation – risk of condensation and
deterioration of air quality!
1.
Automatic visibility programme.
2. Recirculation of interior air.
3. Rear screen demisting – defrosting.
4. System of f.
5. Air flow adjustment.
6. Temperature adjustment.
7. Air distribution adjustment.
8. Air conditioning on/off.
9. Maximum air conditioning.
3
Ease of use and comfort
Page 89 of 292

87
The screenwash jets are integrated in the
tips of each arm.
The screenwash fluid is sprayed along the
length of the wiper blade. This improves
visibility and reduces the consumption of
screenwash fluid.
In some cases, depending on the contents
or colour of the liquid and on the exterior
brightness, the liquid spray may be hardly
noticeable.
To avoid damaging the wiper blades, do
not operate the windscreen washer if the
windscreen washer reservoir is empty.
Only operate the windscreen washer if
there is no risk of the fluid freezing on the
windscreen and hindering visibility. Always
use windscreen washer fluid suitable for
low temperatures during the winter period.
Special position of the
windscreen wipers
This maintenance position is used for cleaning
or replacement of the wiper blades. It can also
be useful, in winter (ice, snow), to release the
wiper blades from the windscreen.To maintain the effectiveness of the flat
wiper blades, it is advisable to:
-
h
andle them with care,
-
c
lean them regularly using soapy
water,
-
a
void using them to retain cardboard
on the windscreen,
-
r
eplace them at the first signs of wear.
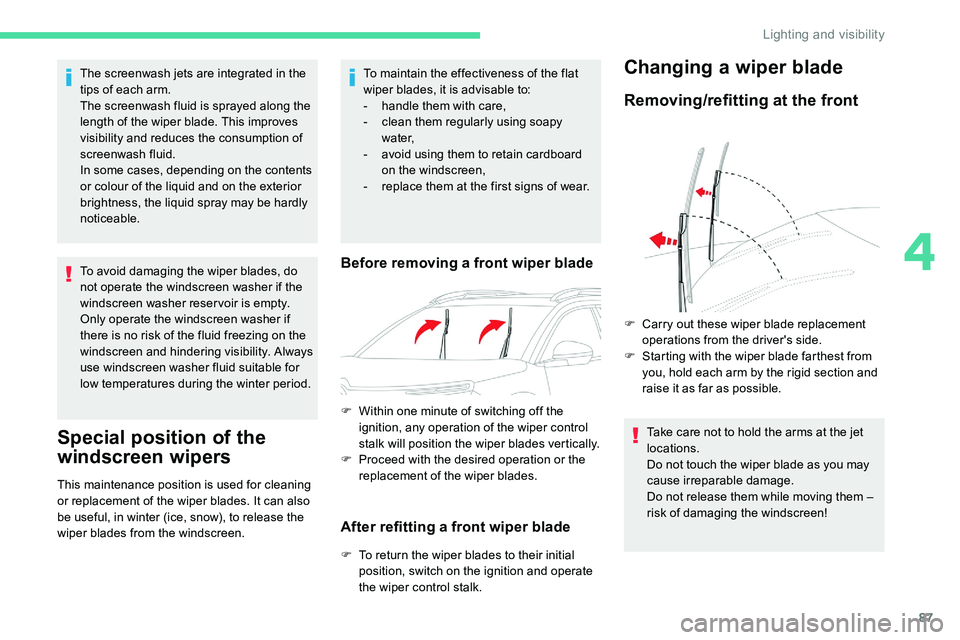
Before removing a front wiper blade
F Within one minute of switching off the
ignition, any operation of the wiper control
stalk will position the wiper blades vertically.
F
P
roceed with the desired operation or the
replacement of the wiper blades.
After refitting a front wiper blade
F To return the wiper blades to their initial position, switch on the ignition and operate
the wiper control stalk.
Changing a wiper blade
Removing/refitting at the front
F Carry out these wiper blade replacement operations from the driver's side.
F
S
tarting with the wiper blade farthest from
you, hold each arm by the rigid section and
raise it as far as possible.
Take care not to hold the arms at the jet
locations.
Do not touch the wiper blade as you may
cause irreparable damage.
Do not release them while moving them –
risk of damaging the windscreen!
4
Lighting and visibility
Page 139 of 292

137
Maintenance
Clean the bumpers and door mirrors and
the field of vision of the cameras regularly.
When washing your vehicle at high
pressure, direct the spray from at least
30 cm away from the radar, sensors and
cameras.
Mats
The use of mats not approved by
CITROËN may inter fere with the operation
of the speed limiter or cruise control.
To avoid any risk of jamming the pedals:
F
e
nsure that the mat is secured
c o r r e c t l y,
F
n
ever fit one mat on top of another.Speed Limit recognition
and recommendation
Refer to the General recommendations on
the use of driving and manoeuvring aids .
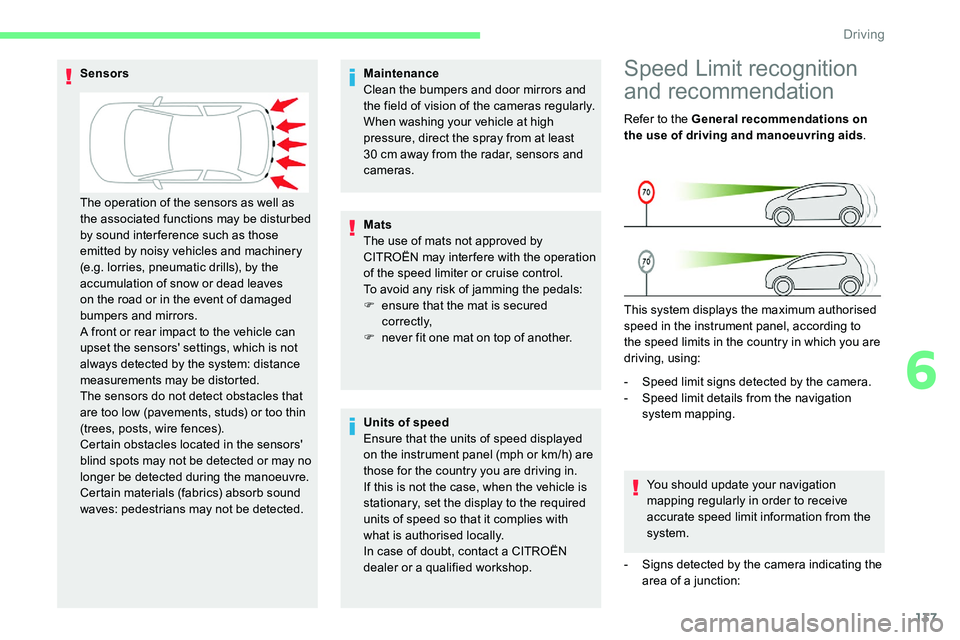
This system displays the maximum authorised
speed in the instrument panel, according to
the speed limits in the country in which you are
driving, using:
-
S
peed limit signs detected by the camera.
-
S
peed limit details from the navigation
system mapping.
You should update your navigation
mapping regularly in order to receive
accurate speed limit information from the
system.
-
S
igns detected by the camera indicating the
area of a
junction:
Sensors
Units of speed
Ensure that the units of speed displayed
on the instrument panel (mph or km/h) are
those for the country you are driving in.
If this is not the case, when the vehicle is
stationary, set the display to the required
units of speed so that it complies with
what is authorised locally.
In case of doubt, contact a
CITROËN
dealer or a
qualified workshop.
The operation of the sensors as well as
the associated functions may be disturbed
by sound inter ference such as those
emitted by noisy vehicles and machinery
(e.g. lorries, pneumatic drills), by the
accumulation of snow or dead leaves
on the road or in the event of damaged
bumpers and mirrors.
A front or rear impact to the vehicle can
upset the sensors' settings, which is not
always detected by the system: distance
measurements may be distorted.
The sensors do not detect obstacles that
are too low (pavements, studs) or too thin
(trees, posts, wire fences).
Certain obstacles located in the sensors'
blind spots may not be detected or may no
longer be detected during the manoeuvre.
Certain materials (fabrics) absorb sound
waves: pedestrians may not be detected.
6
Driving
Page 183 of 292

181
It remains possible to use a fuel can to fill
t he tank.
Travelling abroad
As Diesel fuel pump nozzles may be
different in other countries, the presence
of the misfuel prevention device may make
refuelling impossible.
Not all Diesel vehicles are fitted with
misfuel protection, so before travelling
abroad, we recommend that you check
with a
CITROËN dealer whether your
vehicle is suitable for the fuel pumps in the
country in which you intend to travel.
When a
petrol filler nozzle is introduced into
the fuel filler neck of a Diesel vehicle, it comes
into contact with the flap. The system remains
closed and prevents filling.
Do not persist but introduce a Diesel type
filler nozzle.
Compatibility of fuels
The use of any other type of (bio) fuel
(vegetable or animal oils, pure or diluted,
domestic fuel, etc.) is strictly prohibited
(risk of damage to the engine and fuel
syste m). The only fuel additives authorised for use
are those that meet the B715001 (petrol)
or B715000 (Diesel) standards.
Petrol fuels conforming to the EN228 standard
containing up to 5% and 10% ethanol
respectively.
Diesel fuels conforming to the EN590,
EN16734 and EN16709 standards respectively
and containing up to 7%, 10%, 20% and 30%
fatty acid methyl ester respectively. The use of
B20
or B30 fuels, even occasionally, imposes
special maintenance conditions referred to as
"Arduous conditions".
Paraffinic Diesel fuel conforming to the
EN15940
standard.
Diesel at low temperature
At temperatures below 0°C (+32 °F), the
formation of paraffins in summer-type Diesel
fuels could prevent the engine from operating
correctly. In these temperature conditions, use
winter-type Diesel fuel and keep the fuel tank
more than 50% full.
At temperatures below -15°C (+5 °F) to avoid
problems starting, it is best to park the vehicle
under shelter (heated garage).
Travelling abroad
Cer tain fuels could damage your vehicle's
engine.
In cer tain countries, the use of a
par ticular
fuel may be required (specific octane
rating, specific trade name, etc.) to ensure
correct operation of the engine.
For all additional information, consult a
dealer.
7
Practical information
Page 187 of 292

185
F Remove the protective cover from the towball.
F
A
ttach the trailer to the towball.
F
A
ttach the cable on the trailer to the safety
eye 4
on the carrier.
F
L
ower the connection socket 3 to put it in
position.
F
I
nsert the trailer plug and give it a quarter
turn to connect it to the connection socket
3
of the carrier.
Removing the towball
F Give a quarter turn to and pull the trailer
plug to disconnect it from the connection
socket 3
of the carrier.
F
R
aise the connection socket 3 to the right
again to stow it away.
F
D
etach the cable on the trailer from the
safety eye 4
on the carrier.
F
D
etach the trailer from the towball.
F
R
efit the protective cover to the towball.
F
R
emove the cap from the lock and press it
onto the head of the key.
F
E
xtract the towball from the bottom of its
carrier 1 .
F
R
elease the wheel; this automatically stops
in the unlocked position (position B ).
F
I
nsert the key into the lock 7
.
F
O
pen the lock using the key.
F
H
old the towball 5 firmly in one hand; using
the other hand, pull and turn the wheel
6
fully in a clockwise direction; do not
release the wheel.
Maintenance
Correct operation is only possible if the towball
and its carrier are kept clean.
Before cleaning the vehicle with a
high-
pressure jet wash, the towball must be removed
and the protective plug fitted to the carrier.
Apply the label provided to a
clearly visible
area, close to the carrier or in the boot.
Go to a
CITROËN dealer or a qualified
workshop for any work on the towbar
system.
F
R
efit the protective plug 2 to the carrier 1
.
F
C
arefully stow the towball in its bag away
from knocks and dirt.
7
Practical information