Page 3 of 24

3
Refer to your Owner’s Manual to learn about the information being relayed by the lights, gauges and indicators on the instrument cluster.
See Introduction in your Owner’s Manual.
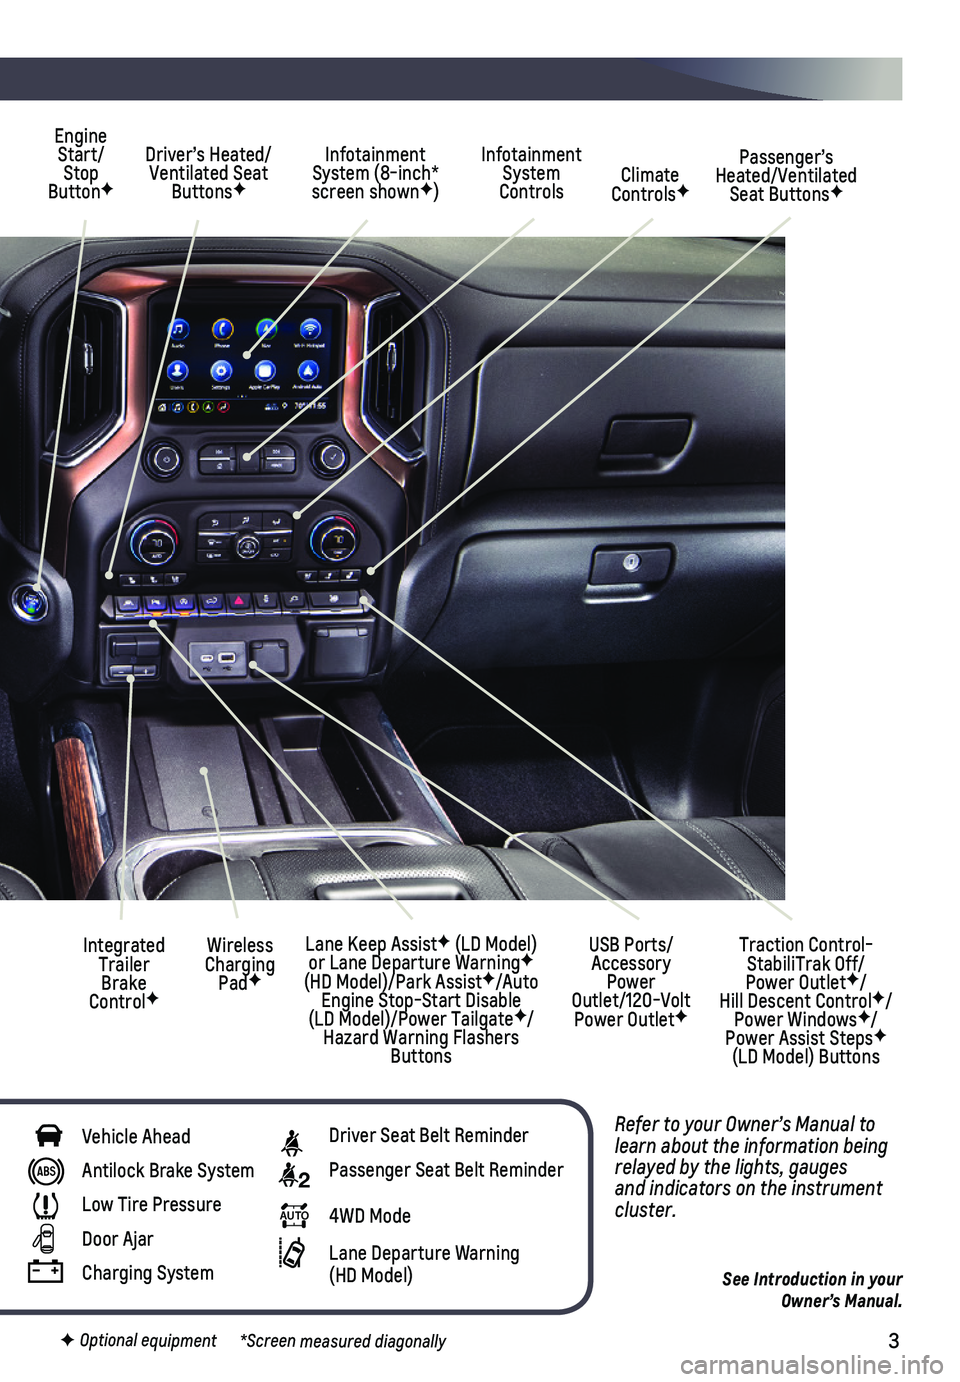
Driver’s Heated/Ventilated Seat ButtonsF
Infotainment System (8-inch* screen shownF)
Passenger’s Heated/Ventilated Seat ButtonsF
Infotainment System Controls Climate ControlsF
USB Ports/ Accessory Power Outlet/120-Volt Power OutletF
Engine Start/Stop ButtonF
Integrated Trailer Brake ControlF
Wireless Charging PadF
Lane Keep AssistF (LD Model) or Lane Departure WarningF (HD Model)/Park AssistF/Auto Engine Stop-Start Disable (LD Model)/Power TailgateF/Hazard Warning Flashers Buttons
F Optional equipment *Screen measured diagonally
Traction Control-StabiliTrak Off/ Power OutletF/ Hill Descent ControlF/Power WindowsF/Power Assist StepsF (LD Model) Buttons
Vehicle Ahead
Antilock Brake System
Low Tire Pressure
Door Ajar
Charging System
Driver Seat Belt Reminder
2 Passenger Seat Belt Reminder
AUTO 4WD Mode
Lane Departure Warning (HD Model)
Page 22 of 24

22
CRUISE CONTROL
SETTING CRUISE CONTROL
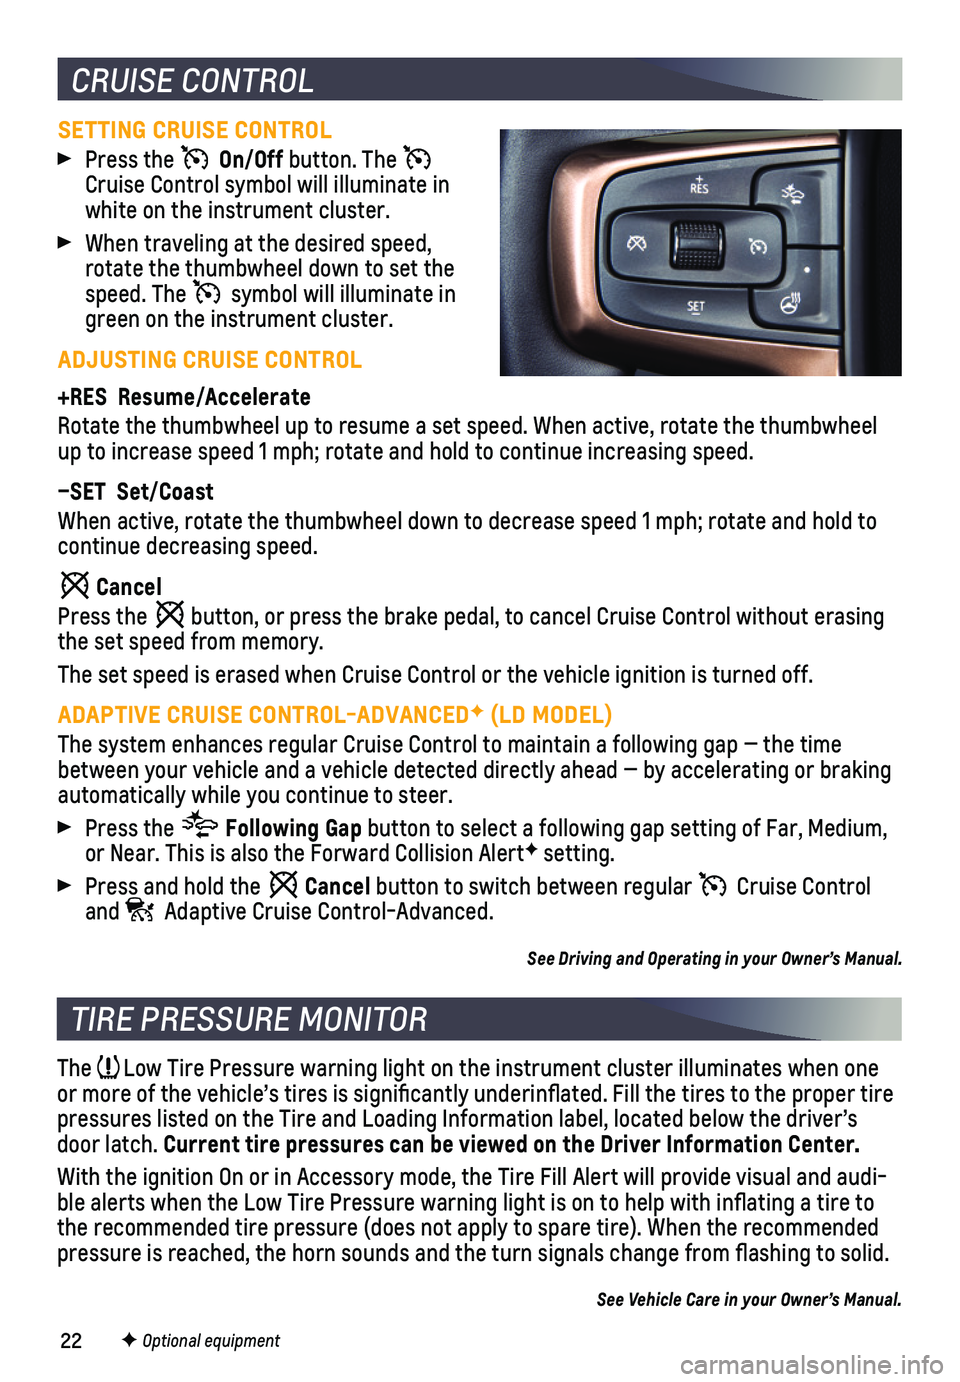
Press the On/Off button. The Cruise Control symbol will illuminate in white on the instrument cluster.
When traveling at the desired speed, rotate the thumbwheel down to set the speed. The symbol will illuminate in green on the instrument cluster.
ADJUSTING CRUISE CONTROL
+RES Resume/Accelerate
Rotate the thumbwheel up to resume a set speed. When active, rotate the \
thumbwheel up to increase speed 1 mph; rotate and hold to continue increasing speed\
.
–SET Set/Coast
When active, rotate the thumbwheel down to decrease speed 1 mph; rotate \
and hold to continue decreasing speed.
Cancel
Press the button, or press the brake pedal, to cancel Cruise Control without erasi\
ng the set speed from memory.
The set speed is erased when Cruise Control or the vehicle ignition is t\
urned off.
ADAPTIVE CRUISE CONTROL-ADVANCEDF (LD MODEL)
The system enhances regular Cruise Control to maintain a following gap —\
the time between your vehicle and a vehicle detected directly ahead — by accel\
erating or braking automatically while you continue to steer.
Press the Following Gap button to select a following gap setting of Far, Medium, or Near. This is also the Forward Collision AlertF setting.
Press and hold the Cancel button to switch between regular Cruise Control and Adaptive Cruise Control-Advanced.
See Driving and Operating in your Owner’s Manual.
TIRE PRESSURE MONITOR
The Low Tire Pressure warning light on the instrument cluster illuminates wh\
en one or more of the vehicle’s tires is significantly underinflated. Fi\
ll the tires to the proper tire pressures listed on the Tire and Loading Information label, located belo\
w the driver’s door latch. Current tire pressures can be viewed on the Driver Information Center.
With the ignition On or in Accessory mode, the Tire Fill Alert will prov\
ide visual and audi-ble alerts when the Low Tire Pressure warning light is on to help with i\
nflating a tire to the recommended tire pressure (does not apply to spare tire). When the\
recommended pressure is reached, the horn sounds and the turn signals change from fl\
ashing to solid.
See Vehicle Care in your Owner’s Manual.
F Optional equipment
Page 23 of 24

23
TRAILERINGF
TRAILERING APP
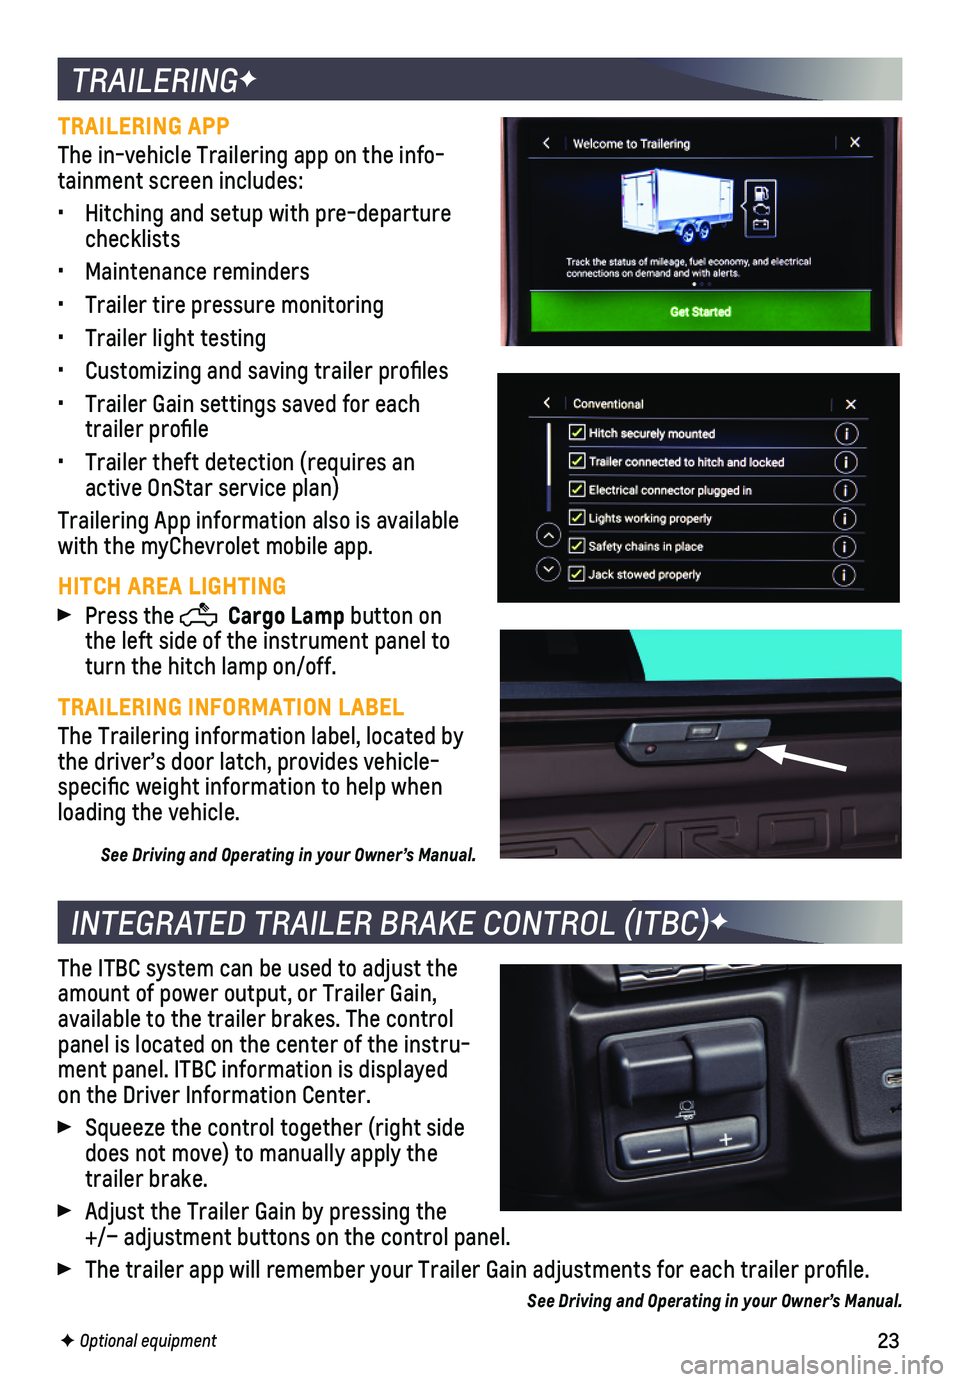
The in-vehicle Trailering app on the info-tainment screen includes:
• Hitching and setup with pre-departure checklists
• Maintenance reminders
• Trailer tire pressure monitoring
• Trailer light testing
• Customizing and saving trailer profiles
• Trailer Gain settings saved for each trailer profile
• Trailer theft detection (requires an active OnStar service plan)
Trailering App information also is available with the myChevrolet mobile app.
HITCH AREA LIGHTING
Press the Cargo Lamp button on the left side of the instrument panel to turn the hitch lamp on/off.
TRAILERING INFORMATION LABEL
The Trailering information label, located by the driver’s door latch, provides vehicle-specific weight information to help when loading the vehicle.
See Driving and Operating in your Owner’s Manual.
INTEGRATED TRAILER BRAKE CONTROL (ITBC)F
The ITBC system can be used to adjust the amount of power output, or Trailer Gain, available to the trailer brakes. The control panel is located on the center of the instru-ment panel. ITBC information is displayed on the Driver Information Center.
Squeeze the control together (right side does not move) to manually apply the trailer brake.
Adjust the Trailer Gain by pressing the +/– adjustment buttons on the control panel.
The trailer app will remember your Trailer Gain adjustments for each tra\
iler profile.
See Driving and Operating in your Owner’s Manual.
F Optional equipment