2020 CHEVROLET SILVERADO 2500 sensor
[x] Cancel search: sensorPage 314 of 500
Chevrolet Silverado Owner Manual (GMNA-Localizing-U.S./Canada/Mexico-
13337620) - 2020 - CRC - 4/11/19
Driving and Operating 313
4. Move to the next tire andrepeat Step 3 for each sensor.
The horn chirps twice when all
sensors are completed.
5. Return to the vehicle to complete the setup.
Maintenance Reminders
To set up maintenance reminders,
touch the Trailer Maintenance icon.
Select Yes to set up the
maintenance reminders for the
Trailer Profile. Follow the on-screen
prompts. The maximum number of
reminders is 50. Select No to return
to the previous screen.
Towing Assistance
If the Transparent Trailer feature is
available, touch the Towing
Assistance icon to set up
transparent trailer.
Touch Yes to begin set up or touch
No to return to the previous screen.
Follow the on-screen instructions.
A rear trailer camera must be
mounted on the trailer and
electrically connected to the vehicle before transparent trailer feature
can be used. See
Assistance
Systems for Parking or Backing
0 257.
Trailer dimensions must be in range
and transparent trailer must be
calibrated prior to use.
Transparent Trailer Setup
To complete setup for transparent
trailer: 1. Select the number of axles on the trailer.
2. Enter trailer dimensions .Trailer Length: 300
cm (118.1 in)
–970 cm (381.8 in).
Measure from center of
coupler to furthest rear
point on the trailer.
. Trailer Width:
120 cm (47.2 in) –
260 cm (102.3 in). Measure
from left edge to right edge. .
Trailer Height:
1 cm (.39 in) –
450 cm (177.1 in). Measure
from ground to tallest point.
. Hitching Point Length:
180 cm (70.8 in)
–970 cm (381.8 in).
Measure from center of
coupler to middle of tires.
. Trailer Tongue Length:
50 cm (119.6 in) –220
cm (86.6 in). Measure from
center of coupler to trailer
front wall.
. Vehicle Hitch Height:
10 cm (3.9 in) –
100 cm (39.3 in). Measure
from ground to top of
coupler.
. Vehicle Hitch Length:
10 cm (3.9 in) –
100 cm;(39.3 in). Measure
from hitch receiver to center
of ball.
3. If trailer dimensions are out of range, this feature will be
unavailable. Select OK to
return.
Page 317 of 500

Chevrolet Silverado Owner Manual (GMNA-Localizing-U.S./Canada/Mexico-
13337620) - 2020 - CRC - 4/11/19
316 Driving and Operating
Trailer
1. Trailer Tire Pressure/Temperature
2. Mileage of Trailer
Mileage
The mileage accumulated while this
Trailer Profile is active will display.
Touch mileage to edit.
Tire Pressure and Temperature
If the TTPMS sensor-to-vehicle
learn process was completed, the
status view will display the current
tire pressure and temperature of the
trailer tires related to the active Trailer Profile. If a tire’
s pressure is
low or high, the color of the
pressure value will be amber. If a
sensor malfunctions, the values are
dashed lines. If the screen displays
“Service Tire Pressure Monitoring
System”, the vehicle needs to be
taken to a dealer for service.
Maintenance
1. List of Maintenance
Reminders
2. Add a New Maintenance Reminder
The Maintenance Status view
displays reminders. Touch a
reminder to edit.
Touch + New Maintenance
Reminder to go to the Select New
Reminder view.
The progress bar turns yellow when
the maintenance item reaches 90%
complete.
The progress bar turns red when
the maintenance item reaches
100% complete.
Maintenance Notifications
.Touch Service Complete to reset
the maintenance reminder.
. Touch Remind Me Later to delay
the reminder.
. Touch X next to Upcoming Alerts
(90%) to dismiss the alert. It will
not appear again.
. Touch X next to Maintenance
Due (100%) to delay the alert to
the next ignition cycle.
Always follow all of the maintenance
instructions that came with your
trailer.
Page 320 of 500

Chevrolet Silverado Owner Manual (GMNA-Localizing-U.S./Canada/Mexico-
13337620) - 2020 - CRC - 4/11/19
Driving and Operating 319
.Average Fuel Economy
. Reverse Lights Alert
. Electric Brakes Alert
Touch Save to save the new value
to the Trailer Profile. Touching Back
will still save the previously entered
information.
Trailer Name
Touch to edit the Trailer Profile’s
name. Use at least one character
and no spaces. Touch Save.
Towing Assistance Setup
A trailer should be connected to
complete this portion of profile
setup.
Touch to set up the Transparent
Trailer feature for the Trailer Profile.
See "Transparent Trailer Setup"
under "Towing Assistance" for
details on the setup.
Tire Pressure Setup
Touch to set up the Trailer Tire
Pressure Monitoring System
(TTPMS) for the Trailer Profile. See
“Trailer Tire Pressure Setup” previously in this section for details
on the setup. Also, touch Tire
Pressure Setup if the trailer tires
were rotated or if the tire pressure
sensors in the tires were replaced
for this Trailer Profile. The vehicle
will need to relearn the tire sensors
and their locations.
If TTPMS had been set up
previously, the Select Number of
Sensors screen will appear after
touching Tire Pressure Setup. If the
number of sensors has changed,
select the number and touch Next.
If a new number of sensors is
selected, the Relearn Sensors
pop-up will appear. Touch Cancel to
go back or touch Relearn to
overwrite the current sensors and
begin the relearning process. See
“Trailer Tire Pressure Setup”
previously in this section.
If number of sensors has not
changed, touch Next and the Learn
sensors screen will appear.
On the Learn Sensors screen.
Touch Relearn to overwrite the
current sensors and begin therelearning process. See
“Trailer Tire
Pressure Setup” previously in this
section.
On the Learn Sensors screen, touch
Next to go to the Edit
Recommended Tire Pressure
screen.
On the Edit Recommended Tire
Pressure screen, touch a number on
the keypad to change the
Recommended Tire Pressure for the
trailer ’s tires. This will change the
number at which the vehicle
displays alerts related to trailer tire
pressure. Touch Done to return to
the Trailer Profile view.
Trailer Maintenance
Touch to view a list of maintenance
reminders for the Trailer Profile.
Touch a reminder to view, reset,
delete, or edit it.
Reset Reminder
Touch Maintenance Complete in the
reminder view to reset the reminder.
On the pop-up, touch Reset to reset
the time and mileage values for the
Page 357 of 500
Chevrolet Silverado Owner Manual (GMNA-Localizing-U.S./Canada/Mexico-
13337620) - 2020 - CRC - 4/10/19
356 Vehicle Care
proper sequence to torque
specifications inCapacities and
Specifications 0457.
Brake linings should always be
replaced as complete axle sets.
Brake Pedal Travel
See your dealer if the brake pedal
does not return to normal height,
or if there is a rapid increase in
pedal travel. This could be a sign
that brake service may be required.
Replacing Brake System Parts
Always replace brake system parts
with new, approved replacement
parts. If this is not done, the brakes
may not work properly. The braking
performance expected can change
in many other ways if the wrong
replacement brake parts are
installed or parts are improperly
installed.
Brake Pad Life System
When to Change Brake Pads
This vehicle has a system that
estimates the remaining life of the
front and rear brake pads. Brake
pad life is displayed in the Driver
Information Center (DIC), along with
a percentage for each axle. The
system must be reset every time the
brake pads are changed.
When the system has determined
that the brake pads need to be
replaced, a message will display,
which may include mileage
remaining.
Brake pads should always be
replaced as complete axle sets.
How to Reset the Brake Pad
Life System
The system will automatically detect
when significantly worn brake pads
are replaced. When the ignition is
turned on after new pads and wear
sensors are installed, a message
will display. Follow the prompts to
reset the system. The brake pad life system can also
be manually reset:
1. Display Brake Pad Life on the DIC. See Driver Information
Center (DIC) (Base Level)
0 148 or
Driver Information Center (DIC)
(Midlevel and Uplevel) 0149.
2. Press the thumbwheel or the trip odometer reset stem if the
vehicle does not have DIC
buttons. Select front or rear
pads as appropriate.
3. Select YES on the confirmation message, or press the trip
odometer reset stem on a base
level DIC. Repeat for pads on
the other axle if they were also
replaced.
How to Disable the Brake Pad
Life System
The brake pad life system can be
turned off. This may be necessary if
aftermarket brake pads without wear
sensors are installed. When the
system is turned off, the front and
rear brake pad life percentages will
not display. However, the built-in
Page 360 of 500
Chevrolet Silverado Owner Manual (GMNA-Localizing-U.S./Canada/Mexico-
13337620) - 2020 - CRC - 4/10/19
Vehicle Care 359
Vehicle Storage
{Warning
Batteries have acid that can burn
you and gas that can explode.
You can be badly hurt if you are
not careful. SeeJump Starting -
North America 0419 for tips on
working around a battery without
getting hurt.
Infrequent Usage: Remove the
black, negative (−) cable from the
battery to keep the battery from
running down.
Extended Storage: Remove the
black, negative (−) cable from the
battery or use a battery trickle
charger.
Negative Battery Cable
Disconnection
{Warning
Before disconnecting the negative
battery cable, turn off all features,
turn the ignition off, and remove
the key, if equipped, from the
vehicle. If this is not done, you or
others could be injured, and the
vehicle could be damaged.
Caution
If the battery is disconnected with
the ignition on or the vehicle in
Retained Accessory Power
(RAP), the OnStar back-up
battery will be permanently
discharged and will need to be
replaced.
1. Make sure the lamps, features, and accessories are turned off.
2. Turn the ignition off and remove the key, if equipped. For vehicles equipped with the Stop/
Start system:
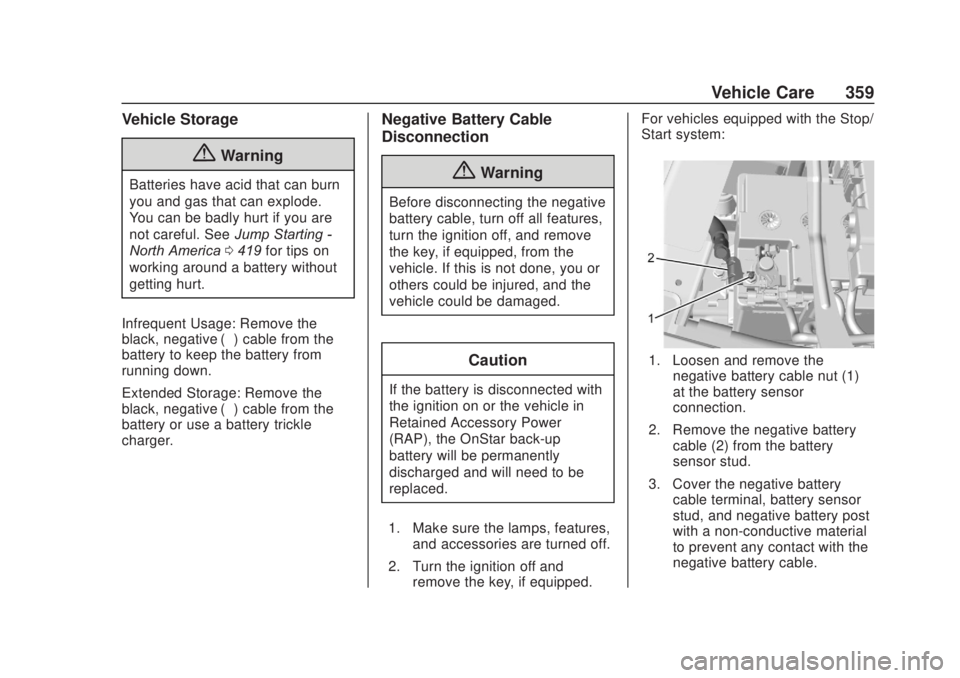
1. Loosen and remove the
negative battery cable nut (1)
at the battery sensor
connection.
2. Remove the negative battery cable (2) from the battery
sensor stud.
3. Cover the negative battery cable terminal, battery sensor
stud, and negative battery post
with a non-conductive material
to prevent any contact with the
negative battery cable.
Page 361 of 500
Chevrolet Silverado Owner Manual (GMNA-Localizing-U.S./Canada/Mexico-
13337620) - 2020 - CRC - 4/10/19
360 Vehicle Care
For vehicles not equipped with the
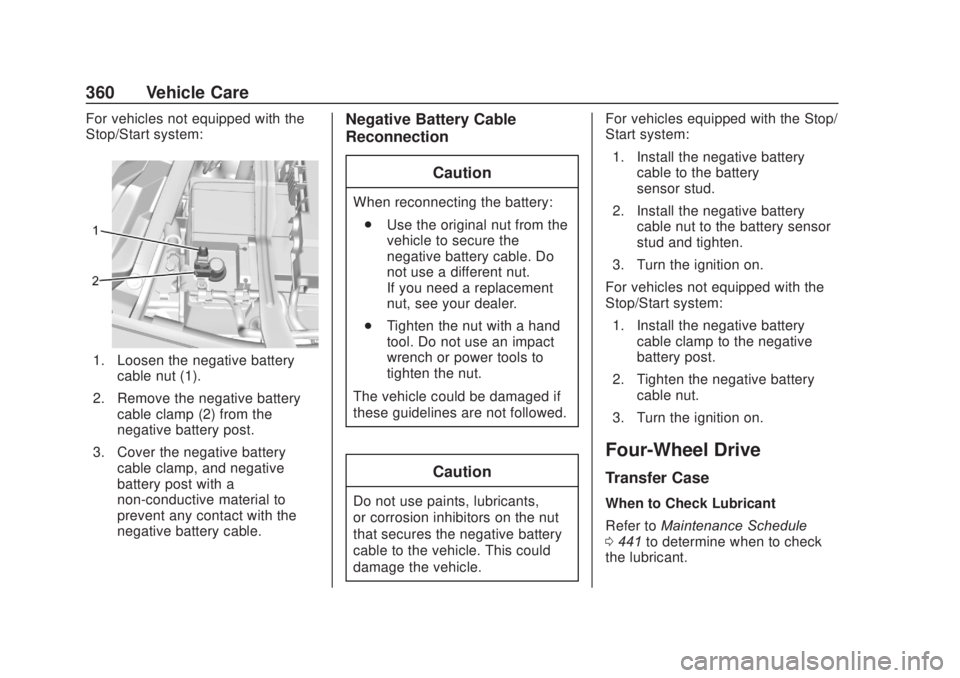
Stop/Start system:
1. Loosen the negative batterycable nut (1).
2. Remove the negative battery cable clamp (2) from the
negative battery post.
3. Cover the negative battery cable clamp, and negative
battery post with a
non-conductive material to
prevent any contact with the
negative battery cable.
Negative Battery Cable
Reconnection
Caution
When reconnecting the battery:. Use the original nut from the
vehicle to secure the
negative battery cable. Do
not use a different nut.
If you need a replacement
nut, see your dealer.
. Tighten the nut with a hand
tool. Do not use an impact
wrench or power tools to
tighten the nut.
The vehicle could be damaged if
these guidelines are not followed.
Caution
Do not use paints, lubricants,
or corrosion inhibitors on the nut
that secures the negative battery
cable to the vehicle. This could
damage the vehicle. For vehicles equipped with the Stop/
Start system:
1. Install the negative battery cable to the battery
sensor stud.
2. Install the negative battery cable nut to the battery sensor
stud and tighten.
3. Turn the ignition on.
For vehicles not equipped with the
Stop/Start system: 1. Install the negative battery cable clamp to the negative
battery post.
2. Tighten the negative battery cable nut.
3. Turn the ignition on.
Four-Wheel Drive
Transfer Case
When to Check Lubricant
Refer to Maintenance Schedule
0 441 to determine when to check
the lubricant.
Page 366 of 500
Chevrolet Silverado Owner Manual (GMNA-Localizing-U.S./Canada/Mexico-
13337620) - 2020 - CRC - 4/10/19
Vehicle Care 365
Glass Replacement
If the windshield or front side glass
must be replaced, see your dealer
to determine the correct
replacement glass.
Windshield Replacement
Driver Assistance Systems
If the windshield needs to be
replaced and the vehicle is
equipped with a front camera sensor
for the Driver Assistance Systems, a
GM replacement windshield is
recommended. The replacement
windshield must be installed
according to GM specifications for
proper alignment. If it is not, these
systems may not work properly, they
may display messages, or they may
not work at all. See your dealer for
proper windshield replacement.
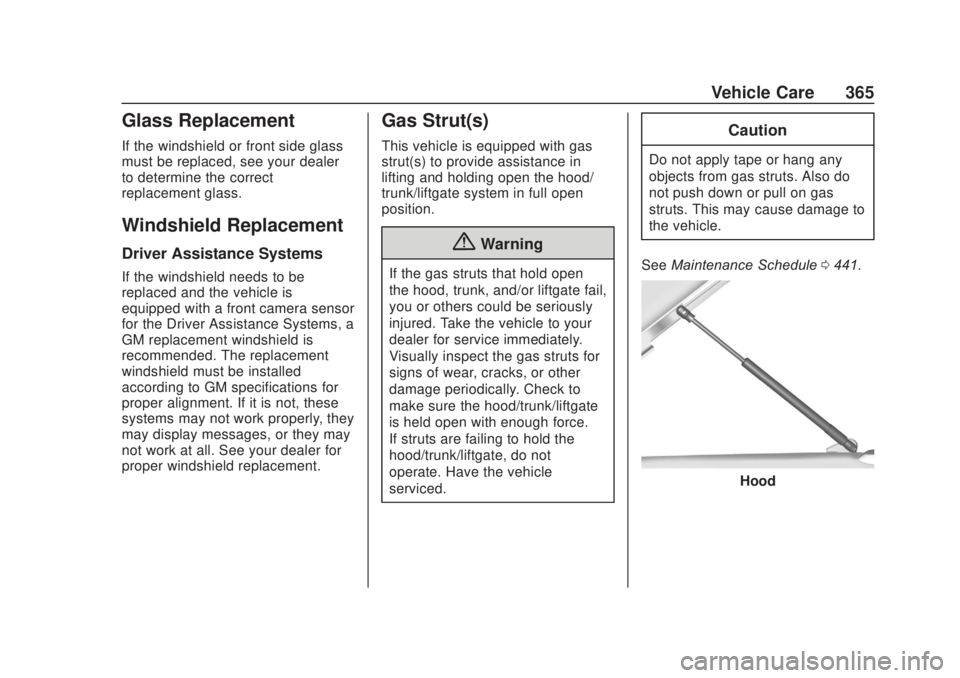
Gas Strut(s)
This vehicle is equipped with gas
strut(s) to provide assistance in
lifting and holding open the hood/
trunk/liftgate system in full open
position.
{Warning
If the gas struts that hold open
the hood, trunk, and/or liftgate fail,
you or others could be seriously
injured. Take the vehicle to your
dealer for service immediately.
Visually inspect the gas struts for
signs of wear, cracks, or other
damage periodically. Check to
make sure the hood/trunk/liftgate
is held open with enough force.
If struts are failing to hold the
hood/trunk/liftgate, do not
operate. Have the vehicle
serviced.
Caution
Do not apply tape or hang any
objects from gas struts. Also do
not push down or pull on gas
struts. This may cause damage to
the vehicle.
See Maintenance Schedule 0441.
Hood
Page 375 of 500
Chevrolet Silverado Owner Manual (GMNA-Localizing-U.S./Canada/Mexico-
13337620) - 2020 - CRC - 4/10/19
374 Vehicle Care
FusesUsage
76 Electric RNG BDS
78 Engine control module
79 Auxiliary battery
80 Cabin cooling pump
81 Trailer stop/turn lamp right
82 TIM
83 FTZM
84 Trailer brake
85 ENG
86 Engine control module
87 Injector B even
88 O2 B sensor
89 O2 A sensor
90 Injector A odd
91 Engine control module throttle
control
92 Cool fan clutch Relays
Usage
5 Headlamp
18 DC/AC inverter
23 Rear window defogger
35 Parking lamp
36 Run/Crank
43 Second fuel pump
59 A/C clutch
64 Starter Motor (LD & HD DSL) / Cool
Fan Clutch
(HD Gas)
70 Starter Pinion (LD) / Starter Motor
(HD Gas)
77 PowertrainInstrument Panel Fuse
Block (Left)
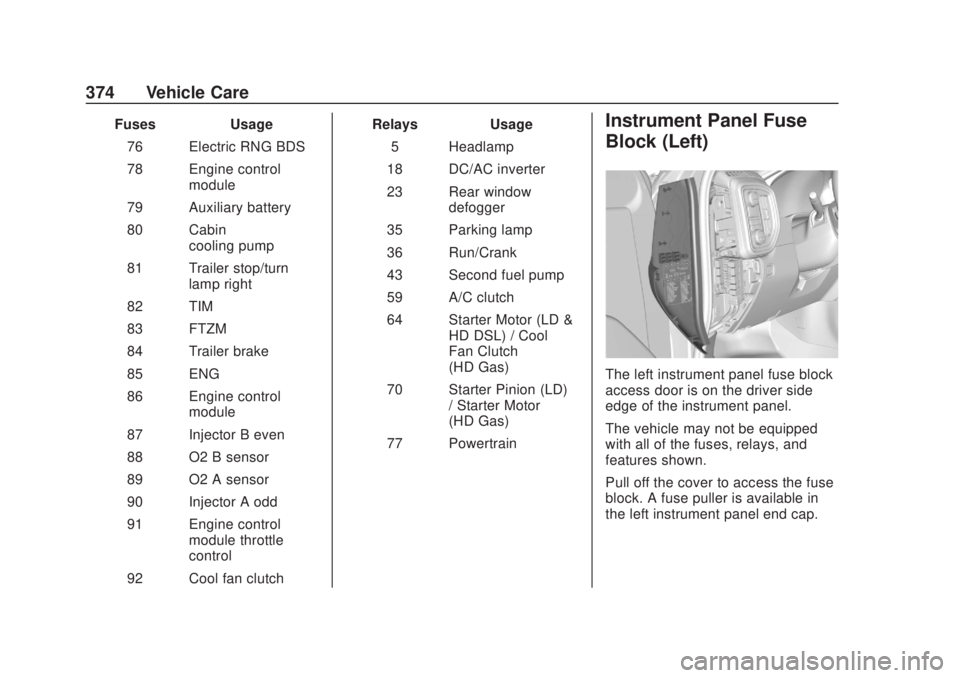
The left instrument panel fuse block
access door is on the driver side
edge of the instrument panel.
The vehicle may not be equipped
with all of the fuses, relays, and
features shown.
Pull off the cover to access the fuse
block. A fuse puller is available in
the left instrument panel end cap.