2020 CHEVROLET SILVERADO 1500 brakes
[x] Cancel search: brakesPage 320 of 500
Chevrolet Silverado Owner Manual (GMNA-Localizing-U.S./Canada/Mexico-
13337620) - 2020 - CRC - 4/11/19
Driving and Operating 319
.Average Fuel Economy
. Reverse Lights Alert
. Electric Brakes Alert
Touch Save to save the new value
to the Trailer Profile. Touching Back
will still save the previously entered
information.
Trailer Name
Touch to edit the Trailer Profile’s
name. Use at least one character
and no spaces. Touch Save.
Towing Assistance Setup
A trailer should be connected to
complete this portion of profile
setup.
Touch to set up the Transparent
Trailer feature for the Trailer Profile.
See "Transparent Trailer Setup"
under "Towing Assistance" for
details on the setup.
Tire Pressure Setup
Touch to set up the Trailer Tire
Pressure Monitoring System
(TTPMS) for the Trailer Profile. See
“Trailer Tire Pressure Setup” previously in this section for details
on the setup. Also, touch Tire
Pressure Setup if the trailer tires
were rotated or if the tire pressure
sensors in the tires were replaced
for this Trailer Profile. The vehicle
will need to relearn the tire sensors
and their locations.
If TTPMS had been set up
previously, the Select Number of
Sensors screen will appear after
touching Tire Pressure Setup. If the
number of sensors has changed,
select the number and touch Next.
If a new number of sensors is
selected, the Relearn Sensors
pop-up will appear. Touch Cancel to
go back or touch Relearn to
overwrite the current sensors and
begin the relearning process. See
“Trailer Tire Pressure Setup”
previously in this section.
If number of sensors has not
changed, touch Next and the Learn
sensors screen will appear.
On the Learn Sensors screen.
Touch Relearn to overwrite the
current sensors and begin therelearning process. See
“Trailer Tire
Pressure Setup” previously in this
section.
On the Learn Sensors screen, touch
Next to go to the Edit
Recommended Tire Pressure
screen.
On the Edit Recommended Tire
Pressure screen, touch a number on
the keypad to change the
Recommended Tire Pressure for the
trailer ’s tires. This will change the
number at which the vehicle
displays alerts related to trailer tire
pressure. Touch Done to return to
the Trailer Profile view.
Trailer Maintenance
Touch to view a list of maintenance
reminders for the Trailer Profile.
Touch a reminder to view, reset,
delete, or edit it.
Reset Reminder
Touch Maintenance Complete in the
reminder view to reset the reminder.
On the pop-up, touch Reset to reset
the time and mileage values for the
Page 321 of 500
Chevrolet Silverado Owner Manual (GMNA-Localizing-U.S./Canada/Mexico-
13337620) - 2020 - CRC - 4/11/19
320 Driving and Operating
reminder. Touch Cancel to return to
the previous view and nothing will
change.
Edit Reminder
Touch to edit the mileage or time
settings for the reminder. Touch
Save to save the new settings to the
Trailer Profile.
Delete Reminder
Touch to delete the maintenance
reminder. On the pop-up, touch
Delete to delete the reminder or
touch Cancel to return to the
previous view and nothing will
change.
New Maintenance Reminder
Touch + New Maintenance
Reminder to set up a new reminder.
Suggested reminders that were
previously set will have checkmarks
next to them. Suggested reminders
that have not been set will have
empty boxes next to them. The
maximum number of reminders
is 50.Mileage
Touch to edit the Trailer Profile’s
mileage.
Effect on Maintenance Reminders
If the mileage is reset or changed,
and mileage has already
accumulated, any maintenance
reminders that have been set up will
be adjusted accordingly.
Average Fuel Economy
Touch to reset the average fuel
economy for the Trailer Profile.
Touch Reset to change, or touch
Cancel to go back to the
previous view.
Reverse Lights Alert
Turn on to receive failure messages
about the reverse lights. Turn off to
not receive failure messages about
the reverse lights, unless they are
later detected. This setting cannot
be edited when the Trailer Profile is
inactive or when the trailer is
disconnected.
Electric Brakes Alert
Turn on to receive failure messages
about the electric trailer brakes.
Turn off to not receive failure
messages about the electric trailer
brakes, unless they are later
detected. This setting cannot be
edited when the Trailer Profile is
inactive or when the trailer is
disconnected.
Delete Trailer
Touch to delete the Trailer Profile
and all of its settings.
On the pop-up, touch Delete to
delete the Trailer Profile. Touch
Cancel to dismiss the pop-up and
return to the previous view.
Settings View
Within the Trailering App, touch the
Settings tab to modify the following
settings:
.
Trailer Detection Alert
. Maintenance Alerts
. Theft Alert
. Tow/Haul Mode Reminder
Page 326 of 500
Chevrolet Silverado Owner Manual (GMNA-Localizing-U.S./Canada/Mexico-
13337620) - 2020 - CRC - 4/11/19
Driving and Operating 325
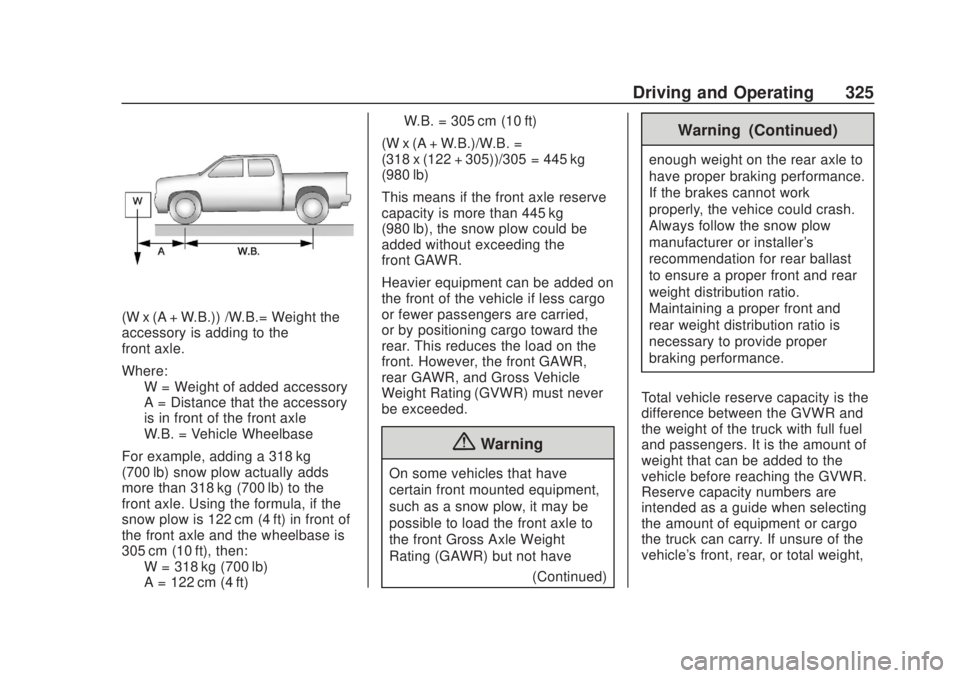
(W x (A + W.B.)) /W.B.= Weight the
accessory is adding to the
front axle.
Where:W = Weight of added accessory
A = Distance that the accessory
is in front of the front axle
W.B. = Vehicle Wheelbase
For example, adding a 318 kg
(700 lb) snow plow actually adds
more than 318 kg (700 lb) to the
front axle. Using the formula, if the
snow plow is 122 cm (4 ft) in front of
the front axle and the wheelbase is
305 cm (10 ft), then: W = 318 kg (700 lb)
A = 122 cm (4 ft) W.B. = 305 cm (10 ft)
(W x (A + W.B.)/W.B. =
(318 x (122 + 305))/305 = 445 kg
(980 lb)
This means if the front axle reserve
capacity is more than 445 kg
(980 lb), the snow plow could be
added without exceeding the
front GAWR.
Heavier equipment can be added on
the front of the vehicle if less cargo
or fewer passengers are carried,
or by positioning cargo toward the
rear. This reduces the load on the
front. However, the front GAWR,
rear GAWR, and Gross Vehicle
Weight Rating (GVWR) must never
be exceeded.
{Warning
On some vehicles that have
certain front mounted equipment,
such as a snow plow, it may be
possible to load the front axle to
the front Gross Axle Weight
Rating (GAWR) but not have (Continued)
Warning (Continued)
enough weight on the rear axle to
have proper braking performance.
If the brakes cannot work
properly, the vehice could crash.
Always follow the snow plow
manufacturer or installer's
recommendation for rear ballast
to ensure a proper front and rear
weight distribution ratio.
Maintaining a proper front and
rear weight distribution ratio is
necessary to provide proper
braking performance.
Total vehicle reserve capacity is the
difference between the GVWR and
the weight of the truck with full fuel
and passengers. It is the amount of
weight that can be added to the
vehicle before reaching the GVWR.
Reserve capacity numbers are
intended as a guide when selecting
the amount of equipment or cargo
the truck can carry. If unsure of the
vehicle's front, rear, or total weight,
Page 328 of 500
Chevrolet Silverado Owner Manual (GMNA-Localizing-U.S./Canada/Mexico-
13337620) - 2020 - CRC - 4/10/19
Vehicle Care 327
Vehicle Care
General Information
General Information . . . . . . . . . . 328
California Proposition65 Warning . . . . . . . . . . . . . . . . . 329
California Perchlorate Materials Requirements . . . . . 329
Accessories and Modifications . . . . . . . . . . . . . . . . 329
Vehicle Checks
Doing Your OwnService Work . . . . . . . . . . . . . . . 330
Hood . . . . . . . . . . . . . . . . . . . . . . . . . 330
Engine Compartment Overview . . . . . . . . . . . . . . . . . . . . 332
Engine Oil . . . . . . . . . . . . . . . . . . . . 339
Engine Oil Life System . . . . . . . 341
Automatic Transmission Fluid . . . . . . . . . . . . . . . . . . . . . . . . 343
Engine Air Filter Life System . . . . . . . . . . . . . . . . . . . . . . 343
Engine Air Cleaner/Filter . . . . . . 344
Cooling System . . . . . . . . . . . . . . 346
Engine Overheating . . . . . . . . . . 351
Overheated Engine Protection Operating Mode . . . . . . . . . . . . . 352
Engine Fan . . . . . . . . . . . . . . . . . . . 353 Power Steering Fluid . . . . . . . . . 353
Washer Fluid . . . . . . . . . . . . . . . . . 354
Brakes . . . . . . . . . . . . . . . . . . . . . . . 355
Brake Pad Life System . . . . . . . 356
Brake Fluid . . . . . . . . . . . . . . . . . . . 357
Battery - North America . . . . . . 358
Four-Wheel Drive . . . . . . . . . . . . . 360
Front Axle . . . . . . . . . . . . . . . . . . . . 361
Rear Axle . . . . . . . . . . . . . . . . . . . . 361
Noise Control System . . . . . . . . 361
Starter Switch Check . . . . . . . . . 362
Automatic Transmission Shift
Lock Control Function
Check . . . . . . . . . . . . . . . . . . . . . . . 363
Ignition Transmission Lock Check . . . . . . . . . . . . . . . . . . . . . . . 363
Park Brake and P (Park) Mechanism Check . . . . . . . . . . 363
Wiper Blade Replacement . . . . 364
Glass Replacement . . . . . . . . . . 365
Windshield Replacement . . . . . 365
Gas Strut(s) . . . . . . . . . . . . . . . . . . 365
Headlamp Aiming
Headlamp Aiming . . . . . . . . . . . . 366
Bulb Replacement
Bulb Replacement . . . . . . . . . . . . 366
Halogen Bulbs . . . . . . . . . . . . . . . . 366
LED Lighting . . . . . . . . . . . . . . . . . 367 Headlamps, Front Turn Signal,
Sidemarker, and Parking
Lamps . . . . . . . . . . . . . . . . . . . . . . 367
Taillamps, Turn Signal, Stoplamps, and Back-Up
Lamps . . . . . . . . . . . . . . . . . . . . . . 368
Center High-Mounted Stoplamp (CHMSL) and
Cargo Lamp . . . . . . . . . . . . . . . . . 369
License Plate Lamp . . . . . . . . . . 369
Electrical System
Electrical System Overload . . . 370
Fuses and Circuit Breakers . . . 370
Engine Compartment Fuse Block . . . . . . . . . . . . . . . . . . . . . . . . 371
Instrument Panel Fuse
Block (Left) . . . . . . . . . . . . . . . . . 374
Instrument Panel Fuse Block (Right) . . . . . . . . . . . . . . . . . . . . . . 376
Wheels and Tires
Tires . . . . . . . . . . . . . . . . . . . . . . . . . . 379
All-Season Tires . . . . . . . . . . . . . . 379
Winter Tires . . . . . . . . . . . . . . . . . . 380
Low-Profile Tires . . . . . . . . . . . . . 380
All-Terrain Tires . . . . . . . . . . . . . . . 381
Tire Sidewall Labeling . . . . . . . . 381
Tire Designations . . . . . . . . . . . . . 383
Tire Terminology andDefinitions . . . . . . . . . . . . . . . . . . 385
Page 330 of 500
Chevrolet Silverado Owner Manual (GMNA-Localizing-U.S./Canada/Mexico-
13337620) - 2020 - CRC - 4/10/19
Vehicle Care 329
California Proposition
65 Warning
{Warning
Most motor vehicles, including
this one, as well as many of its
service parts and fluids, contain
and/or emit chemicals known to
the State of California to cause
cancer and birth defects or other
reproductive harm. Engine
exhaust, many parts and
systems, many fluids, and some
component wear by-products
contain and/or emit these
chemicals. For more information
go to www.P65Warnings.ca.gov/
passenger-vehicle.
See Battery - North America 0358
and
Jump Starting - North America
0 419 and the back cover.
California Perchlorate
Materials Requirements
Certain types of automotive
applications, such as airbag
initiators, seat belt pretensioners,
and lithium batteries contained in
electronic keys, may contain
perchlorate materials. Perchlorate
Material –special handling may
apply. See www.dtsc.ca.gov/
hazardouswaste/perchlorate.
Accessories and
Modifications
Adding non-dealer accessories or
making modifications to the vehicle
can affect vehicle performance and
safety, including such things as
airbags, braking, stability, ride and
handling, emissions systems,
aerodynamics, durability, and
electronic systems like antilock
brakes, traction control, and stability
control. These accessories or
modifications could even cause
malfunction or damage not covered
by the vehicle warranty. Damage to suspension components
caused by modifying vehicle height
outside of factory settings will not be
covered by the vehicle warranty.
Damage to vehicle components
resulting from modifications or the
installation or use of non-GM
certified parts, including control
module or software modifications, is
not covered under the terms of the
vehicle warranty and may affect
remaining warranty coverage for
affected parts.
GM Accessories are designed to
complement and function with other
systems on the vehicle. See your
dealer to accessorize the vehicle
using genuine GM Accessories
installed by a dealer technician.
Also, see
Adding Equipment to the
Airbag-Equipped Vehicle 083.
Page 356 of 500
Chevrolet Silverado Owner Manual (GMNA-Localizing-U.S./Canada/Mexico-
13337620) - 2020 - CRC - 4/10/19
Vehicle Care 355
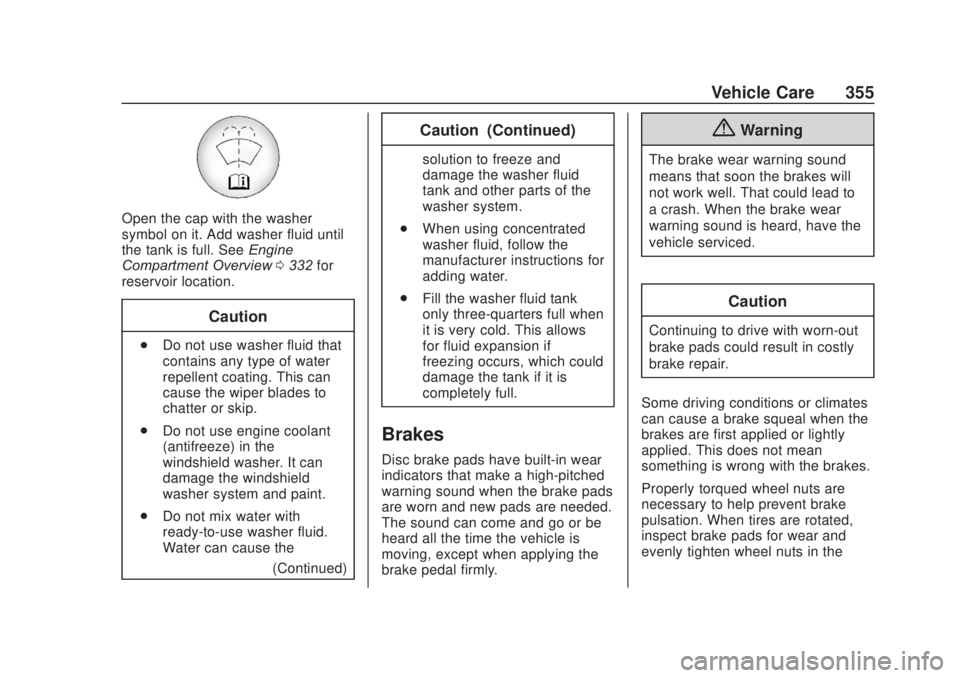
Open the cap with the washer
symbol on it. Add washer fluid until
the tank is full. SeeEngine
Compartment Overview 0332 for
reservoir location.
Caution
. Do not use washer fluid that
contains any type of water
repellent coating. This can
cause the wiper blades to
chatter or skip.
. Do not use engine coolant
(antifreeze) in the
windshield washer. It can
damage the windshield
washer system and paint.
. Do not mix water with
ready-to-use washer fluid.
Water can cause the
(Continued)
Caution (Continued)
solution to freeze and
damage the washer fluid
tank and other parts of the
washer system.
. When using concentrated
washer fluid, follow the
manufacturer instructions for
adding water.
. Fill the washer fluid tank
only three-quarters full when
it is very cold. This allows
for fluid expansion if
freezing occurs, which could
damage the tank if it is
completely full.
Brakes
Disc brake pads have built-in wear
indicators that make a high-pitched
warning sound when the brake pads
are worn and new pads are needed.
The sound can come and go or be
heard all the time the vehicle is
moving, except when applying the
brake pedal firmly.
{Warning
The brake wear warning sound
means that soon the brakes will
not work well. That could lead to
a crash. When the brake wear
warning sound is heard, have the
vehicle serviced.
Caution
Continuing to drive with worn-out
brake pads could result in costly
brake repair.
Some driving conditions or climates
can cause a brake squeal when the
brakes are first applied or lightly
applied. This does not mean
something is wrong with the brakes.
Properly torqued wheel nuts are
necessary to help prevent brake
pulsation. When tires are rotated,
inspect brake pads for wear and
evenly tighten wheel nuts in the
Page 357 of 500
Chevrolet Silverado Owner Manual (GMNA-Localizing-U.S./Canada/Mexico-
13337620) - 2020 - CRC - 4/10/19
356 Vehicle Care
proper sequence to torque
specifications inCapacities and
Specifications 0457.
Brake linings should always be
replaced as complete axle sets.
Brake Pedal Travel
See your dealer if the brake pedal
does not return to normal height,
or if there is a rapid increase in
pedal travel. This could be a sign
that brake service may be required.
Replacing Brake System Parts
Always replace brake system parts
with new, approved replacement
parts. If this is not done, the brakes
may not work properly. The braking
performance expected can change
in many other ways if the wrong
replacement brake parts are
installed or parts are improperly
installed.
Brake Pad Life System
When to Change Brake Pads
This vehicle has a system that
estimates the remaining life of the
front and rear brake pads. Brake
pad life is displayed in the Driver
Information Center (DIC), along with
a percentage for each axle. The
system must be reset every time the
brake pads are changed.
When the system has determined
that the brake pads need to be
replaced, a message will display,
which may include mileage
remaining.
Brake pads should always be
replaced as complete axle sets.
How to Reset the Brake Pad
Life System
The system will automatically detect
when significantly worn brake pads
are replaced. When the ignition is
turned on after new pads and wear
sensors are installed, a message
will display. Follow the prompts to
reset the system. The brake pad life system can also
be manually reset:
1. Display Brake Pad Life on the DIC. See Driver Information
Center (DIC) (Base Level)
0 148 or
Driver Information Center (DIC)
(Midlevel and Uplevel) 0149.
2. Press the thumbwheel or the trip odometer reset stem if the
vehicle does not have DIC
buttons. Select front or rear
pads as appropriate.
3. Select YES on the confirmation message, or press the trip
odometer reset stem on a base
level DIC. Repeat for pads on
the other axle if they were also
replaced.
How to Disable the Brake Pad
Life System
The brake pad life system can be
turned off. This may be necessary if
aftermarket brake pads without wear
sensors are installed. When the
system is turned off, the front and
rear brake pad life percentages will
not display. However, the built-in
Page 358 of 500
Chevrolet Silverado Owner Manual (GMNA-Localizing-U.S./Canada/Mexico-
13337620) - 2020 - CRC - 4/10/19
Vehicle Care 357
wear indicators that make a
high-pitched warning sound when
the brake pads are worn can still
determine when the pads should be
replaced. SeeBrakes0355.
To turn off the brake pad life system:
1. Display Brake Pad Life on the DIC. See Driver Information
Center (DIC) (Base Level)
0 148 or
Driver Information Center (DIC)
(Midlevel and Uplevel) 0149.
2. Select DISABLE.
To turn the brake pad life system
back on, follow the above steps but
select ENABLE in Step 2.
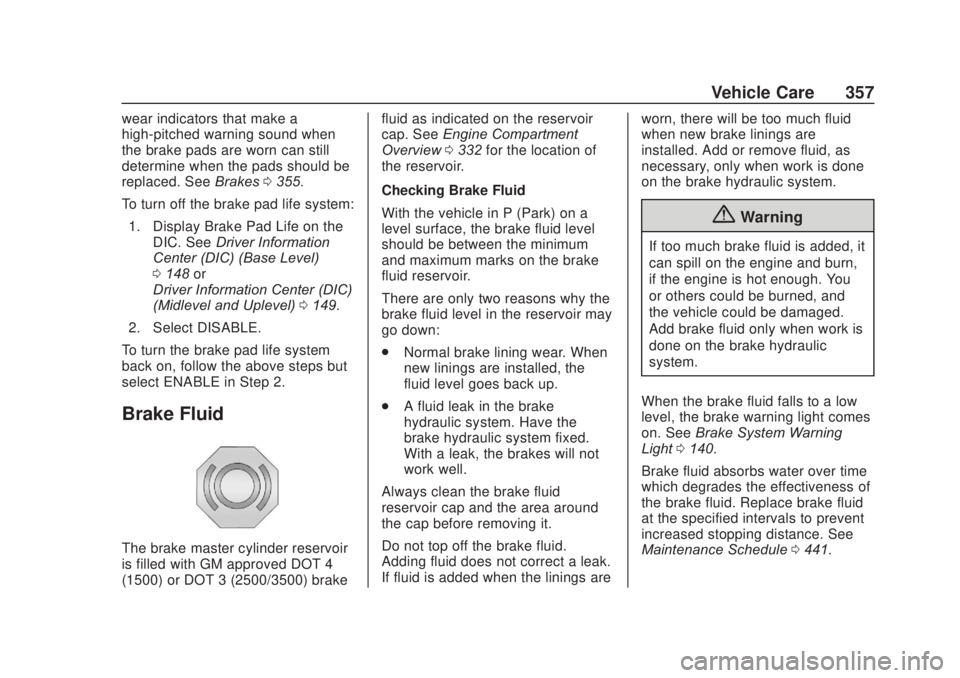
Brake Fluid
The brake master cylinder reservoir
is filled with GM approved DOT 4
(1500) or DOT 3 (2500/3500) brake fluid as indicated on the reservoir
cap. See
Engine Compartment
Overview 0332 for the location of
the reservoir.
Checking Brake Fluid
With the vehicle in P (Park) on a
level surface, the brake fluid level
should be between the minimum
and maximum marks on the brake
fluid reservoir.
There are only two reasons why the
brake fluid level in the reservoir may
go down:
. Normal brake lining wear. When
new linings are installed, the
fluid level goes back up.
. A fluid leak in the brake
hydraulic system. Have the
brake hydraulic system fixed.
With a leak, the brakes will not
work well.
Always clean the brake fluid
reservoir cap and the area around
the cap before removing it.
Do not top off the brake fluid.
Adding fluid does not correct a leak.
If fluid is added when the linings are worn, there will be too much fluid
when new brake linings are
installed. Add or remove fluid, as
necessary, only when work is done
on the brake hydraulic system.
{Warning
If too much brake fluid is added, it
can spill on the engine and burn,
if the engine is hot enough. You
or others could be burned, and
the vehicle could be damaged.
Add brake fluid only when work is
done on the brake hydraulic
system.
When the brake fluid falls to a low
level, the brake warning light comes
on. See Brake System Warning
Light 0140.
Brake fluid absorbs water over time
which degrades the effectiveness of
the brake fluid. Replace brake fluid
at the specified intervals to prevent
increased stopping distance. See
Maintenance Schedule 0441.