2020 CHEVROLET MALIBU ECU
[x] Cancel search: ECUPage 229 of 358
Chevrolet Malibu Owner Manual (GMNA-Localizing-U.S./Canada/Mexico-
13555849) - 2020 - CRC - 8/21/19
228 Vehicle Care
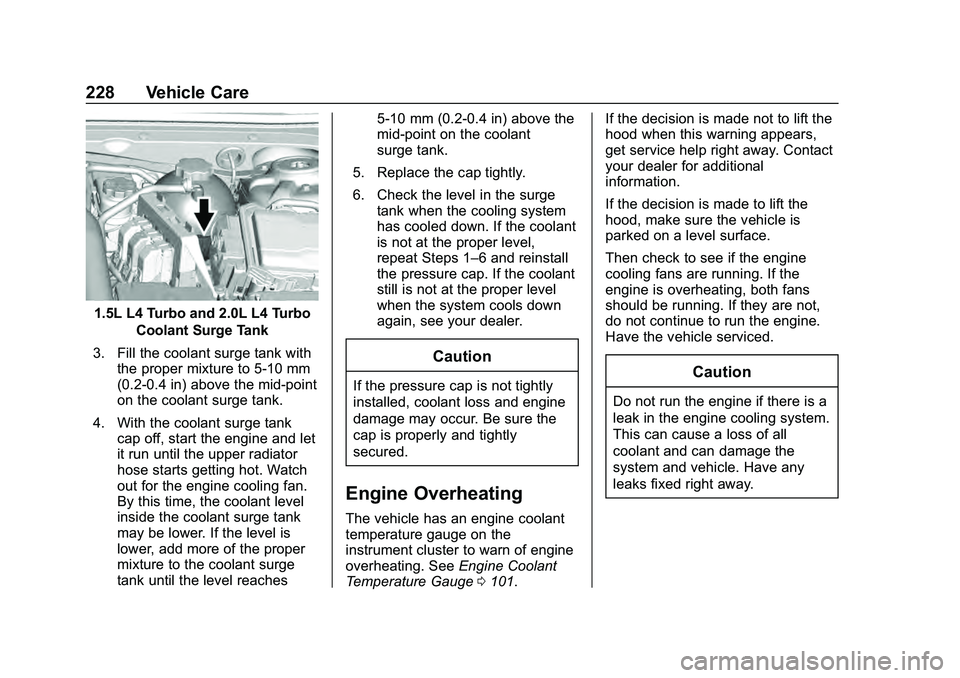
1.5L L4 Turbo and 2.0L L4 TurboCoolant Surge Tank
3. Fill the coolant surge tank with the proper mixture to 5-10 mm
(0.2-0.4 in) above the mid-point
on the coolant surge tank.
4. With the coolant surge tank cap off, start the engine and let
it run until the upper radiator
hose starts getting hot. Watch
out for the engine cooling fan.
By this time, the coolant level
inside the coolant surge tank
may be lower. If the level is
lower, add more of the proper
mixture to the coolant surge
tank until the level reaches 5-10 mm (0.2-0.4 in) above the
mid-point on the coolant
surge tank.
5. Replace the cap tightly.
6. Check the level in the surge tank when the cooling system
has cooled down. If the coolant
is not at the proper level,
repeat Steps 1–6 and reinstall
the pressure cap. If the coolant
still is not at the proper level
when the system cools down
again, see your dealer.
Caution
If the pressure cap is not tightly
installed, coolant loss and engine
damage may occur. Be sure the
cap is properly and tightly
secured.
Engine Overheating
The vehicle has an engine coolant
temperature gauge on the
instrument cluster to warn of engine
overheating. See Engine Coolant
Temperature Gauge 0101. If the decision is made not to lift the
hood when this warning appears,
get service help right away. Contact
your dealer for additional
information.
If the decision is made to lift the
hood, make sure the vehicle is
parked on a level surface.
Then check to see if the engine
cooling fans are running. If the
engine is overheating, both fans
should be running. If they are not,
do not continue to run the engine.
Have the vehicle serviced.
Caution
Do not run the engine if there is a
leak in the engine cooling system.
This can cause a loss of all
coolant and can damage the
system and vehicle. Have any
leaks fixed right away.
Page 235 of 358
Chevrolet Malibu Owner Manual (GMNA-Localizing-U.S./Canada/Mexico-
13555849) - 2020 - CRC - 8/21/19
234 Vehicle Care
Negative Battery Cable
ReconnectionCaution
When reconnecting the battery:. Use the original nut from the
vehicle to secure the
negative battery cable. Do
not use a different nut.
If you need a replacement
nut, see your dealer.
. Tighten the nut with a hand
tool. Do not use an impact
wrench or power tools to
tighten the nut.
The vehicle could be damaged if
these guidelines are not followed.
Caution
Do not use paints, lubricants,
or corrosion inhibitors on the nut
that secures the negative battery
cable to the vehicle. This could
damage the vehicle. For vehicles equipped with the 2.0L
engine:
1. Install the negative battery cable clamp to the negative
battery post.
2. Tighten the negative battery cable nut.
3. Turn the ignition on.
Starter Switch Check
{Warning
When you are doing this
inspection, the vehicle could
move suddenly. If the vehicle
moves, you or others could be
injured.
1. Before starting this check, be sure there is enough room
around the vehicle.
2. Apply both the parking brake and the regular brake. Do not use the accelerator
pedal, and be ready to turn off
the engine immediately if it
starts.
3. Try to start the engine in each gear. The vehicle should start
only in P (Park) or N (Neutral).
If the vehicle starts in any other
position, contact your dealer for
service.
Automatic Transmission
Shift Lock Control
Function Check
{Warning
When you are doing this
inspection, the vehicle could
move suddenly. If the vehicle
moves, you or others could be
injured.
1. Before starting this check, be sure there is enough room
around the vehicle. It should be
parked on a level surface.
Page 272 of 358
Chevrolet Malibu Owner Manual (GMNA-Localizing-U.S./Canada/Mexico-
13555849) - 2020 - CRC - 8/21/19
Vehicle Care 271
Used Replacement Wheels
{Warning
Replacing a wheel with a used
one is dangerous. How it has
been used or how far it has been
driven may be unknown. It could
fail suddenly and cause a crash.
When replacing wheels, use a
new GM original equipment
wheel.
Tire Chains
{Warning
If the vehicle has 245/45R18 or
245/40R19 size tires, do not use
tire chains. There is not enough
clearance. Tire chains used on a
vehicle without the proper amount
of clearance can cause damage
to the brakes, suspension,
or other vehicle parts. The area
damaged by the tire chains could(Continued)
Warning (Continued)
cause loss of control and a crash.
Use another type of traction
device only if its manufacturer
recommends it for the vehicle's
tire size combination and road
conditions. Follow that
manufacturer's instructions. To
avoid vehicle damage, drive slow
and readjust or remove the
traction device if it contacts the
vehicle. Do not spin the wheels. If
traction devices are used, install
them on the front tires.
Caution
If the vehicle is equipped with a
tire size other than 245/45R18 or
245/40R19, use tire chains only
where legal and only when
necessary. Use low profile chains
that add no more than 12 mm
thickness to the tire tread and
(Continued)
Caution (Continued)
inner sidewall. Use chains that
are the proper size for the tires.
Install them on the tires of the
front axle. Do not use chains on
the tires of the rear axle. Tighten
them as tightly as possible with
the ends securely fastened. Drive
slowly and follow the chain
manufacturer's instructions. If the
chains contact the vehicle, stop
and retighten them. If the contact
continues, slow down until it
stops. Driving too fast or spinning
the wheels with chains on will
damage the vehicle.
If a Tire Goes Flat
It is unusual for a tire to blow out
while driving, especially if the tires
are maintained properly. See Tires
0 250. If air goes out of a tire, it is
much more likely to leak out slowly.
But if there is ever a blowout, here
are a few tips about what to expect
and what to do:
Page 285 of 358
Chevrolet Malibu Owner Manual (GMNA-Localizing-U.S./Canada/Mexico-
13555849) - 2020 - CRC - 8/21/19
284 Vehicle Care
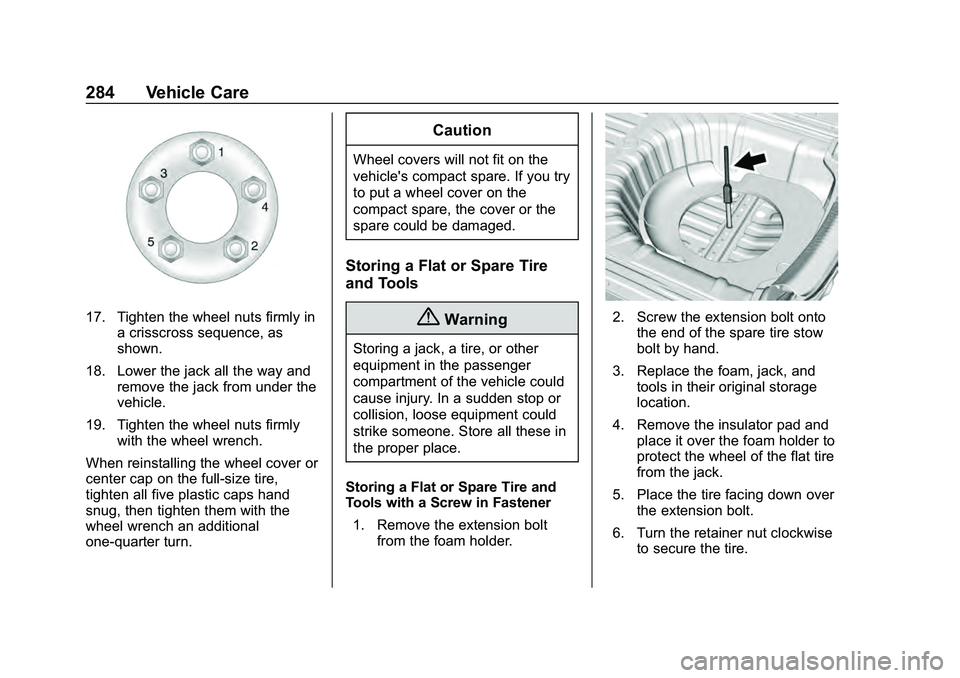
17. Tighten the wheel nuts firmly ina crisscross sequence, as
shown.
18. Lower the jack all the way and remove the jack from under the
vehicle.
19. Tighten the wheel nuts firmly with the wheel wrench.
When reinstalling the wheel cover or
center cap on the full-size tire,
tighten all five plastic caps hand
snug, then tighten them with the
wheel wrench an additional
one-quarter turn.
Caution
Wheel covers will not fit on the
vehicle's compact spare. If you try
to put a wheel cover on the
compact spare, the cover or the
spare could be damaged.
Storing a Flat or Spare Tire
and Tools
{Warning
Storing a jack, a tire, or other
equipment in the passenger
compartment of the vehicle could
cause injury. In a sudden stop or
collision, loose equipment could
strike someone. Store all these in
the proper place.
Storing a Flat or Spare Tire and
Tools with a Screw in Fastener 1. Remove the extension bolt from the foam holder.
2. Screw the extension bolt ontothe end of the spare tire stow
bolt by hand.
3. Replace the foam, jack, and tools in their original storage
location.
4. Remove the insulator pad and place it over the foam holder to
protect the wheel of the flat tire
from the jack.
5. Place the tire facing down over the extension bolt.
6. Turn the retainer nut clockwise to secure the tire.
Page 290 of 358
Chevrolet Malibu Owner Manual (GMNA-Localizing-U.S./Canada/Mexico-
13555849) - 2020 - CRC - 8/21/19
Vehicle Care 289
Towing the Vehicle
Caution
Incorrectly towing a disabled
vehicle may cause damage. The
damage would not be covered by
the vehicle warranty. Do not lash
or hook to suspension
components. Use the proper
straps around the tires to secure
the vehicle. Do not drag a locked
wheel/tire. Use tire skates or
dollies under any locked wheel/
tire while loading the vehicle. Do
not use a sling type lift to tow the
vehicle. This could damage the
vehicle.
Caution
If the vehicle cannot be shifted
into Neutral (N), do not use the
tow eye to tow the vehicle.
Vehicle damage may occur.GM recommends a flatbed tow truck
to transport a disabled vehicle. Use
ramps to help reduce approach
angles, if necessary. A towed
vehicle should have its drive wheels
off the ground. Contact Roadside
Assistance or a professional towing
service if the disabled vehicle must
be towed.
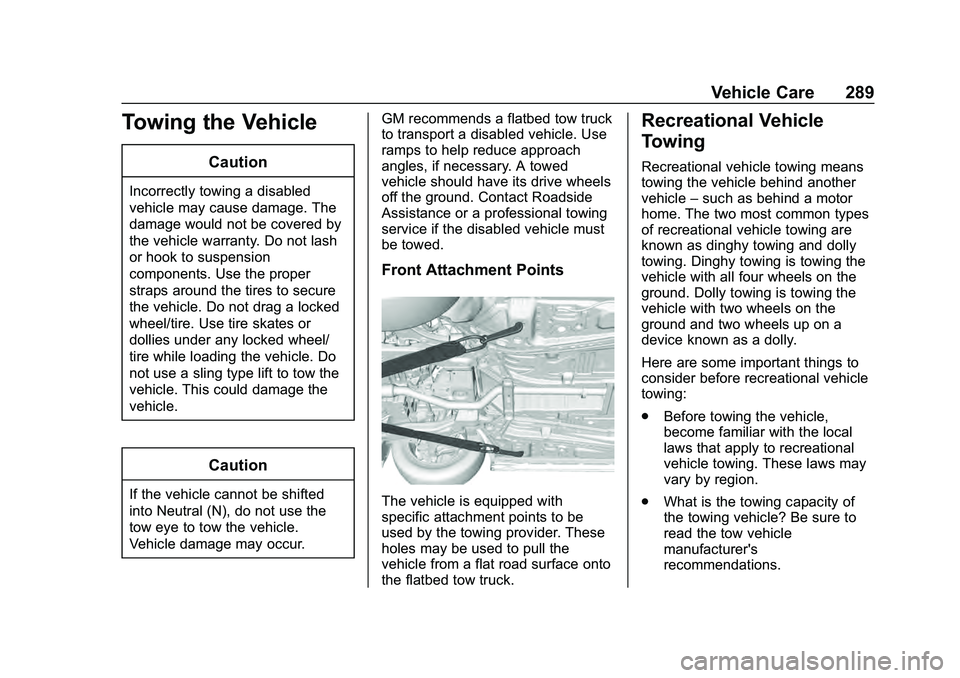
Front Attachment Points
The vehicle is equipped with
specific attachment points to be
used by the towing provider. These
holes may be used to pull the
vehicle from a flat road surface onto
the flatbed tow truck.
Recreational Vehicle
Towing
Recreational vehicle towing means
towing the vehicle behind another
vehicle
–such as behind a motor
home. The two most common types
of recreational vehicle towing are
known as dinghy towing and dolly
towing. Dinghy towing is towing the
vehicle with all four wheels on the
ground. Dolly towing is towing the
vehicle with two wheels on the
ground and two wheels up on a
device known as a dolly.
Here are some important things to
consider before recreational vehicle
towing:
. Before towing the vehicle,
become familiar with the local
laws that apply to recreational
vehicle towing. These laws may
vary by region.
. What is the towing capacity of
the towing vehicle? Be sure to
read the tow vehicle
manufacturer's
recommendations.
Page 291 of 358
Chevrolet Malibu Owner Manual (GMNA-Localizing-U.S./Canada/Mexico-
13555849) - 2020 - CRC - 8/21/19
290 Vehicle Care
.How far will the vehicle be
towed? Some vehicles have
restrictions on how far and how
long they can tow.
. Does the vehicle have the
proper towing equipment? See
your dealer or trailering
professional for additional advice
and equipment
recommendations.
. Is the vehicle ready to be
towed? Just as preparing the
vehicle for a long trip, make sure
the vehicle is prepared to be
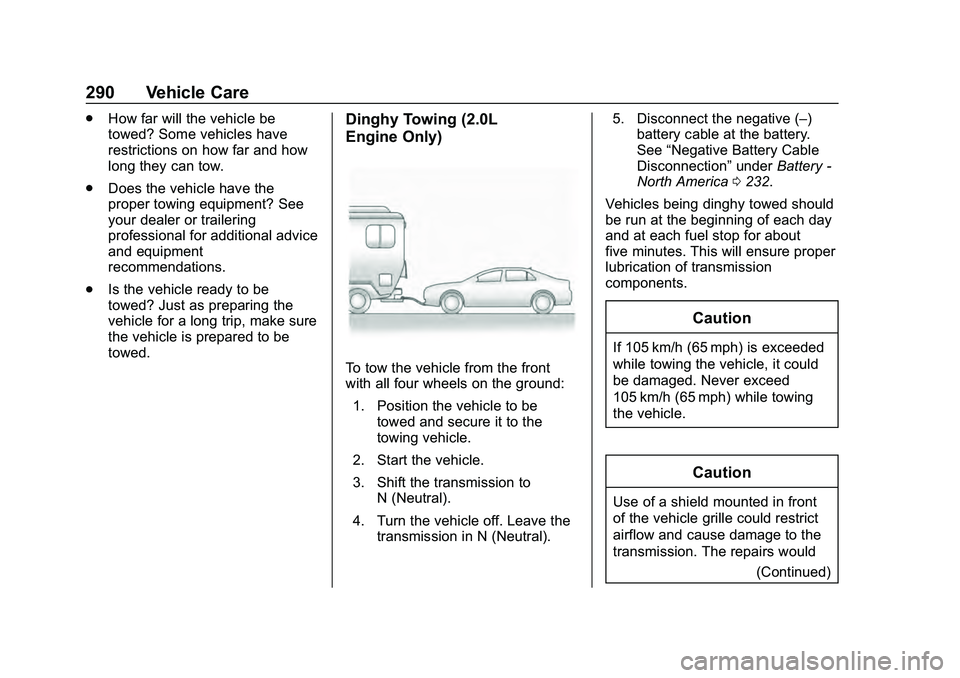
towed.Dinghy Towing (2.0L
Engine Only)
To tow the vehicle from the front
with all four wheels on the ground:
1. Position the vehicle to be towed and secure it to the
towing vehicle.
2. Start the vehicle.
3. Shift the transmission to N (Neutral).
4. Turn the vehicle off. Leave the transmission in N (Neutral). 5. Disconnect the negative (–)
battery cable at the battery.
See “Negative Battery Cable
Disconnection” underBattery -
North America 0232.
Vehicles being dinghy towed should
be run at the beginning of each day
and at each fuel stop for about
five minutes. This will ensure proper
lubrication of transmission
components.
Caution
If 105 km/h (65 mph) is exceeded
while towing the vehicle, it could
be damaged. Never exceed
105 km/h (65 mph) while towing
the vehicle.
Caution
Use of a shield mounted in front
of the vehicle grille could restrict
airflow and cause damage to the
transmission. The repairs would (Continued)
Page 292 of 358
Chevrolet Malibu Owner Manual (GMNA-Localizing-U.S./Canada/Mexico-
13555849) - 2020 - CRC - 8/21/19
Vehicle Care 291
Caution (Continued)
not be covered by the vehicle
warranty. If using a shield, only
use one that attaches to the
towing vehicle.
Caution
Do not tow a vehicle with the front
drive wheels on the ground if one
of the front tires is a compact
spare tire. Towing with two
different tire sizes on the front of
the vehicle can cause severe
damage to the transmission.
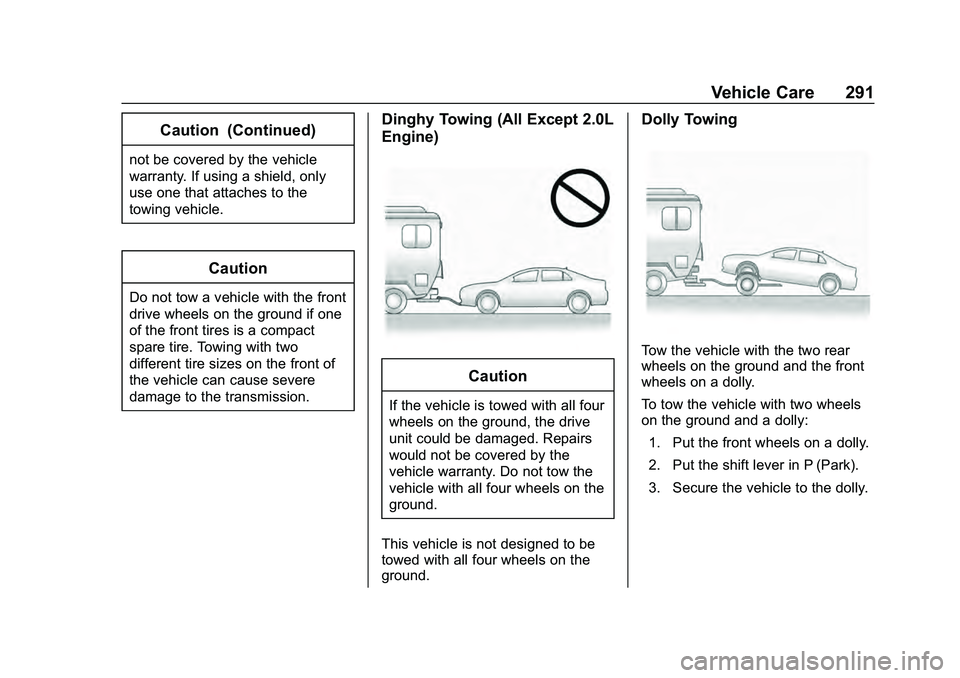
Dinghy Towing (All Except 2.0L
Engine)
Caution
If the vehicle is towed with all four
wheels on the ground, the drive
unit could be damaged. Repairs
would not be covered by the
vehicle warranty. Do not tow the
vehicle with all four wheels on the
ground.
This vehicle is not designed to be
towed with all four wheels on the
ground.
Dolly Towing
Tow the vehicle with the two rear
wheels on the ground and the front
wheels on a dolly.
To tow the vehicle with two wheels
on the ground and a dolly: 1. Put the front wheels on a dolly.
2. Put the shift lever in P (Park).
3. Secure the vehicle to the dolly.
Page 302 of 358
Chevrolet Malibu Owner Manual (GMNA-Localizing-U.S./Canada/Mexico-
13555849) - 2020 - CRC - 8/21/19
Vehicle Care 301
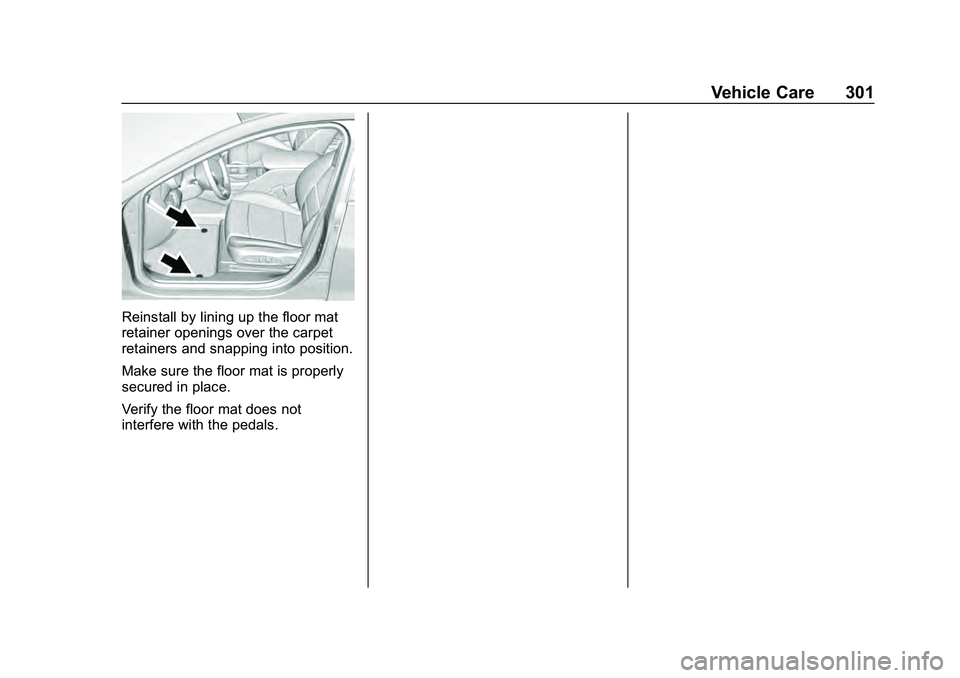
Reinstall by lining up the floor mat
retainer openings over the carpet
retainers and snapping into position.
Make sure the floor mat is properly
secured in place.
Verify the floor mat does not
interfere with the pedals.