2020 CHEVROLET MALIBU Start car
[x] Cancel search: Start carPage 250 of 358

Chevrolet Malibu Owner Manual (GMNA-Localizing-U.S./Canada/Mexico-
13555849) - 2020 - CRC - 8/21/19
Vehicle Care 249
FusesUsage
F22 –
F23 Electric steering column lock
F24 Sensing and diagnostic module/
Automatic occupant
sensing (Airbag)
F25 Data link connector
F26 –
F27 AC DC inverter
F28 –
F29 Body control module 8
F30 Overhead console
F31 Steering wheel controls
F32 –
F33 Heating, ventilation, and air conditioning
F34 Central gateway module
F35 – Fuses
Usage
F36 Wireless charger/USB charger
F37 Front accessory power outlets/
Cigarette lighter –
China only
F38 OnStar
F39 Display
F40 Obstacle detection
F41 Body control module 1 (with Stop/Start
option)
F42 Radio
F43 –
F44 Console accessory power outlet –rear
Relays Usage
K1 –
K2 Retained accessory power
K3 –
K4 – Relays
Usage
K5 –
Page 261 of 358
Chevrolet Malibu Owner Manual (GMNA-Localizing-U.S./Canada/Mexico-
13555849) - 2020 - CRC - 8/21/19
260 Vehicle Care
Accordingly, when the low tire
pressure telltale illuminates, you
should stop and check your tires as
soon as possible, and inflate them
to the proper pressure. Driving on a
significantly under-inflated tire
causes the tire to overheat and can
lead to tire failure. Under-inflation
also reduces fuel efficiency and tire
tread life, and may affect the
vehicle's handling and stopping
ability.
Please note that the TPMS is not a
substitute for proper tire
maintenance, and it is the driver's
responsibility to maintain correct tire
pressure, even if under-inflation has
not reached the level to trigger
illumination of the TPMS low tire
pressure telltale.
Your vehicle has also been
equipped with a TPMS malfunction
indicator to indicate when the
system is not operating properly.
The TPMS malfunction indicator is
combined with the low tire pressure
telltale. When the system detects a
malfunction, the telltale will flash for
approximately one minute and thenremain continuously illuminated.
This sequence will continue upon
subsequent vehicle start-ups as
long as the malfunction exists.
When the malfunction indicator is
illuminated, the system may not be
able to detect or signal low tire
pressure as intended. TPMS
malfunctions may occur for a variety
of reasons, including the installation
of replacement or alternate tires or
wheels on the vehicle that prevent
the TPMS from functioning properly.
Always check the TPMS malfunction
telltale after replacing one or more
tires or wheels on your vehicle to
ensure that the replacement or
alternate tires and wheels allow the
TPMS to continue to function
properly.
See
Tire Pressure Monitor
Operation 0260.
See Radio Frequency Statement
0 329.Tire Pressure Monitor
Operation
This vehicle may have a Tire
Pressure Monitor System (TPMS).
The TPMS is designed to warn the
driver when a low tire pressure
condition exists. TPMS sensors are
mounted onto each tire and wheel
assembly, excluding the spare tire
and wheel assembly. The TPMS
sensors monitor the air pressure in
the tires and transmit the tire
pressure readings to a receiver
located in the vehicle.
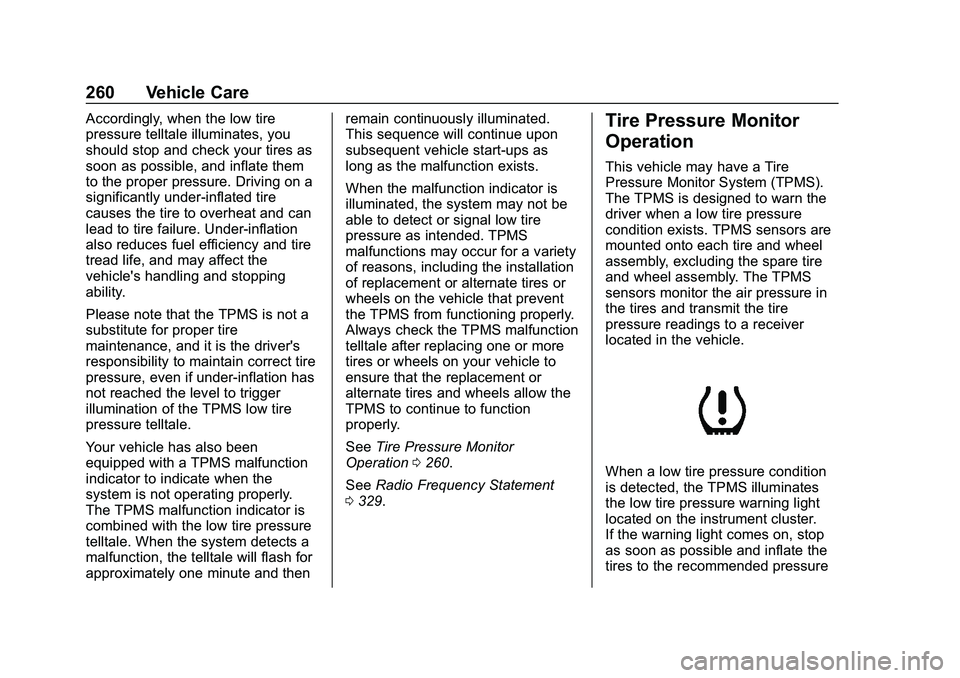
When a low tire pressure condition
is detected, the TPMS illuminates
the low tire pressure warning light
located on the instrument cluster.
If the warning light comes on, stop
as soon as possible and inflate the
tires to the recommended pressure
Page 262 of 358
Chevrolet Malibu Owner Manual (GMNA-Localizing-U.S./Canada/Mexico-
13555849) - 2020 - CRC - 8/21/19
Vehicle Care 261
shown on the Tire and Loading
Information label. SeeVehicle Load
Limits 0151.
A message to check the pressure in
a specific tire displays in the Driver
Information Center (DIC). The low
tire pressure warning light and the
DIC warning message come on at
each ignition cycle until the tires are
inflated to the correct inflation
pressure. Using the DIC, tire
pressure levels can be viewed. For
additional information and details
about the DIC operation and
displays see Driver Information
Center (DIC) (Base Level) 0113 or
Driver Information Center (DIC)
(Uplevel) 0116.
The low tire pressure warning light
may come on in cool weather when
the vehicle is first started, and then
turn off as the vehicle is driven. This
could be an early indicator that the
air pressure is getting low and
needs to be inflated to the proper
pressure.
A Tire and Loading Information
label, attached to your vehicle,
shows the size of the original equipment tires and the correct
inflation pressure for the tires when
they are cold. See
Vehicle Load
Limits 0151, for an example of the
Tire and Loading Information label
and its location. Also see Tire
Pressure 0257.
The TPMS can warn about a low
tire pressure condition but it does
not replace normal tire
maintenance. See Tire Inspection
0 264, Tire Rotation 0265 and
Tires 0250.
Caution
Tire sealant materials are not all
the same. A non-approved tire
sealant could damage the TPMS
sensors. TPMS sensor damage
caused by using an incorrect tire
sealant is not covered by the
vehicle warranty. Always use only
the GM approved tire sealant
available through your dealer or
included in the vehicle. Factory-installed Tire Inflator Kits
use a GM-approved liquid tire
sealant. Using non-approved tire
sealants could damage the TPMS
sensors. See
Tire Sealant and
Compressor Kit 0273 for
information regarding the inflator kit
materials and instructions.
TPMS Malfunction Light and
Message
The TPMS will not function properly
if one or more of the TPMS sensors
are missing or inoperable. When the
system detects a malfunction, the
low tire pressure warning light
flashes for about one minute and
then stays on for the remainder of
the ignition cycle. A DIC warning
message also displays. The
malfunction light and DIC warning
message come on at each ignition
cycle until the problem is corrected.
Some of the conditions that can
cause these to come on are:
. One of the road tires has been
replaced with the spare tire. The
spare tire does not have a
TPMS sensor. The malfunction
Page 264 of 358
Chevrolet Malibu Owner Manual (GMNA-Localizing-U.S./Canada/Mexico-
13555849) - 2020 - CRC - 8/21/19
Vehicle Care 263
To release and correct the pressure,
while the turn signal lamp is still
flashing, briefly press the center of
the valve stem. When the
recommended pressure is reached,
the horn sounds once.
If the turn signal lamp does not flash
within 15 seconds after starting to
inflate the tire, the tire fill alert has
not been activated or is not working.
If the hazard warning flashers are
on, the tire fill alert visual feedback
will not work properly.
The TPMS will not activate the tire
fill alert properly under the following
conditions:
.There is interference from an
external device or transmitter.
. The air pressure from the
inflation device is not sufficient
to inflate the tire.
. There is a malfunction in
the TPMS.
. There is a malfunction in the
horn or turn signal lamps. .
The identification code of the
TPMS sensor is not registered to
the system.
. The battery of the TPMS sensor
is low.
If the tire fill alert does not operate
due to TPMS interference, move the
vehicle about 1 m (3 ft) back or
forward and try again. If the tire fill
alert feature is not working, use a
tire pressure gauge.
TPMS Sensor Matching
Process
Each TPMS sensor has a unique
identification code. The identification
code needs to be matched to a new
tire/wheel position after rotating the
vehicle’s tires or replacing one or
more of the TPMS sensors. The
TPMS sensor matching process
should also be performed after
replacing a spare tire with a road
tire containing the TPMS sensor.
The malfunction light and the DIC
message should go off at the next
ignition cycle. The sensors are
matched to the tire/wheel positions,
using a TPMS relearn tool, in the following order: driver side front tire,
passenger side front tire, passenger
side rear tire, and driver side rear
tire. See your dealer for service or
to purchase a relearn tool. A TPMS
relearn tool can also be purchased.
See Tire Pressure Monitor Sensor
Activation Tool at
www.gmtoolsandequipment.com or
call 1-800-GM TOOLS
(1-800-468-6657).
There are two minutes to match the
first tire/wheel position, and
five minutes overall to match all four
tire/wheel positions. If it takes
longer, the matching process stops
and must be restarted.
The TPMS sensor matching
process is:
1. Set the parking brake.
2. Place the vehicle in Service Mode. See Ignition Positions
0 155.
3. If equipped, make sure the Tire Pressure info page option is
turned on. The info pages on
the DIC can be turned on and
off through the Options menu.
Page 265 of 358
Chevrolet Malibu Owner Manual (GMNA-Localizing-U.S./Canada/Mexico-
13555849) - 2020 - CRC - 8/21/19
264 Vehicle Care
SeeDriver Information Center
(DIC) (Base Level) 0113 or
Driver Information Center (DIC)
(Uplevel) 0116.
4. Use the DIC controls on the right side of the steering wheel
to scroll to the Tire Pressure
screen under the DIC
info page.
5. Press and hold
Vin the center
of the DIC controls.
A message requesting
acceptance of the process may
display.
The horn sounds twice to
signal the receiver is in relearn
mode and the TIRE
LEARNING ACTIVE message
displays on the DIC display.
6. Start with the driver side front tire.
7. Place the relearn tool against the tire sidewall, near the valve
stem. Then press the button to
activate the TPMS sensor.
A horn chirp confirms that the sensor identification code has
been matched to this tire and
wheel position.
8. Proceed to the passenger side front tire, and repeat the
procedure in Step 7.
9. Proceed to the passenger side rear tire, and repeat the
procedure in Step 7.
10. Proceed to the driver side rear tire, and repeat the procedure
in Step 7. The horn sounds two
times to indicate the sensor
identification code has been
matched to the driver side rear
tire, and the TPMS sensor
matching process is no longer
active. The TIRE LEARNING
ACTIVE message on the DIC
display goes off.
11. Turn the vehicle off.
12. Set all four tires to the recommended air pressure
level as indicated on the Tire
and Loading Information label.
Tire Inspection
We recommend that the tires,
including the spare tire, if the
vehicle has one, be inspected
for signs of wear or damage at
least once a month.
Replace the tire if:
.The indicators at three or
more places around the tire
can be seen.
.There is cord or fabric
showing through the tire's
rubber.
.The tread or sidewall is
cracked, cut, or snagged
deep enough to show cord or
fabric.
.The tire has a bump, bulge,
or split.
.The tire has a puncture, cut,
or other damage that cannot
be repaired well because of
the size or location of the
damage.
Page 273 of 358
Chevrolet Malibu Owner Manual (GMNA-Localizing-U.S./Canada/Mexico-
13555849) - 2020 - CRC - 8/21/19
272 Vehicle Care
If a front tire fails, the flat tire
creates a drag that pulls the vehicle
toward that side. Take your foot off
the accelerator pedal and grip the
steering wheel firmly. Steer to
maintain lane position, and then
gently brake to a stop, well off the
road, if possible.
A rear blowout, particularly on a
curve, acts much like a skid and
may require the same correction as
used in a skid. Stop pressing the
accelerator pedal and steer to
straighten the vehicle. It may be
very bumpy and noisy. Gently brake
to a stop, well off the road,
if possible.
{Warning
Driving on a flat tire will cause
permanent damage to the tire.
Re-inflating a tire after it has been
driven on while severely
underinflated or flat may cause a
blowout and a serious crash.
Never attempt to re-inflate a tire(Continued)
Warning (Continued)
that has been driven on while
severely underinflated or flat.
Have your dealer or an authorized
tire service center repair or
replace the flat tire as soon as
possible.
{Warning
Lifting a vehicle and getting under
it to do maintenance or repairs is
dangerous without the
appropriate safety equipment and
training. If a jack is provided with
the vehicle, it is designed only for
changing a flat tire. If it is used for
anything else, you or others could
be badly injured or killed if the
vehicle slips off the jack. If a jack
is provided with the vehicle, only
use it for changing a flat tire. If a tire goes flat, avoid further tire
and wheel damage by driving slowly
to a level place, well off the road,
if possible. Turn on the hazard
warning flashers. See
Hazard
Warning Flashers 0128.
{Warning
Changing a tire can be
dangerous. The vehicle can slip
off the jack and roll over or fall
causing injury or death. Find a
level place to change the tire. To
help prevent the vehicle from
moving:
1. Set the parking brake firmly.
2. Put an automatictransmission in P (Park) or a
manual transmission in
1 (First) or R (Reverse).
3. Turn off the engine and do not restart while the vehicle
is raised.
4. Do not allow passengers to remain in the vehicle.
(Continued)
Page 277 of 358
Chevrolet Malibu Owner Manual (GMNA-Localizing-U.S./Canada/Mexico-
13555849) - 2020 - CRC - 8/21/19
276 Vehicle Care
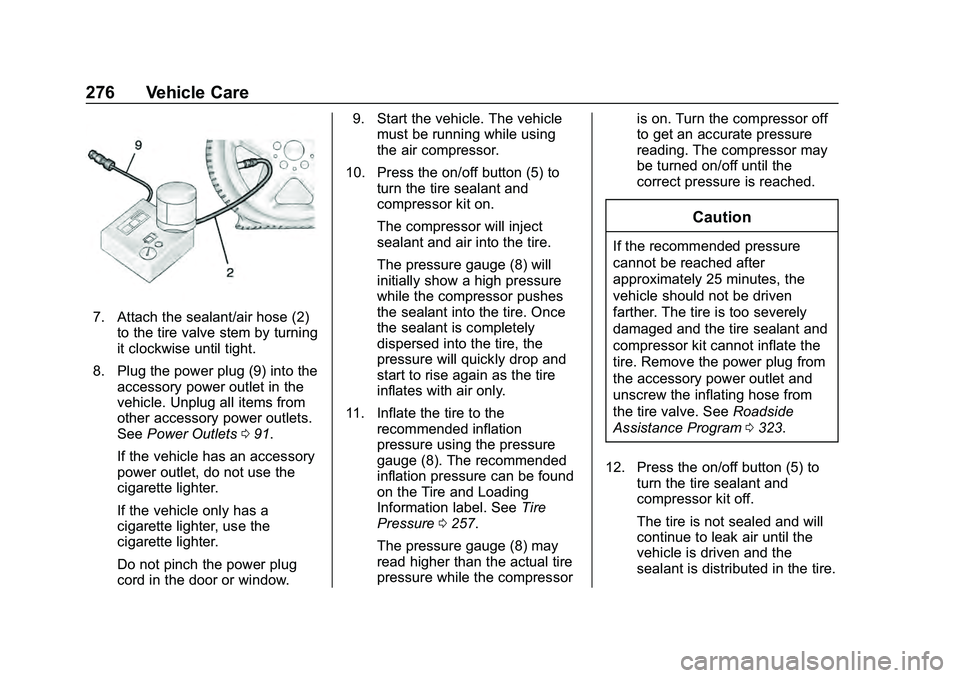
7. Attach the sealant/air hose (2)to the tire valve stem by turning
it clockwise until tight.
8. Plug the power plug (9) into the accessory power outlet in the
vehicle. Unplug all items from
other accessory power outlets.
See Power Outlets 091.
If the vehicle has an accessory
power outlet, do not use the
cigarette lighter.
If the vehicle only has a
cigarette lighter, use the
cigarette lighter.
Do not pinch the power plug
cord in the door or window. 9. Start the vehicle. The vehicle
must be running while using
the air compressor.
10. Press the on/off button (5) to turn the tire sealant and
compressor kit on.
The compressor will inject
sealant and air into the tire.
The pressure gauge (8) will
initially show a high pressure
while the compressor pushes
the sealant into the tire. Once
the sealant is completely
dispersed into the tire, the
pressure will quickly drop and
start to rise again as the tire
inflates with air only.
11. Inflate the tire to the recommended inflation
pressure using the pressure
gauge (8). The recommended
inflation pressure can be found
on the Tire and Loading
Information label. See Tire
Pressure 0257.
The pressure gauge (8) may
read higher than the actual tire
pressure while the compressor is on. Turn the compressor off
to get an accurate pressure
reading. The compressor may
be turned on/off until the
correct pressure is reached.
Caution
If the recommended pressure
cannot be reached after
approximately 25 minutes, the
vehicle should not be driven
farther. The tire is too severely
damaged and the tire sealant and
compressor kit cannot inflate the
tire. Remove the power plug from
the accessory power outlet and
unscrew the inflating hose from
the tire valve. See
Roadside
Assistance Program 0323.
12. Press the on/off button (5) to turn the tire sealant and
compressor kit off.
The tire is not sealed and will
continue to leak air until the
vehicle is driven and the
sealant is distributed in the tire.
Page 280 of 358
Chevrolet Malibu Owner Manual (GMNA-Localizing-U.S./Canada/Mexico-
13555849) - 2020 - CRC - 8/21/19
Vehicle Care 279
If the vehicle only has a
cigarette lighter, use the
cigarette lighter.
Do not pinch the power plug
cord in the door or window.
7. Start the vehicle. The vehicle must be running while using
the air compressor.
8. Press the on/off button (5) to turn the tire sealant and
compressor kit on.
The compressor will inflate the
tire with air only.
9. Inflate the tire to the recommended inflation
pressure using the pressure
gauge (8). The recommended
inflation pressure can be found
on the Tire and Loading
Information label. See Tire
Pressure 0257.
The pressure gauge (8) may
read higher than the actual tire
pressure while the compressor
is on. Turn the compressor off
to get an accurate pressure reading. The compressor may
be turned on/off until the
correct pressure is reached.
Caution
If the recommended pressure
cannot be reached after
approximately 25 minutes, the
vehicle should not be driven
farther. The tire is too severely
damaged and the tire sealant and
compressor kit cannot inflate the
tire. Remove the power plug from
the accessory power outlet and
unscrew the inflating hose from
the tire valve. See
Roadside
Assistance Program 0323.
10. Press the on/off button (5) to turn the tire sealant and
compressor kit off.
Be careful while handling the
compressor as it could be
warm after usage.
11. Unplug the power plug (9) from the accessory power outlet in
the vehicle. 12. Turn the air only hose (10)
counterclockwise to remove it
from the tire valve stem.
13. Replace the tire valve stem cap.
14. Return the air only hose (10) and power plug (9) back to
their original storage location.
15. Return the equipment to its original storage location in the
vehicle.
The tire sealant and compressor kit
has accessory adapters located in a
compartment on the bottom of its
housing that can be used to inflate
air mattresses, balls, etc.
Storing the Tire Sealant
and Compressor Kit
To access the tire sealant and
compressor kit: 1. Open the trunk. See Trunk
0 22.
2. Lift the cover.