2020 CHEVROLET MALIBU transmitter
[x] Cancel search: transmitterPage 124 of 358
Chevrolet Malibu Owner Manual (GMNA-Localizing-U.S./Canada/Mexico-
13555849) - 2020 - CRC - 8/16/19
Instruments and Controls 123
Exit Lighting
This setting specifies how long the
headlamps stay on after the vehicle
is turned off and exited.
Touch Off, 30 Seconds, 60 Seconds,
or 120 Seconds.
Power Door Locks
Touch and the following may
display:
.Open Door Anti Lock Out
. Auto Door Unlock
. Delayed Door Lock
Open Door Anti Lock Out
This setting prevents the driver door
from locking when the door is open.
If this setting is on, the Delayed
Door Lock menu will not be
available.
Touch Off or On.
Auto Door Unlock
This allows selection of which of the
doors will automatically unlock when
the vehicle is shifted into P (Park).
Touch Off, All Doors, or Driver Door. Delayed Door Lock
When on, this feature will delay the
locking of the doors. To override the
delay, press the power door lock
switch on the door.
Touch Off or On.
Remote Lock, Unlock, Start
Touch and the following may
display:
.
Remote Unlock Light Feedback
. Remote Lock Feedback
. Remote Door Unlock
. Remote Start Auto Cool Seats
. Remote Start Auto Heat Seats
. Passive Door Unlock
. Passive Door Lock
. Remote Left in Vehicle Alert
Remote Unlock Light Feedback
This setting flashes the exterior
lamps when the vehicle is unlocked
with the RKE transmitter.
Touch Off or Flash Lights. Remote Lock Feedback
This setting specifies how the
vehicle responds when the vehicle
is locked with the RKE transmitter.
Touch Off, Lights and Horn, Lights
Only, or Horn Only.
Remote Door Unlock
This setting specifies whether all
doors, or just the driver door, unlock
when pressing
Kon the RKE
transmitter.
Touch All Doors or Driver Door.
Remote Start Auto Cool Seats
If equipped and turned on, this
feature will turn the ventilated seats
on when using remote start on
warm days.
Touch Off, On-Driver and
Passenger, or On-Driver.
Remote Start Auto Heat Seats
This setting automatically turns on
the heated seats when using the
remote start function on cold days.
Page 125 of 358
Chevrolet Malibu Owner Manual (GMNA-Localizing-U.S./Canada/Mexico-
13555849) - 2020 - CRC - 8/16/19
124 Instruments and Controls
SeeHeated and Ventilated Front
Seats 041 and
Remote Vehicle Start 016.
Touch Off, On-Driver and
Passenger, or On-Driver.
Passive Door Unlock
This setting specifies which doors
unlock when using the button on the
driver door handle to unlock the
vehicle.
Touch All Doors or Driver Door Only.
Passive Door Lock
This setting specifies if the vehicle
will automatically lock, or lock and
provide an alert after all the doors
are closed, and you walk away from
the vehicle with the RKE transmitter.
See Remote Keyless Entry (RKE)
System Operation 08.
Touch Off, On with Horn
Chirp, or On.
Remote Left in Vehicle Alert
This feature sounds an alert when
the RKE transmitter is left in the
vehicle. This menu also enables
Remote No Longer in Vehicle Alert. Touch Off or On.
Seating Position
Touch and the following may
display:
.
Seat Entry Memory
. Seat Exit Memory
Seat Entry Memory
This feature automatically recalls
the previously stored 1 or 2 button
positions when the ignition is
changed from off to on or ACC/
ACCESSORY. See Memory Seats
0 38.
Touch Off or On.
Seat Exit Memory
This feature automatically recalls
the previously stored exit button
positions when the ignition is
changed from on or ACC/
ACCESSORY to off if the driver
door is open or opened. See
Memory Seats 038.
Touch Off or On.
Teen Driver
See “Teen Driver” under“Settings”
in the infotainment manual.
Valet Mode
This will lock the infotainment
system and steering wheel controls.
It may also limit access to vehicle
storage locations, if equipped.
To enable valet mode:
1. Enter a four-digit code on the keypad.
2. Touch Enter to go to the confirmation screen.
3. Re-enter the four-digit code.
Touch Lock or Unlock to lock or
unlock the system. Touch Back to
go back to the previous menu.
Page 132 of 358
Chevrolet Malibu Owner Manual (GMNA-Localizing-U.S./Canada/Mexico-
13555849) - 2020 - CRC - 8/16/19
Lighting 131
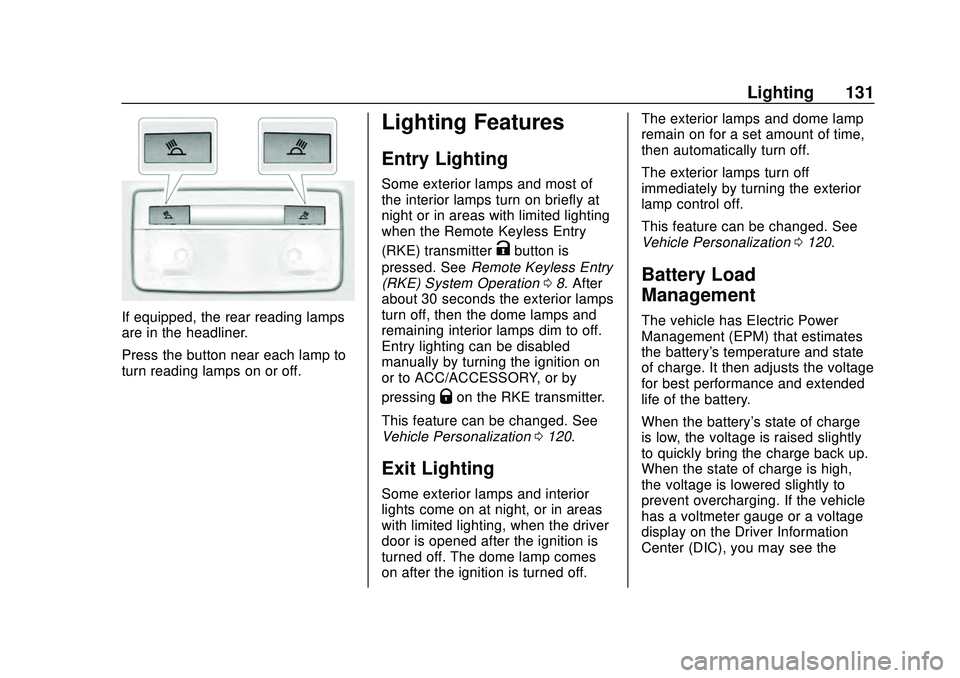
If equipped, the rear reading lamps
are in the headliner.
Press the button near each lamp to
turn reading lamps on or off.
Lighting Features
Entry Lighting
Some exterior lamps and most of
the interior lamps turn on briefly at
night or in areas with limited lighting
when the Remote Keyless Entry
(RKE) transmitter
Kbutton is
pressed. See Remote Keyless Entry
(RKE) System Operation 08. After
about 30 seconds the exterior lamps
turn off, then the dome lamps and
remaining interior lamps dim to off.
Entry lighting can be disabled
manually by turning the ignition on
or to ACC/ACCESSORY, or by
pressing
Qon the RKE transmitter.
This feature can be changed. See
Vehicle Personalization 0120.
Exit Lighting
Some exterior lamps and interior
lights come on at night, or in areas
with limited lighting, when the driver
door is opened after the ignition is
turned off. The dome lamp comes
on after the ignition is turned off. The exterior lamps and dome lamp
remain on for a set amount of time,
then automatically turn off.
The exterior lamps turn off
immediately by turning the exterior
lamp control off.
This feature can be changed. See
Vehicle Personalization
0120.
Battery Load
Management
The vehicle has Electric Power
Management (EPM) that estimates
the battery's temperature and state
of charge. It then adjusts the voltage
for best performance and extended
life of the battery.
When the battery's state of charge
is low, the voltage is raised slightly
to quickly bring the charge back up.
When the state of charge is high,
the voltage is lowered slightly to
prevent overcharging. If the vehicle
has a voltmeter gauge or a voltage
display on the Driver Information
Center (DIC), you may see the
Page 157 of 358
Chevrolet Malibu Owner Manual (GMNA-Localizing-U.S./Canada/Mexico-
13555849) - 2020 - CRC - 8/16/19
156 Driving and Operating
The RKE transmitter must be in the
vehicle for the system to operate.
If the pushbutton start is not
working, the vehicle may be near a
strong radio antenna signal causing
interference to the Keyless Access
system. SeeRemote Keyless Entry
(RKE) System Operation 08.
To shift out of P (Park), the ignition
must be on or in Service Mode, and
the brake pedal must be applied.
Stopping the Engine/LOCK/
OFF (No Indicator Lights) : When
the vehicle is stopped, press
ENGINE START/STOP once to turn
the engine off.
If the vehicle is in P (Park), the
ignition will turn off, and Retained
Accessory Power (RAP) will remain
active. See Retained Accessory
Power (RAP) 0160.
If the vehicle is not in P (Park), the
ignition will return to ACC/
ACCESSORY and display the
message SHIFT TO PARK in the
Driver Information Center (DIC).
When the vehicle is shifted into
P (Park), the ignition will turn off. Do not turn the engine off when the
vehicle is moving. This will cause a
loss of power assist in the brake
and steering systems and disable
the airbags.
If the vehicle must be shut off in an
emergency:
1. Brake using a firm and steady pressure. Do not pump the
brakes repeatedly. This may
deplete power assist, requiring
increased brake pedal force.
2. Shift the vehicle to N (Neutral). This can be done while the
vehicle is moving. After shifting
to N (Neutral), firmly apply the
brakes and steer the vehicle to
a safe location.
3. Come to a complete stop, shift to P (Park), and turn the
ignition off. The shift lever must
be in P (Park) to turn the
ignition off.
4. Set the parking brake. See Electric Parking Brake 0168.{Warning
Turning off the vehicle while
moving may cause loss of power
assist in the brake and steering
systems and disable the airbags.
While driving, only shut the
vehicle off in an emergency.
If the vehicle cannot be pulled over
and must be shut off while driving,
press and hold ENGINE START/
STOP for longer than two seconds,
or press twice in five seconds.
ACC/ACCESSORY (Amber
Indicator Light) : This mode allows
you to use some electrical
accessories when the engine is off.
With the ignition off, pressing the
button one time without the brake
pedal applied will place the ignition
system in ACC/ACCESSORY.
The ignition will switch from ACC/
ACCESSORY to off after
five minutes to prevent battery
run down.
Page 158 of 358
Chevrolet Malibu Owner Manual (GMNA-Localizing-U.S./Canada/Mexico-
13555849) - 2020 - CRC - 8/16/19
Driving and Operating 157
ON/RUN/START (Green Indicator
Light) :This mode is for driving and
starting. With the ignition off, and
the brake pedal applied, pressing
the button once will turn the ignition
on. Once engine cranking begins,
release the button. Engine cranking
will continue until the engine starts.
See Starting the Engine 0157. The
ignition will then remain on.
Service Mode
This power mode is available for
service and diagnostics, and to
verify the proper operation of the
malfunction indicator lamp as may
be required for emission inspection
purposes. With the vehicle off, and
the brake pedal not applied,
pressing and holding the button for
more than five seconds will place
the vehicle in Service Mode. The
instruments and audio systems will
operate as they do with the ignition
on, but the vehicle will not be able
to be driven. The engine will not
start in Service Mode. Press the
button again to turn the vehicle off.Starting the Engine
Move the shift lever to P (Park) or
N (Neutral). The engine will not start
in any other position. To restart the
engine when the vehicle is already
moving, use N (Neutral) only.
Caution
Do not try to shift to P (Park) if the
vehicle is moving. If you do, you
could damage the transmission.
Shift to P (Park) only when the
vehicle is stopped.
Caution
If you add electrical parts or
accessories, you could change
the way the engine operates. Any
resulting damage would not be
covered by the vehicle warranty.
See Add-On Electrical Equipment
0 210. Starting Procedure
1. With the Keyless Access system, the RKE transmitter
must be in the vehicle. Press
ENGINE START/STOP with the
brake pedal applied. When the
engine begins cranking, let go
of the button.
The idle speed will go down as
the engine gets warm. Do not
race the engine immediately
after starting it.
If the RKE transmitter is not in
the vehicle, if there is
interference, or if the RKE
transmitter battery is low, the
Driver Information Center (DIC)
will display a message. See
Driver Information Center (DIC)
(Base Level) 0113 or
Driver Information Center (DIC)
(Uplevel) 0116 and
Remote Keyless Entry (RKE)
System Operation 08.
Page 163 of 358
Chevrolet Malibu Owner Manual (GMNA-Localizing-U.S./Canada/Mexico-
13555849) - 2020 - CRC - 8/16/19
162 Driving and Operating
Parking over Things
That Burn
{Warning
Things that can burn could touch
hot exhaust parts under the
vehicle and ignite. Do not park
over papers, leaves, dry grass,
or other things that can burn.
Active Fuel Management
The vehicle’s engine may be
equipped with Active Fuel
Management, which allows the
engine to operate on either all of its
cylinders, or in reduced cylinder
operation, depending on the driving
conditions.
When less power is required, such
as cruising at a constant vehicle
speed, the system will operate in
reduced operation mode, allowing
the vehicle to achieve better fuel
economy. When greater power
demands are required, such as
accelerating from a stop, passing,or merging onto a highway, the
system will maintain full-cylinder
operation.
If the vehicle has an Active Fuel
Management indicator, see Driver
Information Center (DIC) for more
information on using this display.
Extended Parking
It is best not to park with the vehicle
running. If the vehicle is left running,
be sure it will not move and there is
adequate ventilation.
See
Shifting Into Park 0160 and
Engine Exhaust 0163.
If the vehicle is left parked and
running with the RKE transmitter
outside the vehicle, it will continue
to run for up to half an hour.
If the vehicle is left parked and
running with the RKE transmitter
inside the vehicle, it will continue to
run for up to an hour.
The vehicle could turn off sooner if it
is parked on a hill, due to lack of
available fuel. The timer will reset if the vehicle is
taken out of P (Park) while it is
running.
Page 264 of 358
Chevrolet Malibu Owner Manual (GMNA-Localizing-U.S./Canada/Mexico-
13555849) - 2020 - CRC - 8/21/19
Vehicle Care 263
To release and correct the pressure,
while the turn signal lamp is still
flashing, briefly press the center of
the valve stem. When the
recommended pressure is reached,
the horn sounds once.
If the turn signal lamp does not flash
within 15 seconds after starting to
inflate the tire, the tire fill alert has
not been activated or is not working.
If the hazard warning flashers are
on, the tire fill alert visual feedback
will not work properly.
The TPMS will not activate the tire
fill alert properly under the following
conditions:
.There is interference from an
external device or transmitter.
. The air pressure from the
inflation device is not sufficient
to inflate the tire.
. There is a malfunction in
the TPMS.
. There is a malfunction in the
horn or turn signal lamps. .
The identification code of the
TPMS sensor is not registered to
the system.
. The battery of the TPMS sensor
is low.
If the tire fill alert does not operate
due to TPMS interference, move the
vehicle about 1 m (3 ft) back or
forward and try again. If the tire fill
alert feature is not working, use a
tire pressure gauge.
TPMS Sensor Matching
Process
Each TPMS sensor has a unique
identification code. The identification
code needs to be matched to a new
tire/wheel position after rotating the
vehicle’s tires or replacing one or
more of the TPMS sensors. The
TPMS sensor matching process
should also be performed after
replacing a spare tire with a road
tire containing the TPMS sensor.
The malfunction light and the DIC
message should go off at the next
ignition cycle. The sensors are
matched to the tire/wheel positions,
using a TPMS relearn tool, in the following order: driver side front tire,
passenger side front tire, passenger
side rear tire, and driver side rear
tire. See your dealer for service or
to purchase a relearn tool. A TPMS
relearn tool can also be purchased.
See Tire Pressure Monitor Sensor
Activation Tool at
www.gmtoolsandequipment.com or
call 1-800-GM TOOLS
(1-800-468-6657).
There are two minutes to match the
first tire/wheel position, and
five minutes overall to match all four
tire/wheel positions. If it takes
longer, the matching process stops
and must be restarted.
The TPMS sensor matching
process is:
1. Set the parking brake.
2. Place the vehicle in Service Mode. See Ignition Positions
0 155.
3. If equipped, make sure the Tire Pressure info page option is
turned on. The info pages on
the DIC can be turned on and
off through the Options menu.