2020 CHEVROLET MALIBU trunk
[x] Cancel search: trunkPage 237 of 358
Chevrolet Malibu Owner Manual (GMNA-Localizing-U.S./Canada/Mexico-
13555849) - 2020 - CRC - 8/21/19
236 Vehicle Care
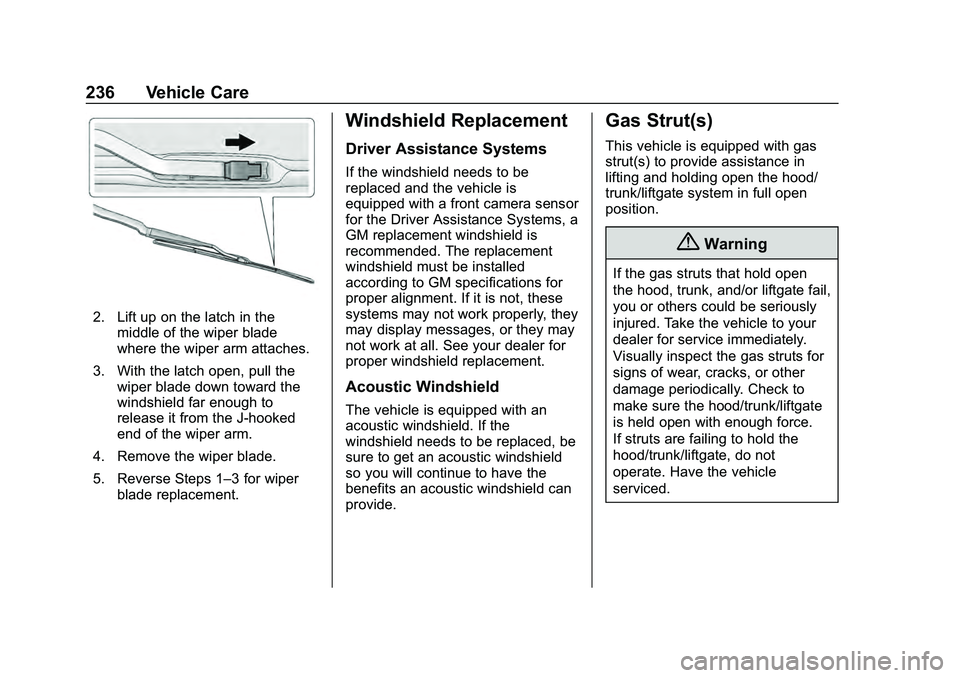
2. Lift up on the latch in themiddle of the wiper blade
where the wiper arm attaches.
3. With the latch open, pull the wiper blade down toward the
windshield far enough to
release it from the J-hooked
end of the wiper arm.
4. Remove the wiper blade.
5. Reverse Steps 1–3 for wiper blade replacement.
Windshield Replacement
Driver Assistance Systems
If the windshield needs to be
replaced and the vehicle is
equipped with a front camera sensor
for the Driver Assistance Systems, a
GM replacement windshield is
recommended. The replacement
windshield must be installed
according to GM specifications for
proper alignment. If it is not, these
systems may not work properly, they
may display messages, or they may
not work at all. See your dealer for
proper windshield replacement.
Acoustic Windshield
The vehicle is equipped with an
acoustic windshield. If the
windshield needs to be replaced, be
sure to get an acoustic windshield
so you will continue to have the
benefits an acoustic windshield can
provide.
Gas Strut(s)
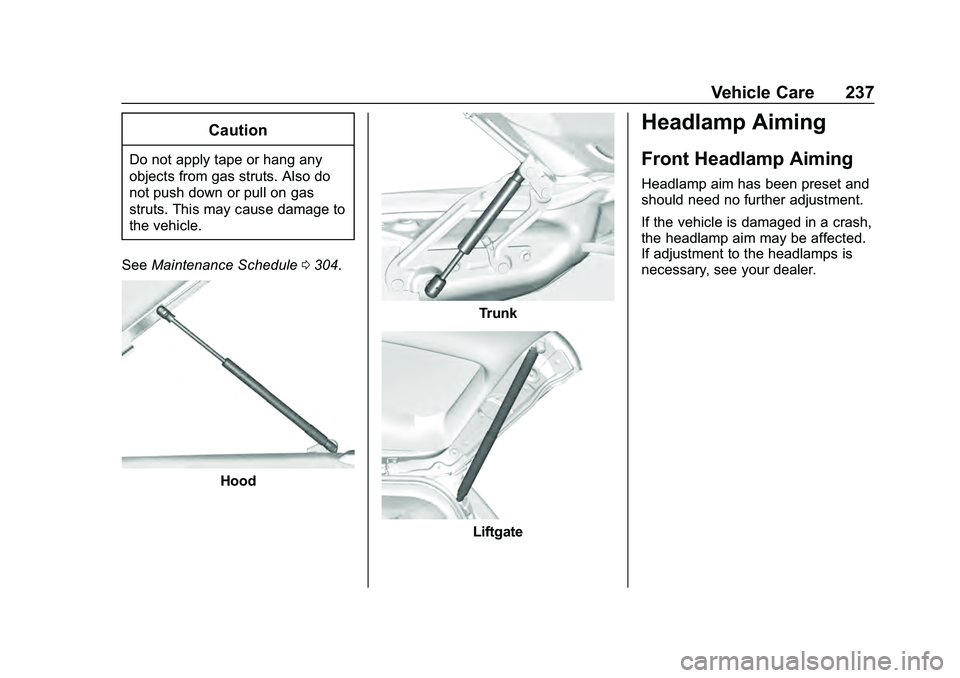
This vehicle is equipped with gas
strut(s) to provide assistance in
lifting and holding open the hood/
trunk/liftgate system in full open
position.
{Warning
If the gas struts that hold open
the hood, trunk, and/or liftgate fail,
you or others could be seriously
injured. Take the vehicle to your
dealer for service immediately.
Visually inspect the gas struts for
signs of wear, cracks, or other
damage periodically. Check to
make sure the hood/trunk/liftgate
is held open with enough force.
If struts are failing to hold the
hood/trunk/liftgate, do not
operate. Have the vehicle
serviced.
Page 238 of 358
Chevrolet Malibu Owner Manual (GMNA-Localizing-U.S./Canada/Mexico-
13555849) - 2020 - CRC - 8/21/19
Vehicle Care 237
Caution
Do not apply tape or hang any
objects from gas struts. Also do
not push down or pull on gas
struts. This may cause damage to
the vehicle.
See Maintenance Schedule 0304.
Hood
Trunk
Liftgate
Headlamp Aiming
Front Headlamp Aiming
Headlamp aim has been preset and
should need no further adjustment.
If the vehicle is damaged in a crash,
the headlamp aim may be affected.
If adjustment to the headlamps is
necessary, see your dealer.
Page 240 of 358
Chevrolet Malibu Owner Manual (GMNA-Localizing-U.S./Canada/Mexico-
13555849) - 2020 - CRC - 8/21/19
Vehicle Care 239
Headlamps (Premier)
See your dealer for replacement.
Front Turn Signal and Parking
Lamps
See your dealer for replacement.
Taillamps, Turn Signal,
Stoplamps, and Back-Up
Lamps (LS and LT)
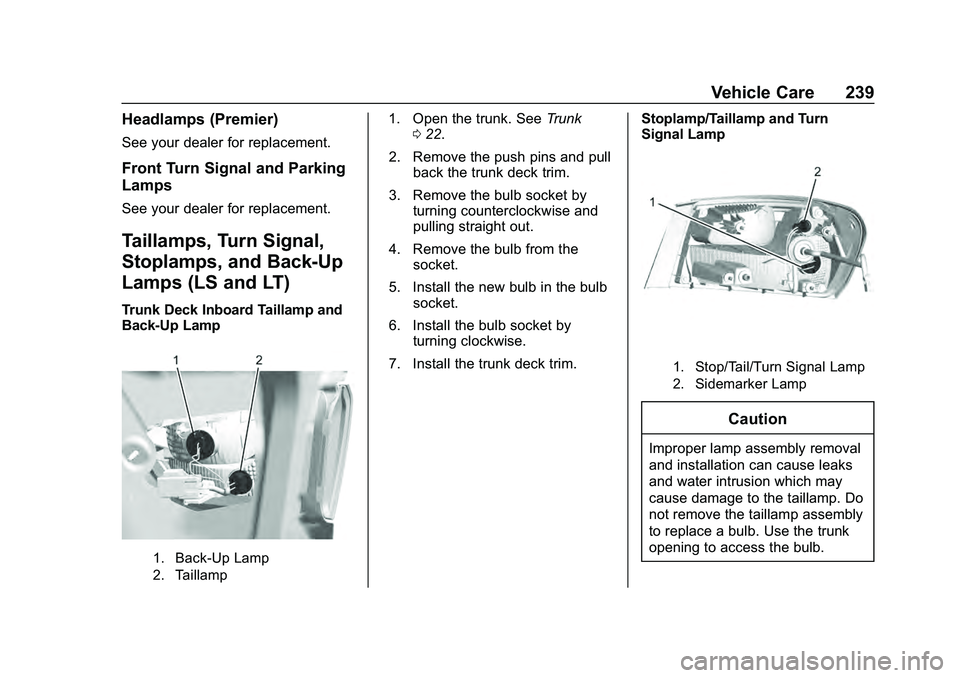
Trunk Deck Inboard Taillamp and
Back-Up Lamp
1. Back-Up Lamp
2. Taillamp
1. Open the trunk. SeeTrunk
0 22.
2. Remove the push pins and pull back the trunk deck trim.
3. Remove the bulb socket by turning counterclockwise and
pulling straight out.
4. Remove the bulb from the socket.
5. Install the new bulb in the bulb socket.
6. Install the bulb socket by turning clockwise.
7. Install the trunk deck trim. Stoplamp/Taillamp and Turn
Signal Lamp
1. Stop/Tail/Turn Signal Lamp
2. Sidemarker Lamp
Caution
Improper lamp assembly removal
and installation can cause leaks
and water intrusion which may
cause damage to the taillamp. Do
not remove the taillamp assembly
to replace a bulb. Use the trunk
opening to access the bulb.
Page 241 of 358
Chevrolet Malibu Owner Manual (GMNA-Localizing-U.S./Canada/Mexico-
13555849) - 2020 - CRC - 8/21/19
240 Vehicle Care
To replace any one of these bulbs:1. Open the trunk. See Trunk
0 22.
2. Remove the push pins and pull the trunk trim away from the
taillamp assembly.
3. Remove three hex-nuts from each stud.
4. Remove the lamp by pulling it straight back.
5. Remove the bulb socket from the taillamp assembly by
turning it counterclockwise.
6. Remove the bulb from the socket by turning the bulb
counterclockwise one-quarter
turn and pulling it straight out.
7. Install a new bulb into the socket.
8. Install the bulb socket into the taillamp assembly by turning it
clockwise.
9. Install the trunk trim, hex nuts, and push pins.Taillamps, Turn Signal,
Stoplamps, and Back-Up
Lamps (LT and Premier)
Caution
Improper lamp assembly removal
and installation can cause leaks
and water intrusion which may
cause damage to the taillamp. Do
not remove the taillamp assembly
to replace a bulb. Use the trunk
opening to access the bulb.
The stoplamp/taillamp and trunk
deck inboard taillamp are LEDs. To
replace, see your dealer.
Back-Up Lamp 1. Open the trunk. See Trunk
0 22.
2. Remove the push pins and pull back the trunk deck trim.
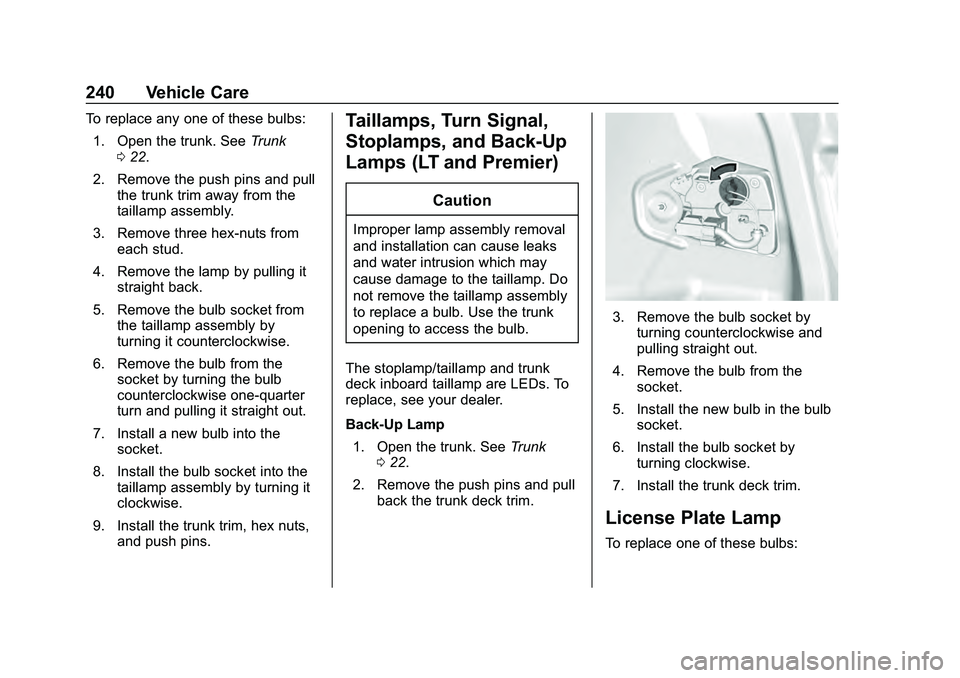
3. Remove the bulb socket byturning counterclockwise and
pulling straight out.
4. Remove the bulb from the socket.
5. Install the new bulb in the bulb socket.
6. Install the bulb socket by turning clockwise.
7. Install the trunk deck trim.
License Plate Lamp
To replace one of these bulbs:
Page 280 of 358
Chevrolet Malibu Owner Manual (GMNA-Localizing-U.S./Canada/Mexico-
13555849) - 2020 - CRC - 8/21/19
Vehicle Care 279
If the vehicle only has a
cigarette lighter, use the
cigarette lighter.
Do not pinch the power plug
cord in the door or window.
7. Start the vehicle. The vehicle must be running while using
the air compressor.
8. Press the on/off button (5) to turn the tire sealant and
compressor kit on.
The compressor will inflate the
tire with air only.
9. Inflate the tire to the recommended inflation
pressure using the pressure
gauge (8). The recommended
inflation pressure can be found
on the Tire and Loading
Information label. See Tire
Pressure 0257.
The pressure gauge (8) may
read higher than the actual tire
pressure while the compressor
is on. Turn the compressor off
to get an accurate pressure reading. The compressor may
be turned on/off until the
correct pressure is reached.
Caution
If the recommended pressure
cannot be reached after
approximately 25 minutes, the
vehicle should not be driven
farther. The tire is too severely
damaged and the tire sealant and
compressor kit cannot inflate the
tire. Remove the power plug from
the accessory power outlet and
unscrew the inflating hose from
the tire valve. See
Roadside
Assistance Program 0323.
10. Press the on/off button (5) to turn the tire sealant and
compressor kit off.
Be careful while handling the
compressor as it could be
warm after usage.
11. Unplug the power plug (9) from the accessory power outlet in
the vehicle. 12. Turn the air only hose (10)
counterclockwise to remove it
from the tire valve stem.
13. Replace the tire valve stem cap.
14. Return the air only hose (10) and power plug (9) back to
their original storage location.
15. Return the equipment to its original storage location in the
vehicle.
The tire sealant and compressor kit
has accessory adapters located in a
compartment on the bottom of its
housing that can be used to inflate
air mattresses, balls, etc.
Storing the Tire Sealant
and Compressor Kit
To access the tire sealant and
compressor kit: 1. Open the trunk. See Trunk
0 22.
2. Lift the cover.
Page 281 of 358
Chevrolet Malibu Owner Manual (GMNA-Localizing-U.S./Canada/Mexico-
13555849) - 2020 - CRC - 8/21/19
280 Vehicle Care
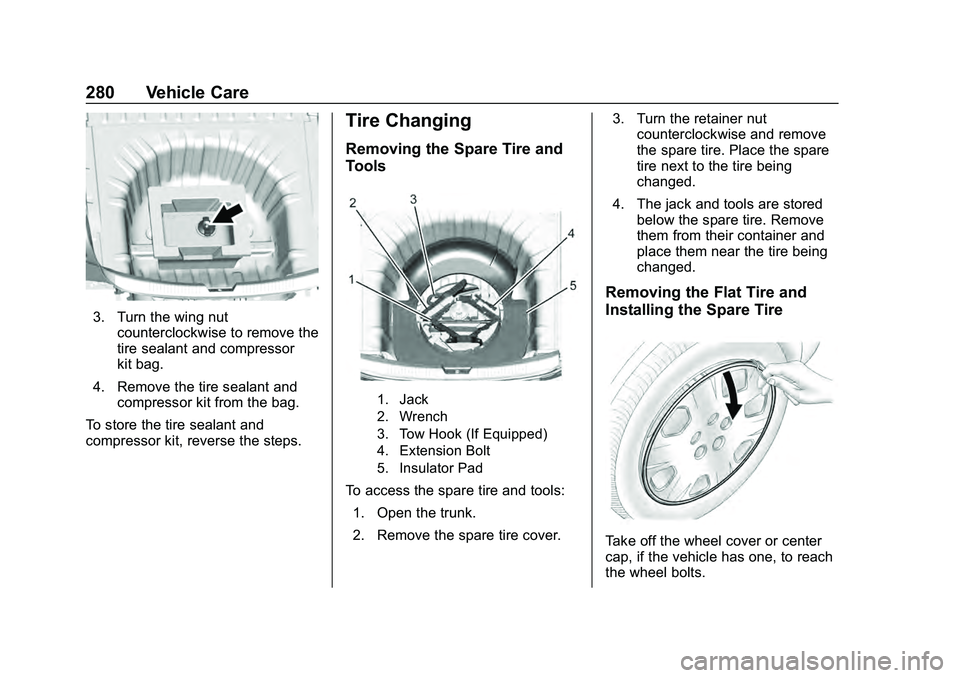
3. Turn the wing nutcounterclockwise to remove the
tire sealant and compressor
kit bag.
4. Remove the tire sealant and compressor kit from the bag.
To store the tire sealant and
compressor kit, reverse the steps.
Tire Changing
Removing the Spare Tire and
Tools
1. Jack
2. Wrench
3. Tow Hook (If Equipped)
4. Extension Bolt
5. Insulator Pad
To access the spare tire and tools: 1. Open the trunk.
2. Remove the spare tire cover. 3. Turn the retainer nut
counterclockwise and remove
the spare tire. Place the spare
tire next to the tire being
changed.
4. The jack and tools are stored below the spare tire. Remove
them from their container and
place them near the tire being
changed.
Removing the Flat Tire and
Installing the Spare Tire
Take off the wheel cover or center
cap, if the vehicle has one, to reach
the wheel bolts.
Page 317 of 358

Chevrolet Malibu Owner Manual (GMNA-Localizing-U.S./Canada/Mexico-
13555849) - 2020 - CRC - 8/16/19
316 Technical Data
Technical Data
Vehicle Identification
Vehicle IdentificationNumber (VIN) . . . . . . . . . . . . . . . 316
Service Parts Identification . . . 316
Vehicle Data
Capacities and Specifications . . . . . . . . . . . . . . . 317
Engine Drive Belt Routing . . . . 318
Vehicle Identification
Vehicle Identification
Number (VIN)
This legal identifier is in the front
corner of the instrument panel, on
the driver side of the vehicle. It can
be seen through the windshield from
outside. The Vehicle Identification
Number (VIN) also appears on the
Vehicle Certification and Service
Parts labels and certificates of title
and registration.
Engine Identification
The eighth character in the VIN is
the engine code. This code
identifies the vehicle's engine,
specifications, and replacement parts. See
“Engine Specifications”
under Capacities and Specifications
0 317 for the vehicle's engine code.
Service Parts
Identification
There may be a large barcode on
the certification label on the center
pillar that you can scan for the
following information:
.
Vehicle Identification
Number (VIN)
. Model designation
. Paint information
. Production options
If there is not a large barcode on
this label, then you will find this
same information on a label inside
of the trunk.
Page 348 of 358
Chevrolet Malibu Owner Manual (GMNA-Localizing-U.S./Canada/Mexico-
13555849) - 2020 - CRC - 8/16/19
Index 347
Assistance Program,Roadside . . . . . . . . . . . . . . . . . . . . . . 323
Assistance Systems for Driving . . . . . . . . . . . . . . . . . . . . . . . . 188
Assistance Systems for Parking and Backing . . . . . . . . . . 183
Auto Stop
Stop/Start System . . . . . . . . . . . . 158
Automatic Door Locks . . . . . . . . . . . . . . . . . . . . . 21
Emergency Braking (AEB) . . . . 190
Headlamp System . . . . . . . . . . . . 128
Transmission . . . . . . . . . . . . . . . . . 164
Transmission Fluid . . . . . . . . . . . 222
Automatic Transmission Manual Mode . . . . . . . . . . . . . . . . . 165
Shift Lock Control Function
Check . . . . . . . . . . . . . . . . . . . . . . . 234
B
BatteryExterior Lighting BatterySaver . . . . . . . . . . . . . . . . . . . . . . . 132
Load Management . . . . . . . . . . . . 131
Power Protection . . . . . . . . . . . . . 132
Battery - North America . . . . 232, 286
Blade Replacement, Wiper . . . . . 235 Brake
Parking, Electric . . . . . . . . . . . . . . 168
System Warning Light . . . . . . . . 106
Brakes . . . . . . . . . . . . . . . . . . . . . . . . . . 230 Antilock . . . . . . . . . . . . . . . . . . . . . . . 166
Assist . . . . . . . . . . . . . . . . . . . . . . . . . 169
Fluid . . . . . . . . . . . . . . . . . . . . . . . . . . 231
Parking . . . . . . . . . . . . . . . . . . . . . . . 167
Braking . . . . . . . . . . . . . . . . . . . . . . . . . 146 AutomaticEmergency (AEB) . . . . . . . . . . . 190
Braking System Front Pedestrian (FPB) . . . . . . . 191
Break-In, New Vehicle . . . . . . . . . . 155
Bulb Replacement Halogen Bulbs . . . . . . . . . . . . . . . . 238
Headlamp Aiming . . . . . . . . . . . . . 237
Headlamps . . . . . . . . . . . . . . . . . . . 238
Headlamps, Front Turn
Signal, Sidemarker, and
Parking Lamps . . . . . . . . . . . . . . 238
License Plate Lamps . . . . . . . . . 240
Taillamps, Turn Signal, Stoplamps, and
Back-up Lamps . . . . . . . . 239, 240
Buying New Tires . . . . . . . . . . . . . . . 266
C
Calibration . . . . . . . . . . . . . . . . . . . . . . . 91
California Perchlorate MaterialsRequirements . . . . . . . . . . . . . . . 213
California Proposition
65 Warning . . . . . . . . . .213, 232, 286, Back Cover
Canadian Vehicle Owners . . . . . . . . 2
Capacities and
Specifications . . . . . . . . . . . . . . . . . 317
Carbon Monoxide Engine Exhaust . . . . . . . . . . . . . . . 163
Trunk . . . . . . . . . . . . . . . . . . . . . . . . . . . 22
Winter Driving . . . . . . . . . . . . . . . . 150
Cargo Tie-Downs . . . . . . . . . . . . . . . . . . . . . . 86
Caution, Danger, and Warning . . . . 2
Center Console Storage . . . . . . . . . 86
Chains, Tire . . . . . . . . . . . . . . . . . . . . 271
Charging
Wireless . . . . . . . . . . . . . . . . . . . . . . . . 92
Charging System Light . . . . . . . . . 104
Check
Engine Light (MalfunctionIndicator) . . . . . . . . . . . . . . . . . . . . 104