Page 216 of 358

Chevrolet Malibu Owner Manual (GMNA-Localizing-U.S./Canada/Mexico-
13555849) - 2020 - CRC - 8/21/19
Vehicle Care 215
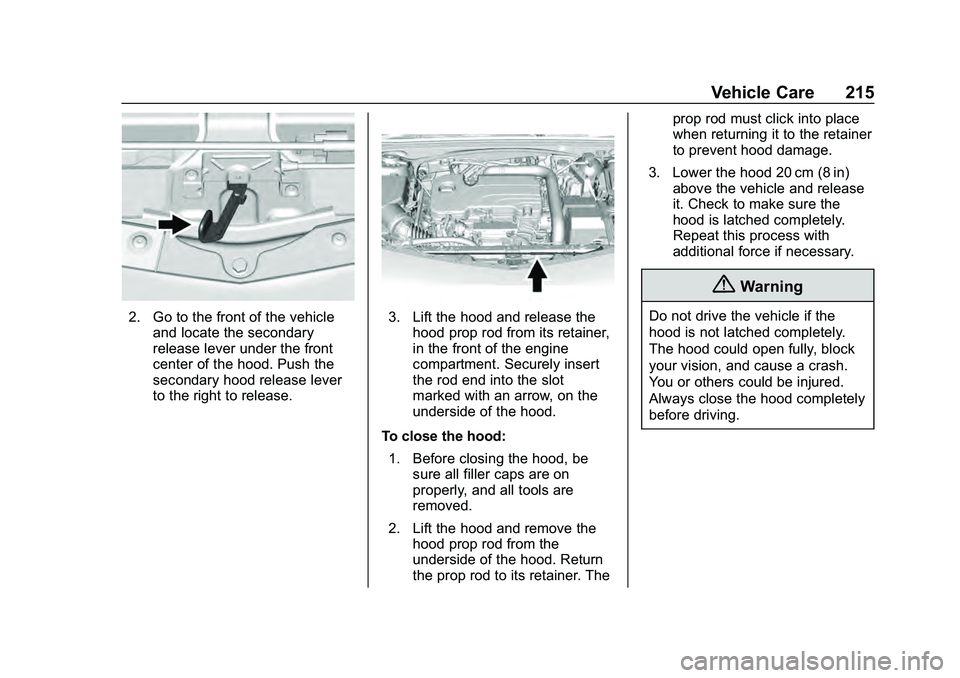
2. Go to the front of the vehicleand locate the secondary
release lever under the front
center of the hood. Push the
secondary hood release lever
to the right to release.3. Lift the hood and release thehood prop rod from its retainer,
in the front of the engine
compartment. Securely insert
the rod end into the slot
marked with an arrow, on the
underside of the hood.
To close the hood: 1. Before closing the hood, be sure all filler caps are on
properly, and all tools are
removed.
2. Lift the hood and remove the hood prop rod from the
underside of the hood. Return
the prop rod to its retainer. The prop rod must click into place
when returning it to the retainer
to prevent hood damage.
3. Lower the hood 20 cm (8 in) above the vehicle and release
it. Check to make sure the
hood is latched completely.
Repeat this process with
additional force if necessary.
{Warning
Do not drive the vehicle if the
hood is not latched completely.
The hood could open fully, block
your vision, and cause a crash.
You or others could be injured.
Always close the hood completely
before driving.
Page 237 of 358

Chevrolet Malibu Owner Manual (GMNA-Localizing-U.S./Canada/Mexico-
13555849) - 2020 - CRC - 8/21/19
236 Vehicle Care
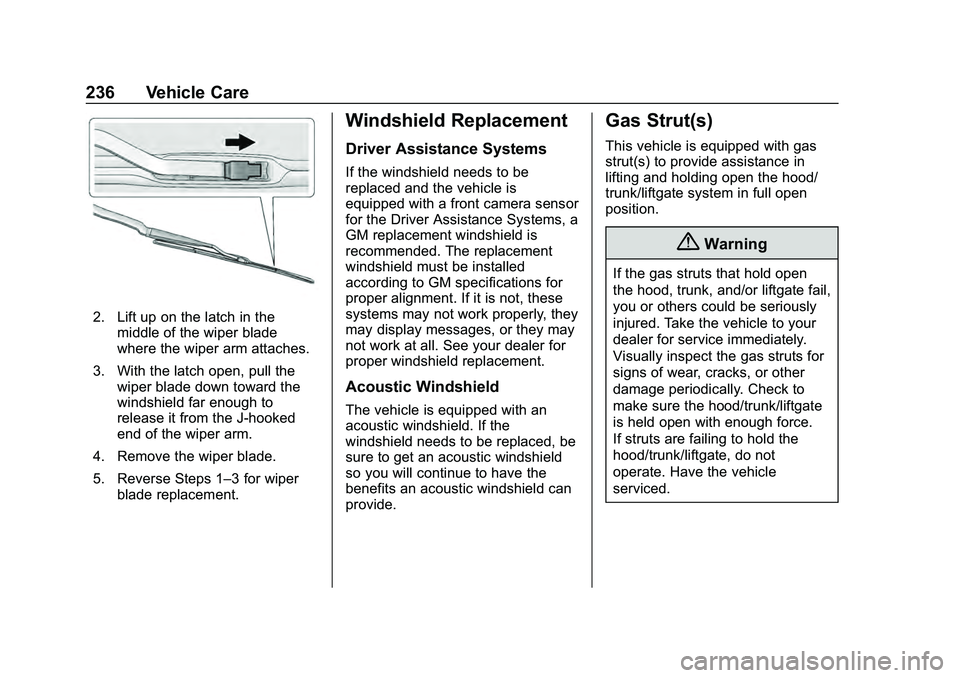
2. Lift up on the latch in themiddle of the wiper blade
where the wiper arm attaches.
3. With the latch open, pull the wiper blade down toward the
windshield far enough to
release it from the J-hooked
end of the wiper arm.
4. Remove the wiper blade.
5. Reverse Steps 1–3 for wiper blade replacement.
Windshield Replacement
Driver Assistance Systems
If the windshield needs to be
replaced and the vehicle is
equipped with a front camera sensor
for the Driver Assistance Systems, a
GM replacement windshield is
recommended. The replacement
windshield must be installed
according to GM specifications for
proper alignment. If it is not, these
systems may not work properly, they
may display messages, or they may
not work at all. See your dealer for
proper windshield replacement.
Acoustic Windshield
The vehicle is equipped with an
acoustic windshield. If the
windshield needs to be replaced, be
sure to get an acoustic windshield
so you will continue to have the
benefits an acoustic windshield can
provide.
Gas Strut(s)
This vehicle is equipped with gas
strut(s) to provide assistance in
lifting and holding open the hood/
trunk/liftgate system in full open
position.
{Warning
If the gas struts that hold open
the hood, trunk, and/or liftgate fail,
you or others could be seriously
injured. Take the vehicle to your
dealer for service immediately.
Visually inspect the gas struts for
signs of wear, cracks, or other
damage periodically. Check to
make sure the hood/trunk/liftgate
is held open with enough force.
If struts are failing to hold the
hood/trunk/liftgate, do not
operate. Have the vehicle
serviced.
Page 239 of 358

Chevrolet Malibu Owner Manual (GMNA-Localizing-U.S./Canada/Mexico-
13555849) - 2020 - CRC - 8/21/19
238 Vehicle Care
Bulb Replacement
For the proper type of replacement
bulbs, or any bulb changing
procedure not listed in this section,
contact your dealer.
Caution
Do not replace incandescent
bulbs with aftermarket LED
replacement bulbs. This can
cause damage to the vehicle
electrical system.
Halogen Bulbs
{Warning
Halogen bulbs have pressurized
gas inside and can burst if you
drop or scratch the bulb. You or
others could be injured. Be sure
to read and follow the instructions
on the bulb package.
LED Lighting
This vehicle has several LED lamps.
For replacement of any LED lighting
assembly, contact your dealer.
Headlamps, Front Turn
Signal, Sidemarker, and
Parking Lamps
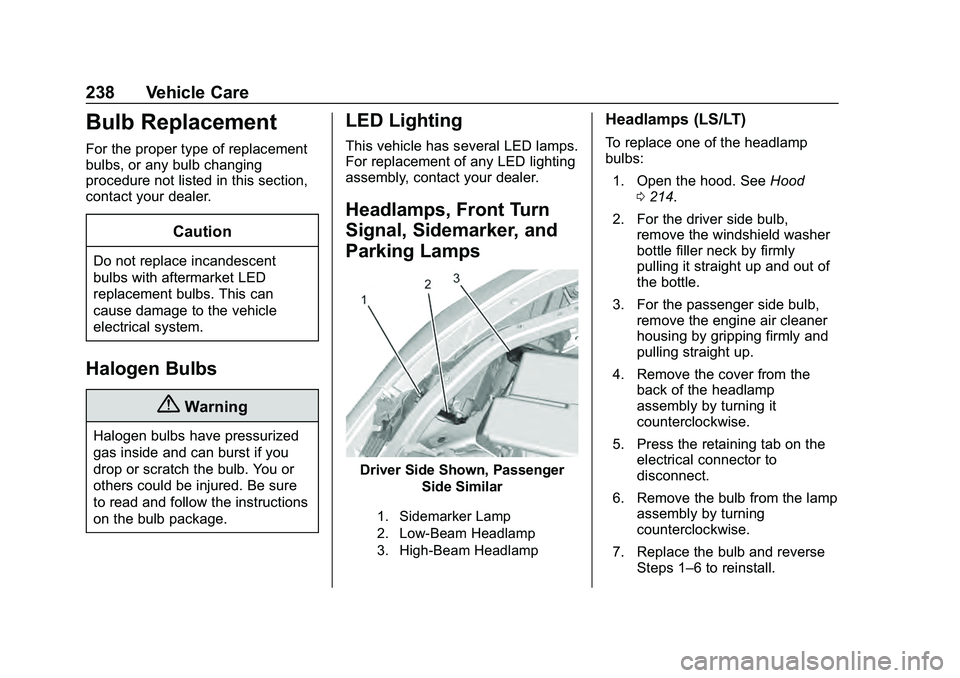
Driver Side Shown, PassengerSide Similar
1. Sidemarker Lamp
2. Low-Beam Headlamp
3. High-Beam Headlamp
Headlamps (LS/LT)
To replace one of the headlamp
bulbs:
1. Open the hood. See Hood
0 214.
2. For the driver side bulb, remove the windshield washer
bottle filler neck by firmly
pulling it straight up and out of
the bottle.
3. For the passenger side bulb, remove the engine air cleaner
housing by gripping firmly and
pulling straight up.
4. Remove the cover from the back of the headlamp
assembly by turning it
counterclockwise.
5. Press the retaining tab on the electrical connector to
disconnect.
6. Remove the bulb from the lamp assembly by turning
counterclockwise.
7. Replace the bulb and reverse Steps 1–6 to reinstall.