2020 CHEVROLET MALIBU change time
[x] Cancel search: change timePage 119 of 358
Chevrolet Malibu Owner Manual (GMNA-Localizing-U.S./Canada/Mexico-
13555849) - 2020 - CRC - 8/16/19
118 Instruments and Controls
holdVfor several seconds while
the Oil Life display is active. See
Engine Oil Life System 0221.
Air Filter Life : Shows an estimate
of the engine air filter ’s remaining
useful life and the state of the
system. Engine Air Filter Life 95%
means 95% of the current air filter
life remains. Messages will display
based on the engine air filter life and
the state of the system. When the
REPLACE AT NEXT OIL CHANGE
message displays, the engine air
filter should be replaced at the time
of the next oil change. When the
REPLACE NOW message displays,
the engine air filter should be
replaced as soon as possible.
The Air Filter Life display must be
reset after the engine air filter
replacement. To reset, see Engine
Air Filter Life System 0223.
Tire Pressure : Shows the
approximate pressures of all four
tires. Tire pressure is displayed in
either kilopascal (kPa) or in pounds
per square inch (psi). If the pressure
is low, the value for that tire is shown in amber. See
Tire Pressure
Monitor System 0259 and
Tire Pressure Monitor Operation
0 260.
Average Vehicle Speed : Displays
the average vehicle speed of the
vehicle in kilometers per hour (km/h)
or miles per hour (mph). This
average is based on the various
vehicle speeds recorded since the
last reset. Reset the average speed
by pressing
Vwhen it is displayed.
Fuel Economy : The center
displays the approximate
instantaneous fuel economy as a
number and bar graph. Displayed
above the bar graph is a running
average of fuel economy for the
most recently traveled selected
distance. Displayed below the bar
graph is the best average fuel
economy that has been achieved for
the selected distance. The selected
distance is displayed at the top of
the page as “last xxx mi/km.” Press
pto select the distance or
reset best value. Use
wandxto
choose the distance and press
V.
Press
wandxto select “Reset
Best Score.” Press
Vto reset the
best average fuel economy. After
reset, the best value displays “-,-”
until the selected distance has been
traveled.
The display provides information on
how current driving behavior affects
the running average and how well
recent driving compares to the best
that has been achieved for the
selected distance.
Timer : This display can be used as
a timer. To start the timer, press
V
while this display is active. The
display will show the amount of time
that has passed since the timer was
last reset. To stop the timer, press
V
briefly while this display is active
and the timer is running. To reset
Page 120 of 358
Chevrolet Malibu Owner Manual (GMNA-Localizing-U.S./Canada/Mexico-
13555849) - 2020 - CRC - 8/16/19
Instruments and Controls 119
the timer to zero, press and holdV
while this display is active, or press
pand select reset.
Speed Limit : Shows the current
speed limit on vehicles with the
navigation system. The information
for this page comes from a roadway
database.
Follow Distance : When Adaptive
Cruise Control (ACC) is not
engaged, the current follow time to
the vehicle ahead is displayed as a
time value on this page. When ACC
has been engaged, the display
switches to the gap setting page.
This page shows the current gap
setting along with the vehicle ahead
indicator.
Battery Voltage : Displays the
current battery voltage, if equipped.
Battery voltage changes are normal
while driving. See Charging System
Light 0104. If there is a problem
with the battery charging system,
the DIC will display a message. Coolant Temperature :
Shows the
engine coolant temperature in either
degrees Celsius (°C) or degrees
Fahrenheit (°F).
Oil Pressure : Oil pressure is
displayed in either kilopascal (kPa)
or in pounds per square inch (psi).
Oil pressure can vary with engine
speed, outside temperature, and oil
viscosity. On some models, the oil
pump will vary engine oil pressure
according to engine needs. Oil
pressure may change quickly as the
engine speed or load varies. This is
normal. If the oil pressure warning
light or Driver Information Center
(DIC) message indicates oil
pressure outside the normal
operating range, check the vehicle's
oil as soon as possible.
Blank Page : Shows no
information.
Vehicle Messages
Messages displayed on the DIC
indicate the status of the vehicle or
some action that may be needed to
correct a condition. Multiple
messages may appear one after
another.
The messages that do not require
immediate action can be
acknowledged and cleared by
pressing
V. The messages that
require immediate action cannot be
cleared until that action is
performed.
All messages should be taken
seriously; clearing the message
does not correct the problem.
If a SERVICE message appears,
see your dealer.
Follow the instructions given in the
messages. The system displays
messages regarding the following
topics:
. Service Messages
. Fluid Levels
. Vehicle Security
Page 126 of 358
Chevrolet Malibu Owner Manual (GMNA-Localizing-U.S./Canada/Mexico-
13555849) - 2020 - CRC - 8/16/19
Lighting 125
Lighting
Exterior Lighting
Exterior Lamp Controls . . . . . . . 125
Exterior Lamps OffReminder . . . . . . . . . . . . . . . . . . . 127
Headlamp High/Low-Beam Changer . . . . . . . . . . . . . . . . . . . . 127
Flash-to-Pass . . . . . . . . . . . . . . . . 127
Daytime Running Lamps (DRL) . . . . . . . . . . . . . . . 127
Automatic Headlamp System . . . . . . . . . . . . . . . . . . . . . . 128
Hazard Warning Flashers . . . . . 128
Turn and Lane-Change Signals . . . . . . . . . . . . . . . . . . . . . . 129
Interior Lighting
Instrument Panel IlluminationControl . . . . . . . . . . . . . . . . . . . . . . 129
Courtesy Lamps . . . . . . . . . . . . . . 130
Dome Lamps . . . . . . . . . . . . . . . . . 130
Reading Lamps . . . . . . . . . . . . . . 130
Lighting Features
Entry Lighting . . . . . . . . . . . . . . . . 131
Exit Lighting . . . . . . . . . . . . . . . . . . 131
Battery Load Management . . . 131
Battery Power Protection . . . . . 132 Exterior Lighting Battery
Saver . . . . . . . . . . . . . . . . . . . . . . . 132
Exterior Lighting
Exterior Lamp Controls
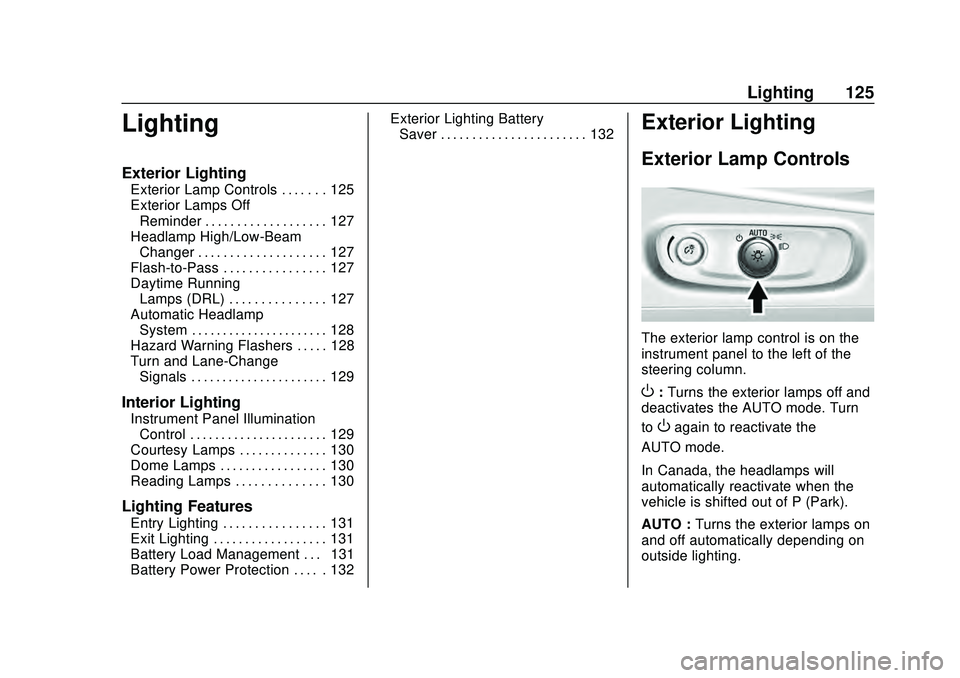
The exterior lamp control is on the
instrument panel to the left of the
steering column.
O: Turns the exterior lamps off and
deactivates the AUTO mode. Turn
to
Oagain to reactivate the
AUTO mode.
In Canada, the headlamps will
automatically reactivate when the
vehicle is shifted out of P (Park).
AUTO : Turns the exterior lamps on
and off automatically depending on
outside lighting.
Page 128 of 358
Chevrolet Malibu Owner Manual (GMNA-Localizing-U.S./Canada/Mexico-
13555849) - 2020 - CRC - 8/16/19
Lighting 127
The high beams may not turn off
automatically if the system cannot
detect another vehicle's lamps
because of any of the following:
.The other vehicle's lamps are
missing, damaged, obstructed
from view, or otherwise
undetected.
. The other vehicle's lamps are
covered with dirt, snow, and/or
road spray.
. The other vehicle's lamps cannot
be detected due to dense
exhaust, smoke, fog, snow, road
spray, mist, or other airborne
obstructions.
. The vehicle's windshield is dirty,
cracked, or obstructed by
something that blocks the view
of the light sensor.
. The vehicle is loaded such that
the front end points upward,
causing the light sensor to aim
high and not detect headlamps
and taillamps.
. Driving on winding or hilly roads. The IntelliBeam system may need to
be disabled if any of the above
conditions exist.
Exterior Lamps Off
Reminder
A warning chime sounds if the driver
door is opened while the ignition is
off and the exterior lamps are on.
Headlamp High/
Low-Beam Changer
3
:
Push the turn signal lever away
from you and release, to turn the
high beams on. To return to low
beams, push the lever again or pull
it toward you and release.
This indicator light turns on in the
instrument cluster when the
high-beam headlamps are on.
Flash-to-Pass
To flash the high beams, pull the
turn signal lever toward you, and
release.
Daytime Running
Lamps (DRL)
DRL can make it easier for others to
see the front of your vehicle during
the day. Fully functional DRL are
required on all vehicles first sold in
Canada.
The DRL system comes on in
daylight when the following
conditions are met:
. The ignition is on.
. The exterior lamp control is in
AUTO, if equipped.
. The light sensor determines it is
daytime.
. The vehicle is not in P (Park).
When the DRL are on, the taillamps,
sidemarker lamps, instrument panel
lights, and other lamps will not
be on.
Page 129 of 358

Chevrolet Malibu Owner Manual (GMNA-Localizing-U.S./Canada/Mexico-
13555849) - 2020 - CRC - 8/16/19
128 Lighting
The DRL turn off when the
headlamps are turned to
Oor(,
or when the ignition is off. For
vehicles first sold in Canada, the
DRL can only be turned off when
the vehicle is parked.
Automatic Headlamp
System
The headlamps come on
automatically when the exterior
lamp control is set to AUTO and it is
dark enough outside.
There is a light sensor on top of the
instrument panel. Do not cover the
sensor, otherwise the headlamps
will come on when they are not
needed.
The system may also turn on the
headlamps when driving through a
parking garage or tunnel.
When it is bright enough outside,
the headlamps will turn off or may
change to Daytime Running
Lamps (DRL).
The automatic headlamp system
turns off when the exterior lamp
control is turned to
Oor the ignition
is off.
Lights On with Wipers
If the windshield wipers are
activated in daylight with the engine
on, and the exterior lamp control is
in AUTO, the headlamps, parking
lamps, and other exterior lamps
come on. The transition time for the
lamps coming on varies based on
wiper speed. When the wipers are not operating, these lamps turn off.
Move the exterior lamp control to
O
or;to disable this feature.
Hazard Warning Flashers
With Stop/Start Disable Button
Shown, Without Similar
|:Press this button to make the
front and rear turn signal lamps
flash on and off. Press again to turn
the flashers off.
The hazard warning flashers turn on
automatically if the airbags deploy.
Page 130 of 358
Chevrolet Malibu Owner Manual (GMNA-Localizing-U.S./Canada/Mexico-
13555849) - 2020 - CRC - 8/16/19
Lighting 129
Turn and Lane-Change
Signals
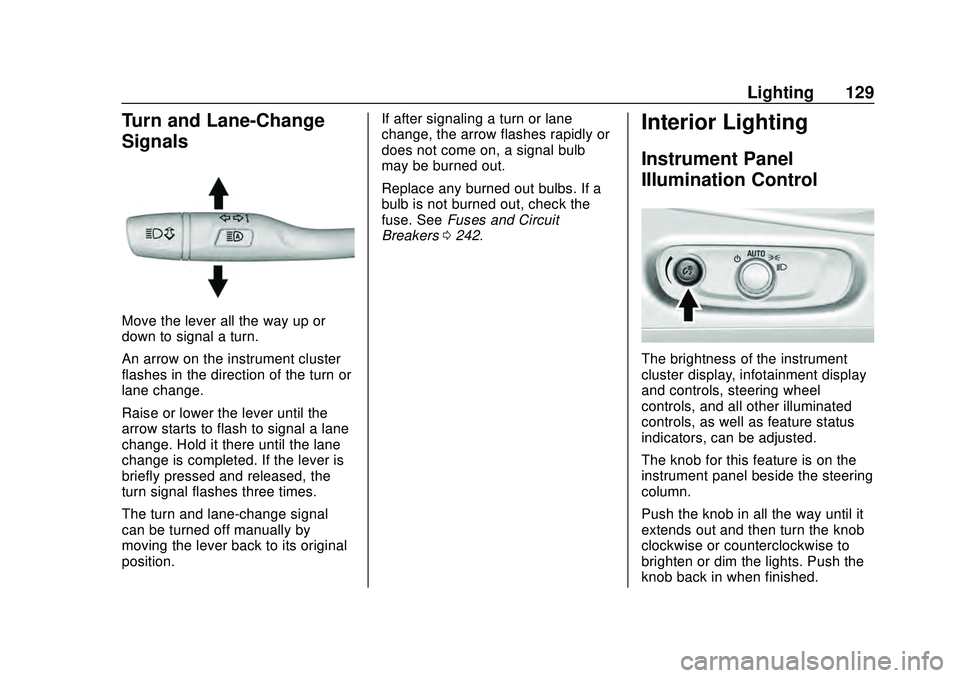
Move the lever all the way up or
down to signal a turn.
An arrow on the instrument cluster
flashes in the direction of the turn or
lane change.
Raise or lower the lever until the
arrow starts to flash to signal a lane
change. Hold it there until the lane
change is completed. If the lever is
briefly pressed and released, the
turn signal flashes three times.
The turn and lane-change signal
can be turned off manually by
moving the lever back to its original
position.If after signaling a turn or lane
change, the arrow flashes rapidly or
does not come on, a signal bulb
may be burned out.
Replace any burned out bulbs. If a
bulb is not burned out, check the
fuse. See
Fuses and Circuit
Breakers 0242.
Interior Lighting
Instrument Panel
Illumination Control
The brightness of the instrument
cluster display, infotainment display
and controls, steering wheel
controls, and all other illuminated
controls, as well as feature status
indicators, can be adjusted.
The knob for this feature is on the
instrument panel beside the steering
column.
Push the knob in all the way until it
extends out and then turn the knob
clockwise or counterclockwise to
brighten or dim the lights. Push the
knob back in when finished.
Page 132 of 358
Chevrolet Malibu Owner Manual (GMNA-Localizing-U.S./Canada/Mexico-
13555849) - 2020 - CRC - 8/16/19
Lighting 131
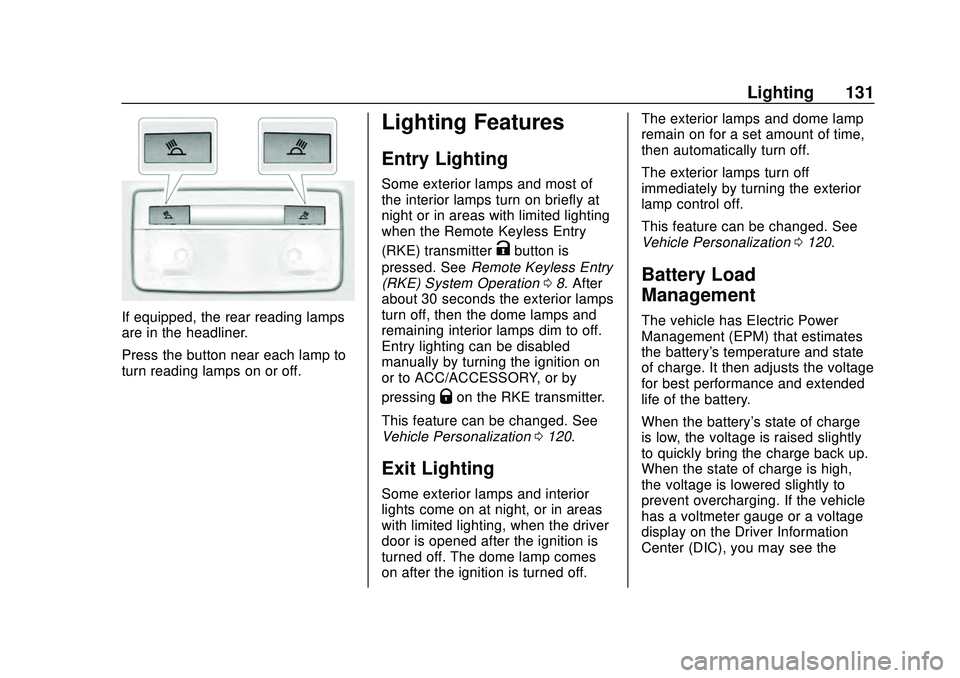
If equipped, the rear reading lamps
are in the headliner.
Press the button near each lamp to
turn reading lamps on or off.
Lighting Features
Entry Lighting
Some exterior lamps and most of
the interior lamps turn on briefly at
night or in areas with limited lighting
when the Remote Keyless Entry
(RKE) transmitter
Kbutton is
pressed. See Remote Keyless Entry
(RKE) System Operation 08. After
about 30 seconds the exterior lamps
turn off, then the dome lamps and
remaining interior lamps dim to off.
Entry lighting can be disabled
manually by turning the ignition on
or to ACC/ACCESSORY, or by
pressing
Qon the RKE transmitter.
This feature can be changed. See
Vehicle Personalization 0120.
Exit Lighting
Some exterior lamps and interior
lights come on at night, or in areas
with limited lighting, when the driver
door is opened after the ignition is
turned off. The dome lamp comes
on after the ignition is turned off. The exterior lamps and dome lamp
remain on for a set amount of time,
then automatically turn off.
The exterior lamps turn off
immediately by turning the exterior
lamp control off.
This feature can be changed. See
Vehicle Personalization
0120.
Battery Load
Management
The vehicle has Electric Power
Management (EPM) that estimates
the battery's temperature and state
of charge. It then adjusts the voltage
for best performance and extended
life of the battery.
When the battery's state of charge
is low, the voltage is raised slightly
to quickly bring the charge back up.
When the state of charge is high,
the voltage is lowered slightly to
prevent overcharging. If the vehicle
has a voltmeter gauge or a voltage
display on the Driver Information
Center (DIC), you may see the
Page 168 of 358
Chevrolet Malibu Owner Manual (GMNA-Localizing-U.S./Canada/Mexico-
13555849) - 2020 - CRC - 8/16/19
Driving and Operating 167
ABS does not change the time
needed to get a foot on the brake
pedal and does not always
decrease stopping distance. If you
get too close to the vehicle ahead,
there will not be enough time to
apply the brakes if that vehicle
suddenly slows or stops. Always
leave enough room ahead to stop,
even with ABS.
Using ABS
Do not pump the brakes. Just hold
the brake pedal down firmly.
Hearing or feeling ABS operate is
normal.
Braking in Emergencies
ABS allows steering and braking at
the same time. In many
emergencies, steering can help
even more than braking.
Parking Brake
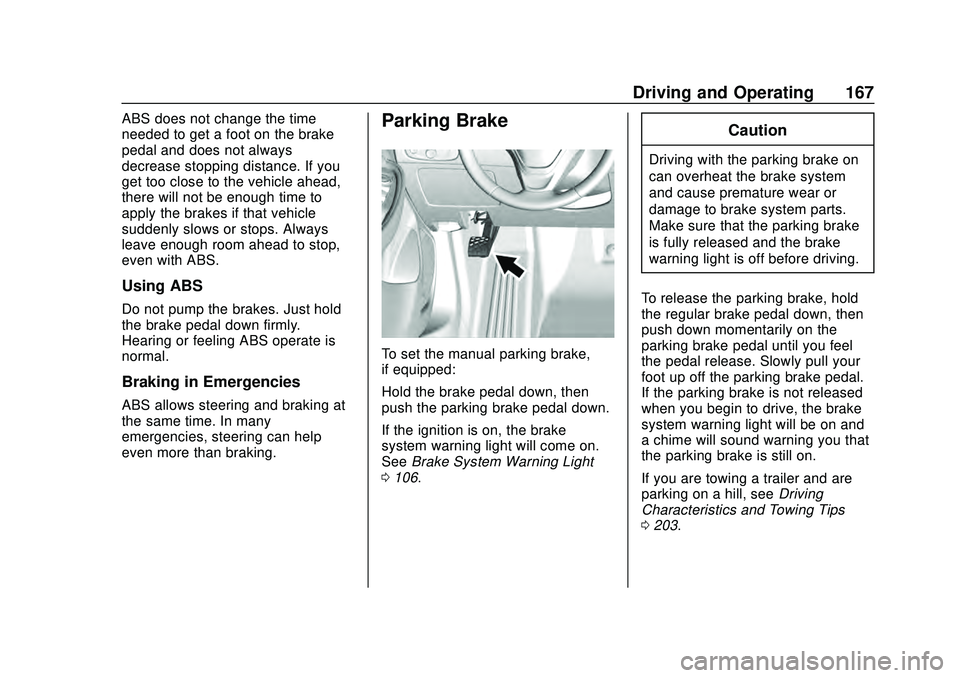
To set the manual parking brake,
if equipped:
Hold the brake pedal down, then
push the parking brake pedal down.
If the ignition is on, the brake
system warning light will come on.
SeeBrake System Warning Light
0 106.
Caution
Driving with the parking brake on
can overheat the brake system
and cause premature wear or
damage to brake system parts.
Make sure that the parking brake
is fully released and the brake
warning light is off before driving.
To release the parking brake, hold
the regular brake pedal down, then
push down momentarily on the
parking brake pedal until you feel
the pedal release. Slowly pull your
foot up off the parking brake pedal.
If the parking brake is not released
when you begin to drive, the brake
system warning light will be on and
a chime will sound warning you that
the parking brake is still on.
If you are towing a trailer and are
parking on a hill, see Driving
Characteristics and Towing Tips
0 203.