2020 CHEVROLET MALIBU light
[x] Cancel search: lightPage 212 of 358

Chevrolet Malibu Owner Manual (GMNA-Localizing-U.S./Canada/Mexico-
13555849) - 2020 - CRC - 8/21/19
Vehicle Care 211
Vehicle Care
General Information
General Information . . . . . . . . . . 212
California Proposition65 Warning . . . . . . . . . . . . . . . . . 213
California Perchlorate Materials Requirements . . . . . 213
Accessories and Modifications . . . . . . . . . . . . . . . . 213
Vehicle Checks
Doing Your OwnService Work . . . . . . . . . . . . . . . 214
Hood . . . . . . . . . . . . . . . . . . . . . . . . . 214
Engine Compartment Overview . . . . . . . . . . . . . . . . . . . . 216
Engine Oil . . . . . . . . . . . . . . . . . . . . 219
Engine Oil Life System . . . . . . . 221
Automatic Transmission Fluid . . . . . . . . . . . . . . . . . . . . . . . . 222
Engine Air Filter Life System . . . . . . . . . . . . . . . . . . . . . . 223
Engine Air Cleaner/Filter . . . . . . 223
Cooling System . . . . . . . . . . . . . . 225
Engine Overheating . . . . . . . . . . 228
Washer Fluid . . . . . . . . . . . . . . . . . 229
Brakes . . . . . . . . . . . . . . . . . . . . . . . 230
Brake Fluid . . . . . . . . . . . . . . . . . . . 231 Battery - North America . . . . . . 232
Starter Switch Check . . . . . . . . . 234
Automatic Transmission Shift
Lock Control Function
Check . . . . . . . . . . . . . . . . . . . . . . . 234
Park Brake and P (Park) Mechanism Check . . . . . . . . . . 235
Wiper Blade Replacement . . . . 235
Windshield Replacement . . . . . 236
Gas Strut(s) . . . . . . . . . . . . . . . . . . 236
Headlamp Aiming
Front Headlamp Aiming . . . . . . 237
Bulb Replacement
Bulb Replacement . . . . . . . . . . . . 238
Halogen Bulbs . . . . . . . . . . . . . . . . 238
LED Lighting . . . . . . . . . . . . . . . . . 238
Headlamps, Front Turn Signal, Sidemarker, and Parking
Lamps . . . . . . . . . . . . . . . . . . . . . . 238
Taillamps, Turn Signal, Stoplamps, and Back-Up
Lamps (LS and LT) . . . . . . . . . . 239
Taillamps, Turn Signal, Stoplamps, and Back-Up
Lamps (LT and Premier) . . . . . 240
License Plate Lamp . . . . . . . . . . 240
Electrical System
High Voltage Devices and Wiring . . . . . . . . . . . . . . . . . . . . . . . 241
Electrical System Overload . . . 242
Fuses and Circuit Breakers . . . 242
Engine Compartment Fuse Block . . . . . . . . . . . . . . . . . . . . . . . . 243
Instrument Panel Fuse Block . . . . . . . . . . . . . . . . . . . . . . . . 247
Wheels and Tires
Tires . . . . . . . . . . . . . . . . . . . . . . . . . . 250
All-Season Tires . . . . . . . . . . . . . . 251
Winter Tires . . . . . . . . . . . . . . . . . . 251
Low-Profile Tires . . . . . . . . . . . . . 251
Summer Tires . . . . . . . . . . . . . . . . 252
Tire Sidewall Labeling . . . . . . . . 252
Tire Designations . . . . . . . . . . . . . 254
Tire Terminology andDefinitions . . . . . . . . . . . . . . . . . . 255
Tire Pressure . . . . . . . . . . . . . . . . . 257
Tire Pressure for High-Speed Operation . . . . . . . . . . . . . . . . . . . 259
Tire Pressure Monitor System . . . . . . . . . . . . . . . . . . . . . . 259
Tire Pressure Monitor Operation . . . . . . . . . . . . . . . . . . . 260
Tire Inspection . . . . . . . . . . . . . . . . 264
Tire Rotation . . . . . . . . . . . . . . . . . 265
Page 231 of 358
Chevrolet Malibu Owner Manual (GMNA-Localizing-U.S./Canada/Mexico-
13555849) - 2020 - CRC - 8/21/19
230 Vehicle Care
Open the cap with the washer
symbol on it. Add washer fluid until
the tank is full. SeeEngine
Compartment Overview 0216 for
reservoir location.
Caution
. Do not use washer fluid that
contains any type of water
repellent coating. This can
cause the wiper blades to
chatter or skip.
. Do not use engine coolant
(antifreeze) in the
windshield washer. It can
damage the windshield
washer system and paint.
. Do not mix water with
ready-to-use washer fluid.
Water can cause the
solution to freeze and
damage the washer fluid
tank and other parts of the
washer system.
(Continued)
Caution (Continued)
.When using concentrated
washer fluid, follow the
manufacturer instructions for
adding water.
. Fill the washer fluid tank
only three-quarters full when
it is very cold. This allows
for fluid expansion if
freezing occurs, which could
damage the tank if it is
completely full.
Brakes
Disc brake pads have built-in wear
indicators that make a high-pitched
warning sound when the brake pads
are worn and new pads are needed.
The sound can come and go or can
be heard all the time when the
vehicle is moving, except when
applying the brake pedal firmly.
{Warning
The brake wear warning sound
means that soon the brakes will
not work well. That could lead to
a crash. When the brake wear
warning sound is heard, have the
vehicle serviced.
Caution
Continuing to drive with worn-out
brake pads could result in costly
brake repair.
Some driving conditions or climates
can cause a brake squeal when the
brakes are first applied or lightly
applied. This does not mean
something is wrong with the brakes.
Properly torqued wheel nuts are
necessary to help prevent brake
pulsation. When tires are rotated,
inspect brake pads for wear and
evenly tighten wheel nuts in the
Page 233 of 358
Chevrolet Malibu Owner Manual (GMNA-Localizing-U.S./Canada/Mexico-
13555849) - 2020 - CRC - 8/21/19
232 Vehicle Care
When the brake fluid falls to a low
level, the brake warning light comes
on. SeeBrake System Warning
Light 0106.
Brake fluid absorbs water over time
which degrades the effectiveness of
the brake fluid. Replace brake fluid
at the specified intervals to prevent
increased stopping distance. See
Maintenance Schedule 0304.
What to Add
Use only GM approved DOT 3
brake fluid from a clean, sealed
container. See Recommended
Fluids and Lubricants 0313.
{Warning
The wrong or contaminated brake
fluid could result in damage to the
brake system. This could result in
the loss of braking leading to a
possible injury. Always use the
proper GM approved brake fluid.
Caution
If brake fluid is spilled on the
vehicle's painted surfaces, the
paint finish can be damaged.
Immediately wash off any painted
surface.
Battery - North America
The original equipment battery is
maintenance free. Do not remove
the cap and do not add fluid.
The vehicle has a standard 12-volt
battery under the hood. See Engine
Compartment Overview 0216.
Refer to the replacement number
shown on the original battery label
when a new 12-volt battery is
needed.
Stop/Start System
If equipped with the 1.5L L4 engine,
the vehicle has a Stop/Start system
to shut off the engine to help
conserve fuel. See Stop/Start
System 0158. Vehicles with a 1.5L engine have an
Absorbed Glass Mat (AGM) 12-volt
battery. Installation of a standard
12-volt battery will result in reduced
12-volt battery life.
When using a 12-volt battery
charger on the 12-volt AGM battery,
some chargers have an AGM
battery setting on the charger.
If available, use the AGM setting on
the charger, to limit charge voltage
to 14.8 volts.
{Warning
WARNING:
Battery posts,
terminals, and related
accessories contain lead and lead
compounds, chemicals known to
the State of California to cause
cancer and birth defects or other
reproductive harm. Batteries also
contain other chemicals known to
the State of California to cause
cancer. WASH HANDS AFTER
HANDLING. For more information
go to www.P65Warnings.ca.gov/
passenger-vehicle.
Page 239 of 358
Chevrolet Malibu Owner Manual (GMNA-Localizing-U.S./Canada/Mexico-
13555849) - 2020 - CRC - 8/21/19
238 Vehicle Care
Bulb Replacement
For the proper type of replacement
bulbs, or any bulb changing
procedure not listed in this section,
contact your dealer.
Caution
Do not replace incandescent
bulbs with aftermarket LED
replacement bulbs. This can
cause damage to the vehicle
electrical system.
Halogen Bulbs
{Warning
Halogen bulbs have pressurized
gas inside and can burst if you
drop or scratch the bulb. You or
others could be injured. Be sure
to read and follow the instructions
on the bulb package.
LED Lighting
This vehicle has several LED lamps.
For replacement of any LED lighting
assembly, contact your dealer.
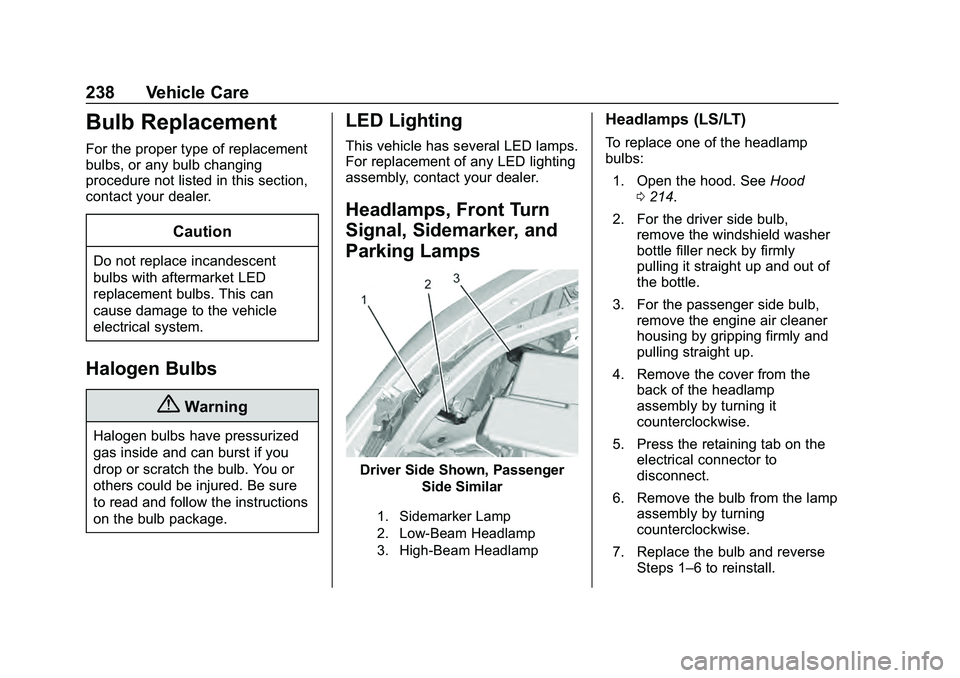
Headlamps, Front Turn
Signal, Sidemarker, and
Parking Lamps
Driver Side Shown, PassengerSide Similar
1. Sidemarker Lamp
2. Low-Beam Headlamp
3. High-Beam Headlamp
Headlamps (LS/LT)
To replace one of the headlamp
bulbs:
1. Open the hood. See Hood
0 214.
2. For the driver side bulb, remove the windshield washer
bottle filler neck by firmly
pulling it straight up and out of
the bottle.
3. For the passenger side bulb, remove the engine air cleaner
housing by gripping firmly and
pulling straight up.
4. Remove the cover from the back of the headlamp
assembly by turning it
counterclockwise.
5. Press the retaining tab on the electrical connector to
disconnect.
6. Remove the bulb from the lamp assembly by turning
counterclockwise.
7. Replace the bulb and reverse Steps 1–6 to reinstall.
Page 246 of 358

Chevrolet Malibu Owner Manual (GMNA-Localizing-U.S./Canada/Mexico-
13555849) - 2020 - CRC - 8/21/19
Vehicle Care 245
The vehicle may not be equipped
with all of the fuses, relays, and
features shown.Fuses Usage
1 –
2 –
3 Antilock brake system pump/Electric brake
boost
5 –
6 Rear closure
7 –
8 Memory seat module
9 Electric brake boost/ Pedestrian friendly
alert function –HEV
10 Automatic occupant sensing/Airbag –HEV
11 DC DC converter 1
12 Rear window defogger
13 Heated mirrors
14 – Fuses Usage
15 Passive entry/Passive start
16 Front wiper
17 Passenger power seat
18 Antilock brake system valve
19 Driver power seat
21 Sunroof
22 Parking lamp
23 Automatic headlamp leveling/Adaptive
forward lighting
24 –
26 Transmission control module/Ignition
27 Instrument panel/ Body/Ignition
28 –
29 Rear vision camera/ Ventilated seats
30 Malfunction indicator lamp/Ignition Fuses Usage
32 Canister vent solenoid/Evap leak
check module
33 Front heated seat
34 Battery system manager/Accessory
power module
fan–HEV
35 Body control module 6/Body control
module 7
36 Fuel module
38 –
39 –
40 Steering column lock
41 –
43 Heated steering wheel
44 Headlamp leveling
45 –
46 Engine control module/Ignition
47 –
Page 250 of 358

Chevrolet Malibu Owner Manual (GMNA-Localizing-U.S./Canada/Mexico-
13555849) - 2020 - CRC - 8/21/19
Vehicle Care 249
FusesUsage
F22 –
F23 Electric steering column lock
F24 Sensing and diagnostic module/
Automatic occupant
sensing (Airbag)
F25 Data link connector
F26 –
F27 AC DC inverter
F28 –
F29 Body control module 8
F30 Overhead console
F31 Steering wheel controls
F32 –
F33 Heating, ventilation, and air conditioning
F34 Central gateway module
F35 – Fuses
Usage
F36 Wireless charger/USB charger
F37 Front accessory power outlets/
Cigarette lighter –
China only
F38 OnStar
F39 Display
F40 Obstacle detection
F41 Body control module 1 (with Stop/Start
option)
F42 Radio
F43 –
F44 Console accessory power outlet –rear
Relays Usage
K1 –
K2 Retained accessory power
K3 –
K4 – Relays
Usage
K5 –
Page 257 of 358
Chevrolet Malibu Owner Manual (GMNA-Localizing-U.S./Canada/Mexico-
13555849) - 2020 - CRC - 8/21/19
256 Vehicle Care
Department of Transportation
(DOT) Motor Vehicle Safety
Standards. The DOT code
includes the Tire Identification
Number (TIN), an alphanumeric
designator which can also
identify the tire manufacturer,
production plant, brand, and
date of production.
GVWR
:Gross Vehicle Weight
Rating. See Vehicle Load Limits
0 151.
GAWR FRT
:Gross Axle Weight
Rating for the front axle. See
Vehicle Load Limits 0151.
GAWR RR
:Gross Axle Weight
Rating for the rear axle. See
Vehicle Load Limits 0151.
Intended Outboard Sidewall
:
The side of an asymmetrical tire
that must always face outward
when mounted on a vehicle.
Kilopascal (kPa)
:The metric
unit for air pressure. Light Truck (LT-Metric) Tire
:A
tire used on light duty trucks and
some multipurpose passenger
vehicles.
Load Index
:An assigned
number ranging from 1 to 279
that corresponds to the load
carrying capacity of a tire.
Maximum Inflation Pressure
:
The maximum air pressure to
which a cold tire can be inflated.
The maximum air pressure is
molded onto the sidewall.
Maximum Load Rating
:The
load rating for a tire at the
maximum permissible inflation
pressure for that tire.
Maximum Loaded Vehicle
Weight
:The sum of curb
weight, accessory weight,
vehicle capacity weight, and
production options weight. Normal Occupant Weight
:The
number of occupants a vehicle
is designed to seat multiplied by
68 kg (150 lb). See Vehicle Load
Limits 0151.
Occupant Distribution
:
Designated seating positions.
Outward Facing Sidewall
:The
side of an asymmetrical tire that
has a particular side that faces
outward when mounted on a
vehicle. The side of the tire that
contains a whitewall, bears
white lettering, or bears
manufacturer, brand, and/or
model name molding that is
higher or deeper than the same
moldings on the other sidewall
of the tire.
Passenger (P-Metric) Tire
:A
tire used on passenger cars and
some light duty trucks and
multipurpose vehicles.
Recommended Inflation
Pressure
:Vehicle
manufacturer's recommended
Page 261 of 358
Chevrolet Malibu Owner Manual (GMNA-Localizing-U.S./Canada/Mexico-
13555849) - 2020 - CRC - 8/21/19
260 Vehicle Care
Accordingly, when the low tire
pressure telltale illuminates, you
should stop and check your tires as
soon as possible, and inflate them
to the proper pressure. Driving on a
significantly under-inflated tire
causes the tire to overheat and can
lead to tire failure. Under-inflation
also reduces fuel efficiency and tire
tread life, and may affect the
vehicle's handling and stopping
ability.
Please note that the TPMS is not a
substitute for proper tire
maintenance, and it is the driver's
responsibility to maintain correct tire
pressure, even if under-inflation has
not reached the level to trigger
illumination of the TPMS low tire
pressure telltale.
Your vehicle has also been
equipped with a TPMS malfunction
indicator to indicate when the
system is not operating properly.
The TPMS malfunction indicator is
combined with the low tire pressure
telltale. When the system detects a
malfunction, the telltale will flash for
approximately one minute and thenremain continuously illuminated.
This sequence will continue upon
subsequent vehicle start-ups as
long as the malfunction exists.
When the malfunction indicator is
illuminated, the system may not be
able to detect or signal low tire
pressure as intended. TPMS
malfunctions may occur for a variety
of reasons, including the installation
of replacement or alternate tires or
wheels on the vehicle that prevent
the TPMS from functioning properly.
Always check the TPMS malfunction
telltale after replacing one or more
tires or wheels on your vehicle to
ensure that the replacement or
alternate tires and wheels allow the
TPMS to continue to function
properly.
See
Tire Pressure Monitor
Operation 0260.
See Radio Frequency Statement
0 329.Tire Pressure Monitor
Operation
This vehicle may have a Tire
Pressure Monitor System (TPMS).
The TPMS is designed to warn the
driver when a low tire pressure
condition exists. TPMS sensors are
mounted onto each tire and wheel
assembly, excluding the spare tire
and wheel assembly. The TPMS
sensors monitor the air pressure in
the tires and transmit the tire
pressure readings to a receiver
located in the vehicle.
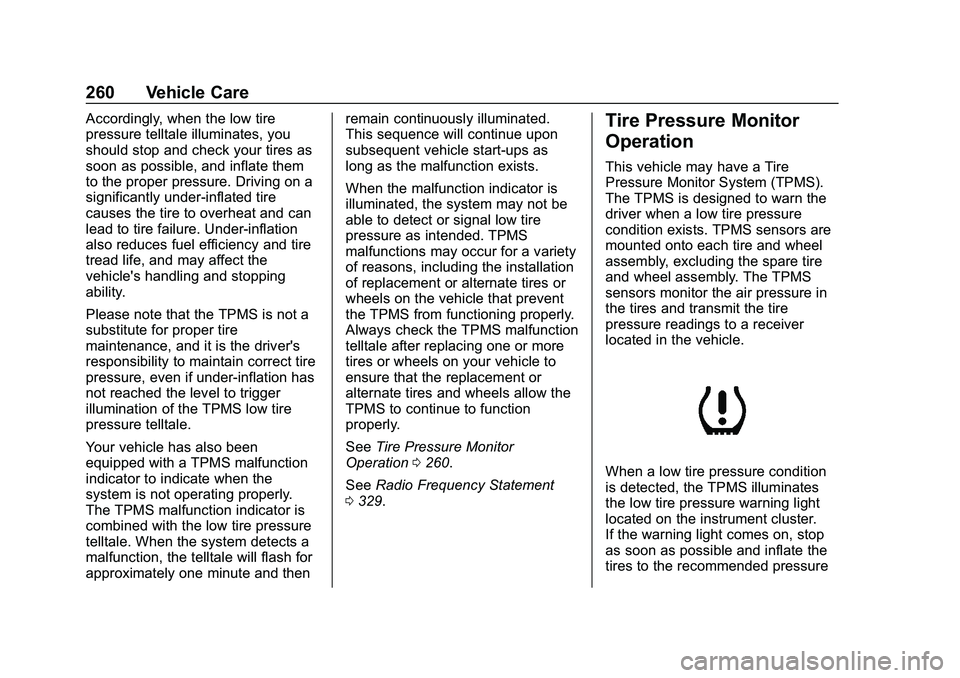
When a low tire pressure condition
is detected, the TPMS illuminates
the low tire pressure warning light
located on the instrument cluster.
If the warning light comes on, stop
as soon as possible and inflate the
tires to the recommended pressure