2020 CHEVROLET EQUINOX warning light
[x] Cancel search: warning lightPage 266 of 415
Chevrolet Equinox Owner Manual (GMNA-Localizing-U.S./Canada/Mexico-
13555863) - 2020 - CRC - 8/2/19
Vehicle Care 265
Vehicle Care
General Information
General Information . . . . . . . . . . 266
California Proposition65 Warning . . . . . . . . . . . . . . . . . 266
California Perchlorate Materials Requirements . . . . . 267
Accessories and Modifications . . . . . . . . . . . . . . . . 267
Vehicle Checks
Doing Your OwnService Work . . . . . . . . . . . . . . . 267
Hood . . . . . . . . . . . . . . . . . . . . . . . . . 268
Engine Compartment Overview . . . . . . . . . . . . . . . . . . . . 270
Engine Oil . . . . . . . . . . . . . . . . . . . . 275
Engine Oil Life System . . . . . . . 279
Automatic Transmission Fluid . . . . . . . . . . . . . . . . . . . . . . . . 280
Engine Air Cleaner/Filter . . . . . . 280
Cooling System . . . . . . . . . . . . . . 282
Engine Overheating . . . . . . . . . . 286
Washer Fluid . . . . . . . . . . . . . . . . . 287
Brakes . . . . . . . . . . . . . . . . . . . . . . . 288
Brake Fluid . . . . . . . . . . . . . . . . . . . 289
Battery - North America . . . . . . 290
All-Wheel Drive . . . . . . . . . . . . . . . 291 Starter Switch Check . . . . . . . . . 291
Automatic Transmission Shift
Lock Control Function
Check . . . . . . . . . . . . . . . . . . . . . . . 291
Park Brake and P (Park)
Mechanism Check . . . . . . . . . . 292
Wiper Blade Replacement . . . . 292
Windshield Replacement . . . . . 293
Gas Strut(s) . . . . . . . . . . . . . . . . . . 294
Headlamp Aiming
Headlamp Aiming . . . . . . . . . . . . 295
Bulb Replacement
Bulb Replacement . . . . . . . . . . . . 295
Halogen Bulbs . . . . . . . . . . . . . . . . 295
High Intensity Discharge (HID) Lighting . . . . . . . . . . . . . . . . . . . . . 296
LED Lighting . . . . . . . . . . . . . . . . . 296
Headlamps . . . . . . . . . . . . . . . . . . . 296
Front Turn Signal and Fog Lamps . . . . . . . . . . . . . . . . . . . . . . 297
Taillamps . . . . . . . . . . . . . . . . . . . . . 297
License Plate Lamp . . . . . . . . . . 298
Electrical System
Electrical System Overload . . . 298
Fuses and Circuit Breakers . . . 299
Engine Compartment Fuse Block . . . . . . . . . . . . . . . . . . . . . . . . 299 Instrument Panel Fuse
Block . . . . . . . . . . . . . . . . . . . . . . . . 302
Rear Compartment Fuse Block . . . . . . . . . . . . . . . . . . . . . . . . 305
Wheels and Tires
Tires . . . . . . . . . . . . . . . . . . . . . . . . . . 307
All-Season Tires . . . . . . . . . . . . . . 307
Winter Tires . . . . . . . . . . . . . . . . . . 308
Tire Sidewall Labeling . . . . . . . . 308
Tire Designations . . . . . . . . . . . . . 310
Tire Terminology andDefinitions . . . . . . . . . . . . . . . . . . . 311
Tire Pressure . . . . . . . . . . . . . . . . . 313
Tire Pressure Monitor System . . . . . . . . . . . . . . . . . . . . . . 315
Tire Pressure Monitor
Operation . . . . . . . . . . . . . . . . . . . 316
Tire Inspection . . . . . . . . . . . . . . . . 320
Tire Rotation . . . . . . . . . . . . . . . . . 320
When It Is Time for New Tires . . . . . . . . . . . . . . . . . . . . . . . . 321
Buying New Tires . . . . . . . . . . . . . 322
Different Size Tires and Wheels . . . . . . . . . . . . . . . . . . . . . . 323
Uniform Tire Quality Grading . . . . . . . . . . . . . . . . . . . . . 324
Wheel Alignment and Tire Balance . . . . . . . . . . . . . . . . . . . . . 325
Wheel Replacement . . . . . . . . . . 326
Tire Chains . . . . . . . . . . . . . . . . . . . 326
Page 289 of 415
Chevrolet Equinox Owner Manual (GMNA-Localizing-U.S./Canada/Mexico-
13555863) - 2020 - CRC - 8/2/19
288 Vehicle Care
Caution (Continued)
.Do not mix water with
ready-to-use washer fluid.
Water can cause the
solution to freeze and
damage the washer fluid
tank and other parts of the
washer system.
. When using concentrated
washer fluid, follow the
manufacturer instructions for
adding water.
. Fill the washer fluid tank
only three-quarters full when
it is very cold. This allows
for fluid expansion if
freezing occurs, which could
damage the tank if it is
completely full.
Brakes
Disc brake pads have built-in wear
indicators that make a high-pitched
warning sound when the brake pads
are worn and new pads are needed.
The sound can come and go or can be heard all the time when the
vehicle is moving, except when
applying the brake pedal firmly.
{Warning
The brake wear warning sound
means that soon the brakes will
not work well. That could lead to
a crash. When the brake wear
warning sound is heard, have the
vehicle serviced.
Caution
Continuing to drive with worn-out
brake pads could result in costly
brake repair.
Some driving conditions or climates
can cause a brake squeal when the
brakes are first applied or lightly
applied. This does not mean
something is wrong with the brakes.
Properly torqued wheel nuts are
necessary to help prevent brake
pulsation. When tires are rotated, inspect brake pads for wear and
evenly tighten wheel nuts in the
proper sequence to torque
specifications. See
Capacities and
Specifications 0374.
Brake pads should be replaced as
complete sets.
Brake Pedal Travel
See your dealer if the brake pedal
does not return to normal height,
or if there is a rapid increase in
pedal travel. This could be a sign
that brake service may be required.
Replacing Brake System Parts
Always replace brake system parts
with new, approved replacement
parts. If this is not done, the brakes
may not work properly. The braking
performance expected can change
in many other ways if the wrong
replacement brake parts are
installed or if parts are improperly
installed.
Page 290 of 415
Chevrolet Equinox Owner Manual (GMNA-Localizing-U.S./Canada/Mexico-
13555863) - 2020 - CRC - 8/2/19
Vehicle Care 289
Brake Fluid
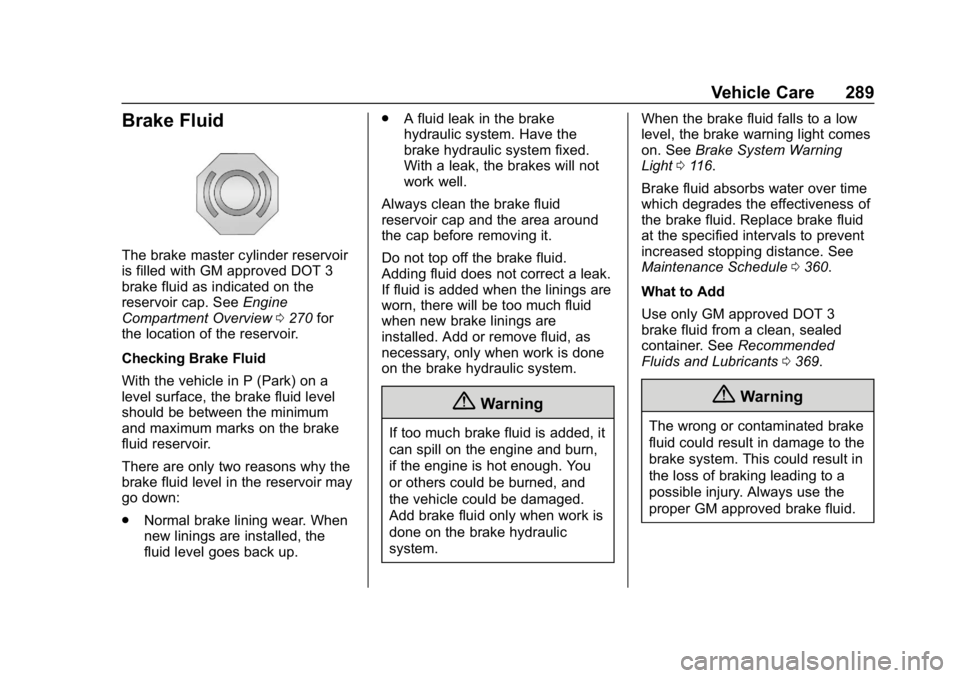
The brake master cylinder reservoir
is filled with GM approved DOT 3
brake fluid as indicated on the
reservoir cap. SeeEngine
Compartment Overview 0270 for
the location of the reservoir.
Checking Brake Fluid
With the vehicle in P (Park) on a
level surface, the brake fluid level
should be between the minimum
and maximum marks on the brake
fluid reservoir.
There are only two reasons why the
brake fluid level in the reservoir may
go down:
. Normal brake lining wear. When
new linings are installed, the
fluid level goes back up. .
A fluid leak in the brake
hydraulic system. Have the
brake hydraulic system fixed.
With a leak, the brakes will not
work well.
Always clean the brake fluid
reservoir cap and the area around
the cap before removing it.
Do not top off the brake fluid.
Adding fluid does not correct a leak.
If fluid is added when the linings are
worn, there will be too much fluid
when new brake linings are
installed. Add or remove fluid, as
necessary, only when work is done
on the brake hydraulic system.
{Warning
If too much brake fluid is added, it
can spill on the engine and burn,
if the engine is hot enough. You
or others could be burned, and
the vehicle could be damaged.
Add brake fluid only when work is
done on the brake hydraulic
system. When the brake fluid falls to a low
level, the brake warning light comes
on. See
Brake System Warning
Light 0116.
Brake fluid absorbs water over time
which degrades the effectiveness of
the brake fluid. Replace brake fluid
at the specified intervals to prevent
increased stopping distance. See
Maintenance Schedule 0360.
What to Add
Use only GM approved DOT 3
brake fluid from a clean, sealed
container. See Recommended
Fluids and Lubricants 0369.
{Warning
The wrong or contaminated brake
fluid could result in damage to the
brake system. This could result in
the loss of braking leading to a
possible injury. Always use the
proper GM approved brake fluid.
Page 297 of 415
Chevrolet Equinox Owner Manual (GMNA-Localizing-U.S./Canada/Mexico-
13555863) - 2020 - CRC - 8/2/19
296 Vehicle Care
High Intensity Discharge
(HID) Lighting
{Warning
The High Intensity Discharge
(HID) lighting system operates at
a very high voltage. If you try to
service any of the system
components, you could be
seriously injured. Have your
dealer or a qualified technician
service them.
After an HID headlamp bulb has
been replaced, the beam might be a
slightly different shade than it was
originally. This is normal.
LED Lighting
This vehicle has several LED lamps.
For replacement of any LED lighting
assembly, contact your dealer.
Headlamps
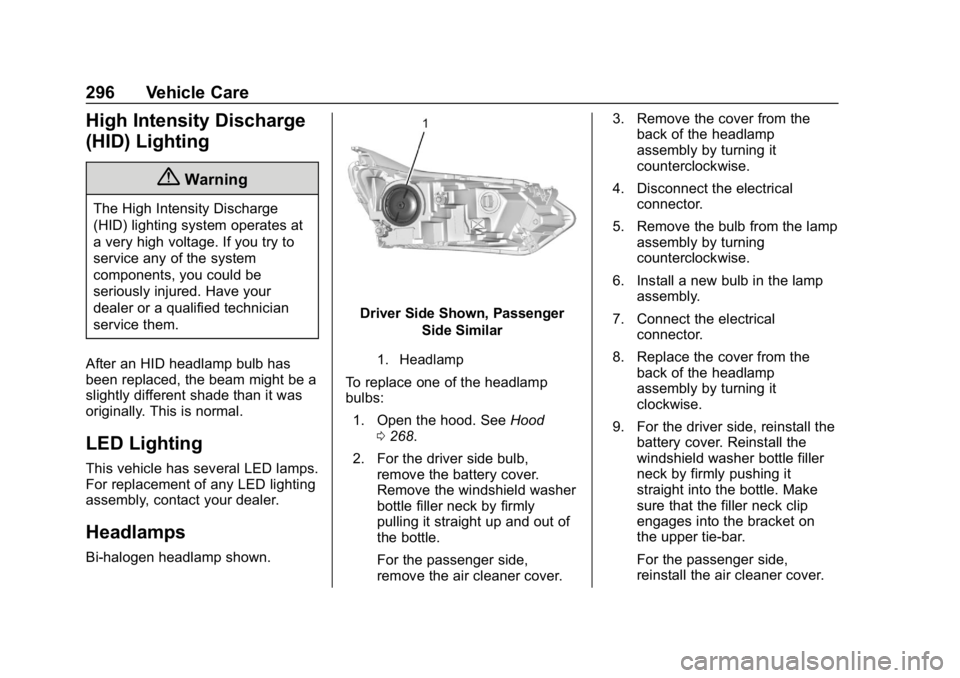
Bi-halogen headlamp shown.
Driver Side Shown, Passenger Side Similar
1. Headlamp
To replace one of the headlamp
bulbs:
1. Open the hood. See Hood
0 268.
2. For the driver side bulb, remove the battery cover.
Remove the windshield washer
bottle filler neck by firmly
pulling it straight up and out of
the bottle.
For the passenger side,
remove the air cleaner cover. 3. Remove the cover from the
back of the headlamp
assembly by turning it
counterclockwise.
4. Disconnect the electrical connector.
5. Remove the bulb from the lamp assembly by turning
counterclockwise.
6. Install a new bulb in the lamp assembly.
7. Connect the electrical connector.
8. Replace the cover from the back of the headlamp
assembly by turning it
clockwise.
9. For the driver side, reinstall the battery cover. Reinstall the
windshield washer bottle filler
neck by firmly pushing it
straight into the bottle. Make
sure that the filler neck clip
engages into the bracket on
the upper tie-bar.
For the passenger side,
reinstall the air cleaner cover.
Page 317 of 415

Chevrolet Equinox Owner Manual (GMNA-Localizing-U.S./Canada/Mexico-
13555863) - 2020 - CRC - 8/2/19
316 Vehicle Care
alternate tires and wheels allow the
TPMS to continue to function
properly.
SeeTire Pressure Monitor
Operation 0316.
See Radio Frequency Statement
0 387.
Tire Pressure Monitor
Operation
This vehicle may have a Tire
Pressure Monitor System (TPMS).
The TPMS is designed to warn the
driver when a low tire pressure
condition exists. TPMS sensors are
mounted onto each tire and wheel
assembly, excluding the spare tire
and wheel assembly. The TPMS
sensors monitor the air pressure in
the tires and transmit the tire
pressure readings to a receiver
located in the vehicle.
When a low tire pressure condition
is detected, the TPMS illuminates
the low tire pressure warning light
located on the instrument cluster.
If the warning light comes on, stop
as soon as possible and inflate the
tires to the recommended pressure
shown on the Tire and Loading
Information label. See Vehicle Load
Limits 0176.
A message to check the pressure in
a specific tire displays in the Driver
Information Center (DIC). The low
tire pressure warning light and the
DIC warning message come on at
each ignition cycle until the tires are
inflated to the correct inflation
pressure. Using the DIC, tire
pressure levels can be viewed. For
additional information and details
about the DIC operation and displays see
Driver Information
Center (DIC) (Base Level and
Midlevel) 0123 or
Driver Information Center (DIC)
(Uplevel) 0129.
The low tire pressure warning light
may come on in cool weather when
the vehicle is first started, and then
turn off as the vehicle is driven. This
could be an early indicator that the
air pressure is getting low and
needs to be inflated to the proper
pressure.
A Tire and Loading Information
label, attached to your vehicle,
shows the size of the original
equipment tires and the correct
inflation pressure for the tires when
they are cold. See Vehicle Load
Limits 0176, for an example of the
Tire and Loading Information label
and its location. Also see Tire
Pressure 0313.
The TPMS can warn about a low
tire pressure condition but it does
not replace normal tire
maintenance. See Tire Inspection
0 320, Tire Rotation 0320 and
Tires 0307.
Page 318 of 415

Chevrolet Equinox Owner Manual (GMNA-Localizing-U.S./Canada/Mexico-
13555863) - 2020 - CRC - 8/2/19
Vehicle Care 317
Caution
Tire sealant materials are not all
the same. A non-approved tire
sealant could damage the TPMS
sensors. TPMS sensor damage
caused by using an incorrect tire
sealant is not covered by the
vehicle warranty. Always use only
the GM approved tire sealant
available through your dealer or
included in the vehicle.
Factory-installed Tire Inflator Kits
use a GM-approved liquid tire
sealant. Using non-approved tire
sealants could damage the TPMS
sensors. See Tire Sealant and
Compressor Kit 0328 for
information regarding the inflator kit
materials and instructions.
TPMS Malfunction Light and
Message
The TPMS will not function properly
if one or more of the TPMS sensors
are missing or inoperable. When the
system detects a malfunction, the low tire pressure warning light
flashes for about one minute and
then stays on for the remainder of
the ignition cycle. A DIC warning
message also displays. The
malfunction light and DIC warning
message come on at each ignition
cycle until the problem is corrected.
Some of the conditions that can
cause these to come on are:
.
One of the road tires has been
replaced with the spare tire. The
spare tire does not have a
TPMS sensor. The malfunction
light and DIC message should
go off after the road tire is
replaced and the sensor
matching process is performed
successfully. See “TPMS Sensor
Matching Process” later in this
section.
. The TPMS sensor matching
process was not done or not
completed successfully after
rotating the tires. The
malfunction light and the DIC
message should go off after
successfully completing the sensor matching process. See
"TPMS Sensor Matching
Process" later in this section.
. One or more TPMS sensors are
missing or damaged. The
malfunction light and the DIC
message should go off when the
TPMS sensors are installed and
the sensor matching process is
performed successfully. See
your dealer for service.
. Replacement tires or wheels do
not match the original equipment
tires or wheels. Tires and wheels
other than those recommended
could prevent the TPMS from
functioning properly. See Buying
New Tires 0322.
. Operating electronic devices or
being near facilities using radio
wave frequencies similar to the
TPMS could cause the TPMS
sensors to malfunction.
If the TPMS is not functioning
properly it cannot detect or signal a
low tire pressure condition. See
Page 319 of 415

Chevrolet Equinox Owner Manual (GMNA-Localizing-U.S./Canada/Mexico-
13555863) - 2020 - CRC - 8/2/19
318 Vehicle Care
your dealer for service if the TPMS
malfunction light and DIC message
come on and stay on.
Tire Fill Alert (If Equipped)
This feature provides visual and
audible alerts outside the vehicle to
help when inflating an underinflated
tire to the recommended cold tire
pressure.
When the low tire pressure warning
light comes on:1. Park the vehicle in a safe, level place.
2. Set the parking brake firmly.
3. Place the vehicle in P (Park).
4. Add air to the tire that is underinflated. The turn signal
lamp will flash.
When the recommended
pressure is reached, the horn
sounds once and the turn
signal lamp will stop flashing
and briefly turn solid. Repeat these steps for all
underinflated tires that have
illuminated the low tire pressure
warning light.{Warning
Overinflating a tire could cause
the tire to rupture and you or
others could be injured. Do not
exceed the maximum pressure
listed on the tire sidewall. See
Tire Sidewall Labeling
0308 and
Vehicle Load Limits 0176.
If the tire is overinflated by more
than 35 kPa (5 psi), the horn will
sound multiple times and the turn
signal lamp will continue to flash for
several seconds after filling stops.
To release and correct the pressure,
while the turn signal lamp is still
flashing, briefly press the center of
the valve stem. When the
recommended pressure is reached,
the horn sounds once. If the turn signal lamp does not flash
within 15 seconds after starting to
inflate the tire, the tire fill alert has
not been activated or is not working.
If the hazard warning flashers are
on, the tire fill alert visual feedback
will not work properly.
The TPMS will not activate the tire
fill alert properly under the following
conditions:
.
There is interference from an
external device or transmitter.
. The air pressure from the
inflation device is not sufficient
to inflate the tire.
. There is a malfunction in
the TPMS.
. There is a malfunction in the
horn or turn signal lamps.
. The identification code of the
TPMS sensor is not registered to
the system.
. The battery of the TPMS sensor
is low.
Page 322 of 415

Chevrolet Equinox Owner Manual (GMNA-Localizing-U.S./Canada/Mexico-
13555863) - 2020 - CRC - 8/2/19
Vehicle Care 321
Use this rotation pattern when
rotating the tires.
Do not include the compact
spare tire in the tire rotation.
Adjust the front and rear tires to
the recommended inflation
pressure on the Tire and
Loading Information label after
the tires have been rotated. See
Tire Pressure0313 and
Vehicle Load Limits 0176.
Reset the Tire Pressure Monitor
System. See Tire Pressure
Monitor Operation 0316.
Check that all wheel nuts are
properly tightened. See “Wheel
Nut Torque” underCapacities
and Specifications 0374, and
“Removing the Flat Tire and
Installing the Spare Tire” under
Tire Changing 0335.{Warning
Rust or dirt on a wheel, or on the
parts to which it is fastened, can
make wheel nuts become loose
after time. The wheel could come
off and cause a crash. When
changing a wheel, remove any
rust or dirt from places where the
wheel attaches to the vehicle. In
an emergency, a cloth or a paper
towel can be used; however, use
a scraper or wire brush later to
remove all rust or dirt.
Lightly coat the inner diameter of
the wheel hub opening with
wheel bearing grease after a
wheel change or tire rotation to
prevent corrosion or rust
buildup. Do not get grease on
the wheel mounting surface or
on the wheel nuts or bolts.
When It Is Time for New
Tires
Factors such as maintenance,
temperatures, driving speeds,
vehicle loading, and road conditions
affect the wear rate of the tires.
Treadwear indicators are one way to
tell when it is time for new tires.
Treadwear indicators appear when
the tires have only 1.6 mm (1/16 in)
or less of tread remaining. See Tire
Inspection 0320 and
Tire Rotation 0320.