2020 CHEVROLET BLAZER lock
[x] Cancel search: lockPage 24 of 390

Chevrolet Blazer Owner Manual (GMNA-Localizing-U.S./Canada/Mexico-
13557845) - 2020 - CRC - 3/24/20
Keys, Doors, and Windows 23
To power open or close the liftgate,
select MAX or 3/4 mode.
.Press
btwice quickly on the
RKE transmitter until the liftgate
moves.
. Press
8on the driver door.
The driver door must either be
unlocked or locked without the
security armed.
. Press the touch pad in the
liftgate handle after unlocking all
doors. The RKE transmitter must
be within 1 m (3 ft).
.Presslon the bottom of the
liftgate. Press any liftgate button or the
touch pad while the liftgate is
moving to stop it. Pressing again
restarts the operation in the reverse
direction. The touch pad in the
liftgate handle cannot be used to
close the liftgate.
Caution
Manually forcing the liftgate to
open or close during a power
cycle can damage the vehicle.
Allow the power cycle to
complete.
The power liftgate may be
temporarily disabled under extreme
low temperatures, or after repeated
power cycling over a short period of
time. If this occurs, the liftgate can
still be operated manually.
If the vehicle is shifted out of
P (Park) while the power function is
in progress, the liftgate will continue
to completion. If the vehicle is
accelerated before the liftgate has
completed moving, the liftgate may
stop or reverse direction. Check for Driver Information Center (DIC)
messages and make sure the
liftgate is closed and latched before
driving.
Falling Liftgate Detection
If the power liftgate automatically
closes after a power opening cycle,
it indicates that the system is
reacting to excess weight on the
liftgate or a possible support strut
failure. A repetitive chime will sound
while the falling liftgate detection
feature is operating. Remove any
excess weight. If the liftgate
continues to automatically close
after opening, see your dealer for
service before using the power
liftgate.
Interfering with the power liftgate
motion or manually closing the
liftgate too quickly after power
opening may resemble a support
strut failure. This could also activate
the falling liftgate detection feature.
Allow the liftgate to complete its
operation and wait a few seconds
before manually closing the liftgate.
Page 25 of 390

Chevrolet Blazer Owner Manual (GMNA-Localizing-U.S./Canada/Mexico-
13557845) - 2020 - CRC - 3/24/20
24 Keys, Doors, and Windows
Obstacle Detection Features
If the liftgate encounters an obstacle
during a power open or close cycle,
a warning chime may sound and the
liftgate will automatically reverse
direction and move a short distance
away from the obstacle. After
removing the obstruction, the power
liftgate operation can be used again.
If the liftgate encounters multiple
obstacles on the same power cycle,
the power function will deactivate.
After removing the obstructions,
manually close the liftgate which will
allow normal power operation
functions to resume.
If the vehicle is locked while the
liftgate is closing, and an obstacle is
encountered that prevents the
liftgate from completely closing, the
horn will sound as an alert that the
liftgate did not close.
Pinch sensors are on the side
edges of the liftgate. If an object is
caught between the liftgate and the
vehicle and presses against this
sensor, the liftgate will reversedirection and open fully. The liftgate
will remain open until it is activated
again or closed manually.
Setting the 3/4 Mode
To change the position the liftgate
stops at when opening:
1. Select MAX or 3/4 mode and power open the liftgate.
2. Stop the liftgate movement at the desired height by pressing
any liftgate switch. Manually
adjust the liftgate position if
needed.
3. Press and hold
lat the
bottom of the liftgate until the
turn signals flash and a beep
sounds. This indicates the
setting has been recorded.
The liftgate cannot be set below a
minimum programmable height.
If there is no light flash or sound,
then the height adjustment may be
too low.
Manual Operation
Select OFF to manually operate the
liftgate. See “Manual Liftgate” at the
beginning of this section.
Caution
Attempting to move the liftgate
too quickly and with excessive
force may result in damage to the
vehicle.
Operate the liftgate manually with a
smooth motion and moderate
speed. The system includes a
feature that limits the manual
closing speed to protect the
components.
Hands-Free Operation
If equipped, the liftgate may be
operated with a kicking motion
under the left side of the rear
bumper at the location of the
projected logo. See "Projected
Logo" later in this section. The RKE
transmitter must be within 1 m (3 ft).
Page 29 of 390

Chevrolet Blazer Owner Manual (GMNA-Localizing-U.S./Canada/Mexico-
13557845) - 2020 - CRC - 3/24/20
28 Keys, Doors, and Windows
Vehicle Security
This vehicle has theft-deterrent
features; however, they do not make
the vehicle impossible to steal.
Vehicle Alarm System
This vehicle has an anti-theft alarm
system.
Arming the Alarm System
1. Close the liftgate and the hood.Turn off the vehicle.
2. Lock the vehicle in one of three ways:
.Use the RKE transmitter.
. Use the Keyless Access
system.
. With a door open, press the
inside
Q.
3. After 30 seconds the alarm system will arm. Pressing
Qon
the RKE transmitter a second
time will bypass the 30-second
delay and immediately arm the
alarm system. The vehicle alarm system will not
arm if the doors are locked with
the key.
If the driver door is opened without
first unlocking with the RKE
transmitter, the horn will chirp and
the lights will flash to indicate
pre-alarm. If the vehicle is not
started, or the door is not unlocked
by pressing
Kon the RKE
transmitter during the 10-second
pre-alarm, the alarm will be
activated.
The alarm will also be activated if a
passenger door, the liftgate, or the
hood is opened without first
disarming the system. When the
alarm is activated, the turn signals
flash and the horn sounds for about
30 seconds. The alarm system will
then re-arm to monitor for the next
unauthorized event.
Disarming the Alarm System
To disarm the alarm system or turn
off the alarm if it has been activated:
. Press
Kon the RKE transmitter. .
Unlock the vehicle using the
Keyless Access system.
. Start the vehicle.
To avoid setting off the alarm by
accident:
. Lock the vehicle after all
occupants have left the vehicle
and all doors are closed.
. Always unlock a door with the
RKE transmitter or use the
Keyless Access system.
Unlocking the driver door with the
key will not disarm the system or
turn off the alarm.
How to Detect a Tamper
Condition
IfKis pressed and the horn chirps
and the lights flash three times, the
alarm was activated while the alarm
system was armed.
If the alarm system has been
activated, a message will appear on
the Driver Information Center (DIC).
Page 35 of 390

Chevrolet Blazer Owner Manual (GMNA-Localizing-U.S./Canada/Mexico-
13557845) - 2020 - CRC - 3/24/20
34 Keys, Doors, and Windows
.Dirt, snow, or other debris blocks
the camera lens. Clean the lens
with a soft damp cloth, or if
equipped, with the Rear Camera
Washer. See Rear Window
Wiper/Washer 0101.
. The camera’s mounting on the
vehicle has been damaged, and/
or the position or the mounting
angle of the camera has
changed.
Windows
{Warning
Never leave a child, a helpless
adult, or a pet alone in a vehicle,
especially with the windows
closed in warm or hot weather.
They can be overcome by the
extreme heat and suffer
permanent injuries or even death
from heat stroke.
The vehicle aerodynamics are
designed to improve fuel economy
performance. This may result in a
pulsing sound when either rear
window is down and the front
windows are up. To reduce the
sound, open either a front window
or the sunroof, if equipped.
Power Windows
{Warning
Leaving children in a vehicle with
a Remote Keyless Entry (RKE)
transmitter is dangerous and
children or others could be
seriously injured or killed. They
could operate the power windows
or other controls or make the
vehicle move. The windows will
function with the RKE transmitter
in the vehicle, and children or
others could be caught in the path
of a closing window. Do not leave
children in a vehicle with an RKE
transmitter.
Page 36 of 390

Chevrolet Blazer Owner Manual (GMNA-Localizing-U.S./Canada/Mexico-
13557845) - 2020 - CRC - 3/24/20
Keys, Doors, and Windows 35
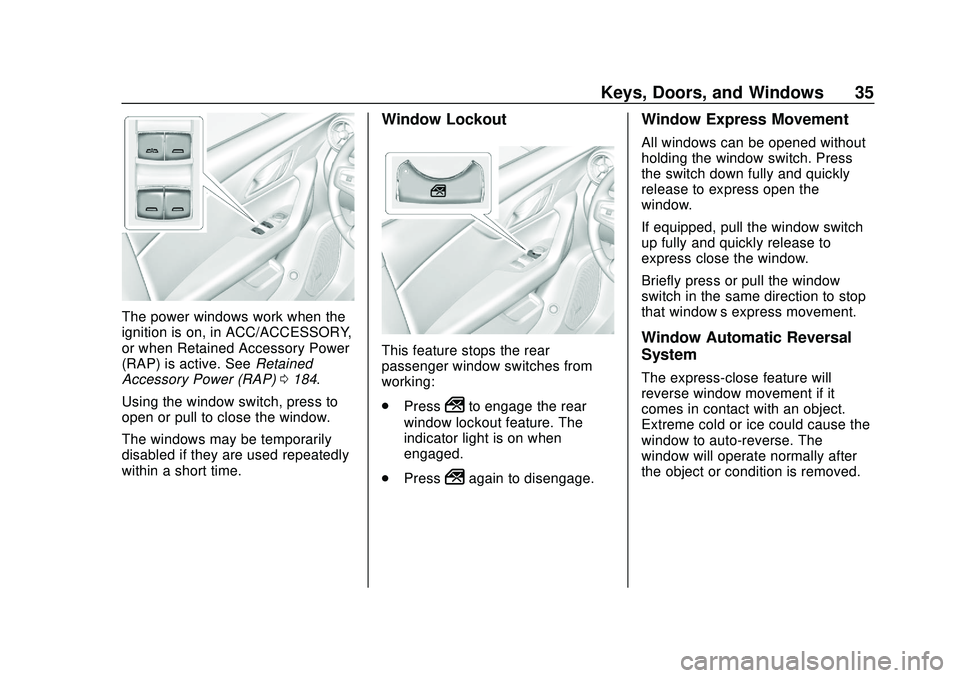
The power windows work when the
ignition is on, in ACC/ACCESSORY,
or when Retained Accessory Power
(RAP) is active. SeeRetained
Accessory Power (RAP) 0184.
Using the window switch, press to
open or pull to close the window.
The windows may be temporarily
disabled if they are used repeatedly
within a short time.
Window Lockout
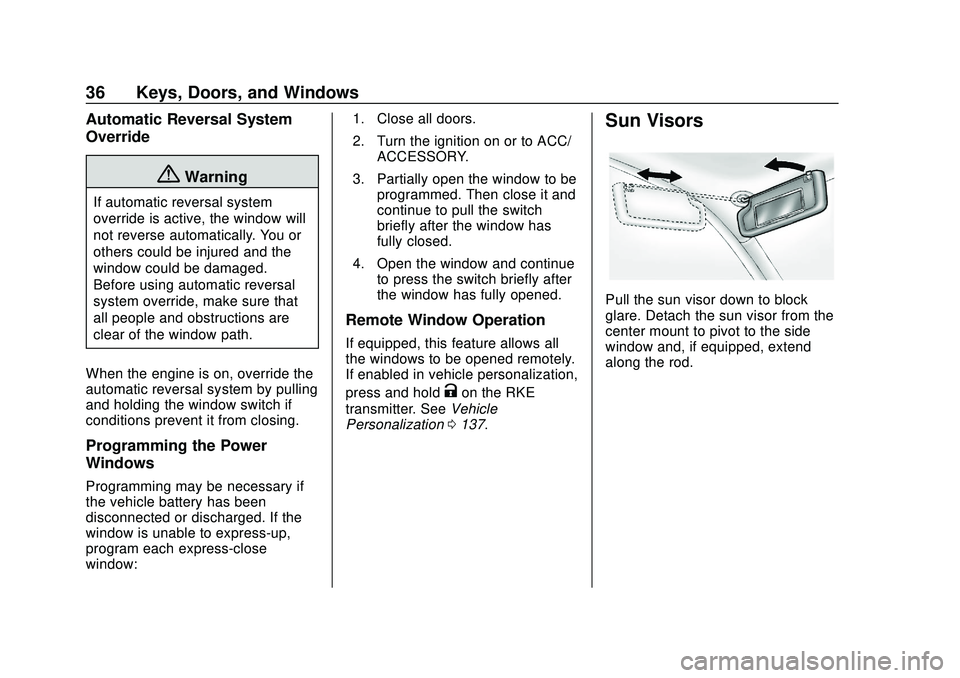
This feature stops the rear
passenger window switches from
working:
. Press
2to engage the rear
window lockout feature. The
indicator light is on when
engaged.
. Press
2again to disengage.
Window Express Movement
All windows can be opened without
holding the window switch. Press
the switch down fully and quickly
release to express open the
window.
If equipped, pull the window switch
up fully and quickly release to
express close the window.
Briefly press or pull the window
switch in the same direction to stop
that window’s express movement.
Window Automatic Reversal
System
The express-close feature will
reverse window movement if it
comes in contact with an object.
Extreme cold or ice could cause the
window to auto-reverse. The
window will operate normally after
the object or condition is removed.
Page 37 of 390

Chevrolet Blazer Owner Manual (GMNA-Localizing-U.S./Canada/Mexico-
13557845) - 2020 - CRC - 3/24/20
36 Keys, Doors, and Windows
Automatic Reversal System
Override
{Warning
If automatic reversal system
override is active, the window will
not reverse automatically. You or
others could be injured and the
window could be damaged.
Before using automatic reversal
system override, make sure that
all people and obstructions are
clear of the window path.
When the engine is on, override the
automatic reversal system by pulling
and holding the window switch if
conditions prevent it from closing.
Programming the Power
Windows
Programming may be necessary if
the vehicle battery has been
disconnected or discharged. If the
window is unable to express-up,
program each express-close
window: 1. Close all doors.
2. Turn the ignition on or to ACC/
ACCESSORY.
3. Partially open the window to be programmed. Then close it and
continue to pull the switch
briefly after the window has
fully closed.
4. Open the window and continue to press the switch briefly after
the window has fully opened.
Remote Window Operation
If equipped, this feature allows all
the windows to be opened remotely.
If enabled in vehicle personalization,
press and hold
Kon the RKE
transmitter. See Vehicle
Personalization 0137.
Sun Visors
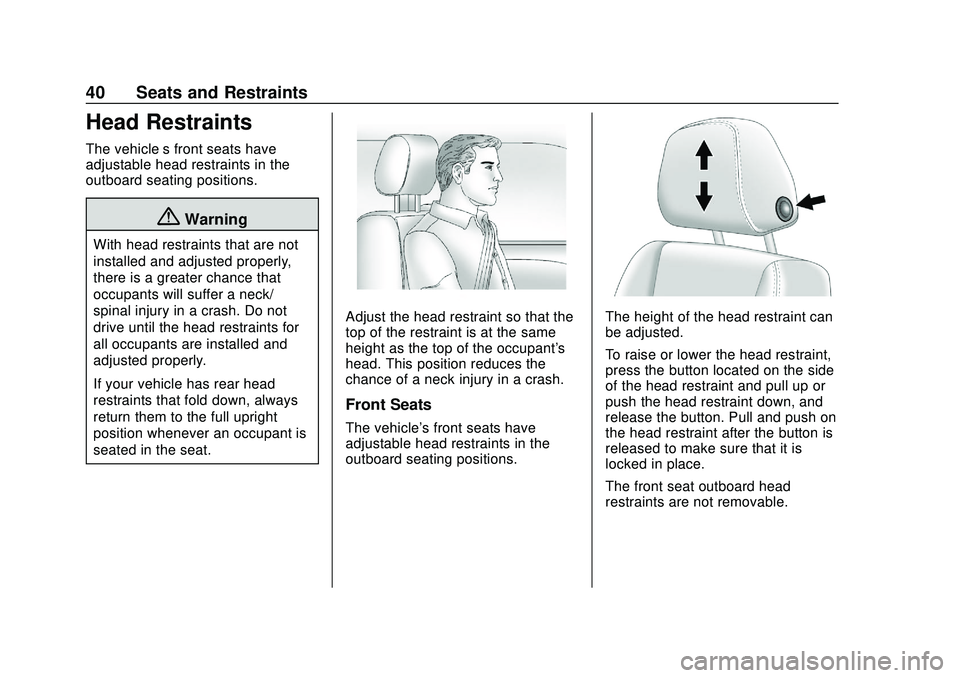
Pull the sun visor down to block
glare. Detach the sun visor from the
center mount to pivot to the side
window and, if equipped, extend
along the rod.
Page 41 of 390

Chevrolet Blazer Owner Manual (GMNA-Localizing-U.S./Canada/Mexico-
13557845) - 2020 - CRC - 3/24/20
40 Seats and Restraints
Head Restraints
The vehicle’s front seats have
adjustable head restraints in the
outboard seating positions.
{Warning
With head restraints that are not
installed and adjusted properly,
there is a greater chance that
occupants will suffer a neck/
spinal injury in a crash. Do not
drive until the head restraints for
all occupants are installed and
adjusted properly.
If your vehicle has rear head
restraints that fold down, always
return them to the full upright
position whenever an occupant is
seated in the seat.
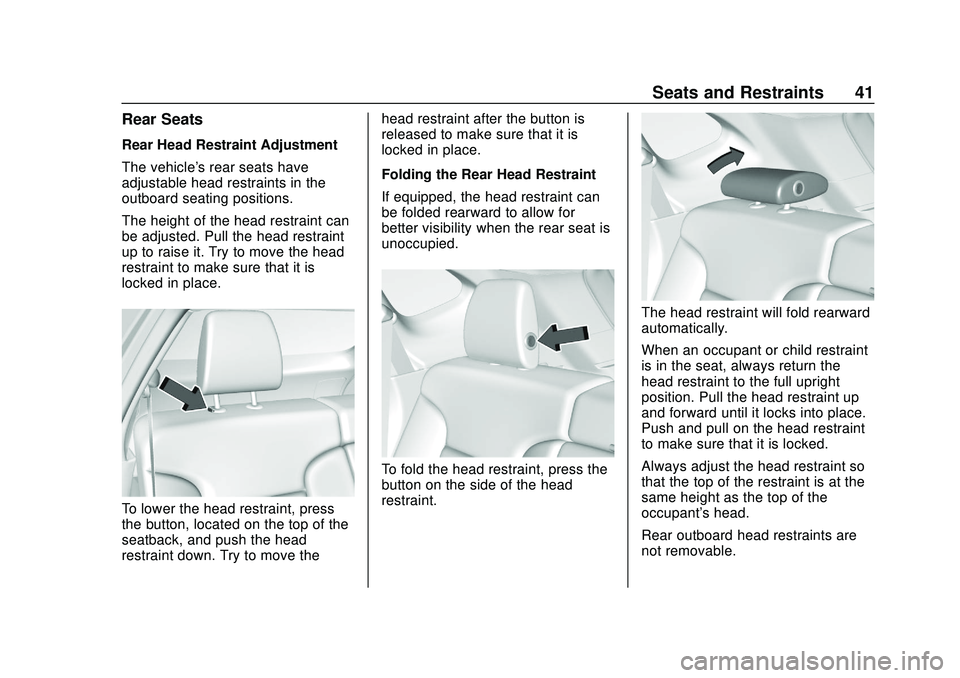
Adjust the head restraint so that the
top of the restraint is at the same
height as the top of the occupant's
head. This position reduces the
chance of a neck injury in a crash.
Front Seats
The vehicle's front seats have
adjustable head restraints in the
outboard seating positions.
The height of the head restraint can
be adjusted.
To raise or lower the head restraint,
press the button located on the side
of the head restraint and pull up or
push the head restraint down, and
release the button. Pull and push on
the head restraint after the button is
released to make sure that it is
locked in place.
The front seat outboard head
restraints are not removable.
Page 42 of 390

Chevrolet Blazer Owner Manual (GMNA-Localizing-U.S./Canada/Mexico-
13557845) - 2020 - CRC - 3/24/20
Seats and Restraints 41
Rear Seats
Rear Head Restraint Adjustment
The vehicle's rear seats have
adjustable head restraints in the
outboard seating positions.
The height of the head restraint can
be adjusted. Pull the head restraint
up to raise it. Try to move the head
restraint to make sure that it is
locked in place.
To lower the head restraint, press
the button, located on the top of the
seatback, and push the head
restraint down. Try to move thehead restraint after the button is
released to make sure that it is
locked in place.
Folding the Rear Head Restraint
If equipped, the head restraint can
be folded rearward to allow for
better visibility when the rear seat is
unoccupied.
To fold the head restraint, press the
button on the side of the head
restraint.
The head restraint will fold rearward
automatically.
When an occupant or child restraint
is in the seat, always return the
head restraint to the full upright
position. Pull the head restraint up
and forward until it locks into place.
Push and pull on the head restraint
to make sure that it is locked.
Always adjust the head restraint so
that the top of the restraint is at the
same height as the top of the
occupant's head.
Rear outboard head restraints are
not removable.