2020 AUDI A8 ignition
[x] Cancel search: ignitionPage 9 of 360
4N0012721BD
Quick access
— Driver assistance systems ......
@ Depending on equipment:
—Cup holders ..............0..
—Socket .........0..0 0.000000.
@0) Depending on equipment:
— Starting the engine when there is
@ MMALFUMGEION: «5 csscice 6 2 soeeane + ane
—
Audi musicinterface ..........
— Audi phone box ...............
—SDcardreader ...............
@) Electromechanical parking brake
button 2.2... 6. cece eee eee eee
@3) Automatic transmission selector
lever... 2... cece ee eee eee eee
@) [START ENGINE STOP] button ....
@4 Steering wheel adjustment ......
@5) Lever for:
— Cruise control system .........
— Adaptive cruise assist ..........
@8 Data link connector for On Board
Diagnostic System (OBD) ........
@) Buttons for:
— LIQHtS sc ss cease se wees ts ee es
—All-weather lights ............
— Rear fog lights ...............
@8 Hood release ................-.
@9) Button for:
— Luggage compartment lid ......
— Fuel filler door release (plug-in
hybrid drive) ..............0.0.
G0 Exterior mirror adjustment ......
@2 Buttons for:
— Power windows .............-
—Child safety lock ..............
G) Tips
157
98 97
L112
254
202
250
124
113 111
80
166
170
332
60 60 60
276
50
271
66
54
53
Some the equipment listed here is only instal-
led in certain models or is available as an op-
tion.
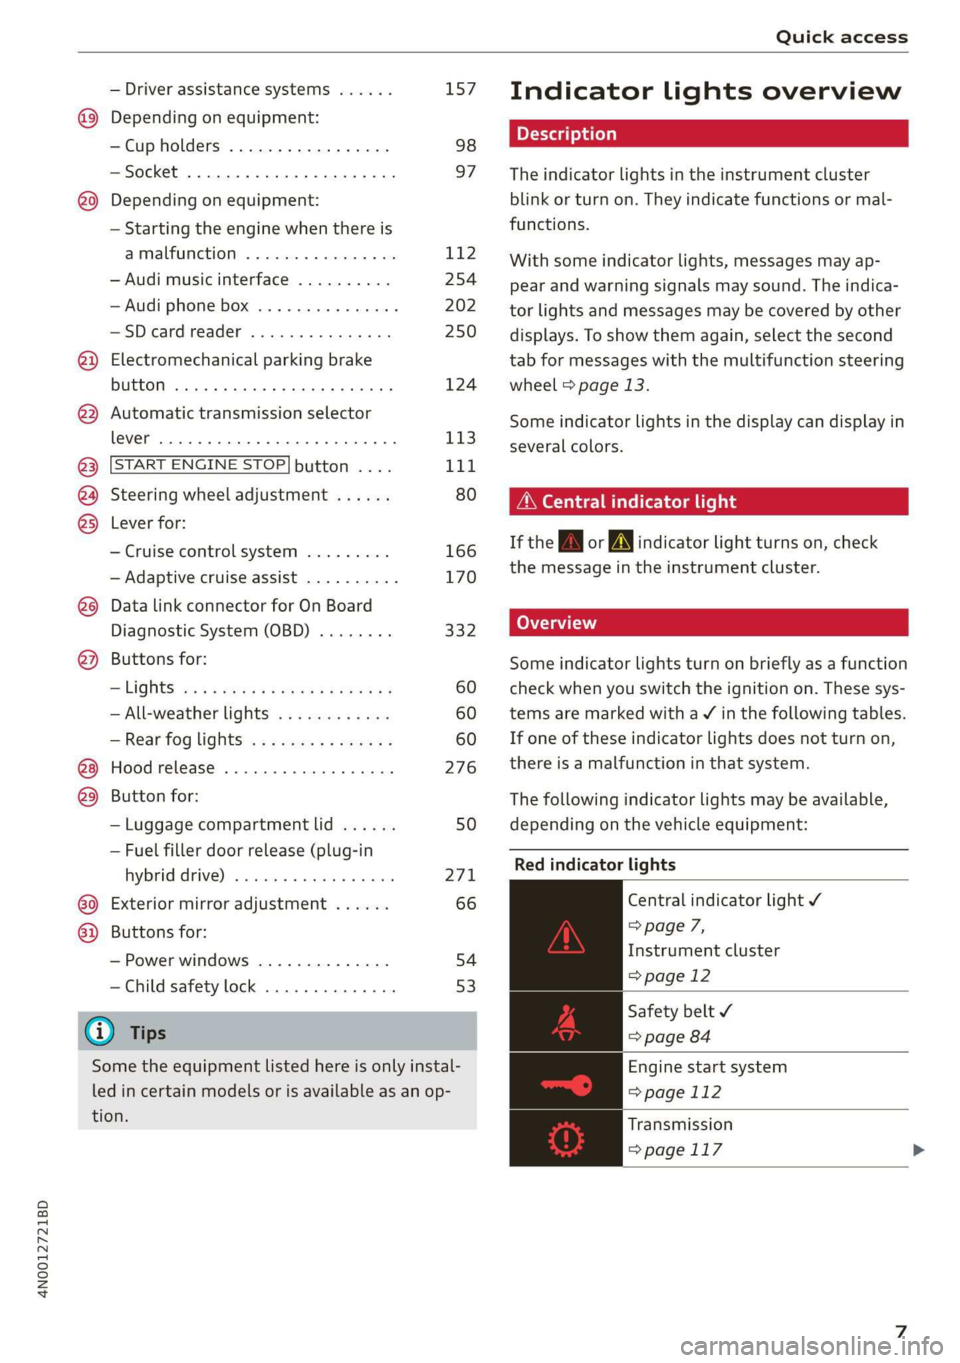
Indicator lights overview
The indicator lights in the instrument cluster
blink or turn on. They indicate functions or mal-
functions.
With some indicator lights, messages may ap-
pear and warning signals may sound. The indica-
tor lights and messages may be covered by other
displays. To show them again, select the second
tab for messages with the multifunction steering
wheel & page 13.
Some indicator lights in the display can display in
several colors.
Oeil ans
If the A or N indicator light turns on, check
the message in the instrument cluster.
Some indicator lights turn on briefly as a function
check
when you switch the ignition on. These sys-
tems are marked with a V in the following tables.
If one of these indicator lights does not turn on,
there is a malfunction in that system.
The following indicator lights may be available,
depending on the vehicle equipment:
Red indicator lights
Central indicator light ¥
=> page 7,
Instrument cluster
=>page 12
Safety belt
=> page 84
Engine start system
=>page 112
Transmission
=>page 117
Page 15 of 360
4N0012721BD
Instrument cluster
You can manage personal profiles in the MMI
=> page 41. Before driving, you can select your
personal profile in the instrument cluster and ap-
ply customized vehicle settings, such as the seat
position.
Requirement: the driver's door must have been
opened and the ignition must not be switched
on.
> Confirm the displayed profile @), or
> To load another profile, select and confirm
Switch profile 2).
> Select and confirm the desired profile. The
user-specific settings will load.
> To cancel the seat, mirror, and steering column
adjustment, select Cancel.
G) Tips
For more information and usage options for
personal profiles, see > page 41.
Operating
Heyes
12/05/2017
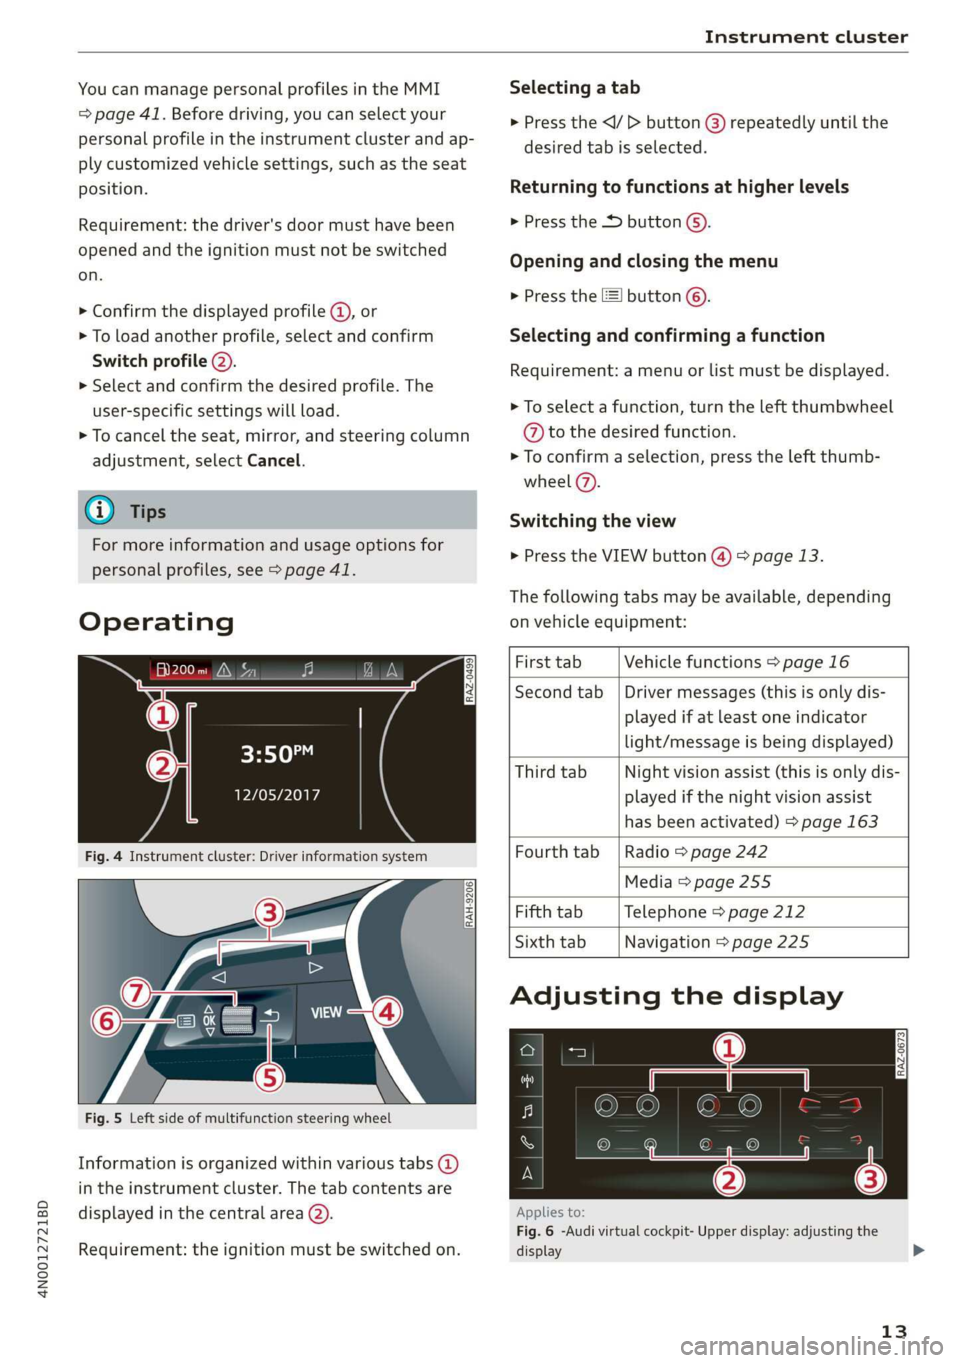
Fig. 4 Instrument cluster: Driver information system
Selecting a tab
> Press the
desired tab is selected.
Returning to functions at higher levels
> Press the D button ©).
Opening and closing the menu
> Press the [=] button ©).
Selecting and confirming a function
Requirement: a menu or list must be displayed.
> To select a function, turn the left thumbwheel
@ to the desired function.
> To confirm a selection, press the left thumb-
wheel (7).
Switching the view
> Press the VIEW button @) > page 13.
The following tabs may be available, depending
on vehicle equipment:
RAH-9206
Fig. 5 Left side of multifunction steering wheel
Information is organized within various tabs @)
in the instrument cluster. The tab contents are
displayed in the central area (2).
Requirement: the ignition must be switched on.
First tab Vehicle functions > page 16
Second tab | Driver messages (this is only dis-
played if at least one indicator
light/message is being displayed)
Third tab Night vision assist (this is only dis-
played if the night vision assist
has been activated) > page 163
Fourth tab | Radio > page 242
Media > page 255
Fifth tab Telephone > page 212
Sixth tab Navigation > page 225
Adjusting the display
RAZ-0673
Applies to:
Fig. 6 -Audi virtual cockpit- Upper display: adjusting the
display
13
>
Page 16 of 360

Instrument cluster
Switching the view
>» Press the VIEW button to switch between the
default view @ and the enhanced view (2).
Adjusting the layout
Depending on the vehicle equipment, various lay-
outs may be available.
» Applies to: MMI: Select on the home screen:
SETTINGS > Display & brightness > Virtual
cockpit.
> To adjust the desired layout, press @).
Adjusting the additional display
Depending on the vehicle equipment, the addi-
tional displays that can be selected may vary.
» Applies to: MMI: Select on the home screen:
SETTINGS > Display & brightness > Virtual
cockpit > (Configure).
> Select the desired additional display.
Reducing the display
Depending on the vehicle equipment, you can
hide the central area in the instrument cluster.
> Select in the instrument cluster: Vehicle func-
tions tab > EE] button > Reduced display.
Coolant temperature
display
Applies to: vehicles with coolant temperature display
The coolant temperature display @) > page 12
only functions when the ignition is switched on.
To reduce the risk of engine damage, please ob-
serve the following notes about the temperature
ranges.
Cold range
If only the LEDs at the bottom of the gauge turn
on, the engine has not reached operating tem-
perature yet. Avoid high engine speeds, full accel-
eration, and heavy engine loads.
Normal range
The engine has reached its operating tempera-
ture once the LEDs up to the center of the gauge
turn on. If the || indicator light in the instru-
14
ment cluster display turns on, the coolant tem-
perature is too high > page 281.
() Note
— Auxiliary headlights and other accessories in
front of the air intake impair the cooling ef-
fect of the coolant. This increases the risk of
the engine overheating during high outside
temperatures and heavy engine load.
— The front spoiler also helps to distribute
cooling air correctly while driving. If the
spoiler is damaged, the cooling effect will
be impaired and the risk of the engine over-
heating will increase. See an authorized
Audi dealer or authorized Audi Service Fa-
cility for assistance.
Tachometer
The tachometer 2) > page 12 displays the engine
speed in revolutions per minute (RPM). The be-
ginning of the red zone in the tachometer indi-
cates the maximum permissible engine speed for
all gears once the engine has been broken in. Be-
fore reaching the red zone, you should shift into
the next higher gear, select the "D" or "S" selec-
tor lever position, or remove your foot from the
accelerator pedal.
Displaying the tachometer
Applies to: vehicles with plug-in hybrid drive
> Applies to: MMI: Select on the home screen:
SETTINGS > Display & brightness > Virtual
cockpit > Left dial > Tachometer or Combined.
Engine speed limitation
If the AI indicator light turns on, the engine will
be automatically limited to the RPM displayed in
the instrument cluster. This will protect the en-
gine components, for example during a cold start
or from overheating.
The engine speed limitation will be deactivated
once the engine has reached its normal operating
temperature and you have released the accelera-
tor pedal.
If the engine speed limitation was activated by
an engine control malfunction, the By indicator
light also turns on. Make sure the engine speed >
Page 19 of 360

4N0012721BD
Instrument cluster
— Energy consumers > page 17
— Driver assistance
— Traffic sign recognition and traffic light infor-
mation
Short-term memory and long-term memory
The short-term memory collects driving informa-
tion from the time the ignition is switched on un-
til it is switched off. If you continue driving within
two hours after switching the ignition off, the
new values will be included when calculating the
current trip information.
Unlike the short-term memory, the long-term
memory is not erased automatically. You can se-
lect the time period for evaluating trip informa-
tion yourself.
Average consumption
The current consumption can be shown using a
bar graph. The average consumption stored in
the short-term memory is also displayed. If the
bar is green, your vehicle is saving energy (for ex-
ample, using recuperation).
Energy consumers
The Energy consumers view lists other equip-
ment that is currently affecting fuel consump-
tion. The display shows up to three equipment
items. The equipment using the most power is
listed first. If more than three items using power
are switched on, the equipment that is currently
using the most power is displayed. A gauge also
shows the current total consumption of all other
equipment.
G@) Tips
The date, time of day, and time and date for-
mat can be set in the Infotainment system
=> page 266.
17
Page 27 of 360
4N0012721BD
Touch displays
Accepting suggested words or selecting
entries from the results list
> To accept a suggested word (2) or select an en-
try from the results list @), press on it.
> To display more content in the results list, drag
your finger upward or downward on the screen.
Setting the input language or keyboard
layout
> Applies to MMI: Select on the home screen:
SETTINGS > Language & keyboard > Keyboard.
> To define additional input languages, press the
© button.
> To change the keyboard layout for an input lan-
guage, press >. For example, you can select be-
tween QWERTZ and QWERTY.
Rear Seat Remote
Applies to: vehicles with Rear Seat Remote
With Rear Seat Remote, you can control conven-
ience and Infotainment system functions in the
rear of the vehicle, such as the climate control
system or the media playback in the vehicle.
ZA WARNING
— As the driver, do not allow usage of the Rear
Seat Remote to distract you from driving, as
this could increase the risk of an accident.
For example, do not reach behind you while
driving to operate the Rear Seat Remote.
— The Rear Seat Remote can only be operated
when the vehicle is stationary or when the
remote is securely positioned in the desig-
nated holder in the vehicle. Like all loose ob-
jects, it could be thrown through the vehicle
and
cause serious injuries in a collision. If
the Rear Seat Remote is not in the designat-
ed holder, it must always be securely stowed
while driving.
— Do not use any wireless devices on the front
seats within range of the airbags while driv-
ing. Also read the warnings in the chapter
> page 86.
— The Rear Seat Remote can become hot while
charging. Pay attention to the housing and
display temperature, and be careful when
removing the Rear Seat Remote from the
holder.
— There are magnets located on the back of
the Rear Seat Remote and in the designated
holder. For people with pacemakers, the
electromagnetic radiation may impair pace-
maker function. Always maintain a mini-
mum distance of approximately 6 in (15 cm)
from the magnets.
CG) Note
— Always follow the information found in 9®
in General information on page 216.
— Protect the Rear Seat Remote against pro-
longed exposure to direct sunlight.
— Extremely high or low temperatures that
can occur inside vehicles can damage the
Rear Seat Remote and/or impair the device
performance. Never leave your Rear Seat
Remote in the vehicle in extremely high or
low temperatures.
— Protect the Rear Seat Remote from coming
into contact with any fluids.
G) Tips
— Please note that the Rear Seat Remote can
be used only when the ignition is switched
on and within range of your vehicle's active
Wi-Fi hotspot.
— Please note that a Wi-Fi connection does
not automatically make it possible to use
the
Internet. For additional information,
see the chapter > page 216.
— When playing online media sources, there
may be longer loading times or restrictions
on media playback, depending on the Inter-
net connection or the Wi-Fi usage (for ex-
ample, if there is intensive usage by multi-
ple devices on the hotspot).
— Signals from Bluetooth devices and Wi-Fi
hotspots within range of the vehicle may
impair the vehicle Wi-Fi services. If multiple
Bluetooth devices and Wi-Fi hotspots are
within range of the vehicle, it may cause re-
duced data transfer rates, connection inter-
ruptions, or limitations when streaming me-
dia.
25
Page 28 of 360
![AUDI A8 2020 Owners Manual Touch displays
Lea TN]
Applies to: vehicles with Rear Seat Remote
Lt
=.
S
Fig. 19 Rear Seat Remote: overview
[RAH-9143]
@ Microphone
@ Volume button (decrease/mute)
@® Volu AUDI A8 2020 Owners Manual Touch displays
Lea TN]
Applies to: vehicles with Rear Seat Remote
Lt
=.
S
Fig. 19 Rear Seat Remote: overview
[RAH-9143]
@ Microphone
@ Volume button (decrease/mute)
@® Volu](/manual-img/6/57606/w960_57606-27.png)
Touch displays
Lea TN]
Applies to: vehicles with Rear Seat Remote
Lt
=.
S
Fig. 19 Rear Seat Remote: overview
[RAH-9143]
@ Microphone
@ Volume button (decrease/mute)
@® Volume button (increase)
@ Speaker
©) Display
Using the holder
Applies to: vehicles with Rear Seat Remote
[RAH-9144)
Fig. 20 Rear center armrest/full-length center console:
Rear Seat Remote holder
Depending on the equipment, the Rear Seat Re-
mote may be located in the rear center armrest
or on the full-length center console.
Removing the Rear Seat Remote
> To release the Rear Seat Remote, press the A
button @.
26
>» Remove the Rear Seat Remote from the holder
using both hands > A\ in Introduction on
page 25.
Securing the Rear Seat Remote
> Hold the Rear Seat Remote in both hands so
that the volume buttons @) and @) > page 26,
fig. 19 face upward.
> Carefully press the Rear Seat Remote toward
the holder until the Rear Seat Remote locks in-
to place.
Charging the battery
Applies to: vehicles with Rear Seat Remote
Requirement: the ignition must be switched on.
> To charge the battery, secure the Rear Seat Re-
mote in the holder > page 26. The battery will
charge automatically.
@) Note
The Rear Seat Remote battery is permanently
installed and may only be replaced by an au-
thorized Audi dealer or authorized Audi Serv-
ice Facility. If the battery replacement is not
done correctly, it may cause malfunctions and
increase the risk of damaging the Rear Seat
Remote.
@ Tips
— Batteries have a limited service life. If the
operating time decreases significantly, the
battery should be replaced. Contact an au-
thorized Audi dealer or authorized Audi
Service Facility if you need a new battery.
— The Rear Seat Remote is equipped with an
intelligent battery management system to
provide a long battery service life. There-
fore, the battery may not be charged to its
full capacity, especially when temperatures
are high or low.
Page 29 of 360
4N0012721BD
Touch displays
Menus and symbols
Applies to: vehicles with Rear Seat Remote
RADIO c=)
RAX-0092
Smet) (7)
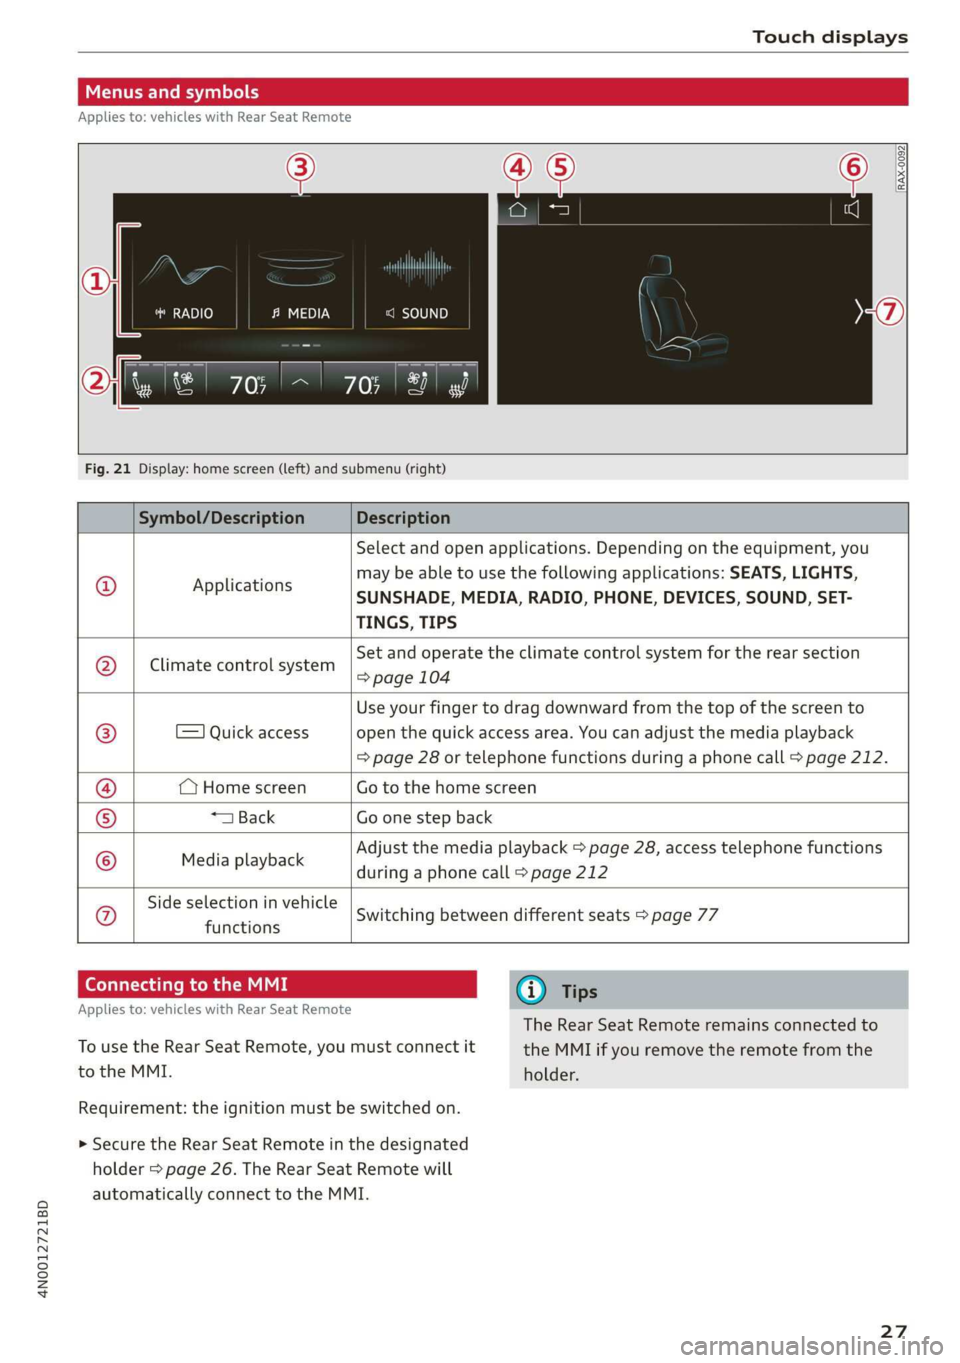
Fig. 21 Display: home screen (left) and submenu (right)
Symbol/Description Description
© Applications
Select and open applications. Depending on the equipment, you
may be able to use the following applications: SEATS, LIGHTS,
SUNSHADE, MEDIA, RADIO, PHONE, DEVICES, SOUND, SET-
TINGS, TIPS
Climate control system
Set and operate the climate control system for the rear section
=> page 104
=) Quick access
Use your finger to drag downward from the top of the screen to
open the quick access area. You can adjust the media playback
=> page 28 or telephone functions during a phone call > page 212.
(Home screen Go to the home screen
*1 Back Go one step back
Media playback
Adjust the media playback > page 28, access telephone functions
during a phone call > page 212
Side selection in vehicle
functions Q}]e
|@Oe|
©
|
0
Switching between different seats > page 77
Connecting to the MMI G@) Tips
Applies to: vehicles with Rear Seat Remote
The Rear Seat Remote remains connected to
To use the Rear Seat Remote, you must connect it the MMI if you remove the remote from the
to the MMI. holder.
Requirement: the ignition must be switched on.
> Secure the Rear Seat Remote in the designated
holder > page 26. The Rear Seat Remote will
automatically connect to the MMI.
27
Page 31 of 360
4N0012721BD
Touch displays
Rear Seat Remote
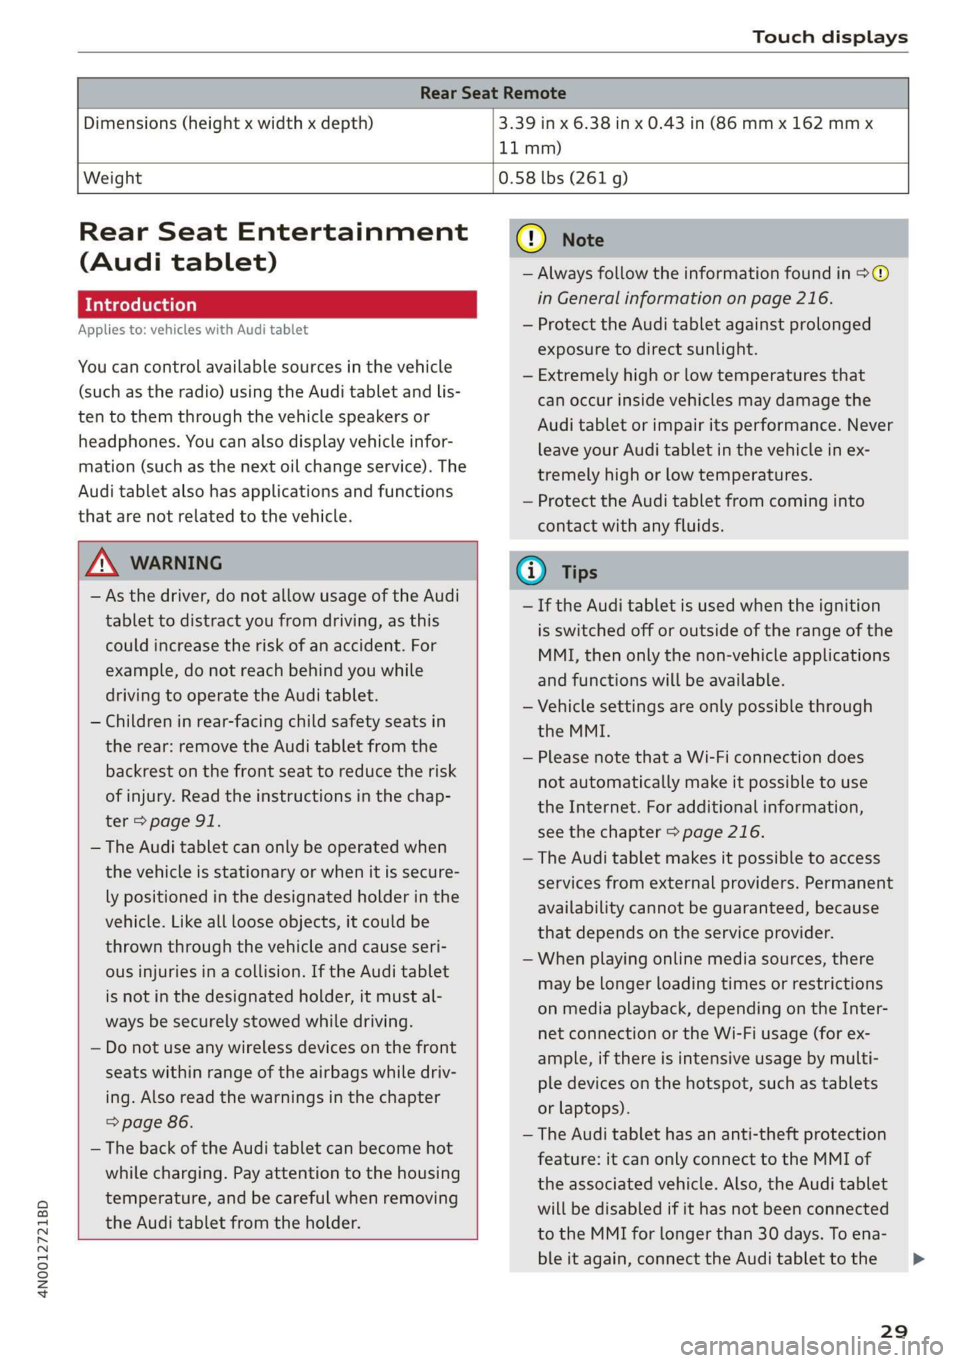
Dimensions (height x width x depth) 3.39 in x 6.38 in x 0.43 in (86 mm x 162 mmx
11 mm)
Weight
0.58 lbs (261 g)
Rear Seat Entertainment
(Audi tablet)
Introduction
Applies to: vehicles with Audi tablet
You can control available sources in the vehicle
(such as the radio) using the Audi tablet and lis-
ten to them through the vehicle speakers or
headphones. You can also display vehicle infor-
mation (such as the next oil change service). The
Audi tablet also has applications and functions
that are not related to the vehicle.
ZA WARNING
— As the driver, do not allow usage of the Audi
tablet to distract you from driving, as this
could increase the risk of an accident. For
example, do not reach behind you while
driving to operate the Audi tablet.
— Children in rear-facing child safety seats in
the rear: remove the Audi tablet from the
backrest on the front seat to reduce the risk
of
injury. Read the instructions in the chap-
ter > page 91.
— The Audi tablet can only be operated when
the vehicle is stationary or when it is secure-
ly positioned in the designated holder in the
vehicle. Like all loose objects, it could be
thrown through the vehicle and cause seri-
ous injuries in a collision. If the Audi tablet
is not in the designated holder, it must al-
ways be securely stowed while driving.
— Do not use any wireless devices on the front
seats within range of the airbags while driv-
ing. Also read the warnings in the chapter
=> page 86.
— The back of the Audi tablet can become hot
while charging. Pay attention to the housing
temperature, and be careful when removing
the Audi tablet from the holder.
@) Note
— Always follow the information found in >®
in General information on page 216.
— Protect the Audi tablet against prolonged
exposure to direct sunlight.
— Extremely high or low temperatures that
can occur inside vehicles may damage the
Audi tablet or impair its performance. Never
leave your Audi tablet in the vehicle in ex-
tremely high or low temperatures.
— Protect the Audi tablet from coming into
contact with any fluids.
G) Tips
— If the Audi tablet is used when the ignition
is switched off or outside of the range of the
MMI, then only the non-vehicle applications
and functions will be available.
— Vehicle settings are only possible through
the MMI.
— Please note that a Wi-Fi connection does
not automatically make it possible to use
the
Internet. For additional information,
see the chapter > page 216.
— The Audi tablet makes it possible to access
services from external providers. Permanent
availability cannot be guaranteed, because
that depends on the service provider.
— When playing online media sources, there
may be longer loading times or restrictions
on media playback, depending on the Inter-
net connection or the Wi-Fi usage (for ex-
ample, if there is intensive usage by multi-
ple devices on the hotspot, such as tablets
or laptops).
— The Audi tablet has an anti-theft protection
feature: it can only connect to the MMI of
the associated vehicle. Also, the Audi tablet
will be disabled if it has not been connected
to the MMI for longer than 30 days. To ena-
ble it again, connect the Audi tablet to the
29
>