2020 AUDI A8 warning
[x] Cancel search: warningPage 13 of 360

4N0012721BD
Quick access
OLED tail lights
=> page 64
Door lock
> page 45
Child safety lock
=> page 53
Speed warning system
=>page 159
Speed warning system
=>page 159
Camera-based traffic sign recog-
nition
=> page 160
Night vision assist
>page 165
Cruise control system
=> page 166
Cruise control system
=> page 166
Intersection assistant
=> page 189
Side assist
=> page 187
Distance warning
=> page 179
A) Rear cross-traffic assist
here => page 198
Adaptive cruise assist
=> page 178,
Efficiency assist
=> page 169
Adaptive cruise assist
>page 175
Lane guidance for adaptive cruise
assist
=> page 172
Lane departure warning
=> page 180
Lane departure warning
=>page 181
Audi pre sense
=>page 185
Emergency assist
=> page 190
11
Page 14 of 360

Instrument cluster
Instrument cluster
cH) Olas
aE
Fig. 2 Instrument cluster overview (Audi virtual cockpit)
Depending on the vehicle equipment, the follow-
ing items may appear in the instrument cluster:
@) Display
— Engine coolant temperature ~E .. 14
— High-voltage battery charge level
Left
dial
—Tachometer ........ 000s eee 14
POWER MCLE cose so cece oo cesuene ¥ & 15
Tab ated « < neues « + sees 2 eas be 13
Central area ..............02.0. 13
Status line (one or two lines)
Right dial
— Convenience display
Fuellevel IY ...... 2... eee eee 272
Right additional display with speed-
ometer
Left additional display with:
—Gear ...... 0... eee eee 113
— Audi drive select mode ......... 128
Z\ WARNING
If there is a severe malfunction in the instru
ment cluster, the display may turn off. The
indicator
light may also turn on. Stop the ve-
hicle safely. See an authorized Audi dealer or
authorized Audi Service Facility for assistance.
12
@ Tips
— You can select the units used for tempera-
ture, speed, and other measurements in the
Infotainment system > page 266.
— Speeds are displayed in mph (miles per
hour) or km/h (kilometers per hour).
— If there is a malfunction in the instrument
cluster, DEF will appear in the trip odometer
display. Have the malfunction corrected as
soon as possible.
— Certain instrument cluster content can also
be displayed in the head-up display*
=> page 37.
— Certain settings are stored automatically in
the active personal profile.
Loading a personal
profile
Nel Ceto dna}
me Gasca ard
(1 re ests)
e-: - Switch profile
Fig. 3 Instrument cluster: loading a personal profile
Page 17 of 360

4N0012721BD
Instrument cluster
does not go above the speed displayed, for exam-
ple when downshifting. Drive to an authorized
Audi dealer or authorized Audi Service Facility im-
mediately to have the malfunction corrected.
@) Note
The needle in the tachometer may only be in
the red area of the gauge for a short period of
time before there is a risk of damaging the
engine. The location where the red zone be-
gins varies depending on the engine.
Power meter
Applies to: vehicles with plug-in hybrid drive
6)
@
RAZ-0575
9
©
Fig. 7 Instrument cluster: Power meter
Displaying the power meter
>» Applies to: MMI: Select on the home screen:
SETTINGS > Display & brightness > Virtual
cockpit > Left dial > Power meter or Combined.
The power meter @) > page 12 gives feedback
about the usage capacity of the drive system. The
power meter needle displays the current usage
capacity. A colored border indicates how much
the drive system can currently be utilized. The
colored borders may vary depending on the se-
lected driving program and the electric power
currently available.
Depending on the vehicle equipment, the power
meter displays the following driving statuses:
Drive system switched off
Vehicle recovering electrical energy
Drive system switched on
®©O0O Vehicle is driving with the electric
motor (green)
©) Vehicle is driving with the electric
motor, the combustion engine can
switch on automatically (green
dash)
© Vehicle is driving with the combus-
tion engine (orange)
@ Vehicle is driving with maximum
power from the electric motor and
combustion engine for a brief peri-
od of time
Odometer
The trip odometer and odometer are displayed in
the status line ©) > page 12.
The trip odometer shows the distance driven
since it was last reset. It can be used to measure
short distances. The odometer shows the total
distance that the vehicle has been driven.
Resetting the trip odometer
> Select in the instrument cluster: Vehicle func-
tions tab > EI button > Reset mi.
@) Tips
Distances are displayed in mi (miles) or km
(kilometers).
Outside temperature
display
The outside temperature is displayed in the sta-
tus line © > page 12.
If your vehicle is stationary or if you are driving at
very low speeds, the temperature displayed in
the instrument cluster may be slightly higher
than the actual temperature outside due to heat
radiating from the engine.
At temperatures below 41 °F (+5 °C), a snowflake
symbol appears in front of the temperature dis-
play > A.
Z\ WARNING
Do not assume the roads are free of ice based
on the outside temperature display. Be aware
that there may be ice on roads even when the |P>
15
Page 22 of 360

Touch displays
> Press the SETTINGS button.
> If the General button is not displayed, swipe
toward the left or right with one finger until it
appears.
> Press the General button.
> If the Date & time button is not displayed,
swipe upward or downward with one finger un-
tilit appears.
> Press the Date & time button.
@) Tips
If a menu or symbol is in parentheses in the
path, for example, (General) or ({23), then it is
an optional menu item that does not need to
be used in every system.
You can adjust or turn off the MMI touch display
feedback.
> Applies to: MMI: Select on the home screen:
SETTINGS > Display & brightness > MMI.
Possible settings:
— Brightness
— Touchscreen Feedback
Multi Media Interface
MeCN ACen
Audi recommends performing certain Infotain-
ment system functions, such as entering a desti-
nation, only when the vehicle is stationary. Al-
ways be prepared to stop operating the Infotain-
ment system in the interest of your safety and
the safety of other road users.
ZA WARNING
Only use the Infotainment system when road,
traffic, weather, and visibility conditions per-
mit and always in a way that allows you to
maintain complete control over your vehicle.
@ Tips
Certain functions are not available while driv-
ing.
20
Wine mela mel mela
Switching the MMI on or off
> To switch the MMI off, press and hold the
On/Off knob > page 40, fig. 31 until the up-
per
display and all Infotainment system func-
tions are switched off.
> To switch the MMI on, press the On/Off knob.
Restarting the MMI
>» Press and hold the On/Off knob for at least 10
seconds.
Switching displays on or off
> To switch the upper display off, press [Jon the
lower display.
> To switch the upper display on, touch the upper
display or press [Jon the lower display.
> To switch both displays on or off, press and hold
Co] on the lower display.
Introduction
You can display and operate Infotainment system
and vehicle functions using both of the Multi Me-
dia Interface (MMI) touch displays.
Configuration wizard
After starting for the first time, the configuration
wizard helps you to set up the vehicle, for exam-
ple to set the desired system language and con-
nect a telephone.
> Follow the instructions in the display.
> Applies to: MMI: To access the configuration
wizard at a later time, select on the home
screen: HELP > Configuration wizard.
Tool tips
Tool tips are displayed on the upper display after
starting for the first time. They introduce various
MMI functions to you.
> Follow the instructions in the display.
» Applies to: MMI: To access the tool tips at a lat-
er time, select on the home screen: SETTINGS
> Help > Show tool tips.
> Applies to: MMI: To receive other tool tips, se-
lect on the home screen: HELP > Tool tips > Ba-
sic information or Expert information.
Page 27 of 360

4N0012721BD
Touch displays
Accepting suggested words or selecting
entries from the results list
> To accept a suggested word (2) or select an en-
try from the results list @), press on it.
> To display more content in the results list, drag
your finger upward or downward on the screen.
Setting the input language or keyboard
layout
> Applies to MMI: Select on the home screen:
SETTINGS > Language & keyboard > Keyboard.
> To define additional input languages, press the
© button.
> To change the keyboard layout for an input lan-
guage, press >. For example, you can select be-
tween QWERTZ and QWERTY.
Rear Seat Remote
Applies to: vehicles with Rear Seat Remote
With Rear Seat Remote, you can control conven-
ience and Infotainment system functions in the
rear of the vehicle, such as the climate control
system or the media playback in the vehicle.
ZA WARNING
— As the driver, do not allow usage of the Rear
Seat Remote to distract you from driving, as
this could increase the risk of an accident.
For example, do not reach behind you while
driving to operate the Rear Seat Remote.
— The Rear Seat Remote can only be operated
when the vehicle is stationary or when the
remote is securely positioned in the desig-
nated holder in the vehicle. Like all loose ob-
jects, it could be thrown through the vehicle
and
cause serious injuries in a collision. If
the Rear Seat Remote is not in the designat-
ed holder, it must always be securely stowed
while driving.
— Do not use any wireless devices on the front
seats within range of the airbags while driv-
ing. Also read the warnings in the chapter
> page 86.
— The Rear Seat Remote can become hot while
charging. Pay attention to the housing and
display temperature, and be careful when
removing the Rear Seat Remote from the
holder.
— There are magnets located on the back of
the Rear Seat Remote and in the designated
holder. For people with pacemakers, the
electromagnetic radiation may impair pace-
maker function. Always maintain a mini-
mum distance of approximately 6 in (15 cm)
from the magnets.
CG) Note
— Always follow the information found in 9®
in General information on page 216.
— Protect the Rear Seat Remote against pro-
longed exposure to direct sunlight.
— Extremely high or low temperatures that
can occur inside vehicles can damage the
Rear Seat Remote and/or impair the device
performance. Never leave your Rear Seat
Remote in the vehicle in extremely high or
low temperatures.
— Protect the Rear Seat Remote from coming
into contact with any fluids.
G) Tips
— Please note that the Rear Seat Remote can
be used only when the ignition is switched
on and within range of your vehicle's active
Wi-Fi hotspot.
— Please note that a Wi-Fi connection does
not automatically make it possible to use
the
Internet. For additional information,
see the chapter > page 216.
— When playing online media sources, there
may be longer loading times or restrictions
on media playback, depending on the Inter-
net connection or the Wi-Fi usage (for ex-
ample, if there is intensive usage by multi-
ple devices on the hotspot).
— Signals from Bluetooth devices and Wi-Fi
hotspots within range of the vehicle may
impair the vehicle Wi-Fi services. If multiple
Bluetooth devices and Wi-Fi hotspots are
within range of the vehicle, it may cause re-
duced data transfer rates, connection inter-
ruptions, or limitations when streaming me-
dia.
25
Page 31 of 360

4N0012721BD
Touch displays
Rear Seat Remote
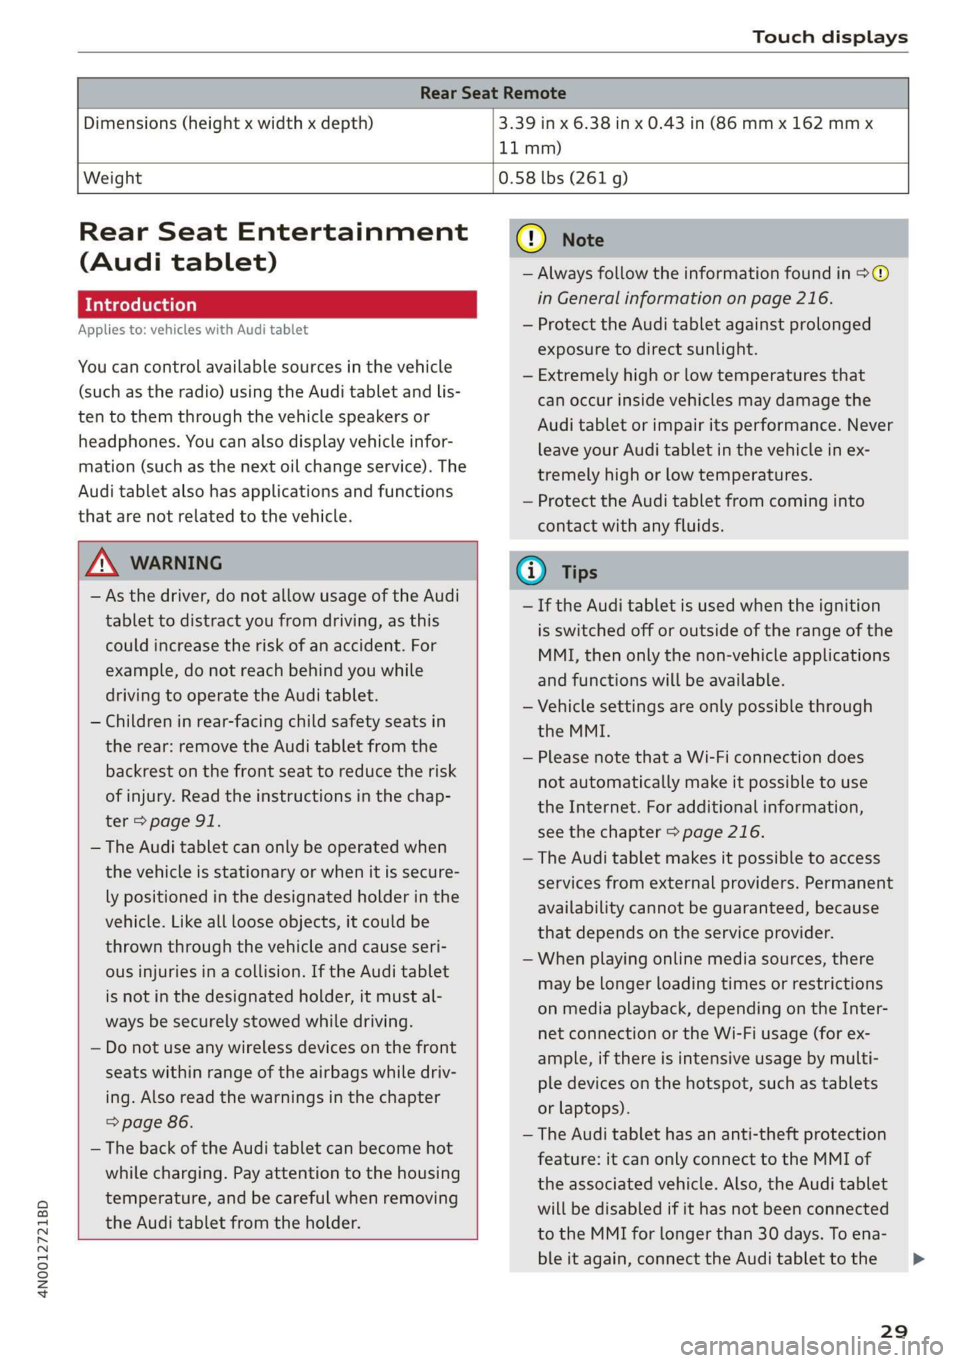
Dimensions (height x width x depth) 3.39 in x 6.38 in x 0.43 in (86 mm x 162 mmx
11 mm)
Weight
0.58 lbs (261 g)
Rear Seat Entertainment
(Audi tablet)
Introduction
Applies to: vehicles with Audi tablet
You can control available sources in the vehicle
(such as the radio) using the Audi tablet and lis-
ten to them through the vehicle speakers or
headphones. You can also display vehicle infor-
mation (such as the next oil change service). The
Audi tablet also has applications and functions
that are not related to the vehicle.
ZA WARNING
— As the driver, do not allow usage of the Audi
tablet to distract you from driving, as this
could increase the risk of an accident. For
example, do not reach behind you while
driving to operate the Audi tablet.
— Children in rear-facing child safety seats in
the rear: remove the Audi tablet from the
backrest on the front seat to reduce the risk
of
injury. Read the instructions in the chap-
ter > page 91.
— The Audi tablet can only be operated when
the vehicle is stationary or when it is secure-
ly positioned in the designated holder in the
vehicle. Like all loose objects, it could be
thrown through the vehicle and cause seri-
ous injuries in a collision. If the Audi tablet
is not in the designated holder, it must al-
ways be securely stowed while driving.
— Do not use any wireless devices on the front
seats within range of the airbags while driv-
ing. Also read the warnings in the chapter
=> page 86.
— The back of the Audi tablet can become hot
while charging. Pay attention to the housing
temperature, and be careful when removing
the Audi tablet from the holder.
@) Note
— Always follow the information found in >®
in General information on page 216.
— Protect the Audi tablet against prolonged
exposure to direct sunlight.
— Extremely high or low temperatures that
can occur inside vehicles may damage the
Audi tablet or impair its performance. Never
leave your Audi tablet in the vehicle in ex-
tremely high or low temperatures.
— Protect the Audi tablet from coming into
contact with any fluids.
G) Tips
— If the Audi tablet is used when the ignition
is switched off or outside of the range of the
MMI, then only the non-vehicle applications
and functions will be available.
— Vehicle settings are only possible through
the MMI.
— Please note that a Wi-Fi connection does
not automatically make it possible to use
the
Internet. For additional information,
see the chapter > page 216.
— The Audi tablet makes it possible to access
services from external providers. Permanent
availability cannot be guaranteed, because
that depends on the service provider.
— When playing online media sources, there
may be longer loading times or restrictions
on media playback, depending on the Inter-
net connection or the Wi-Fi usage (for ex-
ample, if there is intensive usage by multi-
ple devices on the hotspot, such as tablets
or laptops).
— The Audi tablet has an anti-theft protection
feature: it can only connect to the MMI of
the associated vehicle. Also, the Audi tablet
will be disabled if it has not been connected
to the MMI for longer than 30 days. To ena-
ble it again, connect the Audi tablet to the
29
>
Page 33 of 360

4N0012721BD
Touch displays
Securing the Audi tablet
Requirement: the two buttons @) ° fig. 24 must
be in the retracted position.
> Hold the Audi tablet in both hands during the
entire process.
» Engage the Audi tablet at the contact strip @
> fig. 25.
> Carefully press the Audi tablet toward the Audi
tablet holder @) > fig. 25 until the Audi tablet
locks into place audibly.
@ Tips
If the Audi tablet is not in its holder and is ex-
posed to extremely high or low temperatures,
it may turn off automatically for safety rea-
sons.
Tilting the holder
Applies to: vehicles with Audi tablet
wy
RAH-8642|
Fig. 26 Rear side of driver's/front passenger's seat: angle
range of the holder
Tilting the holder manually
Applies to: manually adjustable holders
> Hold the Audi tablet in both hands during the
entire process.
> Tilt that holder in the specified area @).
Tilting the holder using the power controls
Applies to: power adjustable holders
> Applies to: Rear Seat Remote: Select on the
home screen: SEATS > Seat setting and touch
the picture of the front passenger seat on the
Audi tablet. Press the left or right arrows until
the desired position is reached.
® Note
To reduce the risk of damage to the holder:
— Applies to: manually adjustable holders Tilt
the holder within the intended range @)
without pressing or pulling it forcefully.
— Applies to: power adjustable holders Only
use the power adjustment to tilt the holder.
Do not tilt it manually with your hands.
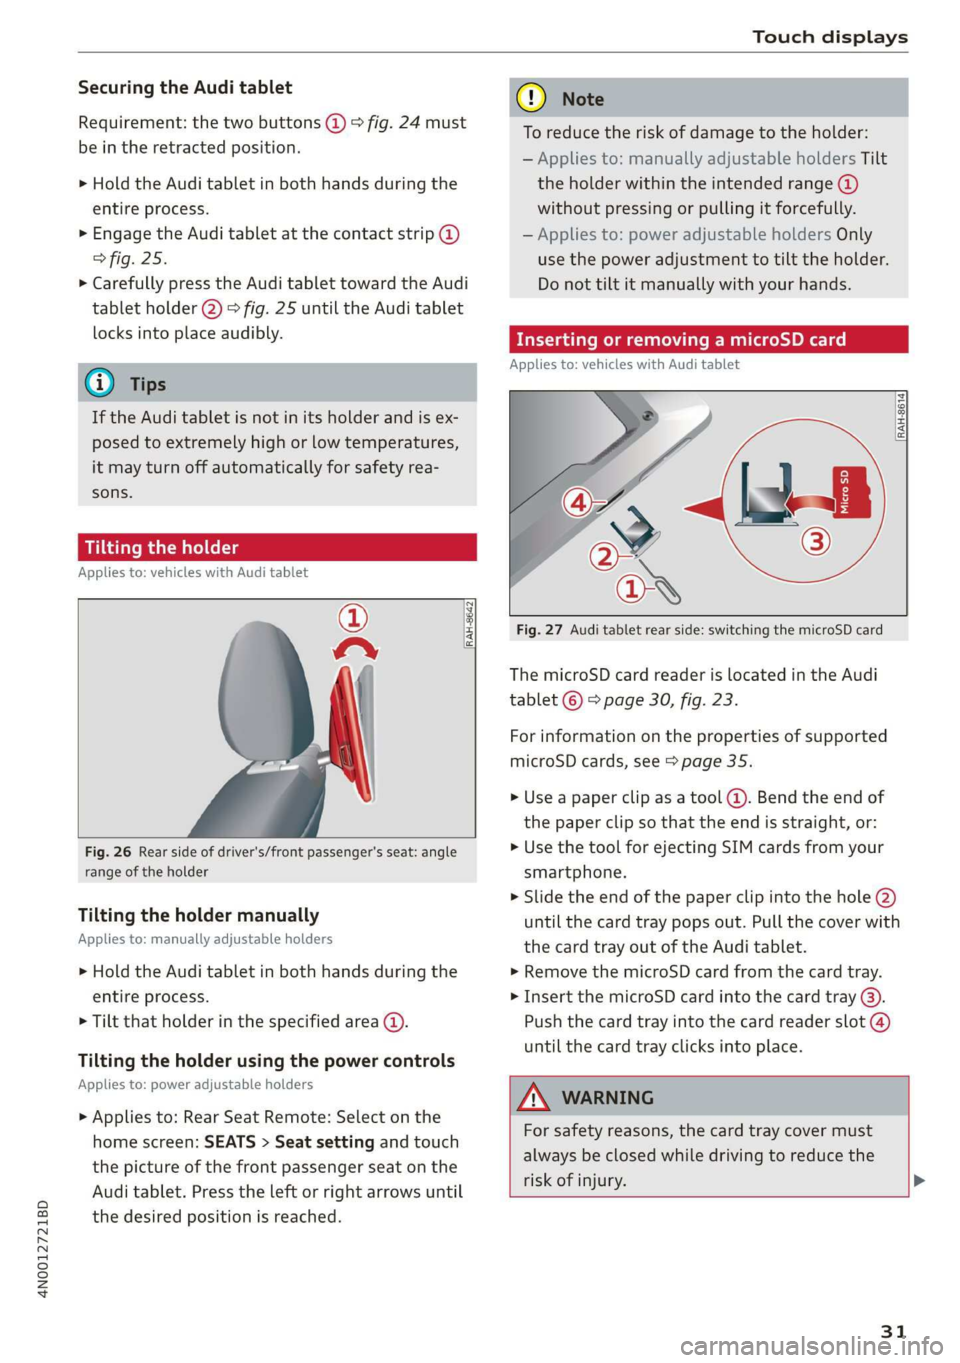
Inserting or removing a microSD card
Applies to: vehicles with Audi tablet
RAH-8614 fi
Fig. 27 Audi tablet rear side: switching the microSD card
The microSD card reader is located in the Audi
tablet © > page 30, fig. 23.
For information on the properties of supported
microSD cards, see > page 35.
» Use a paper clip as a tool (@). Bend the end of
the paper clip so that the end is straight, or:
> Use the tool for ejecting SIM cards from your
smartphone.
> Slide the end of the paper clip into the hole @)
until the card tray pops out. Pull the cover with
the card tray out of the Audi tablet.
» Remove the microSD card from the card tray.
> Insert the microSD card into the card tray @).
Push the card tray into the card reader slot @)
until the card tray clicks into place.
AN WARNING
For safety reasons, the card tray cover must
always be closed while driving to reduce the
risk of injury. >
31
Page 39 of 360

4N0012721BD
Head-up display
Head-up display
Description
Applies to: vehicles with head-up display
The head-up display projects certain warnings or
selected information from the assist systems on
the windshield. The display appears within the
driver's field of vision.
Switching on and off
The Y button is located in the function bar on
the lower display > page 21.
> To switch the head-up display on or off, press
and hold the Y button.
Settings in the Infotainment system
> Applies to: MMI: Select on the home screen:
SETTINGS > Display & brightness > Head-up
display, or
> Press the Y button.
Possible settings:
— Picture rotation
— Brightness
— Display height: You can adjust the height of the
display. Sit in the correct seating position
=> page 72 and adjust the head-up display.
— Display contents: You can set which informa-
tion should be displayed. The display of certain
information and some of the red indicator
lights cannot be hidden.
@) Note
To reduce the risk of scratches on the glass
covering the head-up display, do not place any
objects in the projection opening.
@ Tips
— Sunglasses with polarization filters and un-
favorable lighting conditions can impair visi-
bility of the display.
— An optimal display depends on the seat po-
sition and the height adjustment of the
head-up display.
—A special windshield is needed for the head-
up display function.
— For information on cleaning, see > table In-
terior cleaning on page 311.
— Certain settings are stored automatically in
the active personal profile.
37