2020 AUDI A4 steering
[x] Cancel search: steeringPage 158 of 296
Parking and maneuvering
— The driver is always responsible when enter-
ing or exiting a parking space and during
similar maneuvers.
— Do not use this function if the vehicle cannot
move freely, for example when on a vehicle
jack.
— Sensors and cameras have spots in which
the surrounding area cannot be detected.
Objects, animals, and people may only be
detected with limitations may not be detect-
ed at all. Always monitor the traffic and the
vehicle's surroundings directly and do not
become distracted.
@ Note
— Do not use the park assist systems when
transporting cargo that extends out of the
vehicle, when snow chains are mounted, or
when the parking space is on a hill or in-
cline.
— Park assist guides the vehicle either away
from curbs or onto them if other vehicles
are parked on the curb. Make sure that your
vehicle's tires and rims are not damaged.
Resume control of the vehicle in time or
stop the parking process if needed to pre-
vent damage.
— In parking spaces without curbs, maintain a
distance of at least 19 inches (50 cm) from
walls and buildings in order to reduce the
risk of vehicle damage.
@ Tips
Follow the legal regulations in the country
where you are located when using Park assist.
Parking with the park assists
Applies to: vehicles with park assist
Requirement: a suitable parking space must be
found and selected > page 154. The vehicle must
initially be stationary.
> Select the reverse gear after stopping briefly.
> Remove your hands from the steering wheel.
> Pay attention to the path of the vehicle. If the
traffic situation permits, accelerate carefully
>A.
156
> Follow the visual instructions in the center dis-
play and the warning tones until the parking
process
has ended.
> The indicators in the center display show the
necessary direction of travel. Drive in the direc-
tion indicated by the arrows or symbols on the
roof in the parking aid image @) > page 154,
fig. 136.
Park assist automatically steers the vehicle into
the parking space while the driver presses the
pedals. The maximum parking speed is approxi-
mately 4 mph (7 km/h).
ZA WARNING
— Follow the safety precautions and note the
limits of the assist systems, sensors, and
cameras > page 114.
— The park assist is an assist system. The driv-
er is still responsible for monitoring the ve-
hicle's surroundings and preventing colli-
sions when using the system.
— When using park assist to drive into or out
of a parking space, the steering wheel turns
quickly on its own. Reaching into the steer-
ing wheel spokes while this is happening can
result in injury.
G) Tips
You can also cancel the driving direction set
by the system by shifting between D and re-
verse gear. Based on the position of the vehi-
cle, the system then calculates the additional
steering and driving directions for maneuver-
ing.
Exiting parking spaces with park assist
Applies to: vehicles with park assist
If you parked the vehicle in a parallel parking
space, park assist can help you drive out of it.
> Start the engine.
> Press the Pe button in the center console.
> Wait until a message appears in the center dis-
play that specifies the direction of travel re-
quired to exit the parking space.
Page 159 of 296
8W1012721BB
Parking and maneuvering
> Activate the turn signal on the desired side or
press that side next to the vehicle in the center
display.
> Remove your hands from the steering wheel.
> Pay attention to the path of the vehicle. If the
traffic situation permits, accelerate carefully
of.
> Follow the visual instructions in the display and
the warning tones until the vehicle has finished
exiting the parking space.
> The indicators in the center display show the
necessary direction of travel. Drive in the direc-
tion indicated by the arrows or symbols on the
roof in the parking aid image @) 9 page 154,
fig. 136.
> The process of exiting the parking space has
ended if additional corrective movements are
no longer necessary and the specified steering
wheel angle is sufficient to drive out of the
parking space. Resume control of the steering
wheel >@).
Park assist automatically steers the vehicle out of
the parking space while the driver presses the
pedals. The maximum speed for exiting a parking
space is 3 mph (5 km/h).
Z\ WARNING
— Follow the safety precautions and note the
limits of the assist systems, sensors, and
cameras © page 114.
— The park assist is an assist system. The driv-
er is still responsible for monitoring the ve-
hicle's surroundings and preventing colli-
sions when using the system.
— When using park assist to drive into or out
of a parking space, the steering wheel turns
quickly on its own. Reaching into the steer-
ing wheel spokes while this is happening can
result in injury.
@) Note
Resume steering immediately after the last
corrective movement and the takeover
prompt, so that the specified steering wheel
angle is not recentered.
Interrupting the park assists
Applies to: vehicles with park assist
Park assist will be canceled automatically in the
following scenarios:
— You switch the system off.
— You start steering.
— The speed is too high.
— The time limit is exceeded.
— An obstacle is detected.
— ESC intervenes.
Resume control of the vehicle, end the parking
process manually, or:
— You can resume the parking process in some sit-
uations. Press the Pe button in the center con-
sole.
— To continue exiting the parking space, switch
the engine off and on. Press the Pe button.
Z\ WARNING
Follow the safety precautions and note the
limits of the assist systems, sensors, and
cameras > page 114.
tLe Ly
Applies to: vehicles with park assist
If the & or indicator light turns on, the park
assist is not available or was interrupted.
A message that indicates the cause and possible
solution may appear with some displays. The
weather conditions may be too poor or a sensor
may be covered. Clean the area in front of the
sensors > page 116, fig. 106 and try to turn on
the systems again later.
If the malfunction remains, drive to an author-
ized Audi dealer or authorized Audi Service Facili-
ty immediately to have the malfunction correct-
ed.
157
Page 164 of 296
Telephone
» Applies to: MMI: Select on the home screen:
SETTINGS > General > Reminder signal and
mobile device charging.
The following settings may be available, depend-
ing on vehicle equipment:
— Signal tone
— Off
Spoken cue
this setting is switched on at the factory.
Mobile device notes: reminder, charge level
When this function is switched on, the charge
status of your mobile device is displayed. You will
also be reminded not to forget your mobile de-
vice when leaving the vehicle.
Using the telephone
Accessing the telephone functions
Applies to: vehicles with telephone
~ ee)
$0}
RAX-0144
©OOOCOLO
arch
IE) j} ao Bu
min Dialphone
Contacts cee a
Fig. 138 Center display: selection menu
Requirement: a mobile device must be connected
to the MMI.
> Applies to: MMI: Select on the home screen:
PHONE.
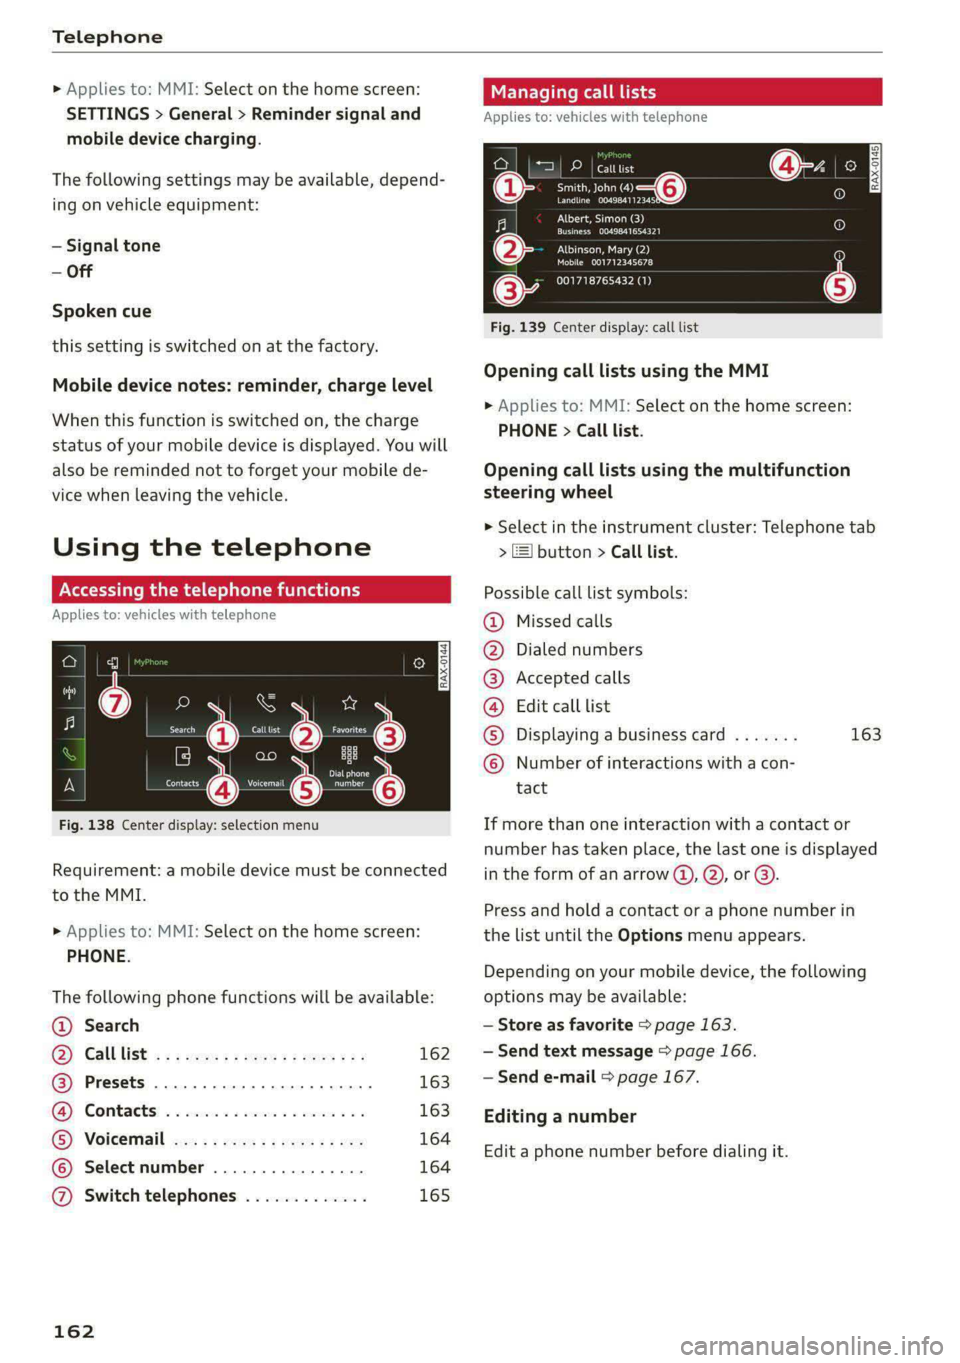
The following phone functions will be available:
@ Search
G@) Gall list <<: wee: 2s eee se een ees 162
@ Presets ..............0.0 0 eee ee 163
GG Contacts: . «isin so assess vv evans oo 163
G) Voicemail cx ys sees 2 2 news es ee 164
© Select number ................ 164
@ Switch telephones ............. 165
162
Managing call lists
Applies to: vehicles with telephone
pe) ees
ae o—@
erat orere
RAX-0145)
Plas)
renee acer)
Albinson, Mary (2)
Mobile 001712345678
001718765432 (1)
Fig. 139 Center display: call list
Opening call lists using the MMI
> Applies to: MMI: Select on the home screen:
PHONE > Call list.
Opening call lists using the multifunction
steering wheel
> Select in the instrument cluster: Telephone tab
> ) button > Call list.
Possible call list symbols:
Missed calls
Dialed numbers
Accepted calls
Edit call list
Displaying a business card ....... 163
Number of interactions with a con-
tact
If more than one interaction with a contact or
number has taken place, the last one is displayed
in the form of an arrow @), Q), or @).
Press and hold a contact or a phone number in
the list until the Options menu appears.
Depending on your mobile device, the following
options may be available:
— Store as favorite > page 163.
— Send text message > page 166.
— Send e-mail > page 167.
Editing a number
Edit a phone number before dialing it.
Page 165 of 296
8W1012721BB
Telephone
Managing favorites
Applies to: vehicles with telephone
You can store contacts for all connected mobile
devices as shortcuts in the favorites list.
Selecting favorites using the MMI
> Applies to: MMI: Select on the home screen:
PHONE > Favorites.
Opening favorites using the multifunction
steering wheel
> Select in the instrument cluster: Telephone tab
> ) button > Favorites.
Storing favorites
> Press Y¥ > page 163 in the details, or
> Press Store as favorite in the options
=> page 162.
Deleting a favorite
> Press W > page 163 in the details, or
> Select: Favorites > Z > one or multiple favor-
ites or Select all > Delete > Done.
Managing the directory
Applies to: vehicles with telephone
You can manage up to four directories in the
MMI.
Requirement: a mobile device must be connected
to the MMI.
Opening the directory
> Applies to: MMI: Select on the home screen:
PHONE > Contacts.
The contacts will be displayed. You can change
the sort order > page 166, Sort order.
Deleting imported contacts
Requirement: you must have imported at least
one contact.
> Select: Contacts > Z > one or more text mes-
sages > Delete > Done. The imported contacts
are deleted.
Directory options
Press and hold a contact in the directory until the
Options menu appears.
Depending on your mobile device, the following
options may be available:
— Store as favorite > page 163
— Send text message > page 166.
— Send e-mail > page 167.
G) Tips
— Pay attention to any synchronization
prompts on your mobile device when down-
loading contacts.
— The contacts from the mobile device may
not be transferred in alphabetical order. If
there are too many entries, contacts with
different first letters may be missing in the
MMI.
— Only the contacts from the active connected
mobile device are displayed.
— The contacts in the local MMI memory are
always visible and can be accessed by other
users.
— After switching off the ignition and exiting
the vehicle, the mobile device directory will
be loaded when the MMI is started again if
the mobile device is within range and the
Bluetooth function is switched on in the mo-
bile device and the MMI.
— Only the contacts in the local MMI memory
can be deleted.
oy eY em Lee
Applies to: vehicles with telephone
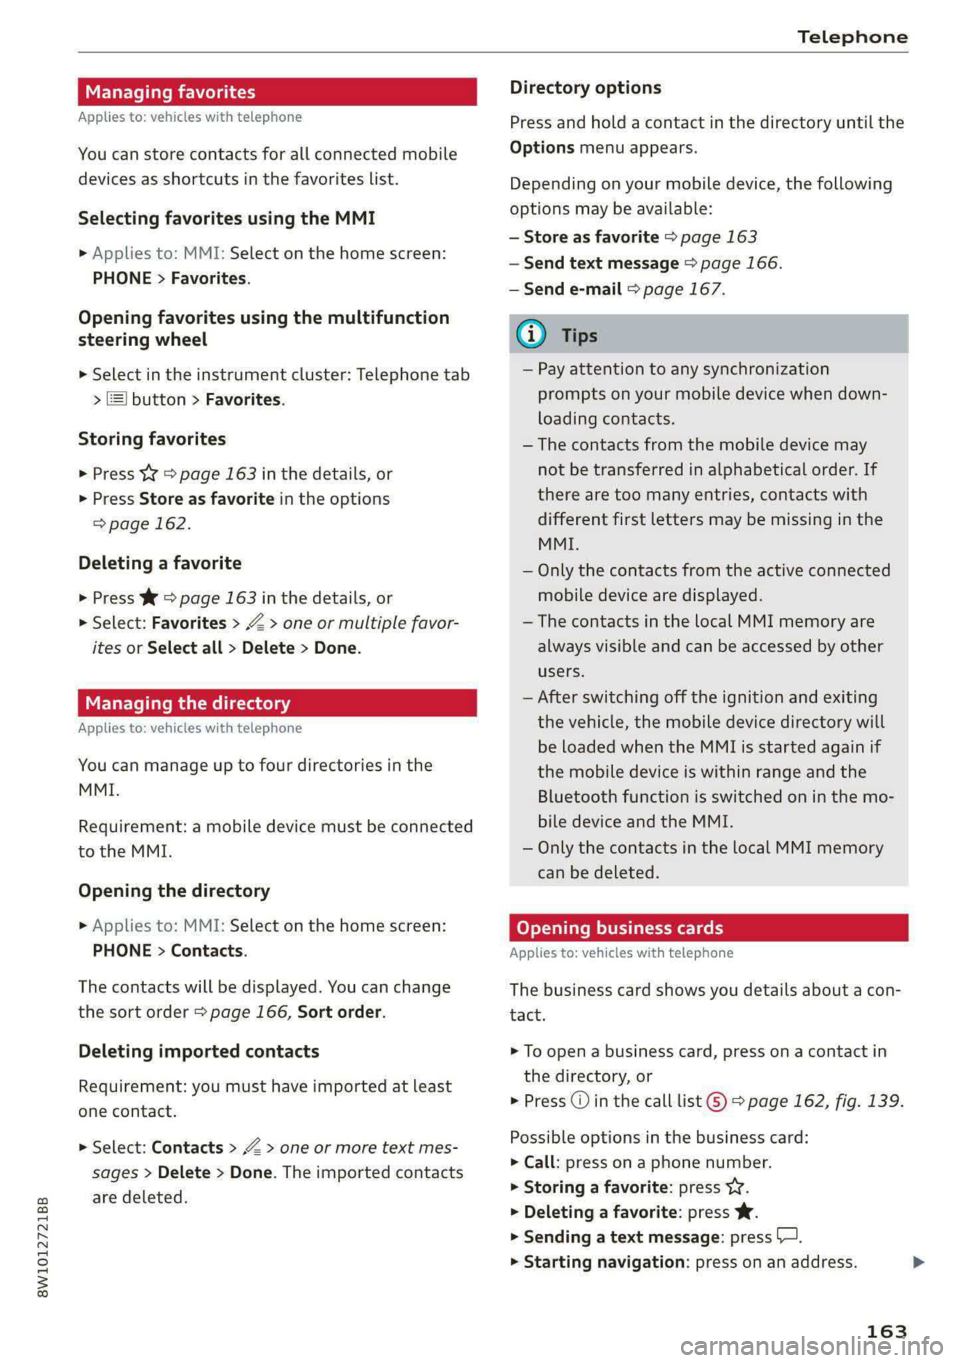
The business card shows you details about a con-
tact.
> To open a business card, press on a contact in
the directory, or
> Press @ in the call list ©) > page 162, fig. 139.
Possible options in the business card:
> Call: press on a phone number.
> Storing a favorite: press YY.
> Deleting a favorite: press W.
> Sending a text message: press S—.
> Starting navigation: press on an address.
163
>
Page 166 of 296
Telephone
> Sending an e-mail: press on an e-mail address.
Listening to voicemail
Applies to: vehicles with telephone
> Applies to: MMI: Select on the home screen:
PHONE > Voicemail.
Requirement: there must be no voicemail num-
ber stored.
> Entering the voicemail number: enter the de-
sired number. Press OK.
Requirement: a voicemail number must be stor-
ed.
> Dialing the voicemail number: press Voice-
mail. The call begins immediately.
i) Tips
This service must be set up and activated by
the mobile phone service provider.
Dialing a phone number
Applies to: vehicles with telephone
Depending on the vehicle equipment, you may
have the following options for dialing a phone
number:
— Using text input in the MMI = page 21.
— Using voice operation > page 24.
Call options
Applies to: vehicles with telephone
> To accept or end a call, press the @ button on
the multifunction steering wheel. For opera-
tion, see > page 12.
Depending on your mobile device, the following
options may be available in the MMI when there
is an incoming call:
— Answer
— Decline
— Message
If you exit the vehicle during a phone call, the
Bluetooth connection will be disconnected. De-
pending on your mobile device, phone calls in
progress may be automatically transferred from
the MMI to your mobile device.
164
G) Tips
The radio or media playback is muted during a
phone call.
During a phone call
Applies to: vehicles with telephone
Depending on your mobile device and the type of
connection, the following options may be availa-
ble during a call:
— End call...
— Mute
Sending a tone sequence
Press Numbers. You can enter tone sequences
(DTMF) and send them to the other party on the
call.
Hold
Puts the current call on hold. To resume the call,
press Resume.
Answering an incoming call
One of these options will be available, depending
on the mobile phone service provider:
— Answer: the current phone call will be put on
hold. The incoming call will be answered.
— Replace: the active call will be replaced with
the incoming call.
Declining an incoming call
If you select Decline, the incoming call will be de-
clined.
Conference
Requirement: two phone calls must be in prog-
ress.
Depending on your mobile phone service provid-
er, you can add a call on hold and up to five active
callers to a conference call.
Swap call
Requirement: two phone calls must be in prog-
ress.
You can alternate between two phone calls. >
Page 178 of 296
Navigation
Navigation
Opening navigation
Applies to: vehicles with navigation system
The navigation system directs you to your desti-
nation, around traffic incidents, and on alterna-
tive routes, if desired.
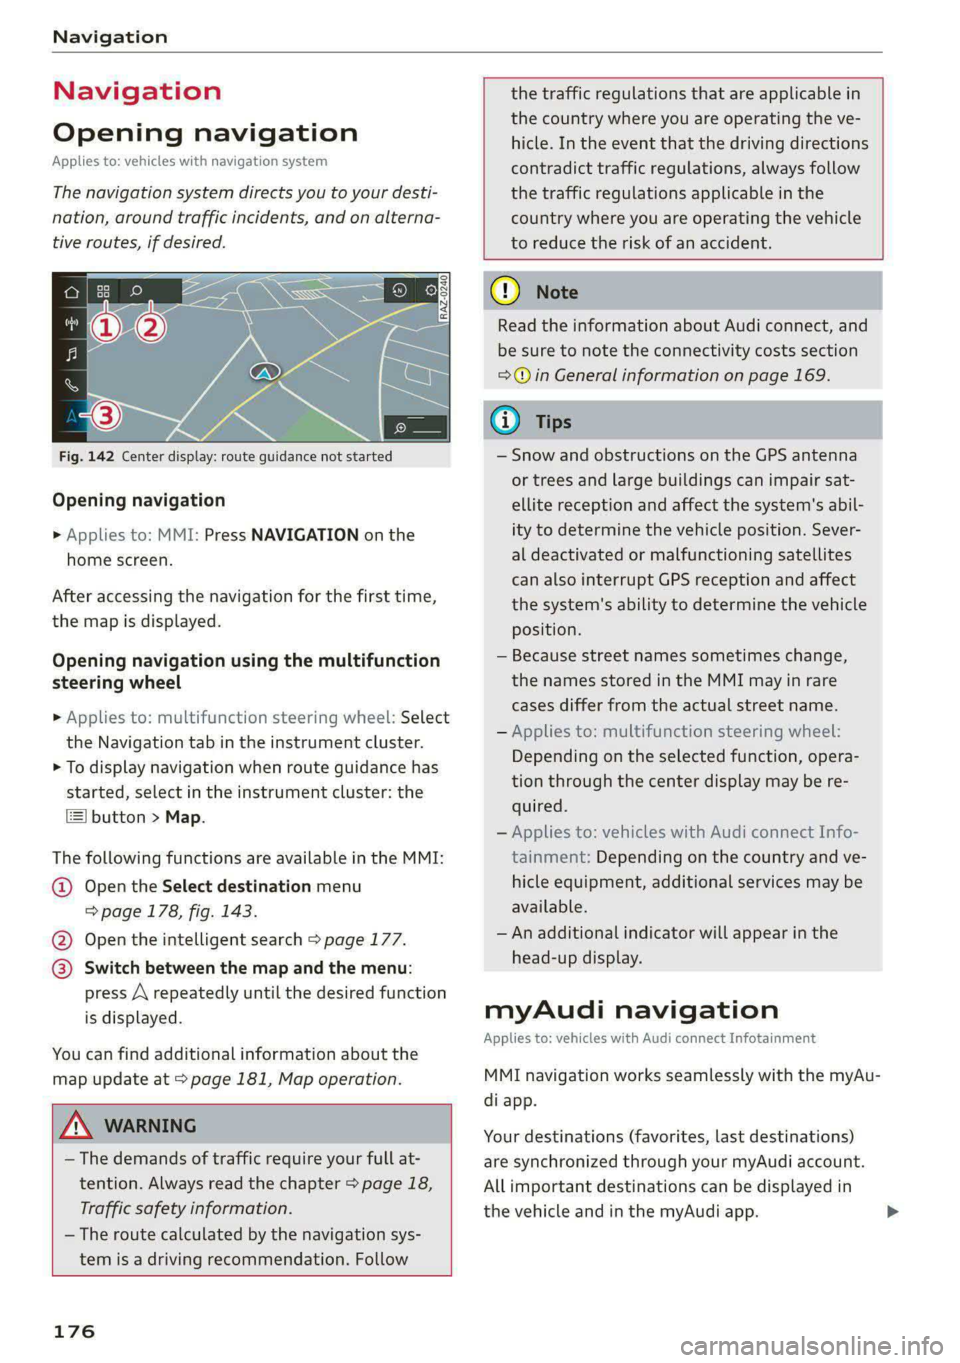
Fig. 142 Center display: route guidance not started
Opening navigation
> Applies to: MMI: Press NAVIGATION on the
home screen.
After accessing the navigation for the first time,
the map is displayed.
Opening navigation using the multifunction
steering wheel
> Applies to: multifunction steering wheel: Select
the Navigation tab in the instrument cluster.
> To display navigation when route guidance has
started, select in the instrument cluster: the
button > Map.
The following functions are available in the MMI:
@ Open the Select destination menu
=> page 178, fig. 143.
@ Open the intelligent search > page 177.
@ Switch between the map and the menu:
press A repeatedly until the desired function
is displayed.
You can find additional information about the
map update at > page 181, Map operation.
the traffic regulations that are applicable in
the country where you are operating the ve-
hicle. In the event that the driving directions
contradict traffic regulations, always follow
the traffic regulations applicable in the
country where you are operating the vehicle
to reduce the risk of an accident.
Z\ WARNING
— The demands of traffic require your full at-
tention. Always read the chapter > page 18,
Traffic safety information.
—The route calculated by the navigation sys-
tem is a driving recommendation. Follow
176
@ Note
Read the information about Audi connect, and
be sure to note the connectivity costs section
=>@ in General information on page 169.
@ Tips
— Snow and obstructions on the GPS antenna
or trees and large buildings can impair sat-
ellite reception and affect the system's abil-
ity to determine the vehicle position. Sever-
al deactivated or malfunctioning satellites
can also interrupt GPS reception and affect
the system's ability to determine the vehicle
position.
— Because street names sometimes change,
the names stored in the MMI may in rare
cases differ from the actual street name.
— Applies to: multifunction steering wheel:
Depending on the selected function, opera-
tion through the center display may be re-
quired.
— Applies to: vehicles with Audi connect Info-
tainment: Depending on the country and ve-
hicle equipment, additional services may be
available.
— An additional indicator will appear in the
head-up display.
myAudi navigation
Applies to: vehicles with Audi connect Infotainment
MMI navigation works seamlessly with the myAu-
di app.
Your destinations (favorites, last destinations)
are synchronized through your myAudi account.
All important destinations can be displayed in
the vehicle and in the myAudi app.
Page 180 of 296
Navigation
Check the spelling of the term that was
searched or check the search area
=> page 177.
— Distances to points of interest are displayed
as a Straight-line distance from your current
location. The actual distance from your cur-
rent location to the point of interest is up-
dated automatically. The list of points of in-
terest that were found is not resorted when
this happens.
Select destinati
Applies to: vehicles with navigation system
eer er
RAX-0146 cr) m
&
i Last
|__ destinations | sere Pinte
$3 6 6
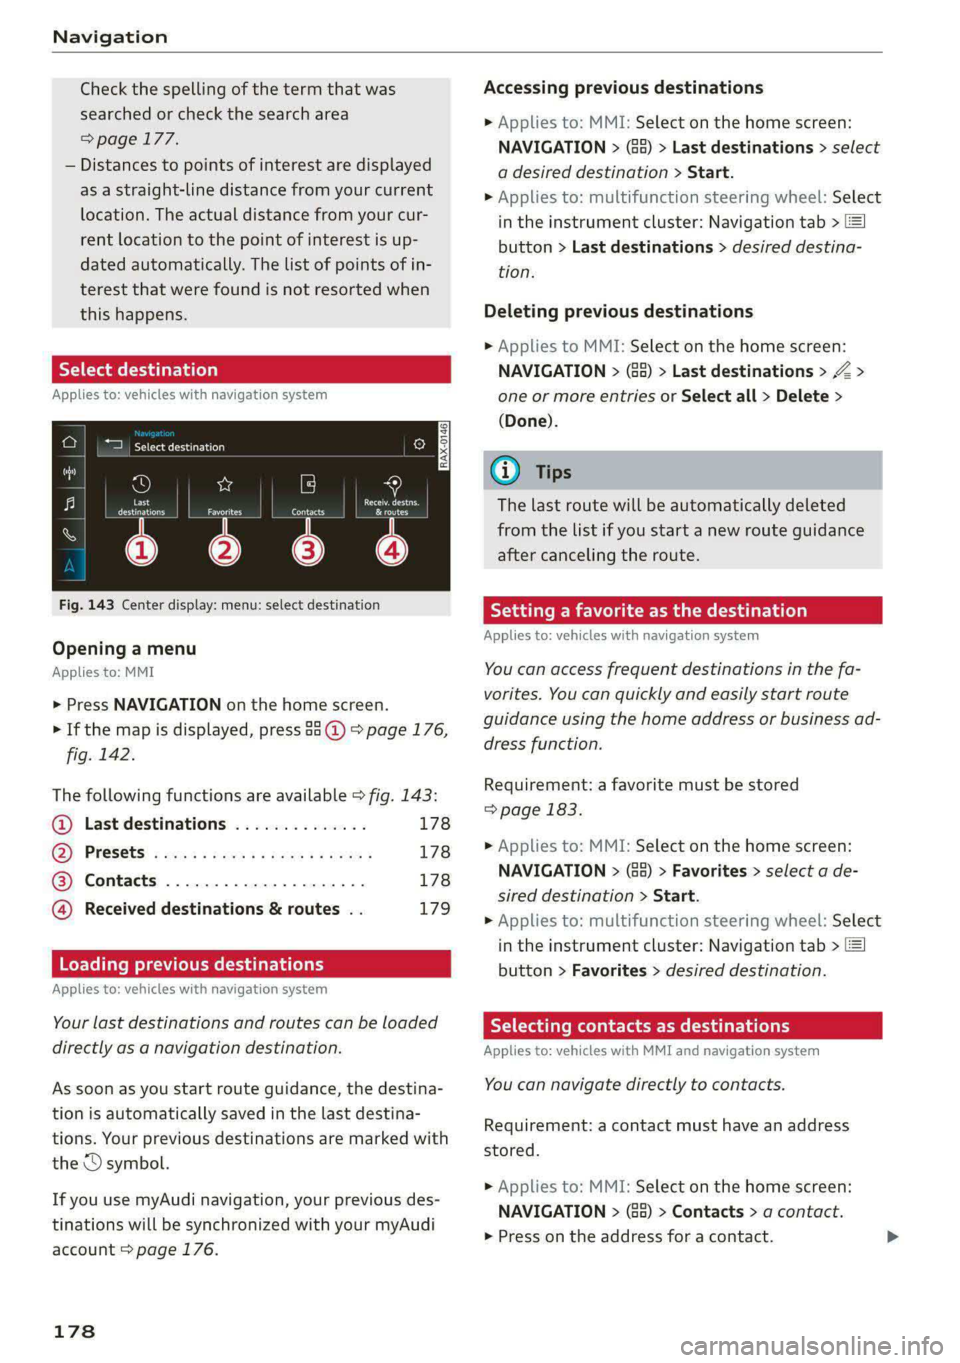
Fig. 143 Center display: menu: select destination
Opening a menu
Applies to: MMI
> Press NAVIGATION on the home screen.
> If the map is displayed, press aa (2) > page 176,
fig. 142.
The following functions are available > fig. 143:
©@ Last destinations 178
GQ) PréS6ts! s cess s vee as pawu ce xenas 178
@® Contacts ...................., 178
@ Received destinations & routes . . 179
Loading previous destinations
Applies to: vehicles with navigation system
Your last destinations and routes can be loaded
directly as a navigation destination.
As soon as you start route guidance, the destina-
tion is automatically saved in the last destina-
tions. Your previous destinations are marked with
the © symbol.
If you use myAudi navigation, your previous des-
tinations will be synchronized with your myAudi
account > page 176.
178
Accessing previous destinations
> Applies to: MMI: Select on the home screen:
NAVIGATION > (Ga) > Last destinations > select
a desired destination > Start.
> Applies to: multifunction steering wheel: Select
in the instrument cluster: Navigation tab > [=]
button > Last destinations > desired destina-
tion.
Deleting previous destinations
> Applies to MMI: Select on the home screen:
NAVIGATION > (Ge) > Last destinations > Z >
one or more entries or Select all > Delete >
(Done).
G) Tips
The last route will be automatically deleted
from the list if you start a new route guidance
after canceling the route.
Setting a favorite as the destination
Applies to: vehicles with navigation system
You can access frequent destinations in the fa-
vorites. You can quickly and easily start route
guidance using the home address or business ad-
dress function.
Requirement: a favorite must be stored
> page 183.
> Applies to: MMI: Select on the home screen:
NAVIGATION > (&&) > Favorites > select a de-
sired destination > Start.
> Applies to: multifunction steering wheel: Select
in the instrument cluster: Navigation tab >
button > Favorites > desired destination.
ST a dle meee eee eee dilly
Applies to: vehicles with MMI and navigation system
You can navigate directly to contacts.
Requirement: a contact must have an address
stored.
> Applies to: MMI: Select on the home screen:
NAVIGATION > (8) > Contacts > a contact.
> Press on the address for a contact.
Page 182 of 296
Navigation
Selecting map content (such as POIs) as the
destination
Requirement: map content must be displayed
=> page 186.
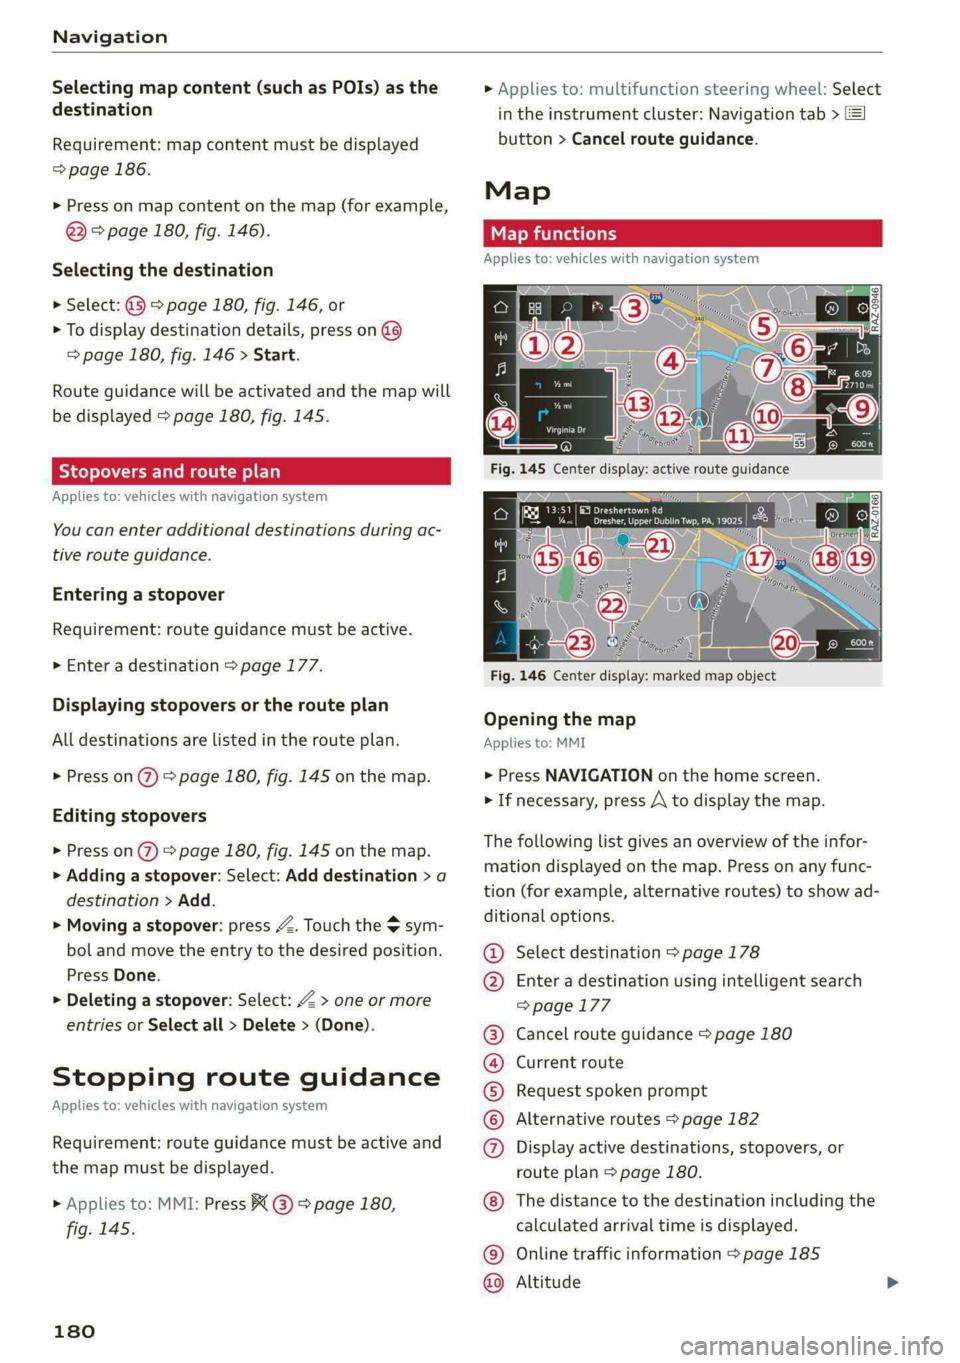
> Press on map content on the map (for example,
@) > page 180, fig. 146).
Selecting the destination
> Select: @ > page 180, fig. 146, or
> To display destination details, press on
=> page 180, fig. 146 > Start.
Route guidance will be activated and the map will
be displayed > page 180, fig. 145.
SS) ee meee el
Applies to: vehicles with navigation system
You can enter additional destinations during ac-
tive route guidance.
Entering a stopover
Requirement: route guidance must be active.
> Enter a destination > page 177.
Displaying stopovers or the route plan
All destinations are listed in the route plan.
> Press on 2) page 180, fig. 145 on the map.
Editing stopovers
> Press on %) > page 180, fig. 145 on the map.
> Adding a stopover: Select: Add destination > a
destination > Add.
> Moving a stopover: press Z. Touch the $ sym-
bol and move the entry to the desired position.
Press Done.
> Deleting a stopover: Select: Z > one or more
entries or Select all > Delete > (Done).
Stopping route guidance
Applies to: vehicles with navigation system
Requirement: route guidance must be active and
the map must be displayed.
> Applies to: MMI: Press BX @ > page 180,
fig. 145.
180
> Applies to: multifunction steering wheel: Select
in the instrument cluster: Navigation tab >
button > Cancel route guidance.
Map
Applies to: vehicles with navigation system
Cera
Drees eaey cr amy
Fig. 146 Center display: marked map object
Opening the map
Applies to: MMI
> Press NAVIGATION on the home screen.
> If necessary, press A to display the map.
The following list gives an overview of the infor-
mation displayed on the map. Press on any func-
tion (for example, alternative routes) to show ad-
ditional options.
Select destination > page 178
Enter a destination using intelligent search
=> page 177
Cancel route guidance > page 180
Current route
Request spoken prompt
Alternative routes > page 182
Display active destinations, stopovers, or
route plan > page 180.
©@
COOH
OO
The distance to the destination including the
calculated arrival time is displayed.
Online traffic information > page 185
Altitude ©©