Page 195 of 701
194
uuAdjusting the Seats uSecond Row Seats
Controls
Second Row Seats
■Adjusting the Seat Positions1Second Row Seats
Once a seat is adjusted co rrectly, rock it back and
forth to make sure it is locked in position.
3WARNING
An unsecured seat or seat-back can move
out of position or collapse without warning
if there is sudden acce leration or stop or in
a crash.
A seat or seat-back that suddenly moves or
collapses can result in severe injury or
death.
Always make sure all seats and seat-backs
are securely locked in to position before
driving.
Seat-back Angle
Adjustment
Pull up the lever to change
the angle.Horizontal Position
Adjustment
Pull up the bar to move the
seat, then release the bar.
Models with bench seat
20 ACURA MDX-31TZ56600.book 194 ページ 2019年4月24日 水曜日 午後5時44分
Page 198 of 701

197
uuAdjusting the Seats uSecond Row Seats
Controls
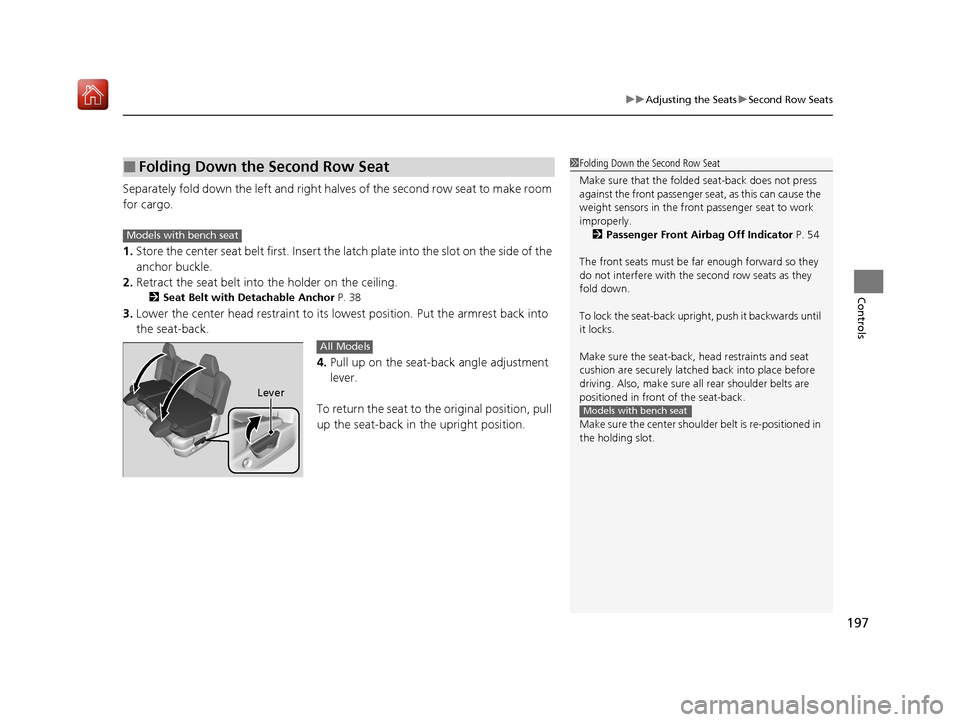
Separately fold down the left and right ha lves of the second row seat to make room
for cargo.
1. Store the center seat belt first. Insert the la tch plate into the slot on the side of the
anchor buckle.
2. Retract the seat belt into the holder on the ceiling.
2 Seat Belt with Detachable Anchor P. 38
3.Lower the center head restraint to its lo west position. Put the armrest back into
the seat-back.
4.Pull up on the seat-back angle adjustment
lever.
To return the seat to th e original position, pull
up the seat-back in the upright position.
■Folding Down the Second Row Seat1 Folding Down the Second Row Seat
Make sure that the folded seat-back does not press
against the front passenger seat, as this can cause the
weight sensors in the front passenger seat to work
improperly. 2 Passenger Front Airbag Off Indicator P. 54
The front seats must be far enough forward so they
do not interfere with the second row seats as they
fold down.
To lock the seat-back upri ght, push it backwards until
it locks.
Make sure the seat-back, head restraints and seat
cushion are securely latche d back into place before
driving. Also, make sure all rear shoulder belts are
positioned in front of the seat-back.
Make sure the center shoulde r belt is re-positioned in
the holding slot.
Models with bench seat
Models with bench seat
Lever
All Models
20 ACURA MDX-31TZ56600.book 197 ページ 2019年4月24日 水曜日 午後5時44分
Page 201 of 701

uuAdjusting the Seats uHead Restraints
200
Controls
A passenger sitting in the second row center
seating position should adjust the height of
their head restraint to an appropriate position
before the vehicle begins moving.
To raise the head restraint:
Pull it upward.
To lower the head restraint:
Push it down while pressing the release
button.
Head restraints can be removed for cleaning or repair.
To remove a head restraint:
Pull the restraint up as far as it will go. Then push the release button, and pull the
restraint up and out.
To reinstall a head restraint:
Insert the legs back in place, then adjust the head restraint to an appropriate height
while pressing the release butto n. Pull up on the restraint to make sure it is locked
in position.
■Changing the Second Row Center Seat Head Restraint
Position*
■Removing and Reinstalling the Head Restraints1 Removing and Reinstalling the Head Restraints
3WARNING
Failure to reinstall, or correctly reinstall, the
head restraints can result in severe injury
during a crash.
Always replace the he ad restraints before
driving.
Front and second row head restraints
* Not available on all models
20 ACURA MDX-31TZ56600.book 200 ページ 2019年4月24日 水曜日 午後5時44分
Page 207 of 701

206
Controls
Interior Lights/Interior Convenience Items
Interior Lights
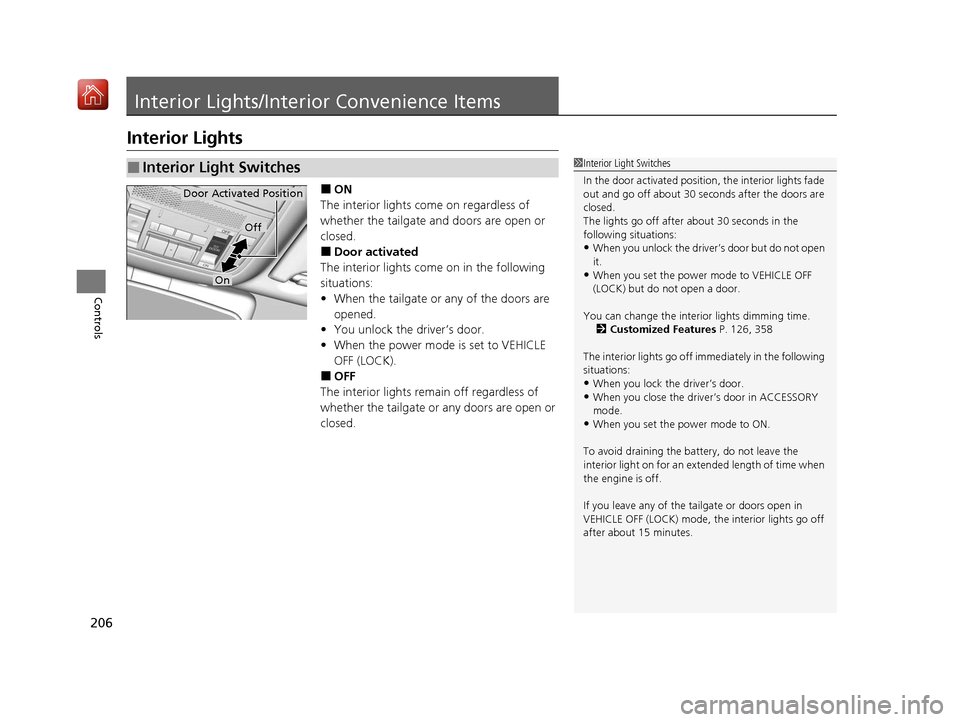
■ON
The interior lights come on regardless of
whether the tailgate and doors are open or
closed.
■Door activated
The interior lights come on in the following
situations:
• When the tailgate or any of the doors are
opened.
• You unlock the driver’s door.
• When the power mode is set to VEHICLE
OFF (LOCK).
■OFF
The interior lights remain off regardless of
whether the tailgate or any doors are open or
closed.
■Interior Light Switches1 Interior Light Switches
In the door activated position, the interior lights fade
out and go off about 30 se conds after the doors are
closed.
The lights go off after about 30 seconds in the
following situations:
•When you unlock the driver’s door but do not open
it.
•When you set the power mode to VEHICLE OFF
(LOCK) but do not open a door.
You can change the interi or lights dimming time.
2 Customized Features P. 126, 358
The interior lights go off im mediately in the following
situations:
•When you lock the driver’s door.•When you close the driver’s door in ACCESSORY
mode.
•When you set the power mode to ON.
To avoid draining the ba ttery, do not leave the
interior light on for an extended length of time when
the engine is off.
If you leave any of the tailgate or doors open in
VEHICLE OFF (LOCK) mode, th e interior lights go off
after about 15 minutes.
Door Activated Position
Off
On
20 ACURA MDX-31TZ56600.book 206 ページ 2019年4月24日 水曜日 午後5時44分
Page 209 of 701
208
uuInterior Lights/Interior Convenience Items uInterior Convenience Items
Controls
Interior Convenience Items
Press the button to open the glove box. You
can lock the glove box with the built-in key.
■Removable shelf
The shelf in the glove box is detachable. To
remove it, disengage the tabs.
The removed shelf can be stored upside down
in the glove box.
■Glove Box1 Glove Box
3WARNING
An open glove box can cause serious injury
to your passenger in a crash, even if the
passenger is wearing the seat belt.
Always keep the glove box closed while
driving.
Glove Box
To Lock
Shelf
Tabs
20 ACURA MDX-31TZ56600.book 208 ページ 2019年4月24日 水曜日 午後5時44分
Page 215 of 701

uuInterior Lights/Interior Convenience Items uInterior Convenience Items
214
Controls
■Accessory power socket (cargo area)
Open the cover to use it.
The AC power outlet can be used when the engine is running. Open the cover to use it. Plug in the appliance
slightly, turn it 90° clockwise, then push it all
the way.
■AC Power Outlet*1AC Power Outlet*
NOTICE
Do not use the AC power outlet for electric
appliances that require hi gh initial peak wattage,
such as cathode-ray tube type televisions,
refrigerators, electric pumps, etc. It is not suitable for
devices that process precis e data, such as medical
equipment, and that require an extremely stable
power supply, such as microcomputer-controlled
electric blankets, touc h sensor lamps, etc.
The AC power outlet is desi gned to supply power for
up to 115 volt appliances that are rated 150 watts or
less.
Continued use of any elec tric appliance/device
exceeding these ratings may result in damage to the
appliance/device.
* Not available on all models
20 ACURA MDX-31TZ56600.book 214 ページ 2019年4月24日 水曜日 午後5時44分
Page 221 of 701
uuClimate Control System uUsing Automatic Climate Control
220
Controls
In addition to the button/switch controls, you can operate the climate control system
from the On Demand Multi-Use DisplayTM touch screen.
■Operating from the On Demand Multi-Use DisplayTM1 Using Automatic Climate Control
When you unlock the doors with your remote, the
driver’s ID ( Driver 1 or Driver 2) is detected, and the
climate control settings are turned to the respective
mode automatically when yo u set the power mode to
ON.
On Demand Multi-Use DisplayTM
A/C (Air Conditioning) and
SYNC (Synchronization) Icon
Driver’s Side
Temperature
Control Icon Recirculation/
Fresh Air mode
Icon
Fan Control Icon Passenger’s Side
Temperature
Control Icon
Vent Mode Icon
20 ACURA MDX-31TZ56600.book 220 ページ 2019年4月24日 水曜日 午後5時44分
Page 227 of 701

226
uuClimate Control System uRear Climate Control System
Controls
Rear Climate Control System
Use the system when the engine is running.
1. Select REAR.
2. Select Auto.
u The rear system changes to AUTO mode.
3. Adjust the rear passenger’s compartment temperature using the temperature
control icon.
4. Select the On/Off to cancel.
u When the turned back on, the system returns to your last selection.
■Using the Rear Climate Control System From the Front Panel1Rear Climate Control System
If any icons on the touch screen are pressed while
using the rear climate control system in auto, the
function of the icon that was pressed will take
priority.
Rear Lock: Appears on the front panel. When
selected, it disables the rear panel control.
LOCK: Appears on the rear c ontrol panel while the
rear lock is on.
If the rear lock is on while in SYNC mode, the rear
control panel is disabled. LOCK SYNC appears on the
rear control panel.
When the rear fan is set to maximum speed, Auto
Idle Stop does not activate.
u Auto Idle Stop may not activate under other
conditions when the rear climate control system is
in use.
On Demand Multi-Use DisplayTM
( +/(-
(Temperature
Control) Icon
Fan Speed Level
Indicators
On/Off Icon
Auto Icon Rear Lock
Icon
Vent Mode Icon
20 ACURA MDX-31TZ56600.book 226 ページ 2019年4月24日 水曜日 午後5時44分