2020 Abarth 500 lifting
[x] Cancel search: liftingPage 40 of 196
lower the bonnet to approximately
20 centimetres above the engine
compartment and let it come down.
Make sure that the bonnet is
completely closed and not just secured
in safety position. If it is not perfectly
closed, do not try to press the bonnet
down but open it and repeat the
procedure.
29)
WARNING
26)The bonnet may drop suddenly if the
supporting rod is not positioned correctly.
Only perform these operations when the
car is stationary.
27)Be careful working inside engine
compartment when the engine is hot to
avoid burning yourself. Do not place your
hands near the engine fan as it may be
activated even when the key is removed.
Wait until the engine has cooled.
28)Be very careful not to allow scarves,
neckties and other loose articles of clothing
from touching, even accidentally, any
moving parts. This may cause the clothing
to be pulled into the part, resulting in
serious injury to the wearer.29)For safety reasons, the bonnet must
always be properly closed while the car is
travelling. Therefore, always make sure that
it is closed properly and that the lock is
engaged. If you notice when driving that
the bonnet has not been properly locked,
stop immediately and close the bonnet
correctly.
30)Use both hands to lift the bonnet.
Before lifting, check that the windscreen
wiper arms are not raised from the
windscreen, that the vehicle is stationary
and that the handbrake is engaged.
LUGGAGE
COMPARTMENT
31) 32)
OPENING THE TAILGATE
WITH THE REMOTE
CONTROL
Press buttonon the key with the
remote control.
The direction indicators will blink twice
when the tailgate is opened.
On some versions, opening the tailgate
will switch the boot ceiling light on:
the light will switch off automatically
when the tailgate is closed.
14)
33)
ELECTRIC HANDLE
(SOFT TOUCH)
The tailgate (if unlocked) can be opened
from the outside by using the electric
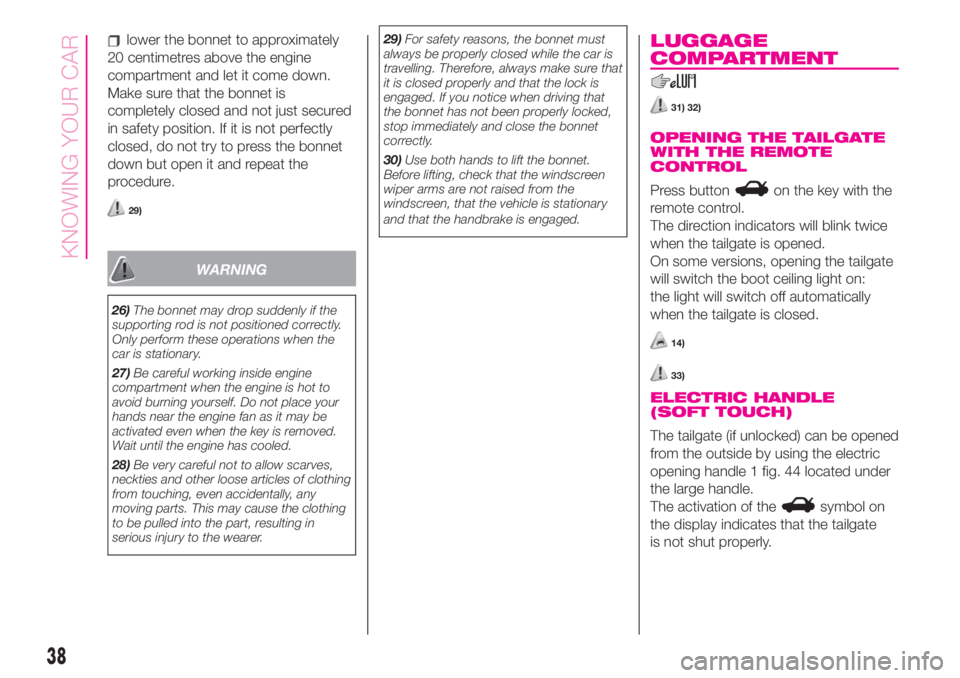
opening handle 1 fig. 44 located under
the large handle.
The activation of the
symbol on
the display indicates that the tailgate
is not shut properly.
38
KNOWING YOUR CAR
Page 111 of 196
operate the compressor by pressing
the ON-OFF button 5 fig. 102. When
the pressure shown in the "Wheels"
paragraph in the “Technical data”
chapter or on the specific label appears
on the pressure gauge 7, stop the
compressor by pressing the ON-OFF
button 5 again;
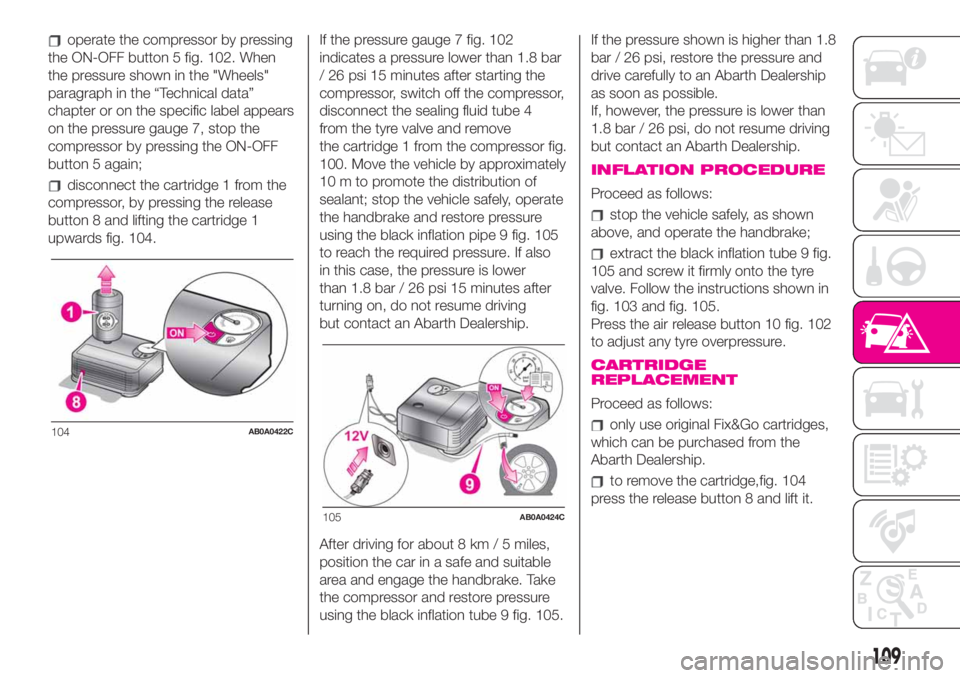
disconnect the cartridge 1 from the
compressor, by pressing the release
button 8 and lifting the cartridge 1
upwards fig. 104.If the pressure gauge 7 fig. 102
indicates a pressure lower than 1.8 bar
/ 26 psi 15 minutes after starting the
compressor, switch off the compressor,
disconnect the sealing fluid tube 4
from the tyre valve and remove
the cartridge 1 from the compressor fig.
100. Move the vehicle by approximately
10 m to promote the distribution of
sealant; stop the vehicle safely, operate
the handbrake and restore pressure
using the black inflation pipe 9 fig. 105
to reach the required pressure. If also
in this case, the pressure is lower
than 1.8 bar / 26 psi 15 minutes after
turning on, do not resume driving
but contact an Abarth Dealership.
After driving for about 8 km / 5 miles,
position the car in a safe and suitable
area and engage the handbrake. Take
the compressor and restore pressure
using the black inflation tube 9 fig. 105.If the pressure shown is higher than 1.8
bar / 26 psi, restore the pressure and
drive carefully to an Abarth Dealership
as soon as possible.
If, however, the pressure is lower than
1.8 bar / 26 psi, do not resume driving
but contact an Abarth Dealership.INFLATION PROCEDURE
Proceed as follows:
stop the vehicle safely, as shown
above, and operate the handbrake;
extract the black inflation tube 9 fig.
105 and screw it firmly onto the tyre
valve. Follow the instructions shown in
fig. 103 and fig. 105.
Press the air release button 10 fig. 102
to adjust any tyre overpressure.
CARTRIDGE
REPLACEMENT
Proceed as follows:
only use original Fix&Go cartridges,
which can be purchased from the
Abarth Dealership.
to remove the cartridge,fig. 104
press the release button 8 and lift it.
104AB0A0422C
105AB0A0424C
109
Page 116 of 196

SERVICING AND CARE
Correct servicing permits the
performance of the vehicle to be
maintained over time, as well as limited
running costs and safeguarding the
efficiency of the safety systems.
This chapter explains how.SCHEDULED SERVICING ...............115
SERVICE SCHEDULE .....................116
PERIODIC CHECKS ........................120
DEMANDING USE OF THE CAR .....120
CHECKING LEVELS........................121
BATTERY ........................................125
BATTERY RECHARGING ................126
WINDSCREEN / REAR WINDOW
WIPERS ..........................................127
LIFTING THE CAR...........................128
WHEELS AND TYRES.....................128
BODYWORK ...................................129
INTERIOR .......................................132
114
SERVICING AND CARE
Page 130 of 196

Rear window washer
The rear window washer jets are fixed.
The nozzle holder is on the rear window
fig. 114.
WARNING
148)Driving with worn windscreen/rear
window wiper blades is a serious risk,
because visibility is reduced in bad
weather.
LIFTING THE CAR
36)
As a result of its sporty nature, the car
is fitted with aerodynamic spoilers at
the bottom and side skirts at the sides.
If the car needs to be raised, go to an
Abarth Dealership which is equipped
with arm lifts and workshop lifts.
WARNING
36)When positioning the workshop lift
arms, be very careful to avoid damaging
the aerodynamic spoilers and the side
skirts.
WHEELS AND TYRES
Check the pressure of each tyre,
including the space-saver wheel,
approximately every two weeks and
before long journeys: the pressure
should be checked with the tyre rested
and cold.
149) 150) 151) 152)
It is normal for the pressure to increase
when the car is used; for the correct
tyre inflation pressure, see “Wheels” in
the “Technical specifications” section.
SNOW TYRES
Use snow tyres of the same size as the
standard tyres provided with the car.
An Abarth Dealership will be happy to
provide advice concerning the most
suitable type of tyre for the Customer's
requirements.
153)
For the type of tyre to be used, inflation
pressures and the specifications of
snow tyres, follow the instructions given
in the "Wheels" paragraph in the
"Technical specifications" chapter.
114AB0A0115C
128
SERVICING AND CARE
Page 192 of 196

Jump starting.....................110
Lifting the car.....................128
Light bulbs
bulbs (replacement)..............95
Bulbs types.....................97
general instructions..............95
Lubricants (specifications)..........144
Luggage compartment..............38
closing..........................39
extending the boot..............39
Main beam headlights..............21
Main beam headlights (bulb
replacement)....................101
Manual climate control system.......27
controls.........................27
Menu options.......................43
Number plate lights (bulb
replacement)....................102
Occupant protection systems.......66
Official type approvals..............180
Paintwork (maintenance)...........129
Parking sensors.....................91
Parking the vehicle..................86
Passenger front airbag...............78
Performance.......................146
Pre-tensioners......................68
load limiters.....................68
Radio transmitters and mobile
phones............................4Rear light clusters (bulb
replacement)....................101
Rear seats (backrest release).........17
Rear view mirrors....................19
Rear window washer (jets)..........128
Rear window wiper/washer..........24
Reconfigurable multifunction
display...........................41
Refuelling..........................143
Refuelling the vehicle................92
Replacing an exterior bulb..........100
Right hand drive versions...........181
Rims
dimensions....................138
wheels and tyres...............128
Rims and tyres.....................138
Safety..............................67
seat belts.......................67
SBR system........................68
Screen wiper/washer................24
Seat belts
using the seat belts..............67
Seat belts (maintenance).............69
Seats...............................15
front seats......................15
Sensors
parking.........................91
Service Schedule..................116
Servicing and maintenance.........115Demanding use of the car......120
periodic checks................120
scheduled servicing............115
Service Schedule...............116
Side airbags (Side bag - Window
bag)..............................81
Side bags (front side airbags)........81
Side lights/daytime running lights
(bulb replacement)...............101
Snow chains.......................129
Snow tyres........................128
Soft Top............................33
Spark plugs (type)..................136
Sport front seats....................16
SPORT function.....................90
Starting the engine..................85
Steering wheel......................19
Sun roof ............................31
Technical data....................135
The keys............................11
key with remote control..........11
Mechanical key..................11
Third brake light (bulb
replacement)....................102
Towing the vehicle..................112
TRIP button.........................45
Trip computer.......................44
Ty r e s
inflation pressures..............138
INDEX