Page 169 of 669

WINDOWS, GLASS AND MIRRORS
}}
* Option/accessory.167
Rear window shelf
An electrically operated sun curtain is integratedin the rear window shelf.
To operate the sun curtain, the ignition must bein mode II.
NOTE
It may not be possible to operate the sunshade if the temperature in the passengercompartment is low.
Operating using the center display
Tap Rear Sun Curtainin Func-tion view in the center display -the sun curtain will automati-cally move to its end position,up or down.
Operating with right-side rear door controls
Briefly press the button - the sun curtain willautomatically move to its end position, up ordown.
Related information
Pinch protection for windows and sun cur-tains (p. 162)
Reset procedure for pinch protection(p. 163)
Power windows (p. 164)
Rearview/door mirrors
The rearview mirror and door mirrors can beused to improve the driver's visibility behind thevehicle.
Rearview mirror
The rearview mirror can be easily adjusted man-ually. The rearview mirror can be equipped withHomeLink*, auto-dim* and compass*.
Door mirrors
WARNING
The door mirror on the passenger side iscurved to improve visibility. Objects in the mir-ror may appear farther away than they actuallyare.
The joystick in the drivers' door control panel isused to adjust the position of the door mirrors.There are also several automatic settings thatcan also be connected to the memory functionbuttons for the power seat*.
Related information
HomeLink®* (p. 471)
Compass* (p. 474)
Adjusting the rearview mirror dimming func-tion (p. 168)
Adjusting the door mirrors (p. 169)
Page 170 of 669

WINDOWS, GLASS AND MIRRORS
* Option/accessory.168
Storing positions for seats, mirrors and head-up display* (p. 182)
Activating and deactivating the heated rearwindow and door mirrors (p. 218)
Adjusting the rearview mirrordimming function
Bright light entering the vehicle from behind, e.g.from the headlights of following vehicles, couldreflect in the rearview mirror and door mirrorsand cause a glare. Use the dimming functionwhen light from behind is distracting.
Auto-dim
If bright light enters the vehicle from behind, thedoor mirrors will automatically dim. Auto-dim isalways active when the engine is running, exceptwhen reverse gear is engaged.
NOTE
Adjustments to the sensitivity level will not benoticeable immediately but will instead takeeffect after a short period of time.
The sensitivity level for dimming will affect boththe rearview mirror and door mirrors.
To change the dimming sensitivity level:
1.Tap Settings in the Top view in the centerdisplay.
2.Tap My CarMirrors and Convenience.
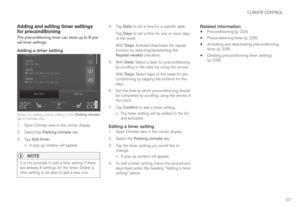
3.Under Rearview Mirror Auto Dimming,select Normal, Dark or Light.
The rearview mirror instead has two sensors -one pointing forward and one pointing rearward -
which work together to identify and eliminateglare. The forward-pointing sensor monitorsambient light, while the rearward-pointing sensormonitors light from the headlights of followingvehicles.
For the door mirrors to be equipped with auto-dim, the rearview mirror must also be equippedwith auto-dim.
NOTE
If the sensors are obstructed by e.g. a parkingpermit, transponder, sunshade or objects onthe seats or parcel shelf in a way that pre-vents light from reaching the sensors, theauto-dim function in the rearview and doormirrors will be reduced.
Related information
Rearview/door mirrors (p. 167)
Adjusting the door mirrors (p. 169)
Page 171 of 669

WINDOWS, GLASS AND MIRRORS
}}
* Option/accessory.169
Adjusting the door mirrors
To improve visibility to the rear, the door mirrorsneed to be adjusted to the driver's height andseating position. There are several automaticsettings that can also be connected to the mem-ory function buttons for the power seat*.
Controls used for door mirrors
Door mirror controls.
The joystick in the drivers' door control panel isused to adjust the position of the door mirrors.The ignition must be in at least mode I.
1.Press the L button for the left door mirror orR for the right door mirror. The button willlight up.
2. Adjust the position using the joystick locatedbetween the buttons.
3.Press the L or R button again. The light inthe button will go out.
Automatically folding door mirrors *
The door mirrors can be automatically foldedwhen driving or parking in tight spaces.
1.Press the L and R buttons at the same time.
2. Release the buttons after about 1 second.The mirrors will automatically stop when theyare completely folded in.
Open the mirrors by pressing L and R at thesame time. The mirrors will automatically stopwhen they are completely open.
Resetting the mirrors' position
A mirror that has been moved out of positionmanually (e.g. hit or bumped into) must be electri-cally returned to its normal position for automaticfolding* to function properly.
1.Fold in the mirrors by pressing the L and Rbuttons at the same time.
2.Open them again by pressing the L and Rbuttons at the same time.
3. Repeat the above procedure as needed.
The mirrors are now reset to their original posi-tions.
Tilting when parking 3
The door mirrors can be tilted down to help givethe driver a better view along the sides of thevehicle, e.g. of the curb when parking.
–Select reverse gear and press the L or R mir-ror button.
Please note that the button may need to bepressed twice depending on settings. When thedoor mirror is tilted down, the light in the buttonwill flash. When reverse gear is engaged, thedoor mirrors will automatically start to move after3 seconds and will reach their original positionafter about 8 seconds.
Automatically tilting when parking 3
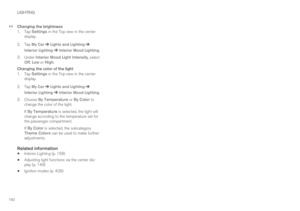
With this setting, the door mirrors will automati-cally tilt down when reverse gear is engaged. Thefolded position is preset and cannot be adjusted.To immediately return the door mirrors to theiroriginal position, press the L or R button twice.
1.Tap Settings in the center display's Topview.
2. Tap My CarMirrors and Convenience.
3.Under Exterior Mirror Tilt at Reverse,select Off, Driver, Passenger or Both toactivate/deactivate and to select which mir-ror to tilt.
3
Only on models equipped with a power driver's seat with memory buttons * .
Page 172 of 669

||
WINDOWS, GLASS AND MIRRORS
* Option/accessory.170
Automatic folding when the vehicle is
locked *
The door mirrors can automatically fold in whenthe vehicle is locked and open when the vehicleis unlocked using the remote key.
1.Tap Settings in the center display's Topview.
2. Tap My CarMirrors and Convenience.
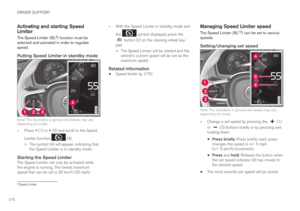
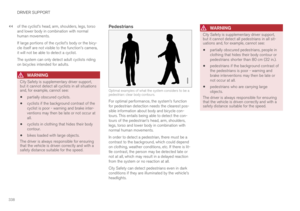
3.Select Fold Mirror When Locked to acti-vate/deactivate.
Related information
Rearview/door mirrors (p. 167)
Adjusting the rearview mirror dimming func-tion (p. 168)
Storing positions for seats, mirrors and head-up display* (p. 182)
Activating and deactivating the heated rearwindow and door mirrors (p. 218)
Panoramic roof
The panoramic roof is divided into two glasssections. The front section can be opened verti-cally at the rear edge (ventilation position) or hor-izontally (open position). The rear section cannotbe moved.
The panoramic roof has a wind deflector andsun curtain made of perforated fabric (locatedbeneath the glass sections) for extra protectionin e.g. bright sunlight.
The panoramic roof and sun curtain are operatedusing the controls in the ceiling.
The panoramic roof and sun curtain can also beoperated with the controls in the right-side reardoor.
It can also be operated using keyless opening*with the door handle.
To operate the panoramic roof and sun curtain,the ignition must be in mode I or II.
Page 173 of 669

WINDOWS, GLASS AND MIRRORS
}}
* Option/accessory.171
WARNING
Children, other passengers or objects can betrapped by the moving parts.
Always operate the windows with caution.
Do not allow children to play with theoperating controls.
Never leave a child alone in the vehicle.
Remember to always cut the current tothe power windows by setting the vehi-cle's electrical system to ignition mode 0and then taking the remote key with youwhen leaving the vehicle.
Never stick objects or body parts outthrough the windows, even if the vehicleelectrical system is completely turned off.
CAUTION
Do not open the panoramic roof whenload carriers are installed.
Never place heavy objects on the panor-amic roof.
CAUTION
Remove ice and snow before opening thepanoramic roof. Be careful not to scratchany surfaces or damage the trim.
Do not operate the panoramic roof if it isfrozen in place.
Wind blocker
The panoramic roof is equipped with a windblocker that folds up when the roof is open.
Related information
Operating the panoramic roof (p. 171)
Auto closing the panoramic roof sun curtain(p. 175)
Pinch protection for windows and sun cur-tains (p. 162)
Keyless locking and unlocking* (p. 253)
Locking and unlocking using the remote key(p. 240)
Operating the panoramic roof
The panoramic roof and sun curtain are oper-ated using a control in the ceiling panel, andboth are equipped with pinch protection.
The control in the right rear door can also beused for operation.
WARNING
Children, other passengers or objects can betrapped by the moving parts.
Always operate the windows with caution.
Do not allow children to play with theoperating controls.
Never leave a child alone in the vehicle.
Remember to always cut the current tothe power windows by setting the vehi-cle's electrical system to ignition mode 0and then taking the remote key with youwhen leaving the vehicle.
Never stick objects or body parts outthrough the windows, even if the vehicleelectrical system is completely turned off.
CAUTION
Do not open the panoramic roof whenload carriers are installed.
Never place heavy objects on the panor-amic roof.
Page 174 of 669

||
WINDOWS, GLASS AND MIRRORS
* Option/accessory.172
CAUTION
Remove ice and snow before opening thepanoramic roof. Be careful not to scratchany surfaces or damage the trim.
Do not operate the panoramic roof if it isfrozen in place.
To operate the panoramic roof and sun curtain,the ignition must be in mode I or II.
It can also be operated using keyless opening*with the door handle.
WARNING
Make sure that no child or other passengercomes into contact with the windows as theyare closing with keyless closing*.
CAUTION
Check that the panoramic roof is properlyclosed when closing.
The movement of the roof will stop if the controlis released during manual operation or when theglass has reached the fully open/closed position.The movement of both the panoramic roof andthe sun curtain is also stopped if the control inthe ceiling is operated again in the directionopposite that of the current direction of move-
ment. Movement will also stop if the control in theright rear door is moved again in any direction.
The panoramic roof and sun curtain are alsoequipped with pinch protection. If there is anyproblem with the pinch protection, a rest proce-dure can be tested.
NOTE
For manual opening, the sun curtain must becompletely open before the panoramic roofcan be opened. For the reverse procedure,the panoramic roof must be completelyclosed before the sun curtain can be com-pletely closed.
Opening and closing ventilation
position
Ventilation position, rear edge raised.
Open by pushing the control upward once.
Close by pushing the control downwardonce.
When ventilation mode is selected, the rear edgeof the front section of the roof is raised. If the suncurtain is fully closed when ventilation position isselected, it will automatically open approx. 50 mm(approx. 2 inches).
If the panoramic roof is closed from the ventila-tion position, the sun curtain will also automati-cally close.
Page 175 of 669

WINDOWS, GLASS AND MIRRORS
}}
173
NOTE
If the roof is closed using the control in theright rear door, the sun curtain must beclosed separately.
Fully opening and closing the
panoramic roof with the control in the
ceiling
Operation, manual mode
Operation, automatic mode
Manual operation
1. To open the sun curtain, pull the controlbackward to the manual open mode.
2. To open the panoramic roof, pull the controlbackward a second time to the manual open-ing position.
Close by repeating the above procedure inreverse - push the control forward/down to themanual closing position.
Auto operation
1. To open the sun curtain to the fully openposition, pull the control backward to theauto open mode and release.
2. To open the panoramic roof, pull the controlbackward a second time to the automaticopening position and release.
Close by repeating the above procedure inreverse - push the control forward/down to theauto close position.
Automatic operation - rapid opening or
closing
The panoramic roof and sun curtain can beopened or closed simultaneously:
–Open - press the control backward twice tothe automatic operation position and release.
–Close - press the control forward/down twiceto the automatic operation position andrelease.
Operating with right-side rear door
controls
Sun curtain control.
Operation, manual mode
Operation, automatic mode
Page 176 of 669

||
WINDOWS, GLASS AND MIRRORS
* Option/accessory.174
Panoramic roof control.
Operation, manual mode
Operation, automatic mode
Manual operation
1. To open the panoramic roof to the ventilationposition, move the panoramic roof controldownward to the manual opening position.
2. To open the sun curtain, move the sun cur-tain control downward to the manual openposition.
3. To open the panoramic roof fully, move thepanoramic roof control downward a secondtime to the manual operation position.
To close, pull up the respective control to themanual closing position.
Auto operation
1. To open to the ventilation position, move thepanoramic roof control downward to the autoopen position and release.
2. To open to the sun curtain, move the suncurtain control downward to the auto openposition and release.
3. To open the panoramic roof, move the panor-amic roof control downward a second time tothe auto open position and release.
To close, pull up the respective control to theautomatic closing position.
Automatic operation - rapid opening and
closing
The panoramic roof and sun curtain can beopened or closed simultaneously.
1. To open to the ventilation position, move thepanoramic roof control downward to the autoposition and release.
2. To open fully, move the sun curtain controldownward to the auto position and release.Then immediately move the panoramic roofcontrol downward to the auto position andrelease.
–To close, pull up the panoramic roof controlto the auto position and release. Then imme-diately move the sun curtain control up to theauto position and release.
Related information
Panoramic roof (p. 170)
Auto closing the panoramic roof sun curtain(p. 175)
Pinch protection for windows and sun cur-tains (p. 162)
Keyless locking and unlocking* (p. 253)
Locking and unlocking using the remote key(p. 240)