2019 VOLVO S60T8 buttons
[x] Cancel search: buttonsPage 5 of 47

GETTING STARTEDThe following functions, concepts and tips are intended to help familiar- ize you with your Volvo as quickly as possible. Volvo ID Volvo ID is a personal ID that gives you access to a number of services with a single username and password. Some examples are Volvo On Call, navigation * and the opportunity to schedule service and repairs.
You can create a Volvo ID via the Volvo On Call app or directly in your vehicle. Sensus Sensus is your vehicle's intelligent interface and includes all of its solu- tions relating to entertainment, connecting to the Internet, navigation *
and information services. Sensus enables communication between you, the vehicle and the digital world around you. Volvo On Call Volvo On Call gives you direct contact with your vehicle and enhanced comfort and assistance 24 hours a day. With the Volvo On Call app, youcan see if e.g. any bulbs need replacing and if washer fluid needs to befilled. You can lock and unlock the vehicle, check the fuel level and findyour nearest service station. Preconditioning can also be set andstarted via the vehicle's parking climate or the engine remote start function 1
. Download the Volvo On Call app to get started.
Volvo On Call also gives you access to roadside assistance, other security services and emergency assistance using the ON CALL and
SOS buttons in the ceiling console.
Driver profiles Many of the vehicle's settings can be adapted to the driver's personal preferences and saved in one or more driver profiles. Each of theremote keys can be linked to a driver profile. See the section "Topview" in this Quick Guide for more information on driver profiles. Preconditioning before driving Make it a habit to precondition the vehicle before driving to create a more comfortable passenger compartment temperature. From the cen-ter display's climate view, select the
Parking climate tab or activate the
function via the Volvo On Call app. Full preconditioning is only available when the vehicle is connected to an electrical outlet.
1 Available on certain markets and models.
01
Page 18 of 47

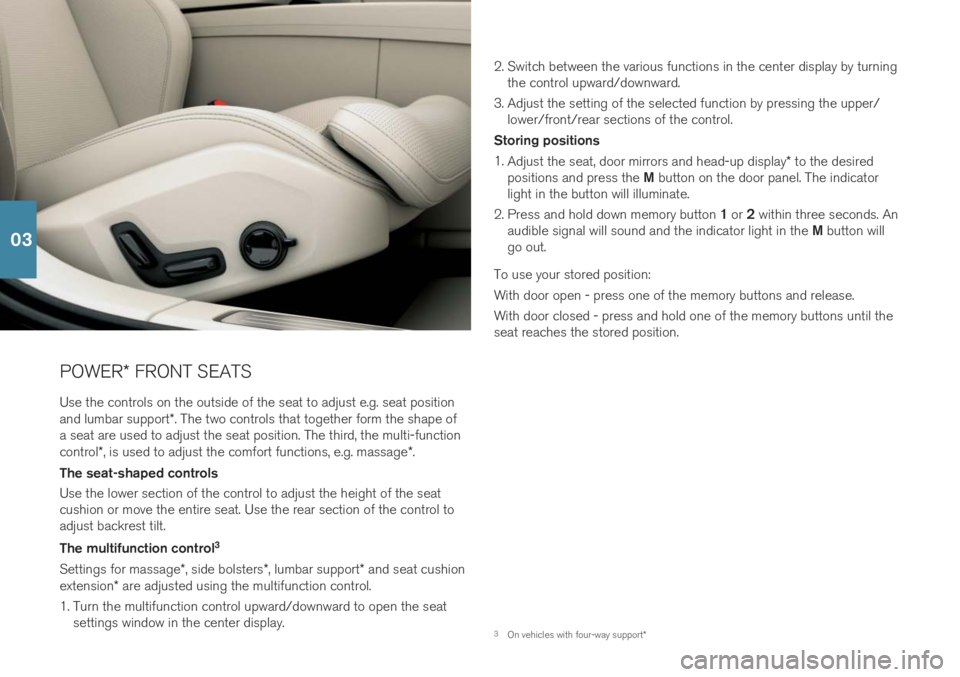
POWER* FRONT SEATS
Use the controls on the outside of the seat to adjust e.g. seat position and lumbar support *. The two controls that together form the shape of
a seat are used to adjust the seat position. The third, the multi-functioncontrol *, is used to adjust the comfort functions, e.g. massage *.
The seat-shaped controls Use the lower section of the control to adjust the height of the seat cushion or move the entire seat. Use the rear section of the control toadjust backrest tilt. The multifunction control 3
Settings for massage *, side bolsters *, lumbar support * and seat cushion
extension * are adjusted using the multifunction control.
1. Turn the multifunction control upward/downward to open the seat settings window in the center display. 2. Switch between the various functions in the center display by turning
the control upward/downward.
3. Adjust the setting of the selected function by pressing the upper/ lower/front/rear sections of the control.
Storing positions 1. Adjust the seat, door mirrors and head-up display * to the desired
positions and press the M button on the door panel. The indicator
light in the button will illuminate.
2. Press and hold down memory button 1 or 2 within three seconds. An
audible signal will sound and the indicator light in the M button will
go out.
To use your stored position: With door open - press one of the memory buttons and release. With door closed - press and hold one of the memory buttons until the seat reaches the stored position.
3 On vehicles with four-way support *
03
Page 19 of 47

FOLDING THE BACKRESTS IN THE REAR SEAT*
Make sure that the backrest and head restraint do not come into con- tact with the back of the seat in front when folding down. The frontseats may need to be adjusted in order to fold down the backrests. Folding down the backrests The vehicle must be stationary and at least one rear door must be open before a backrest can be folded down.
1. Fold down the center seat's head restraint manually.
2. Press and hold one of the buttons on the parcel shelf on the left side of the vehicle.
3. The seat will no longer be locked but will remain in the same posi- tion. The head restraints folds down automatically.
4. Fold down the backrest manually to the horizontal position. Folding up backrests
1. Move the backrest upward/rearward until it locks into position.
2. Return the head restraint to the upright position manually.
3. If needed, adjust the center seat's head restraint.
03
Page 20 of 47

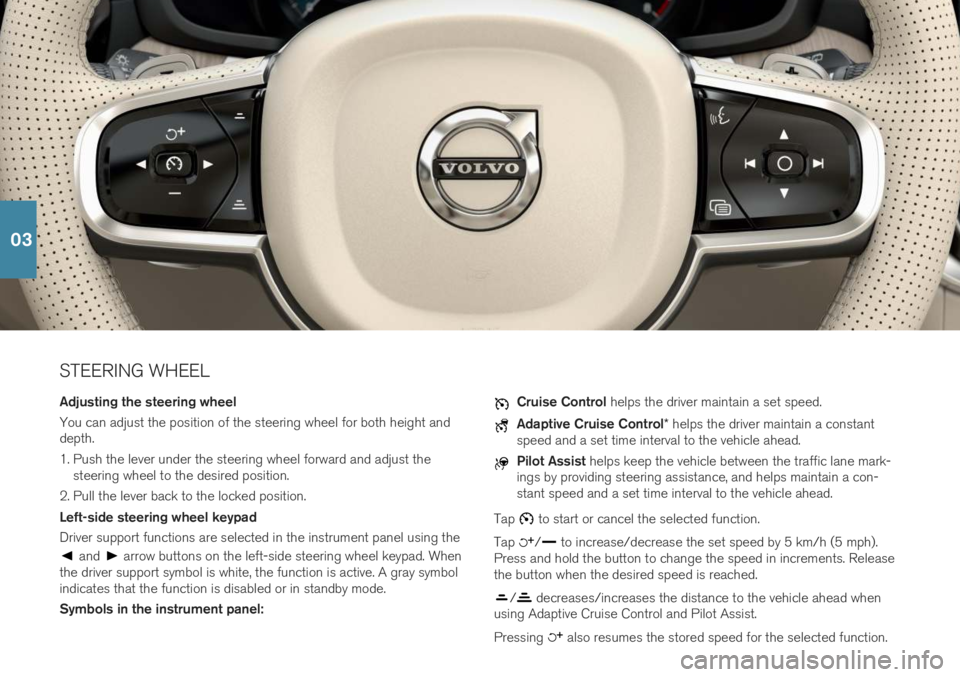
STEERING WHEEL Adjusting the steering wheel You can adjust the position of the steering wheel for both height and depth.
1. Push the lever under the steering wheel forward and adjust thesteering wheel to the desired position.
2. Pull the lever back to the locked position. Left-side steering wheel keypad Driver support functions are selected in the instrument panel using the
and arrow buttons on the left-side steering wheel keypad. When
the driver support symbol is white, the function is active. A gray symbol indicates that the function is disabled or in standby mode. Symbols in the instrument panel:
Cruise Control helps the driver maintain a set speed.
Adaptive Cruise Control * helps the driver maintain a constant
speed and a set time interval to the vehicle ahead.
Pilot Assist helps keep the vehicle between the traffic lane mark-
ings by providing steering assistance, and helps maintain a con- stant speed and a set time interval to the vehicle ahead.
Tap
to start or cancel the selected function.
Tap
/ to increase/decrease the set speed by 5 km/h (5 mph).
Press and hold the button to change the speed in increments. Release the button when the desired speed is reached.
/ decreases/increases the distance to the vehicle ahead when
using Adaptive Cruise Control and Pilot Assist. Pressing
also resumes the stored speed for the selected function.
03
Page 21 of 47

Right-side steering wheel keypad The right-side steering wheel keypad controls the instrument panel.Open/close the app menu. From here, you can control the trip computer, media player, a connected cell phone and the naviga-
tion system *.
Press the left/right arrows to scroll among the apps.
Select/deselect or confirm a choice, e.g. select the trip comput- er's menu or erase a message from the instrument panel.
Scroll among a selected app's functions by pressing the up/down arrows.
Raise/lower the media volume by pressing or . If no other
function is active these buttons serve as volume control. Voice control is activated by pressing the
button to give voice com-
mands for e.g. media, navigation and climate systems. Say e.g. “Radio”,
“Raise temperature” or “Cancel”.
See the chapter "Voice control" in this Quick Guide for additional voice commands. Trip computer The trip computer shows e.g. mileage, fuel consumption and average speed. You can choose the type of trip computer information that willbe displayed in the instrument panel. The trip computer calculates theremaining distance that can be driven on the amount of fuel remainingin the tank or until the hybrid battery is discharged. Use the buttons onthe right-side steering wheel keypad to display the various options.When “----” is displayed in the instrument panel, there is no guaranteedelectrical current remaining in the battery.
03
Page 25 of 47

PASSENGER COMPARTMENT CLIMATE Climate system functions for the front and rear sections of the passen- ger compartment are controlled from the center display and from the buttons on the center console and the rear side of the tunnel console*.
Some functions can also be controlled using voice commands.
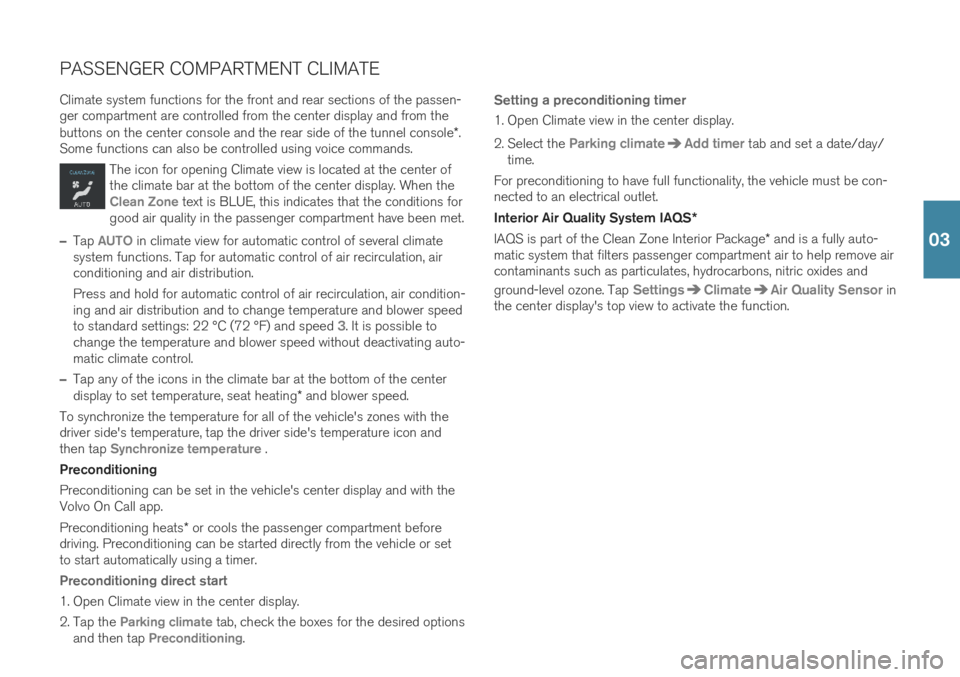
The icon for opening Climate view is located at the center of the climate bar at the bottom of the center display. When the
Clean Zone text is BLUE, this indicates that the conditions for
good air quality in the passenger compartment have been met.
–Tap AUTO in climate view for automatic control of several climate
system functions. Tap for automatic control of air recirculation, air conditioning and air distribution. Press and hold for automatic control of air recirculation, air condition- ing and air distribution and to change temperature and blower speedto standard settings: 22 °C (72 °F) and speed
3. It is possible to
change the temperature and blower speed without deactivating auto- matic climate control.
–Tap any of the icons in the climate bar at the bottom of the center display to set temperature, seat heating * and blower speed.
To synchronize the temperature for all of the vehicle's zones with the driver side's temperature, tap the driver side's temperature icon andthen tap
Synchronize temperature .
Preconditioning Preconditioning can be set in the vehicle's center display and with the Volvo On Call app. Preconditioning heats * or cools the passenger compartment before
driving. Preconditioning can be started directly from the vehicle or set to start automatically using a timer.
Preconditioning direct start
1. Open Climate view in the center display.
2. Tap the
Parking climate tab, check the boxes for the desired options
and then tap Preconditioning.
Setting a preconditioning timer
1. Open Climate view in the center display.
2. Select the
Parking climateAdd timer tab and set a date/day/
time.
For preconditioning to have full functionality, the vehicle must be con- nected to an electrical outlet. Interior Air Quality System IAQS *
IAQS is part of the Clean Zone Interior Package * and is a fully auto-
matic system that filters passenger compartment air to help remove air contaminants such as particulates, hydrocarbons, nitric oxides and ground-level ozone. Tap
SettingsClimateAir Quality Sensor in
the center display's top view to activate the function.
03
Page 33 of 47

FUNCTION VIEW AND APP VIEW Function view In home view, swipe the screen from left to right8
to access function
view. From here, you can activate/deactivate various vehicle functions, such as
Head-up Display* and Park Assist. Activate/deactivate a func-
tion by tapping its symbol. Some functions open in their own windows. App view In home view, swipe from right to left 8
to access app view. This displays
the vehicle's factory-installed apps as well as any apps you have down- loaded and installed.
Managing and updating apps and systems
You can update many of the vehicle's systems in Download
Center in app view. The vehicle must be connected to the
Internet in order for this to be possible. In Download Center,
you can:
Download apps - Tap New apps and select the desired app. SelectInstall to download the app.
Update apps - Tap
Install all to update all apps. Or tap Application
updates to display a list of available updates. Select the desired app
and tap Install.
Uninstall apps - Tap
Application updates and select the desired app.
Tap Uninstall to delete the app.
Update system software - Tap
System updates to display a list of
updates that can be installed in the vehicle. Tap Install all at the bottom
of the list to update all software or Install to update specific software. If
you do not want a list, select Install all near the System updates but-
ton. Moving icons The apps and buttons for vehicle functions in app view and function view can be moved to customize these views. 1. Press and hold an app or button.
2. Drag the app or button to the desired location in the view and
release it.
8Applies for left-hand drive vehicles. For right-hand drive vehicles, swipe the opposite way.
04