Page 63 of 211

If you have to drive a right-hand drive vehicle in a left-hand drive country, or vice versa, the
asymmetric dipped beam headlights may dazzle oncoming traffic.
Therefore you may have to apply stickers to certain parts of the headlight lenses if you are driving
abroad. A qualified workshop can provide you with further information. Volkswagen recommends
using a Volkswagen dealership for this purpose.
Stickers may only be used on the headlights for a limited period. Please contact a qualified
workshop for a permanent alteration. Volkswagen recommends using a Volkswagen dealership for
this purpose.
Headlight range control, instrument and switch lighting
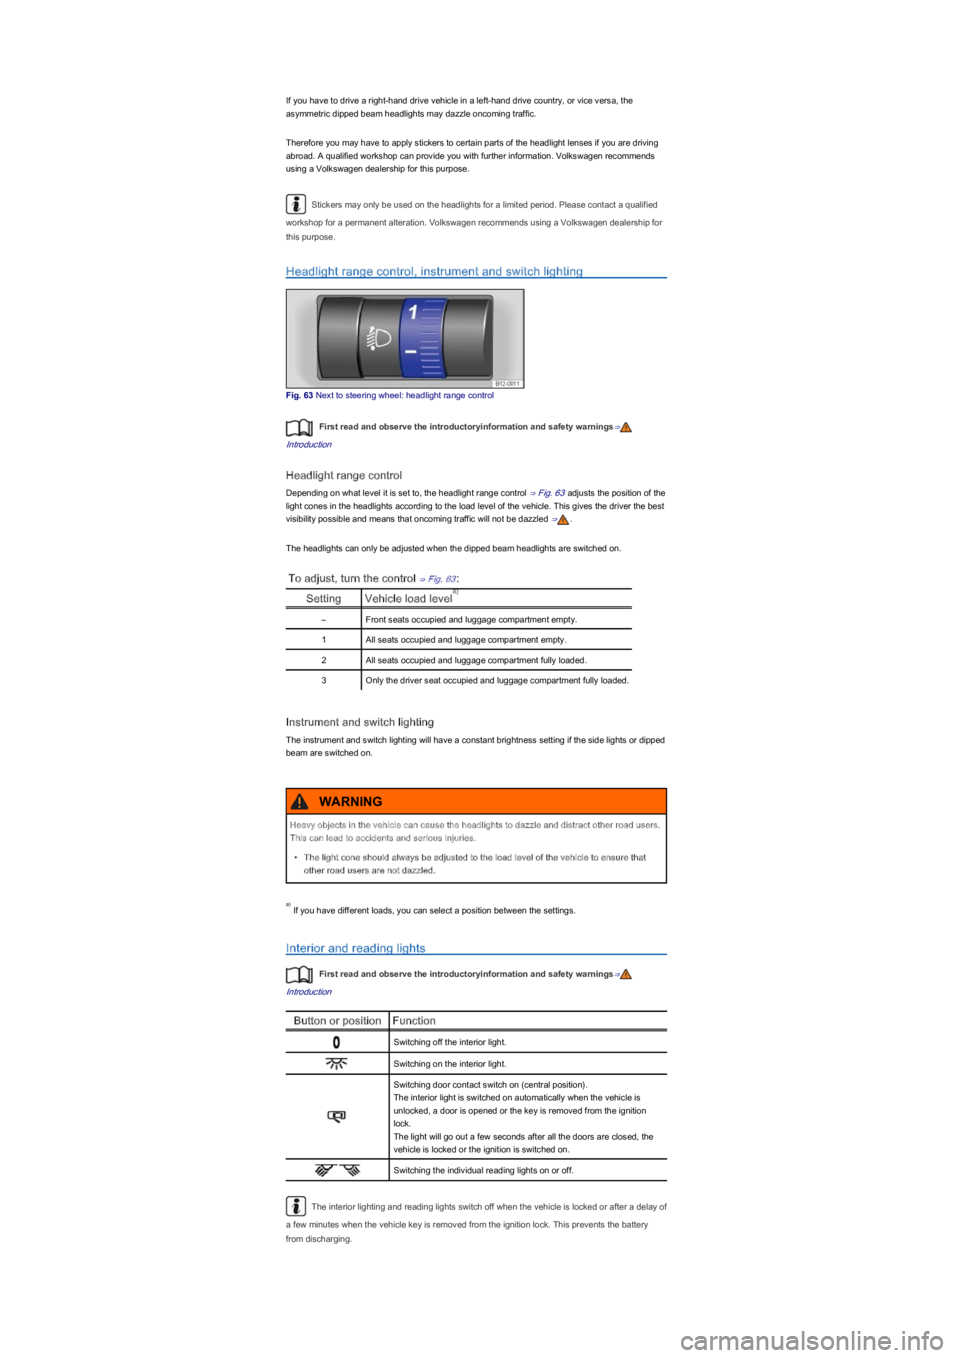
Fig. 63 Next to steering wheel: headlight range control
First read and observe the introductoryinformation and safety warnings⇒
Introduction
Headlight range control
Depending on what level it is set to, the headlight range control ⇒ Fig. 63 adjusts the position of the
light cones in the headlights according to the load level of the vehicle. This gives the driver the best
visibility possible and means that oncoming traffic will not be dazzled ⇒.
The headlights can only be adjusted when the dipped beam headlights are switched on.
To adjust, turn the control ⇒ Fig. 63:
SettingVehicle load level
\f
Page 129 of 211

Windscreen washer fluid level Windscreen wiper and washer
Engine oil level Engine oil
Engine coolant level Coolant
Brake fluid level Braking, stopping and parking
Tyre pressure Wheels and tyres
equipment, service fluids and unsuitable tools are not available ⇒ Preparation for working in the
engine compartment! The work should be carried out by a qualified workshop if you are
uncertain. Please ensure that the following are checked regularly, preferably every time you fill
the tank:
Vehicle lighting necessary for traffic safety:
- Turn signals
- Side lights, dipped beam headlights and main beam headlights
- Tail light cluster
- Brake lights
- Rear fog light ⇒ Lights
Information on changing bulbs ⇒ Changing bulbs.
Fuel
Introduction
This chapter contains information on the followingsubjects:
⇒ Petrol
⇒ Natural gas
Different engines require different fuels. The factory-fitted sticker on the inside of the tank flap
indicates the fuel type that is required for your particular vehicle.
Volkswagen recommends using low-sulphur or sulphur-free fuels, to help reduce fuel consumption
and prevent damage to the engine.
If the engine is not running smoothly or begins to judder, this can indicate poor or inadequate fuel
quality, e.g. water in the fuel. If these symptoms appear, reduce the vehicle speed immediately and
drive to the nearest qualified workshop at medium engine speeds, avoiding high engine loading. If
these symptoms occur immediately after the vehicle has been refuelled, switch the engine off as
soon as it is safe to do so and seek expert assistance. This can help to prevent further damage.
Additional information and warnings:
\f
Page 130 of 211

than the engine requires. However, this does not provide any advantage in terms of fuel
consumption or engine output.
Volkswagen recommends using fuel with a low sulphur content or sulphur-free fuel for petrol
engines in order to achieve reduced fuel consumption.
Petrol additives
The quality of petrol influences the running properties, performance and service life of the engine.
This is why the vehicle should be refuelled with good quality petrol that has only non-metallic
additives pre-added by the petroleum industry. These petrol additives help to prevent corrosion,
keep the fuel system clean, and prevent the build-up of deposits in the engine.
If good quality petrol containing non-metallic additives is not available, or if engine problems arise,
the necessary petrol additives must be added to the petrol when refuelling ⇒.
Not all petrol additives are effective. The use of unsuitable petrol additives can cause considerable
damage to the engine and catalytic converter. Metallic additives should be avoided at all times.
Petrol additives on sale that are intended to improve knock resistance or increase the octane
number can also contain metallic additives ⇒.
Volkswagen recommends genuine Volkswagen or Audi fuel additives for petrol engines. These
additives and information on how to use them are available from your Volkswagen dealership.
Natural gas engines
Run the petrol tank empty every 6 months until the indicator lamp lights up. This is necessary to
maintain the required system function for petrol mode and fuel quality.
Natural gas
First read and observe the introductoryinformation and safety warnings⇒
Introduction
Natural gas
Natural gas can be delivered in compressed or liquefied form.
Liquefied Natural Gas (LNGyf���L�V���S�U�R�G�X�F�H�G���E�\���U�D�S�L�G���F�R�R�O�L�Q�J���R�I���W�K�H���Q�D�W�X�U�D�O���J�D�V�����7�K�L�V���G�H�F�U�H�D�V�H�V���W�K�H�
volume considerably in comparison to Compressed Natural Gas (CNGyf�����$���Y�H�K�L�F�O�H���H�T�X�L�S�S�H�G���Z�L�W�K���D�
natural gas engine may not be refilled directly with liquefied natural gas as the gas would expand
too much once in the tank in the vehicle.
Vehicles fitted with a natural gas engine may therefore only be refilled and driven using
compressed natural gas ⇒.
Natural gas quality and consumption
Natural gas is available in two grades: H-gas and L-gas.
H-gas has a higher calorific value and a lower nitrogen and carbon dioxide content. The higher the
calorific value of the natural gas the lower the levels of consumption.
The calorific value and the nitrogen or carbon dioxide values may, however, vary within one quality
group. For this reason, the vehicle consumption may vary when using natural gas of the same
quality.
\f
Page 142 of 211
Explanation of the warnings on the vehicle battery
SymbolMeaning
Always wear eye protection!
Electrolyte is very corrosive and caustic. Always wear protective gloves
and eye protection!
No fires, sparks, naked lights or smoking!
A highly explosive mixture of gases is given off when the vehicle battery
is charging!
Always keep children away from acid and the vehicle battery!
Additional information and warnings:
\f
Page 182 of 211
Stop the vehicle at a safe distance away from moving traffic and on a suitable surface .
Switch on the hazard warning lights using the button .
Apply the handbrake firmly Braking, stopping and parking.
Select the neutral position or move the selector lever to N Changing gear.
Stop the engine and remove the vehicle key from the ignition .
Ensure that all occupants exit the vehicle away from moving traffic and proceed to a safe
position, e.g. behind the safety barrier.
Take all vehicle keys with you when you leave the vehicle.
Place the warning triangle in position to draw the attention of other road users to your
vehicle.
Allow the engine to cool down and, if necessary, seek expert assistance.
\f
Page 183 of 211
The vehicle battery will discharge if the hazard warning lights are left on over a long period of
time \f
Page 195 of 211

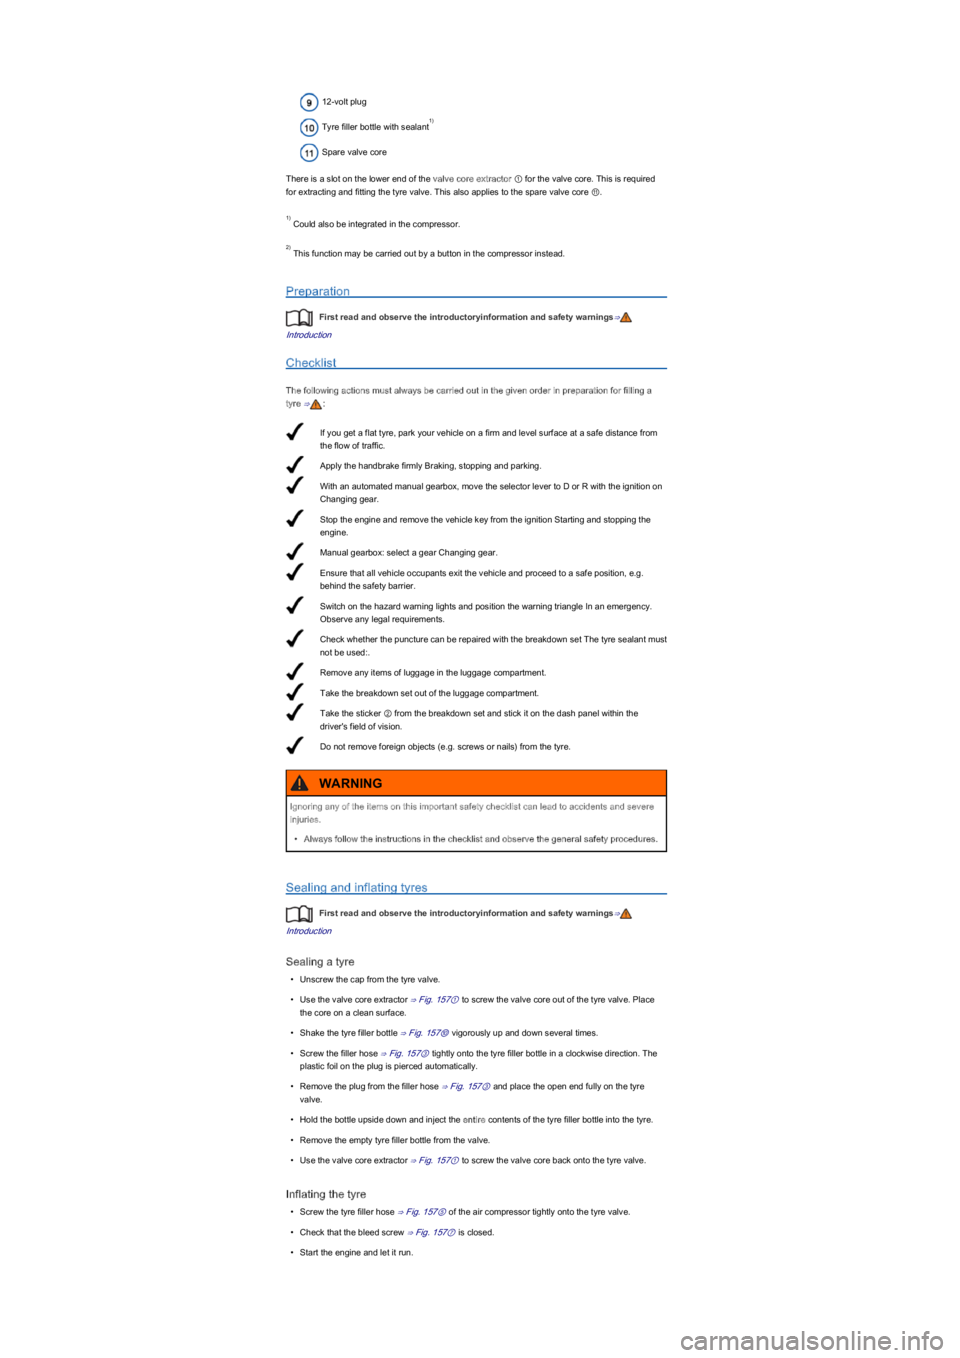
If you get a flat tyre, park your vehicle on a firm and level surface at a safe distance from
the flow of traffic.
Apply the handbrake firmly Braking, stopping and parking.
With an automated manual gearbox, move the selector lever to D or R with the ignition on
Changing gear.
Stop the engine and remove the vehicle key from the ignition Starting and stopping the
engine.
Manual gearbox: select a gear Changing gear.
Ensure that all vehicle occupants exit the vehicle and proceed to a safe position, e.g.
behind the safety barrier.
Switch on the hazard warning lights and position the warning triangle In an emergency.
Observe any legal requirements.
Check whether the puncture can be repaired with the breakdown set The tyre sealant must
not be used:.
Remove any items of luggage in the luggage compartment.
Take the breakdown set out of the luggage compartment.
Take the sticker ② from the breakdown set and stick it on the dash panel within the
driver's field of vision.
Do not remove foreign objects (e.g. screws or nailsyf���I�U�R�P���W�K�H���W�\�U�H�.
12-volt plug
Tyre filler bottle with sealant
Spare valve core
There is a slot on the lower end of the valve core extractor ① for the valve core. This is required
for extracting and fitting the tyre valve. This also applies to the spare valve core ⑪.
Could also be integrated in the compressor.
This function may be carried out by a button in the compressor instead.
Preparation
First read and observe the introductoryinformation and safety warnings⇒
Introduction
Checklist
The following actions must always be carried out in the given order in preparation for filling a
tyre ⇒:
Sealing and inflating tyres
First read and observe the introductoryinformation and safety warnings⇒
Introduction
Sealing a tyre
\f
Page 200 of 211

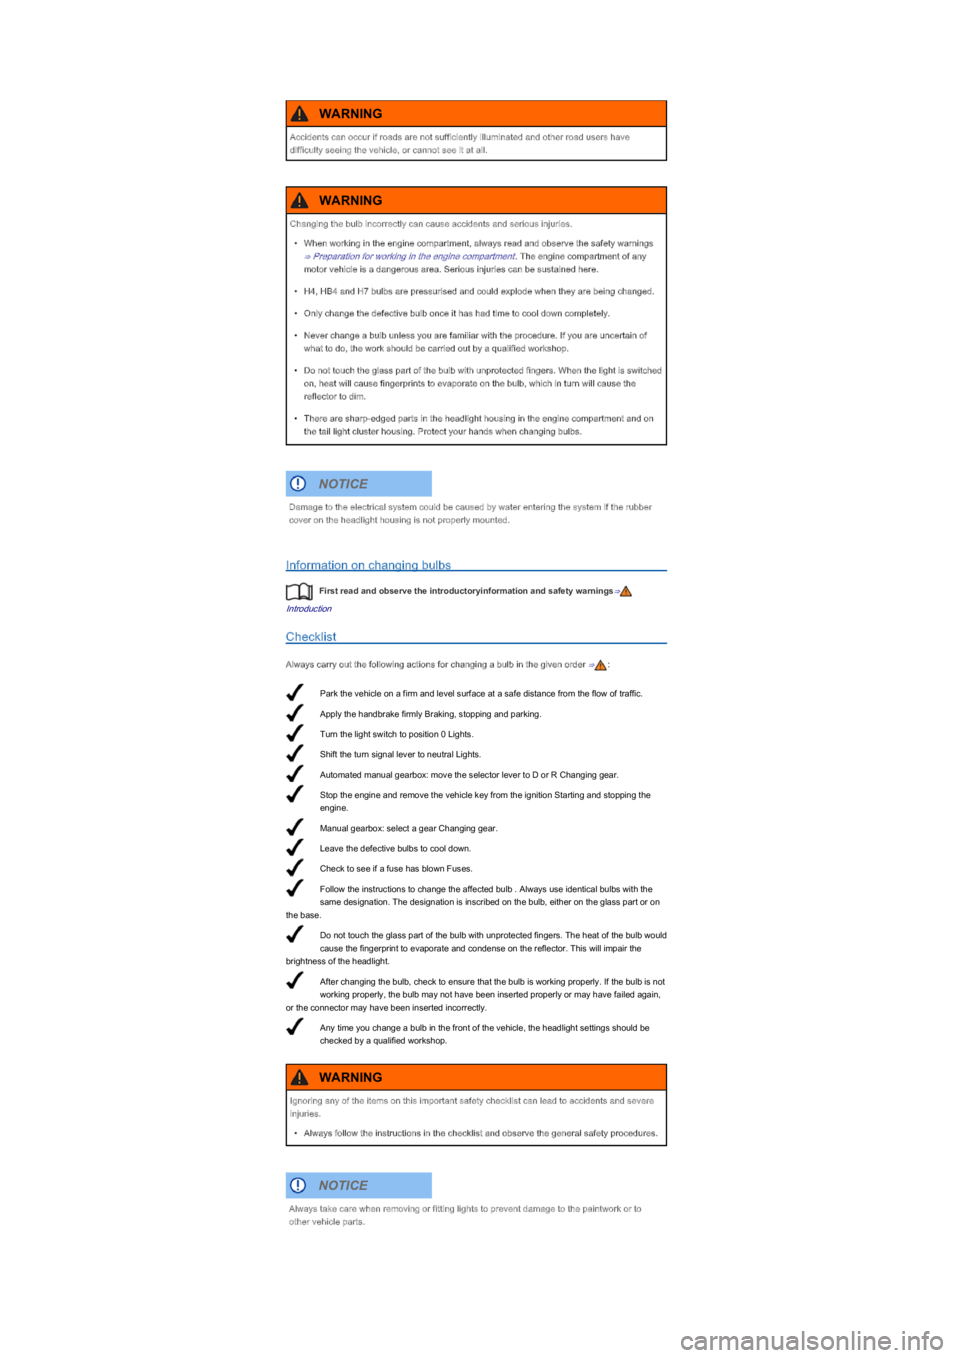
Park the vehicle on a firm and level surface at a safe distance from the flow of traffic.
Apply the handbrake firmly Braking, stopping and parking.
Turn the light switch to position 0 Lights.
Shift the turn signal lever to neutral Lights.
Automated manual gearbox: move the selector lever to D or R Changing gear.
Stop the engine and remove the vehicle key from the ignition Starting and stopping the
engine.
Manual gearbox: select a gear Changing gear.
Leave the defective bulbs to cool down.
Check to see if a fuse has blown Fuses.
Follow the instructions to change the affected bulb . Always use identical bulbs with the
same designation. The designation is inscribed on the bulb, either on the glass part or on
the base.
Do not touch the glass part of the bulb with unprotected fingers. The heat of the bulb would
cause the fingerprint to evaporate and condense on the reflector. This will impair the
brightness of the headlight.
After changing the bulb, check to ensure that the bulb is working properly. If the bulb is not
working properly, the bulb may not have been inserted properly or may have failed again,
or the connector may have been inserted incorrectly.
Any time you change a bulb in the front of the vehicle, the headlight settings should be
checked by a qualified workshop.
Information on changing bulbs
First read and observe the introductoryinformation and safety warnings⇒
Introduction
Checklist
Always carry out the following actions for changing a bulb in the given order ⇒:
Accidents can occur if roads are not sufficiently illuminated and other road users have
difficulty seeing the vehicle, or cannot see it at all.
WARNING
Changing the bulb incorrectly can cause accidents and serious injuries.
\f