Page 78 of 692

781-2. Child safety
YARIS_F_OM_Europe_OM52A54E
■Installing child restraint system using a seat belt
Install the child restraint system in accordance to the operation
manual enclosed with the child restraint system.
If the child restraint system on hand is not within the “universal” cat-
egory (or the necessary information is not in the table), refer to the
“Vehicle List” provided by the child restraint system maker for vari-
ous possible installation positions, or check the compatibility after
asking the retailer of the child seat. ( P. 70, 71)
If installing the child restraint system to the front passenger seat
is unavoidable, refer to P. 65 for front passenger seat adjustment.
If the head restraint interferes with the child restraint system
installation and the head restraint can be removed, remove the
head restraint. Otherwise, put the head restraint in the upper
most position. ( P. 204)
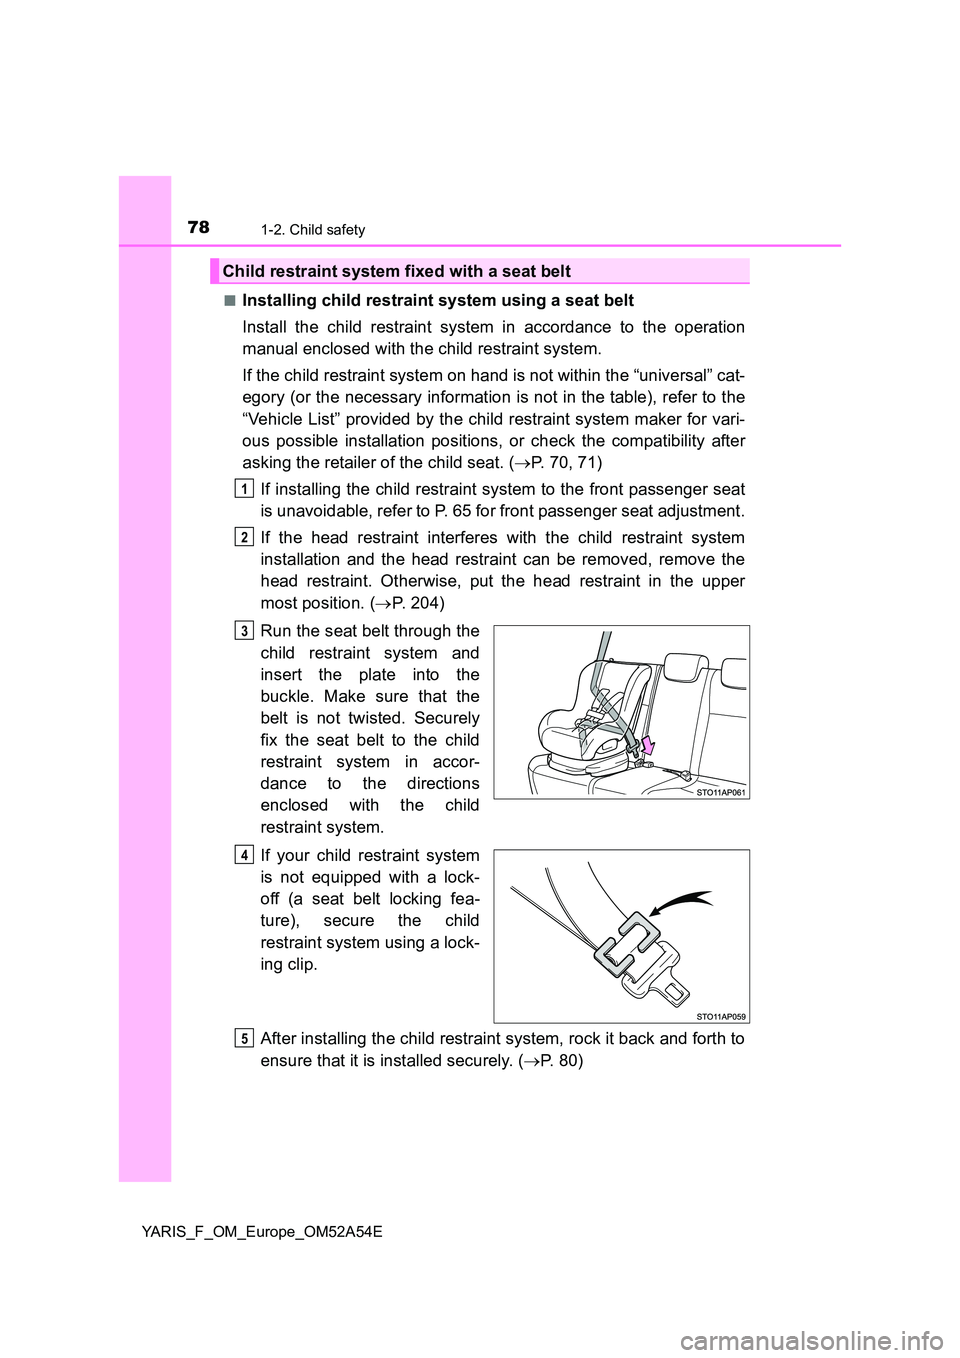
Run the seat belt through the
child restraint system and
insert the plate into the
buckle. Make sure that the
belt is not twisted. Securely
fix the seat belt to the child
restraint system in accor-
dance to the directions
enclosed with the child
restraint system.
If your child restraint system
is not equipped with a lock-
off (a seat belt locking fea-
ture), secure the child
restraint system using a lock-
ing clip.
After installing the child restraint system, rock it back and forth to
ensure that it is installed securely. ( P. 8 0 )
Child restraint system fixed with a seat belt
1
2
3
4
5
Page 79 of 692
791-2. Child safety
1
For safety and security
YARIS_F_OM_Europe_OM52A54E
■Removing a child restraint system installed with a seat belt
Press the buckle release button and fully retract the seat belt.
When releasing the buckle, the chil d restraint system may spring up due
to the rebound of the seat cushion. Release the buckle while holding
down the child restraint system.
Since the seat belt automatically reels itself, slowly return it to the stow-
ing position.
■ When installing a child restraint system
You may need a locking clip to install the child restraint system. Follow the
instructions provided by the manufacturer of the system. If your child restraint
system does not provide a locking clip, you can purchase the following item
from any authorized Toyota retailer or Toyota authorized repairer, or any reli-
able repairer: Locking clip for child restraint system
(Part No. 73119-22010)
Page 80 of 692

801-2. Child safety
YARIS_F_OM_Europe_OM52A54E
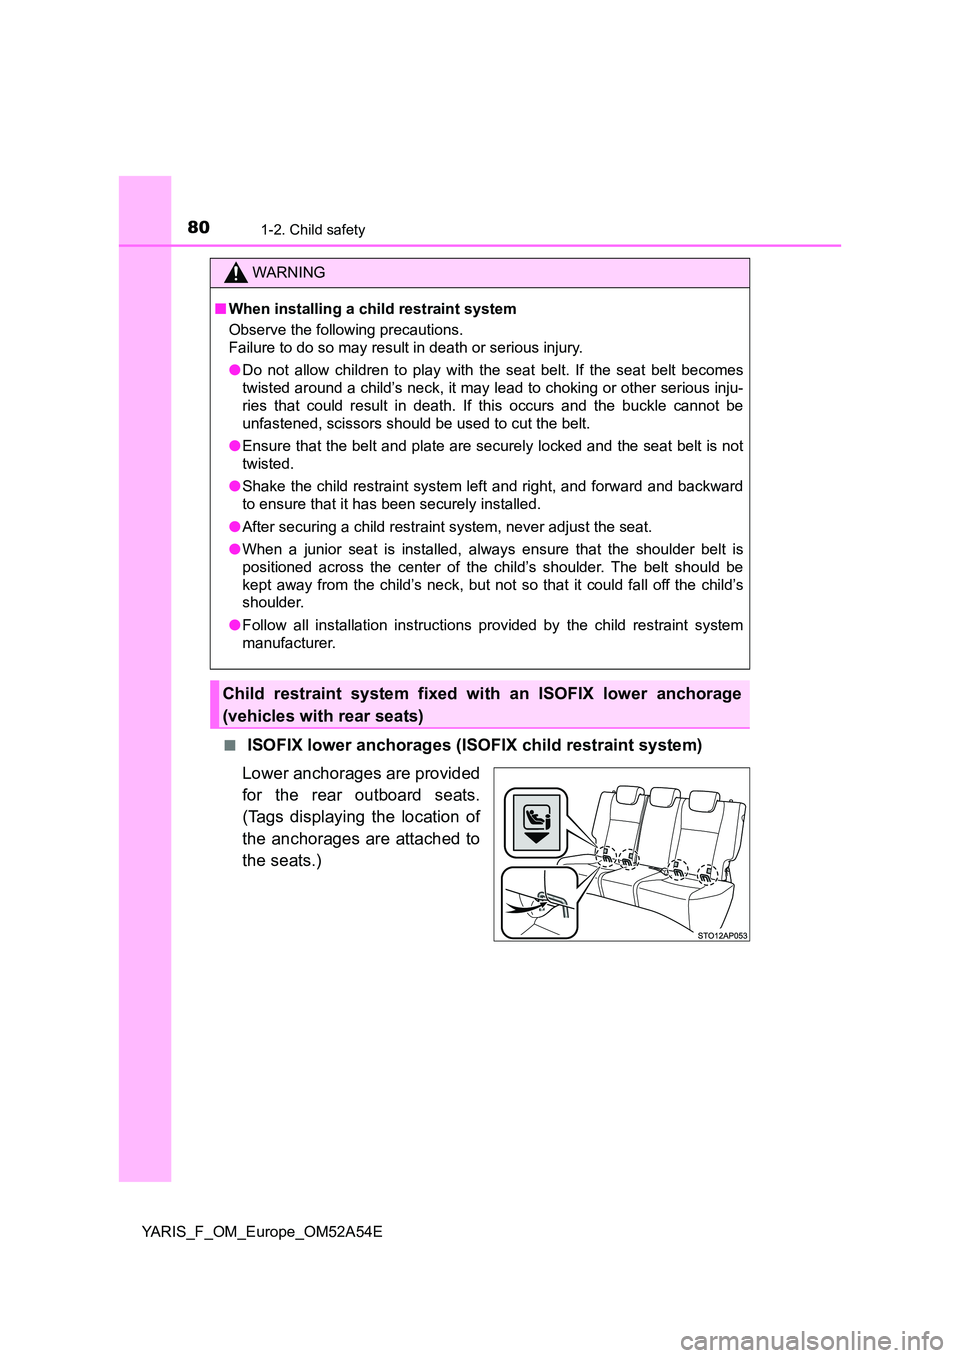
■ ISOFIX lower anchorages (ISOFIX child restraint system)
Lower anchorages are provided
for the rear outboard seats.
(Tags displaying the location of
the anchorages are attached to
the seats.)
WARNING
■ When installing a child restraint system
Observe the following precautions.
Failure to do so may result in death or serious injury.
● Do not allow children to play with the seat belt. If the seat belt becomes
twisted around a child’s neck, it may lead to choking or other serious inju-
ries that could result in death. If this occurs and the buckle cannot be
unfastened, scissors should be used to cut the belt.
● Ensure that the belt and plate are securely locked and the seat belt is not
twisted.
● Shake the child restraint system left and right, and forward and backward
to ensure that it has been securely installed.
● After securing a child restraint system, never adjust the seat.
● When a junior seat is installed, always ensure that the shoulder belt is
positioned across the center of the child’s shoulder. The belt should be
kept away from the child’s neck, but not so that it could fall off the child’s
shoulder.
● Follow all installation instructions provided by the child restraint system
manufacturer.
Child restraint system fixed with an ISOFIX lower anchorage
(vehicles with rear seats)
Page 104 of 692
1041-3. Theft deterrent system
YARIS_F_OM_Europe_OM52A54E
Double locking system
Vehicles employing this system
have labels on the window glass
of both front doors.
Turn the engine switch to the “LOCK” position (vehicles without a
smart entry & start system) or off (vehicles with a smart entry & start
system), have all the passengers exit the vehicle and ensure that all
the doors are closed.
Using the entry function (vehicles with a smart entry & start system):
Touch the sensor area on the outside door handle twice within 5 sec-
onds.
Using the wireless remote control:
Press twice within 5 seconds.
: If equipped
Unauthorized access to the vehicle is prevented by disabling the
door unlocking function from both the interior and exterior of
the vehicle.
Setting the double locking system
Page 105 of 692
1051-3. Theft deterrent system
1
For safety and security
YARIS_F_OM_Europe_OM52A54E
Using the entry function (vehicles with a smart entry & start system):
Hold either front outside door handle or push up the back door opener
switch.
Using the wireless remote control:
Press .
Canceling the double locking system
WARNING
■ Double locking system precaution
Never activate the double locking system when there are people in the vehi-
cle because all the doors cannot be opened from inside the vehicle.
Page 111 of 692

1112. Instrument cluster
2
Instrument cluster
YARIS_F_OM_Europe_OM52A54E
*1: These lights turn on when the engine switch is turned to the “ON” position
(vehicles without a smart entry & start system) or IGNITION ON mode
(vehicles with a smart entry & start system) to indicate that a system check
is being performed. They will turn off after the engine is started, or after a
few seconds. There may be a malfunction in a system if a light does not
come on, or if the lights do not turn off. Have the vehicle inspected by any
authorized Toyota retailer or Toyota authorized repairer, or any reliable
repairer.
*2: If equipped
*3: The light flashes in yellow to indicate a malfunction. The light flashes
quickly in green to indicate that the steering lock has not been released.
*4: The light turns on to indicate a malfunction.
*5: The light flashes to indicate a malfunction.
*6: The light illuminate on the center panel.
*7: The lights turn on with LDA indicator to indicate a malfunction.
*8: Vehicles with monochrome display.
*9: Vehicles with color display.
*10: The light illuminates on the multi-information display.
*8
Open door warning light
(P. 584)*2, 6Rear passengers’ seat
belt reminder lights
(P. 585)
Low fuel level warning
light (P. 585)*1, 2Tire pressure warning
light (P. 585)
Driver’s and front pas-
senger’s seat belt
reminder light (P. 585)*1, 9
Master warning light
(P. 585)
Page 115 of 692
115
2
2. Instrument cluster
Instrument cluster
YARIS_F_OM_Europe_OM52A54E
Gauges and meters (vehicles with monochrome
display)
Tachometer (if equipped)
Displays the engine speed in revolutions per minute.
Speedometer
Displays the vehicle speed.
Fuel gauge (if equipped)
Displays the quantity of fuel remaining in the tank.
Display change button
P. 123
Multi-information display
Presents the driver with a variety of driving-related data. (P. 1 2 2 )
Clock adjusting buttons
P. 125
1
2
3
4
5
6
Page 118 of 692
1182. Instrument cluster
YARIS_F_OM_Europe_OM52A54E
Gauges and meters (vehicles with color display)
Tachometer
Displays the engine speed in revolutions per minute.
Outside temperature display
Displays the outside temperature within the range of -40°C (-40°F) to 50°C
(122°F). Low outside temperature indicator comes on when the ambient
temperature is 3°C (37°F) or lower.
Shift position and shift range display (if equipped)
Displays the selected shift position or selected shift range. (P. 252)
Clock
Displays the current time. (→P. 125)
Speedometer
Displays the vehicle speed.
Fuel gauge
Displays the quantity of fuel remaining in the tank.
1
2
3
4
5
6