Page 207 of 324
207
PHONE
7
2. SETUP
1. PHONE/MESSAGE SETTINGS
1Press the “APPS” button.
2Select “Setup” .
3Select “Phone” .
4Select the item to be set.
1Display the phone top screen.
(P.191)
2Select “Settings” .
PHONE/MESSAGE SETTINGS
SCREEN
No.InformationPage
Registering/connecting a
phone 42
Sound settings208
Contact/call history set-
tings209
Messaging settings217
Phone display settings218
DISPLAYING THE PHONE/
MESSAGE SETTINGS SCREEN
IN A DIFFERENT WAY
Page 208 of 324
208
2. SETUP
1Display the “Phone/Message Settings”
screen. (P.207)
2Select “Sound Settings” .
3 Select the desired item to be set.
“Sound Settings” SCREEN
The call and ringtone volume can be
adjusted. A ringtone can be selected.
No.Function
Select to set the desired ringtone.
Select “-” or “+” to adjust the ring-
tone volume.
Select “-” or “+” to adjust the mes-
sage readout volume.
Select to set the desired incoming
SMS/MMS tone.
Select “-” or “+” to adjust the in-
coming SMS/MMS tone volume.
Select to set the desired incoming e-
mail tone.
Select “-” or “+” to adjust the in-
coming e-mail tone volume.
Select “-” or “+” to adjust the de-
fault volume of the other party’s
voice.
Select to reset all setup items.
INFORMATION
● Depending on the type of phone, certain
functions may not be available.
Page 209 of 324

209
2. SETUP
PHONE
7
1Display the “Phone/Message Settings”
screen. (P.207)
2Select “Contact/Call History Set-
tings” .
3Select the desired item to be set.
*: For PBAP compatible Bluetooth
®
phones, this function is available when
“Automatic Contact/History Transfer” is
set to off. (P.209)
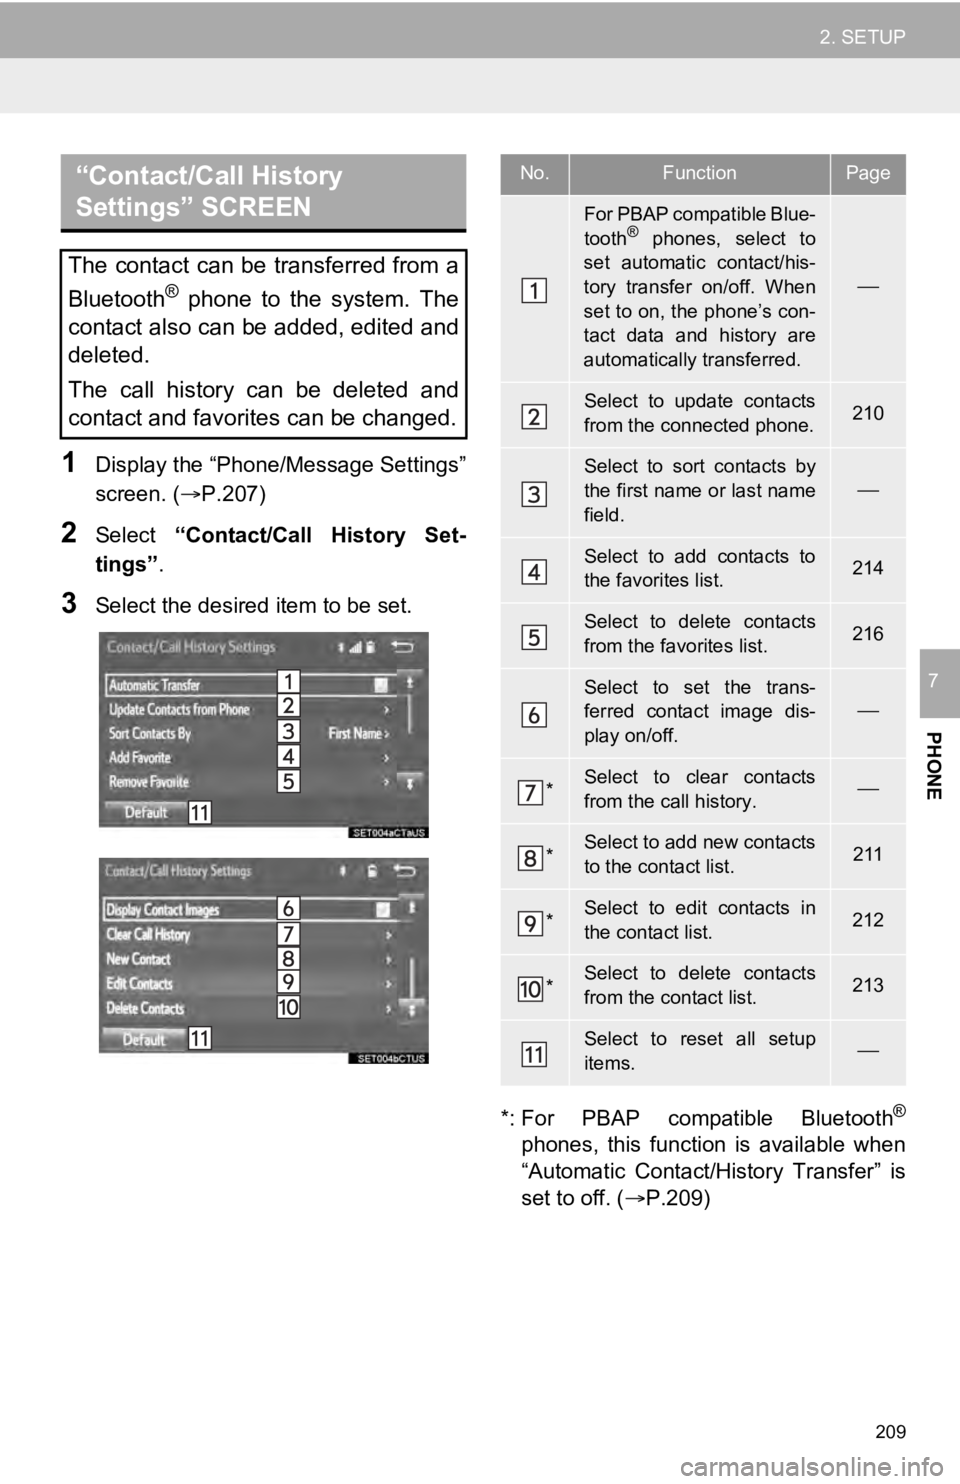
“Contact/Call History
Settings” SCREEN
The contact can be transferred from a
Bluetooth
® phone to the system. The
contact also can be added, edited and
deleted.
The call history can be deleted and
contact and favorites can be changed.
No.FunctionPage
For PBAP compatible Blue-
tooth® phones, select to
set automatic contact/his-
tory transfer on/off. When
set to on, the phone’s con-
tact data and history are
automatically transferred.
Select to update contacts
from the connected phone.210
Select to sort contacts by
the first name or last name
field.
Select to add contacts to
the favorites list. 214
Select to delete contacts
from the favorites list. 216
Select to set the trans-
ferred contact image dis-
play on/off.
*Select to clear contacts
from the call history.
*Select to add new contacts
to the contact list.211
*Select to edit contacts in
the contact list.212
*Select to delete contacts
from the contact list.213
Select to reset all setup
items.
Page 210 of 324

210
2. SETUP
■FOR PBAP COMPATIBLE
Bluetooth
® PHONES
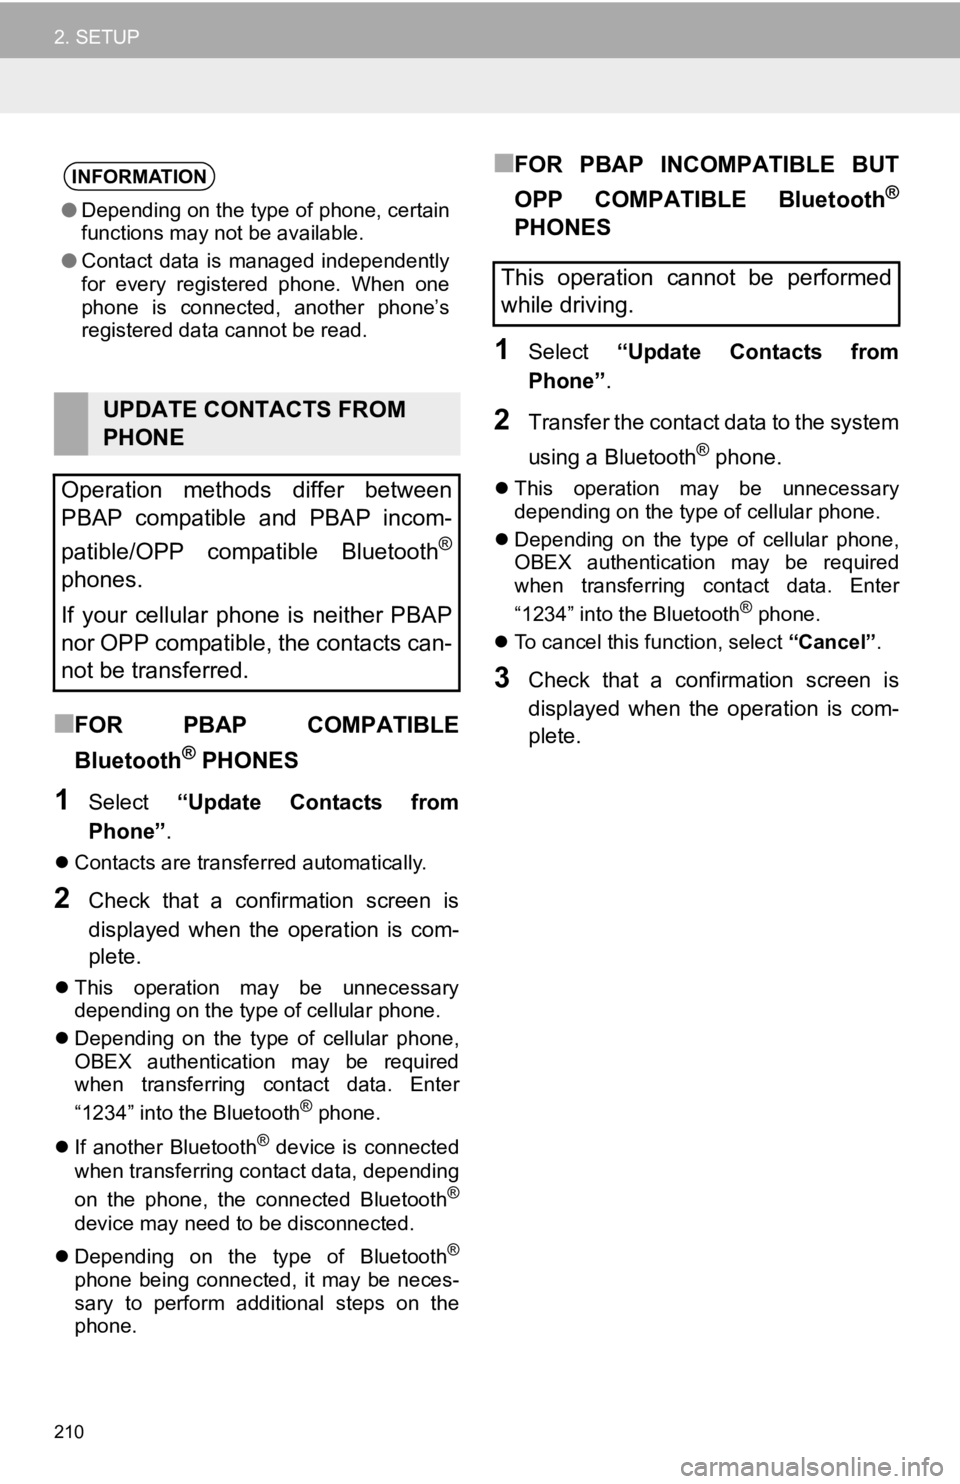
1Select “Update Contacts from
Phone” .
Contacts are transferred automatically.
2Check that a confirmation screen is
displayed when the operation is com-
plete.
This operation may be unnecessary
depending on the type of cellular phone.
Depending on the type of cellular phone,
OBEX authentication may be required
when transferring contact data. Enter
“1234” into the Bluetooth
® phone.
If another Bluetooth
® device is connected
when transferring contact data, depending
on the phone, the connected Bluetooth
®
device may need to be disconnected.
Depending on the type of Bluetooth
®
phone being connected, it may be neces-
sary to perform additional steps on the
phone.
■FOR PBAP INCOMPATIBLE BUT
OPP COMPATIBLE Bluetooth
®
PHONES
1Select “Update Contacts from
Phone” .
2Transfer the contact data to the system
using a Bluetooth
® phone.
This operation may be unnecessary
depending on the type of cellular phone.
Depending on the type of cellular phone,
OBEX authentication may be required
when transferring contact data. Enter
“1234” into the Bluetooth
® phone.
To cancel this function, select “Cancel”.
3Check that a confirmation screen is
displayed when the operation is com-
plete.
INFORMATION
●Depending on the type of phone, certain
functions may not be available.
● Contact data is managed independently
for every registered phone. When one
phone is connected, another phone’s
registered data cannot be read.
UPDATE CONTACTS FROM
PHONE
Operation methods differ between
PBAP compatible and PBAP incom-
patible/OPP compatible Bluetooth
®
phones.
If your cellular phone is neither PBAP
nor OPP compatible, the contacts can-
not be transferred.
This operation cannot be performed
while driving.
Page 211 of 324
211
2. SETUP
PHONE
7
■UPDATING THE CONTACTS IN A
DIFFERENT WAY (FROM THE “Call
History” SCREEN)
1Display the phone top screen.
(P.191)
2Select the “Call History” tab and se-
lect a contact not yet registered in the
contact list.
3Select “Update Contact” .
4Select the desired contact.
5Select a phone type for the phone
number.
1Select “New Contact” .
2Enter the name and select “OK”.
3Enter the phone number and select
“OK”.
4Select the phone type for the phone
number.
5To add another number to this contact,
select “Yes”.
For PBAP compatible Bluetooth®
phones, this function is available when
“Automatic Contact/History Transfer”
is set to off.
(P.209)
REGISTERING A NEW
CONTACT TO THE CONTACT
LIST
New contact data can be registered.
Up to 4 numbers per person can be
registered. For PBAP compatible
Bluetooth
® phones, this function is
available when “Automatic Contact/
History Transfer” is set to off. ( P.209)
Page 212 of 324
212
2. SETUP
■REGISTERING A NEW CONTACT IN
A DIFFERENT WAY (FROM THE
“Call History” SCREEN)
1Display the phone top screen.
(P.191)
2Select the “Call History” tab and se-
lect a contact not yet registered in the
contact list.
3Select “Add to Contacts” .
4Follow the steps in “REGISTERING A
NEW CONTACT TO THE CONTACT
LIST” from “STEP 2”. ( P.211)
1Select “Edit Contacts” .
2Select the desired contact.
3Select corresponding to the de-
sired name or number.
For editing the name
4Follow the steps in “REGISTERING A
NEW CONTACT TO THE CONTACT
LIST” from “STEP 2”. (P.211)
For editing the number
4Follow the steps in “REGISTERING A
NEW CONTACT TO THE CONTACT
LIST” from “STEP 3”. (P.211)
EDITING THE CONTACT DATA
For PBAP compatible Bluetooth
®
phones, this function is available when
“Automatic Contact/History Transfer”
is set to off. ( P.209)
Page 213 of 324
213
2. SETUP
PHONE
7
■EDITING THE CONTACT IN A DIF-
FERENT WAY (FROM THE “Contact
Details” SCREEN)
1Display the phone top screen.
(P.191)
2Select the “Contacts” , “Call history”
tab or the “Favorites” tab and select
the desired contact.
3Select “Edit Contact”.
“E-mail Addresses” : Select to display all
registered e-mail addresses for the con-
tact.
4Follow the steps in “EDITING THE
CONTACT DATA” from “STEP 4”.
(P.212)
1Select “Delete Contacts” .
2Select the desired contact and select
“Delete”.
3Select “Yes” when the confirmation
screen appears.
DELETING THE CONTACT
DATA
For PBAP compatible Bluetooth
®
phones, this function is available when
“Automatic Contact/History Transfer”
is set to off. ( P.209)
INFORMATION
● Multiple data can be selected and
deleted at the same time.
Page 214 of 324
214
2. SETUP
■DELETING THE CONTACT IN A DIF-
FERENT WAY (FROM THE “Contact
Details” SCREEN)
1Display the phone top screen.
(P.191)
2Select the “Contacts” , “Call history”
tab or the “Favorites” tab and select
the desired contact.
3Select “Delete Contact” .
4Select “Yes” when the confirmation
screen appears.
■REGISTERING THE CONTACTS IN
THE FAVORITES LIST
1Select “Add Favorite” .
2Select the desired contact to add to the
favorites list.
Dimmed contacts are already stored as a
favorite.
3Check that a confirmation screen is
displayed when the operation is com-
plete.
INFORMATION
●When a Bluetooth® phone is deleted,
the contact data will be deleted at the
same time.
FAVORITES LIST SETTING
Up to 15 contacts (maximum of 4 num-
bers per contact) can be registered in
the favorites list.