2019 TOYOTA PROACE VERSO rear panel
[x] Cancel search: rear panelPage 3 of 505

.
.
Over view
Instrument panels 13Indicator and warning lamps 15Distance recorders 36Lighting dimmer 37Trip computer 38Touch screen 41Setting the date and time 44
Key 45Key, remote control 45"Smart Entry & Start System" 52Locking / unlocking from inside 64Front doors 65Manual sliding side d o o r (s) 6 6Electric sliding side d o o r (s) 6 8Kick-activated side doors opening and locking 75Rear wing doors with glass windows 79Rear tailgate 81Tailgate rear screen 82Alarm 83Electric windows 86
Steering wheel adjustment 87Front seats 872-seat front bench seat 93Fixed one-piece bench seat 95Fixed rear seat and bench seat 98Rear seat and bench seat on rails 101Captain seat(s) on rails 105Interior fittings 110Seating area fittings 115Skyview® 120Folding and sliding table 121Manual air conditioning 125Dual-zone automatic air conditioning 127Front demist - defrost 131Door mirrors demist - defrost 132Rear screen demist - def rost 13 3Rear Heating - Air Conditioning 136Fuel burner heater/Remote controlled fuel burner heater 137Courtesy lamps 140
M i r r o r s 141Lighting control stalk 144Daytime running lamps 147Automatic illumination of headlamps 147Automatic headlamp dipping 151Interior mood lighting 153Manual headlamp beam height adjustment 153Wiper control stalk 154Automatic rain sensitive wipers 155
Hazard warning lamps 158ER A-GLONASS emergency call system 15 8Hor n 159Electronic stability control (ESC) 159Toyota Traction Select 162Seat belts 164Airbags 168Child seats 173Deactivating the passenger's front airbag 176ISOFIX mountings 183Manual child lock 190Electric child lock 190Child lock on rear windows 191
Eco-driving
Instruments
Access
Ease of use and comfortLighting and visibility
Safety
Labels 10
Contents
Page 8 of 505

7
Locking - unlocking from inside 64Electric sliding d o o r (s) 6 8 -71Electric child lock 190Hazard warning lamps 158Tyre Pressure Warning System (TPWS) 258-260Deactivating Stop & Start 216Deactivating the DSC/ASR system 161
Adjusting the steering wheel 87Hor n 159
Head-up display 218 -219
Instruments and controls (cont.)
Wiper control 154-156Trip computer 38 - 40
Memorising speeds 220Speed limiter 225 -227Cruise control 228 -231Dynamic cruise control 232-238
Instrument panel 13 -14Warning lamps 15-28Coolant temperature 29Ser vice indicator 29 -31Oil level indicator 32AdBlue® range indicators 33 -35Distance recorder 36Gear efficiency indicator 204Lighting dimmer 37Trip computer 38 - 40Setting the time and date 44Driver Attention Alert 247-248
Electric windows 86Adjusting the electric mirrors 141
Toyota Traction Select 161, 162-163Fuel burner heater/Remote controlled fuel burner heater 137-139Alarm 83-85Adjusting the headlamp beam height 153Lane Departure Alert 245 -246Blind Spot Monitoring System 249 -251Automatic headlamp dipping 151-152
Setting the time and date (touch screen) 44Setting the time and date (audio system) 44Rear vision 255 -257Adjustable Speed Limiter (ASL) 220Road Sign Assist 221-224, 227, 230, 234For ward collision warning 239 -242Autonomous emergency braking 242-244Deactivating Stop & Start 216
Lighting control 144-147Direction indicators 146
.
Over view
Page 52 of 505

51
Changing the battery
Do not throw the remote control batteries away, they contain metals which are harmful to the environment.Take them to an approved collection point.
If the battery is flat, you are informed by lighting of this warning lamp in the instrument panel, an audible signal and a message in the screen.
Reinitialisation
Locking the rear wing doors with glass windows
F If fitted to your vehicle, check that the electric child lock is not on.F Open the left-hand door.
Battery ref.: CR1620 / 3 volts.
F Lock the driver's door using the key.F Press one of the remote control buttons.
F Turn the key to position 2 (Ignition on).F Switch off the ignition and remove the key from the ignition switch.The remote control is fully operational again.
Unlocking
F Use the interior door handle.
Remote control problem
Following disconnection of the vehicle battery, replacement of the remote control battery or in the event of a remote control malfunction, you can no longer unlock, lock or locate your vehicle.F First of all, use the key in the lock to unlock or lock your vehicle.F Then reinitialise the remote control.If the problem persists, contact an authorized
Toyota dealer or repairer, or another duly qualified and equipped professional as soon as possible.
F Insert the key into the latch aperture on the edge of the door (without forcing) and slide the assembly upward.F Remove the key.F Close the door and check from the outside that it has locked correctly.
F Unclip the cover using a screwdriver in the cut-out.F Remove the cover.F Extract the flat battery from its location.F Place the new battery into its location obser ving the original direction.F Clip the cover in place.
2
Access
Page 137 of 505

136
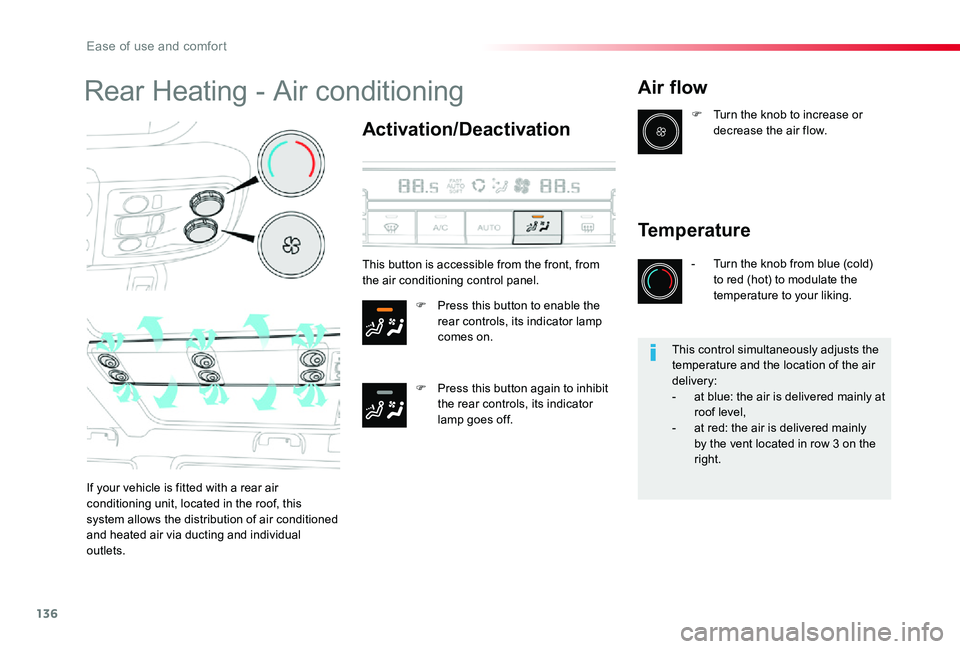
Rear Heating - Air conditioning
Activation/Deactivation
F Press this button to enable the rear controls, its indicator lamp comes on.
F Press this button again to inhibit the rear controls, its indicator lamp goes off.
Air flow
If your vehicle is fitted with a rear air conditioning unit, located in the roof, this system allows the distribution of air conditioned and heated air via ducting and individual outlets.
F Turn the knob to increase or decrease the air flow.
Temperature
- Turn the knob from blue (cold) to red (hot) to modulate the temperature to your liking.
This button is accessible from the front, from the air conditioning control panel.
This control simultaneously adjusts the temperature and the location of the air delivery:- at blue: the air is delivered mainly at roof level,- at red: the air is delivered mainly by the vent located in row 3 on the
right.
Ease of use and comfort
Page 148 of 505

147
Front daytime running
lamps
(light-emitting diodes)
If fitted to your vehicle, they come on automatically when the engine is started, when the lighting control stalk is in position "0" or "AUTO".
Automatic illumination of
headlamps
Activation
When a low level of ambient light is detected by a sunshine sensor, the number plate lamps, sidelamps and dipped beam headlamps are switched on automatically, without any action on the part of the driver. They can also come on if rain is detected, at the same time as automatic operation of the windscreen wipers.As soon as the brightness returns to a
sufficient level or after the windscreen wipers are switched off, the lamps are switched off automatically.
Deactivation
F Turn the ring to another position. Deactivation of the function is accompanied by the display of a message.
Operating fault
In the event of a malfunction of the sunshine sensor, the lighting comes on; this warning lamp is displayed
Contact an authorized Toyota dealer or repairer, or another duly qualified and equipped professional.
in the instrument panel accompanied by an
audible signal and/or a message.
In fog or snow, the sunshine sensor may detect sufficient light. In this case, the lighting will not come on automatically.Do not cover the sunshine sensor, coupled with the rain sensor and located in the top of the windscreen behind the rear view mirror; the
associated functions would no longer be controlled.
F Turn the ring to the "AUTO" position. The
activation of the function is accompanied by the display of a message.
4
Lighting and visibility
Page 156 of 505

155
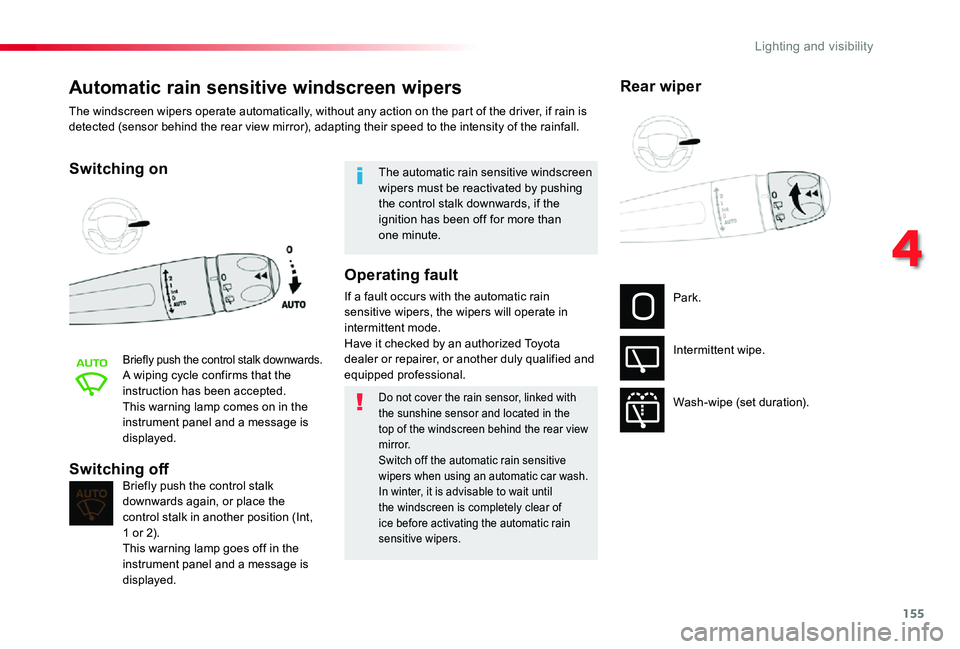
Automatic rain sensitive windscreen wipers
Switching on
Briefly push the control stalk downwards.A wiping cycle confirms that the instruction has been accepted.This warning lamp comes on in the instrument panel and a message is displayed.
Briefly push the control stalk downwards again, or place the control stalk in another position (Int, 1 or 2).This warning lamp goes off in the instrument panel and a message is displayed.
Switching off
The automatic rain sensitive windscreen wipers must be reactivated by pushing the control stalk downwards, if the ignition has been off for more than one minute.
The windscreen wipers operate automatically, without any action on the part of the driver, if rain is detected (sensor behind the rear view mirror), adapting their speed to the intensity of the rainfall.
Do not cover the rain sensor, linked with the sunshine sensor and located in the top of the windscreen behind the rear view m i r r o r.Switch off the automatic rain sensitive wipers when using an automatic car wash.In winter, it is advisable to wait until the windscreen is completely clear of ice before activating the automatic rain sensitive wipers.
Operating fault
If a fault occurs with the automatic rain sensitive wipers, the wipers will operate in intermittent mode.Have it checked by an authorized Toyota dealer or repairer, or another duly qualified and
equipped professional.
Park.
Intermittent wipe.
Wash-wipe (set duration).
Rear wiper
4
Lighting and visibility
Page 157 of 505

156
If a significant accumulation of snow or ice is present, or when using a bicycle carrier on the boot, deactivate the automatic rear wiper.
This function is activated by default.
Reverse gear
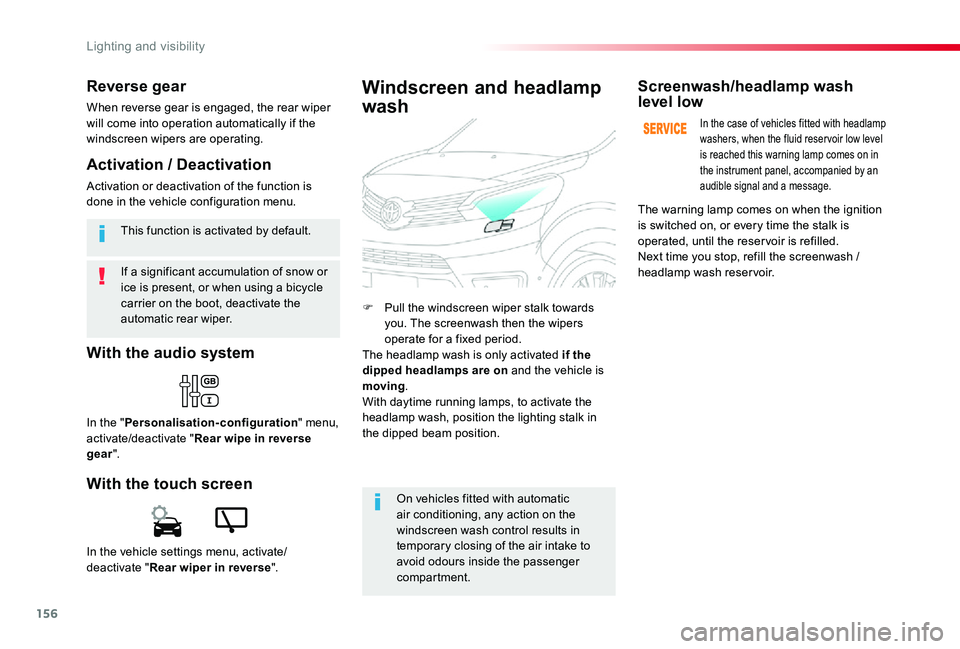
When reverse gear is engaged, the rear wiper will come into operation automatically if the windscreen wipers are operating.
In the vehicle settings menu, activate/deactivate "Rear wiper in reverse".
With the audio system
In the "Personalisation-configuration" menu, activate/deactivate "Rear wipe in reverse gear".
With the touch screen
Activation / Deactivation
Activation or deactivation of the function is done in the vehicle configuration menu.
F Pull the windscreen wiper stalk towards you. The screenwash then the wipers operate for a fixed period.The headlamp wash is only activated if the dipped headlamps are on and the vehicle is moving.With daytime running lamps, to activate the headlamp wash, position the lighting stalk in the dipped beam position.
Windscreen and headlamp
wash
On vehicles fitted with automatic air conditioning, any action on the windscreen wash control results in temporary closing of the air intake to avoid odours inside the passenger compartment.
Screenwash/headlamp wash level low
In the case of vehicles fitted with headlamp washers, when the fluid reser voir low level is reached this warning lamp comes on in the instrument panel, accompanied by an audible signal and a message.
The warning lamp comes on when the ignition is switched on, or every time the stalk is operated, until the reser voir is refilled.Next time you stop, refill the screenwash / headlamp wash reser voir.
Lighting and visibility
Page 171 of 505

170
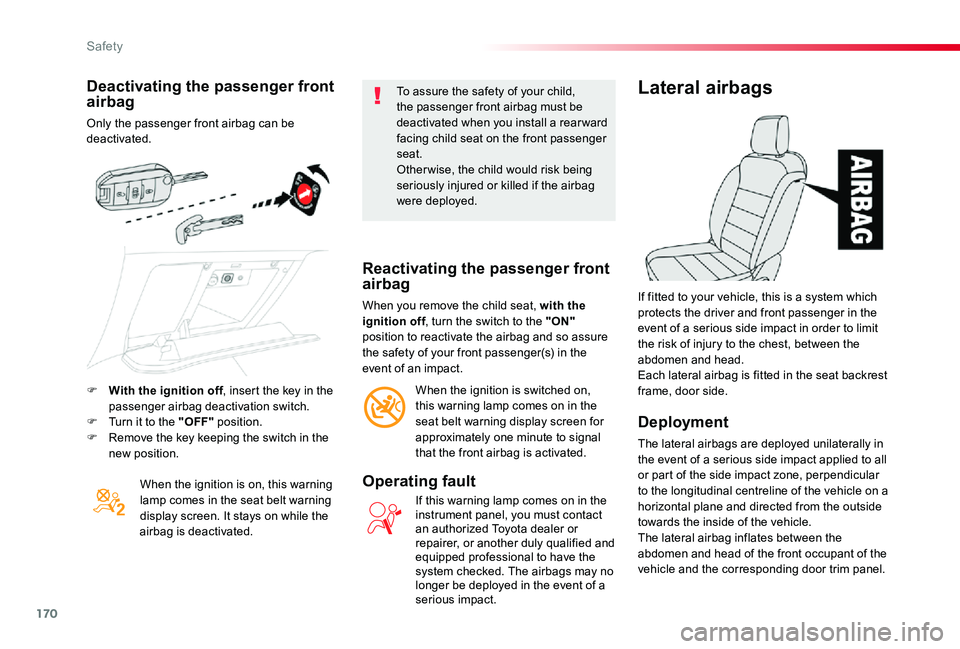
Deactivating the passenger front airbag
Only the passenger front airbag can be deactivated.
When the ignition is on, this warning lamp comes in the seat belt warning display screen. It stays on while the airbag is deactivated.
To assure the safety of your child, the passenger front airbag must be deactivated when you install a rear ward facing child seat on the front passenger seat.Other wise, the child would risk being seriously injured or killed if the airbag were deployed.
Reactivating the passenger front airbag
When you remove the child seat, with the ignition off, turn the switch to the "ON" position to reactivate the airbag and so assure the safety of your front passenger(s) in the event of an impact.
When the ignition is switched on, this warning lamp comes on in the seat belt warning display screen for approximately one minute to signal that the front airbag is activated.
Operating fault
If this warning lamp comes on in the instrument panel, you must contact an authorized Toyota dealer or repairer, or another duly qualified and equipped professional to have the system checked. The airbags may no longer be deployed in the event of a serious impact.
Lateral airbags
Deployment
The lateral airbags are deployed unilaterally in
the event of a serious side impact applied to all or part of the side impact zone, perpendicular to the longitudinal centreline of the vehicle on a horizontal plane and directed from the outside towards the inside of the vehicle.The lateral airbag inflates between the abdomen and head of the front occupant of the vehicle and the corresponding door trim panel.
If fitted to your vehicle, this is a system which protects the driver and front passenger in the event of a serious side impact in order to limit the risk of injury to the chest, between the abdomen and head.Each lateral airbag is fitted in the seat backrest frame, door side.F With the ignition off, insert the key in the passenger airbag deactivation switch.F Turn it to the "OFF" position.F Remove the key keeping the switch in the
new position.
Safety