Page 324 of 516

324
Do not force the lever as locking will not be possible if the clamp is not
positioned correctly; start the procedure again.
Disconnecting the battery
In order to maintain an adequate state of charge for starting the engine, it is recommended that the battery be disconnected if the vehicle is taken out of service for a long period.Wait 2 minutes after switching off the ignition before disconnecting the battery.F close the windows and the doors before disconnecting the battery,F switch off all electrical consumers (audio system, wipers, lighting, ...),F switch off the ignition and wait for four minutes.Having exposed the battery, it is only necessary to disconnect the (+) terminal.
Quick release terminal
Disconnecting the (+) terminal
F Raise the lever A fully to release the clamp B.
Following reconnection of the battery
Reconnecting the (+) terminal
F Position the open clamp B of the cable on the positive post (+) of the battery.F Press down on the clamp to position it correctly on the battery post.F Lock the clamp by lowering the lever A.
After reconnecting the battery, switch on the ignition and wait 1 minute before starting to allow initialisation of the electronic systems.However, if minor problems persist following this operation, contact an authorized Toyota dealer or repairer, or another duly qualified and equipped professional.Referring to the corresponding section, you must yourself reinitialise or reset certain systems, such as:- the remote control or electronic key (depending on version),- the electric windows,- the date and time,- the radio preset stations.
The Stop & Start system may not be operational during the trip following the first engine start.In this case, the system will only be available again after a continuous period of immobilisation of the vehicle, a period which depends on the ambient temperature and the state of charge of the battery (up to about 8 hours).
In the event of a breakdown
Page 364 of 516

364
1
1
8
Choosing a new destination
Select "Enter address".
Select "See on map" to select the "Guidance criteria".
Select the "Country".
Press "Confirm" to select the "Guidance criteria".
Press "Confirm" to start navigation.
Press "Confirm" to start navigation.
And / Or
Press Navigation to display the primary page.
Press the "MENU" button to go to the
secondary page.
Towards a new destinationTowards a recent destination
Select "My destinations".
Press Navigation to display the primary page.
Press the "MENU" button to go to the secondary page.
Enter the "City", the "Street" and the "Number" and confirm by pressing on the suggestions displayed.
Select the "Recent" tab.
Select the address chosen in the list to display the "Guidance criteria".
To use the navigation system, it is necessary to enter the "City", the "Street" and the "Number" using the virtual keypad, or to take them from the list of "Contacts" or from the "History" of addresses.
Without confirmation of the street number, you will be guided to one end of the street.
Select "Position" to see the point of arrival geographically.
Audio and Telematics
Page 366 of 516

366
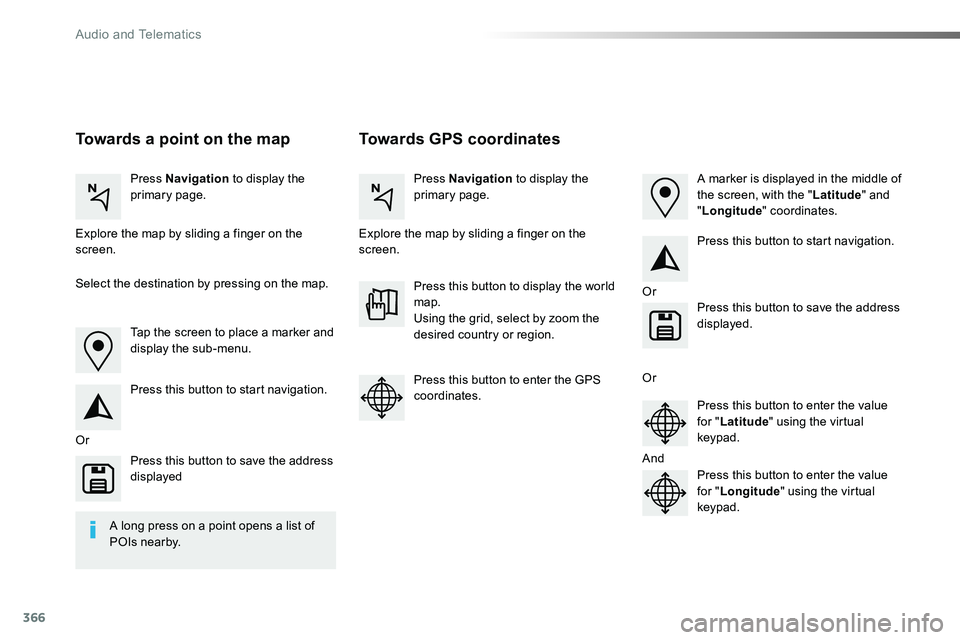
Towards GPS coordinatesTowards a point on the map
Press Navigation to display the primary page.Press Navigation to display the primary page.
Explore the map by sliding a finger on the screen.Explore the map by sliding a finger on the screen.
Tap the screen to place a marker and display the sub-menu.
Or
Or
Or
And
Select the destination by pressing on the map.
Press this button to start navigation.
Press this button to start navigation.
Press this button to display the world map.Using the grid, select by zoom the desired country or region.
Press this button to save the address displayed
Press this button to save the address displayed.
Press this button to enter the GPS coordinates.Press this button to enter the value for "Latitude" using the virtual keypad.
Press this button to enter the value for "Longitude" using the virtual keypad.
A marker is displayed in the middle of the screen, with the "Latitude" and "Longitude" coordinates.
A long press on a point opens a list of
POIs nearby.
Audio and Telematics
Page 377 of 516
377
To distribute information on the declaration of danger zones, you should check the option: "Allow declaration of danger areas".
You can download updates to the system, danger zones and mapping, from the brand's website.The download procedure can be found in the same place.
Declaration of "Danger
areas"
Press Navigation to display the primary page.
Press the "Declare a new danger area" button located in the upper bar of the touch screen.
Select the option "Ty p e" to choose the type of "Danger area".
Select the "Speed" option and enter it using the virtual keypad.
Press "Confirm" to save and distribute the information.
.
Audio and Telematics
Page 381 of 516

381
11
7
8
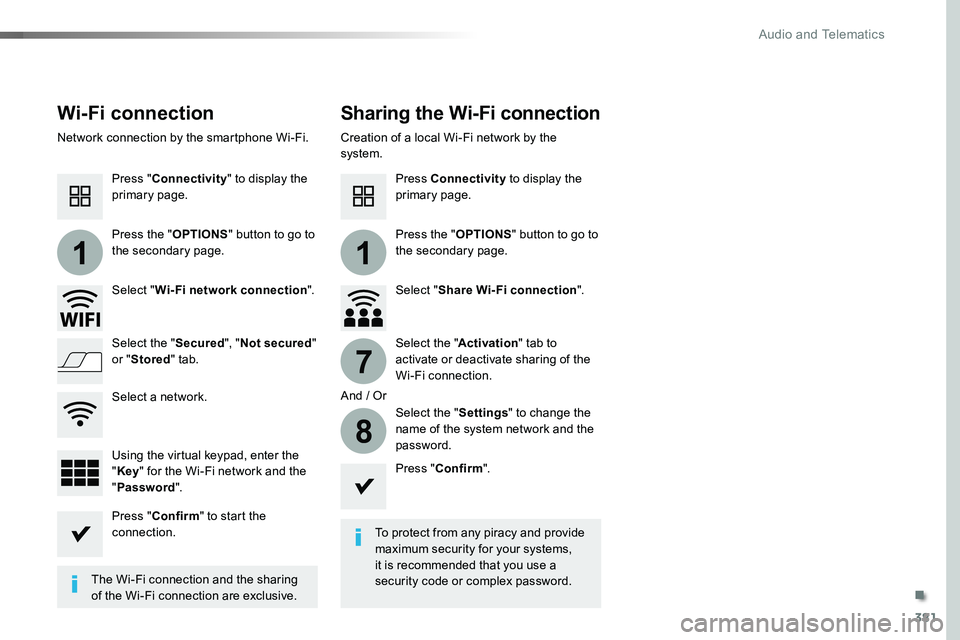
Wi-Fi connectionSharing the Wi-Fi connection
To protect from any piracy and provide maximum security for your systems, it is recommended that you use a security code or complex password.The Wi-Fi connection and the sharing
of the Wi-Fi connection are exclusive.
Press "Confirm".
Press "Confirm" to start the connection.
Press "Connectivity" to display the primary page.
Network connection by the smartphone Wi-Fi.Creation of a local Wi-Fi network by the system.
Press Connectivity to display the primary page.
Press the "OPTIONS" button to go to the secondary page.Press the "OPTIONS" button to go to the secondary page.
Select "Wi-Fi network connection".Select "Share Wi-Fi connection".
And / Or
Select the "Secured", "Not secured" or "Stored" tab.Select the "Activation" tab to activate or deactivate sharing of the Wi-Fi connection.
Select the "Settings" to change the name of the system network and the password.Using the virtual keypad, enter the "Key" for the Wi-Fi network and the "Password".
Select a network.
.
Audio and Telematics
Page 394 of 516

394
1
2
2
2
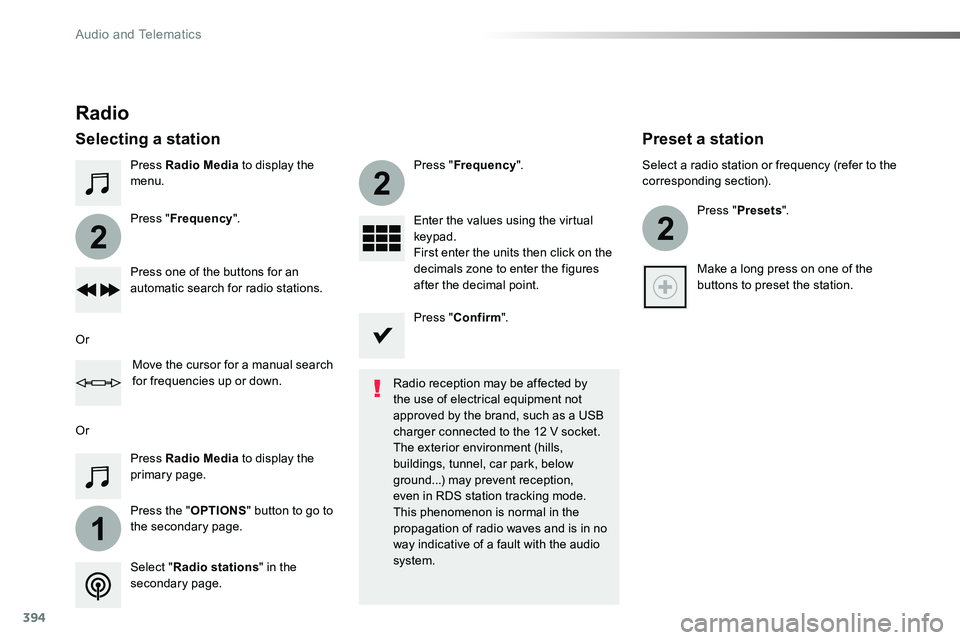
Press Radio Media to display the menu.
Press the "OPTIONS" button to go to the secondary page.
Press "Frequency".
Press "Frequency".
Enter the values using the virtual keypad.First enter the units then click on the decimals zone to enter the figures after the decimal point.Press one of the buttons for an automatic search for radio stations.
Press Radio Media to display the primary page.
Radio
Selecting a station
Radio reception may be affected by the use of electrical equipment not approved by the brand, such as a USB
charger connected to the 12 V socket.The exterior environment (hills, buildings, tunnel, car park, below ground...) may prevent reception, even in RDS station tracking mode. This phenomenon is normal in the propagation of radio waves and is in no way indicative of a fault with the audio system.Select "Radio stations" in the secondary page.
Or
Or
Move the cursor for a manual search for frequencies up or down.
Select a radio station or frequency (refer to the corresponding section).
Press "Presets".
Make a long press on one of the buttons to preset the station.
Preset a station
Press "Confirm".
Audio and Telematics
Page 409 of 516
409
2
3
on the steering mounted button.
Using the telephone is not recommended while driving.Park the vehicle.Make the call using the steering
mounted controls.
Making a call
Calling a new number
Press Telephone to display the primary page.
Enter the phone number using the digital keypad.
Press "Call" to start the call.
Calling a contact
Press Telephone to display the primary page.
Or make a long press
on the steering mounted TEL button.
Select "Contact".
Select the desired contact from the list offered.
Select "Call".
Calling a recently used number
Press Telephone to display the primary page.
Make a long press
Select "Calls".
Select the desired contact from the list offered.
It is always possible to make a call directly from the telephone; as a safety measure, first park the vehicle.
Or
.
Audio and Telematics
Page 418 of 516

418
3
4
5
6
7
1
19
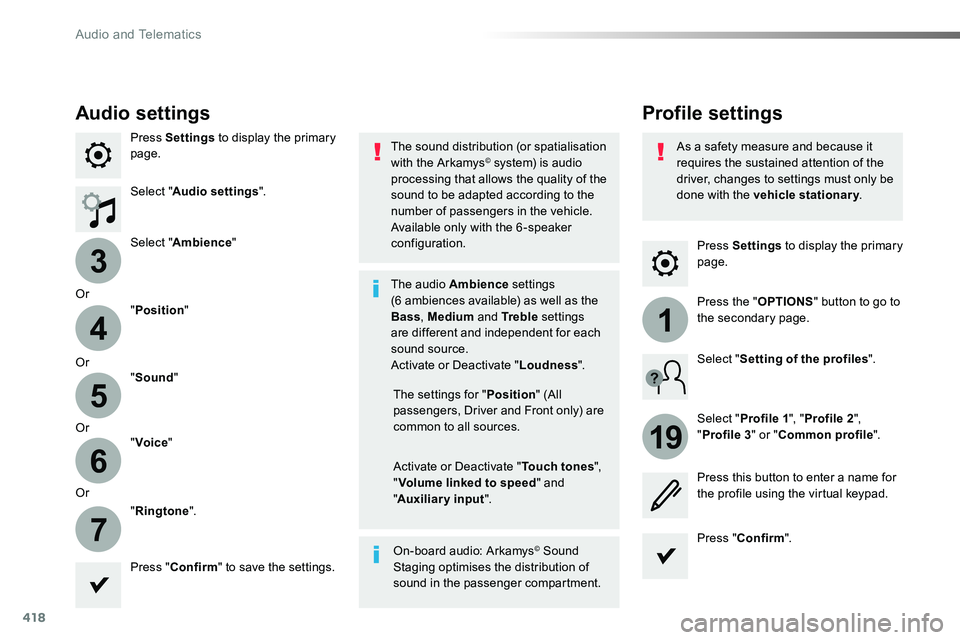
Press Settings to display the primary page.
Profile settingsAudio settings
Press Settings to display the primary page.
Select "Audio settings".
Select "Ambience"
Or
"Position"
Or"Sound"
Or"Voice"
Or
"Ringtone".
On-board audio: Arkamys© Sound Staging optimises the distribution of sound in the passenger compartment.
The settings for "Position" (All passengers, Driver and Front only) are common to all sources.
Activate or Deactivate "Touch tones", "Volume linked to speed" and "Auxiliary input".
The sound distribution (or spatialisation with the Arkamys© system) is audio processing that allows the quality of the sound to be adapted according to the number of passengers in the vehicle.
Available only with the 6 -speaker configuration.
The audio Ambience settings (6 ambiences available) as well as the Bass, Medium and Tr e b l e settings are different and independent for each sound source.Activate or Deactivate "Loudness".
Press "Confirm" to save the settings.
Press "Confirm".
Press the "OPTIONS" button to go to the secondary page.
Select "Profile 1", "Profile 2",
"Profile 3" or "Common profile".
Select "Setting of the profiles".
Press this button to enter a name for the profile using the virtual keypad.
As a safety measure and because it requires the sustained attention of the driver, changes to settings must only be done with the vehicle stationary.
Audio and Telematics