2019 TOYOTA PROACE CITY VERSO radio
[x] Cancel search: radioPage 3 of 272
3
Contents
Cruise control - particular recommendations 121Programmable cruise control 122Adaptive Cruise Control 124Memorising speeds 128Active Safety Brake with Collision Risk Alert and Intelligent emergency braking assistance 128Active Lane Departure Warning System 131Blind Spot Monitoring System 134Active Blind Spot Monitoring System 136Distraction detection 136Parking sensors 137Top Rear Vision 140Park Assist 142
7Practical information
Compatibility of fuels 146Refuelling 146Misfuel prevention (Diesel) 147Snow chains 148Towing device 149Towing device with quickly detachable towball 151
Energy economy mode 152Roof bars / Roof rack 152Bonnet 153Engine compartment 154Checking levels 154Speed checks 156AdBlue® (Diesel engines) 158Free-wheeling 161Advice on care and maintenance 161
8In the event of a breakdown
Running out of fuel (Diesel) 163Tool kit 163Temporary puncture repair kit 164Spare wheel 166Changing a bulb 170Changing a fuse 17512 V battery 178Towing 181
9Technical data
Dimensions 183Engine technical data and towed loads 185Identification markings 189
10Bluetooth® audio system
First steps 190Steering mounted controls 191Menus 192Radio 192DAB (Digital Audio Broadcasting) radio 193
Media 194Telephone 197Frequently asked questions 200
11TOYOTA Connect Radio
First steps 203Steering mounted controls 204Menus 205Applications 206
Radio 206DAB (Digital Audio Broadcasting) radio 208Media 208Telephone 210Settings 213Frequently asked questions 215
12TOYOTA Connect Nav
First steps 217Steering mounted controls 218Menus 218Voice commands 220Navigation 224Connected navigation 226Applications 229Radio 232DAB (Digital Audio Broadcasting) radio 233Media 234Telephone 235Settings 238Frequently asked questions 240
■Alphabetical index
Page 5 of 272
5
Overview
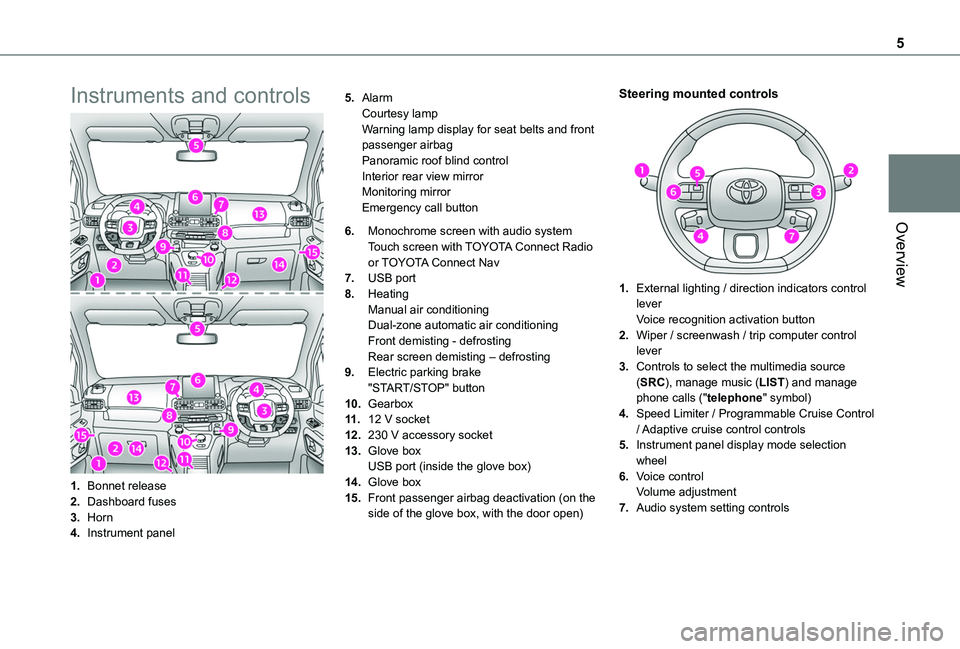
Instruments and controls
1.Bonnet release
2.Dashboard fuses
3.Horn
4.Instrument panel
5.AlarmCourtesy lampWarning lamp display for seat belts and front passenger airbagPanoramic roof blind controlInterior rear view mirrorMonitoring mirrorEmergency call button
6.Monochrome screen with audio system
Touch screen with TOYOTA Connect Radio or TOYOTA Connect Nav
7.USB port
8.HeatingManual air conditioningDual-zone automatic air conditioningFront demisting - defrostingRear screen demisting – defrosting
9.Electric parking brake"START/STOP" button
10.Gearbox
11 .12 V socket
12.230 V accessory socket
13.Glove boxUSB port (inside the glove box)
14.Glove box
15.Front passenger airbag deactivation (on the side of the glove box, with the door open)
Steering mounted controls
1.External lighting / direction indicators control leverVoice recognition activation button
2.Wiper / screenwash / trip computer control lever
3.Controls to select the multimedia source (SRC), manage music (LIST) and manage phone calls ("telephone" symbol)
4.Speed Limiter / Programmable Cruise Control / Adaptive cruise control controls
5.Instrument panel display mode selection wheel
6.Voice controlVolume adjustment
7.Audio system setting controls
Page 8 of 272
8
Eco mode
This mode optimises the heating and air conditioning functions to reduce fuel consumption.
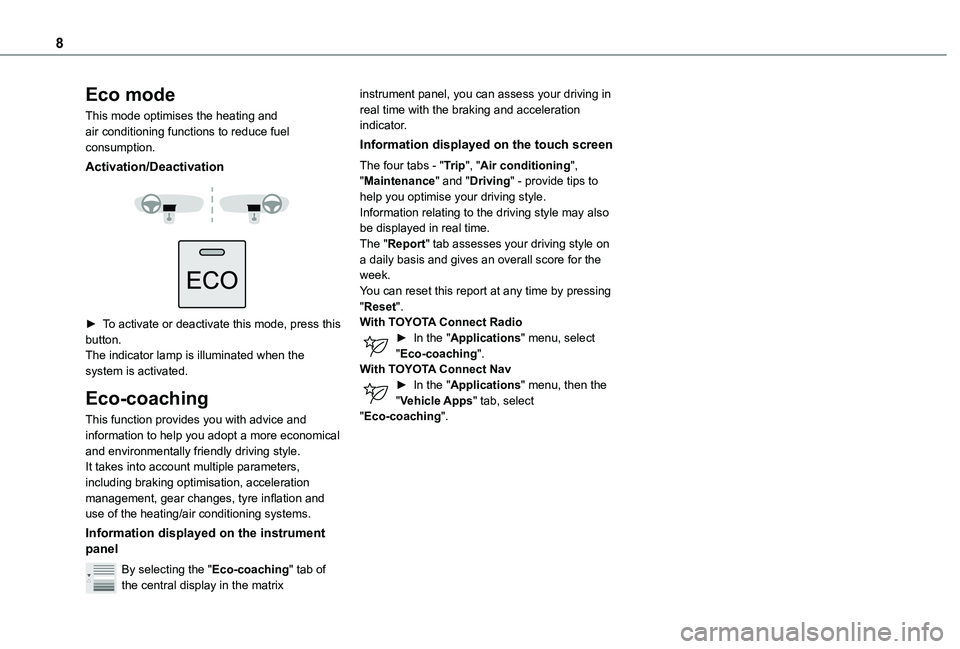
Activation/Deactivation
► To activate or deactivate this mode, press this button.The indicator lamp is illuminated when the system is activated.
Eco-coaching
This function provides you with advice and information to help you adopt a more economical and environmentally friendly driving style.It takes into account multiple parameters, including braking optimisation, acceleration management, gear changes, tyre inflation and use of the heating/air conditioning systems.
Information displayed on the instrument panel
By selecting the "Eco-coaching" tab of the central display in the matrix
instrument panel, you can assess your driving in real time with the braking and acceleration indicator.
Information displayed on the touch screen
The four tabs - "Trip", "Air conditioning", "Maintenance" and "Driving" - provide tips to help you optimise your driving style.Information relating to the driving style may also be displayed in real time.The "Report" tab assesses your driving style on a daily basis and gives an overall score for the week.You can reset this report at any time by pressing "Reset".With TOYOTA Connect Radio► In the "Applications" menu, select "Eco-coaching".With TOYOTA Connect Nav► In the "Applications" menu, then the "Vehicle Apps" tab, select "Eco-coaching".
Page 48 of 272
48
► To open it from the vehicle’s boot, place your thumb on the boot recess then pull the handle.
WARNI NG
Open the rear storage compartment with care, to prevent any objects stored inside from falling out.
Light ambience
The light ambience can be configured from the vehicle’s configuration menu.
Blind
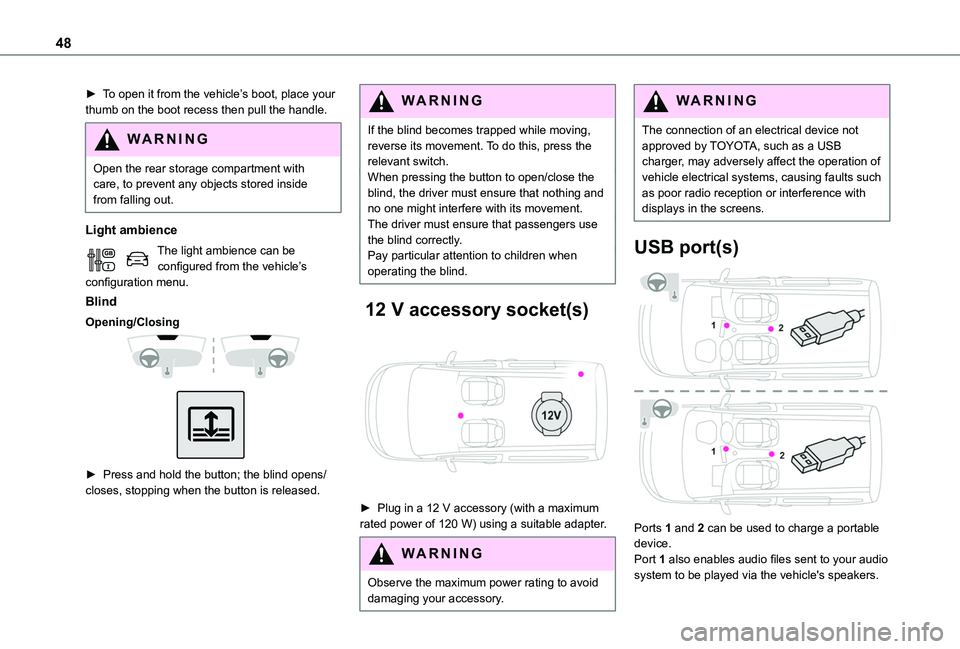
Opening/Closing
► Press and hold the button; the blind opens/closes, stopping when the button is released.
WARNI NG
If the blind becomes trapped while moving, reverse its movement. To do this, press the relevant switch.When pressing the button to open/close the blind, the driver must ensure that nothing and no one might interfere with its movement.The driver must ensure that passengers use the blind correctly.Pay particular attention to children when operating the blind.
12 V accessory socket(s)
► Plug in a 12 V accessory (with a maximum rated power of 120 W) using a suitable adapter.
WARNI NG
Observe the maximum power rating to avoid damaging your accessory.
WARNI NG
The connection of an electrical device not approved by TOYOTA, such as a USB charger, may adversely affect the operation of vehicle electrical systems, causing faults such as poor radio reception or interference with displays in the screens.
USB port(s)
Ports 1 and 2 can be used to charge a portable device.
Port 1 also enables audio files sent to your audio system to be played via the vehicle's speakers.
Page 60 of 272
60
Programming
With Bluetooth® audio system
► Press the MENU button to access the main menu. ► Select "Pre-heat. / Pre-ventil.".► Select "Activation" and, if necessary, for programming, “Parameters".► Select "Heating" to heat the engine and passenger compartment or "Ventilation" to ventilate the passenger compartment.
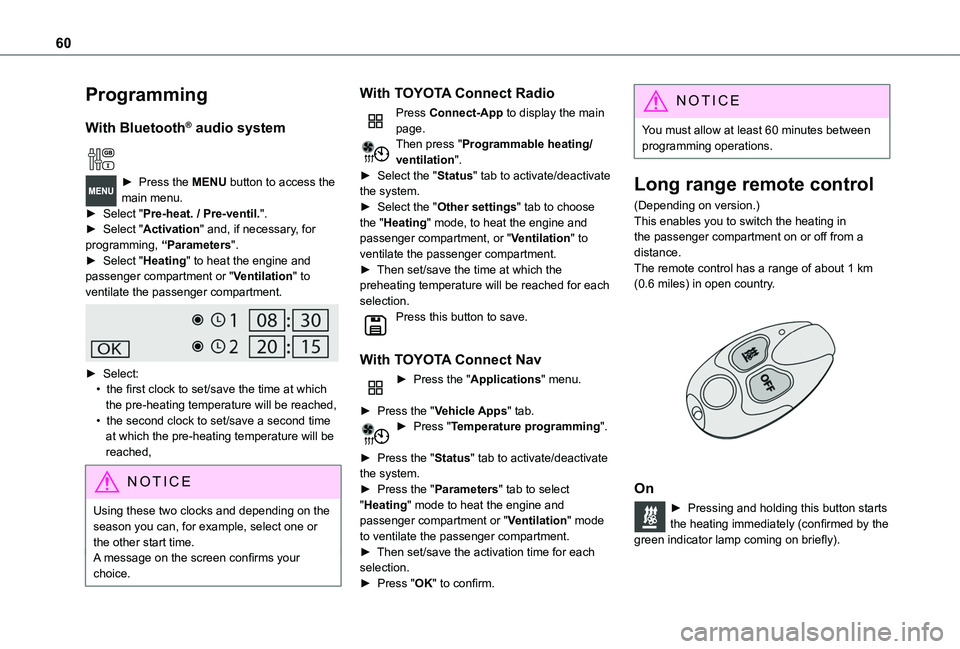
► Select:• the first clock to set/save the time at which the pre-heating temperature will be reached,• the second clock to set/save a second time at which the pre-heating temperature will be reached,
N OTIC E
Using these two clocks and depending on the season you can, for example, select one or the other start time.A message on the screen confirms your choice.
With TOYOTA Connect Radio
Press Connect-App to display the main page.Then press "Programmable heating/ventilation".► Select the "Status" tab to activate/deactivate the system.► Select the "Other settings" tab to choose the "Heating" mode, to heat the engine and passenger compartment, or "Ventilation" to ventilate the passenger compartment.► Then set/save the time at which the preheating temperature will be reached for each selection.Press this button to save.
With TOYOTA Connect Nav
► Press the "Applications" menu.
► Press the "Vehicle Apps" tab.► Press "Temperature programming".
► Press the "Status" tab to activate/deactivate the system.► Press the "Parameters" tab to select "Heating" mode to heat the engine and passenger compartment or "Ventilation" mode to ventilate the passenger compartment.► Then set/save the activation time for each selection.► Press "OK" to confirm.
NOTIC E
You must allow at least 60 minutes between programming operations.
Long range remote control
(Depending on version.)This enables you to switch the heating in the passenger compartment on or off from a distance.The remote control has a range of about 1 km (0.6 miles) in open country.
On
► Pressing and holding this button starts the heating immediately (confirmed by the green indicator lamp coming on briefly).
Page 71 of 272
71
Safety
5
General safety
recommendations
WARNI NG
Do not remove the labels attached in different places on your vehicle. They include safety warnings as well as identification information for the vehicle.
WARNI NG
For all work on your vehicle, use a qualified workshop that has the technical information, skills and equipment required, all of which a TOYOTA dealer is able to provide.
WARNI NG
Depending on country regulations, certain safety equipment may be mandatory: high
visibility safety vests, warning triangles, breathalysers, spare bulbs, spare fuses, fire extinguisher, first aid kit, mud flaps at the rear of the vehicle, etc.
WARNI NG
Installing electrical accessories:– The fitting of electrical equipment or accessories not approved by TOYOTA may cause excessive current consumption and faults and failures with the electrical system of your vehicle. Contact a TOYOTA dealer for information on the range of approved accessories.– As a safety measure, access to the diagnostic socket, used for the vehicle's electronic systems, is reserved strictly for TOYOTA dealers or qualified workshops, equipped with the special tools required (risk of malfunctions of the vehicle's electronic systems that could cause breakdowns or serious accidents). The Manufacturer cannot be held responsible if this advice is not followed.– Any modification or adaptation not intended or authorised by TOYOTA or carried out without meeting the technical requirements
defined by the Manufacturer will result in the suspension of the commercial warranty.
W ARNI NG
Installation of accessory radio communication transmittersBefore installing a radio communication transmitter with an external aerial, you must without fail contact a TOYOTA dealer for the specification of transmitters which can be fitted (frequency, maximum power, aerial position, specific installation requirements), in line with the Vehicle Electromagnetic Compatibility Directive (2004/104/EC).
Emergency or assistance
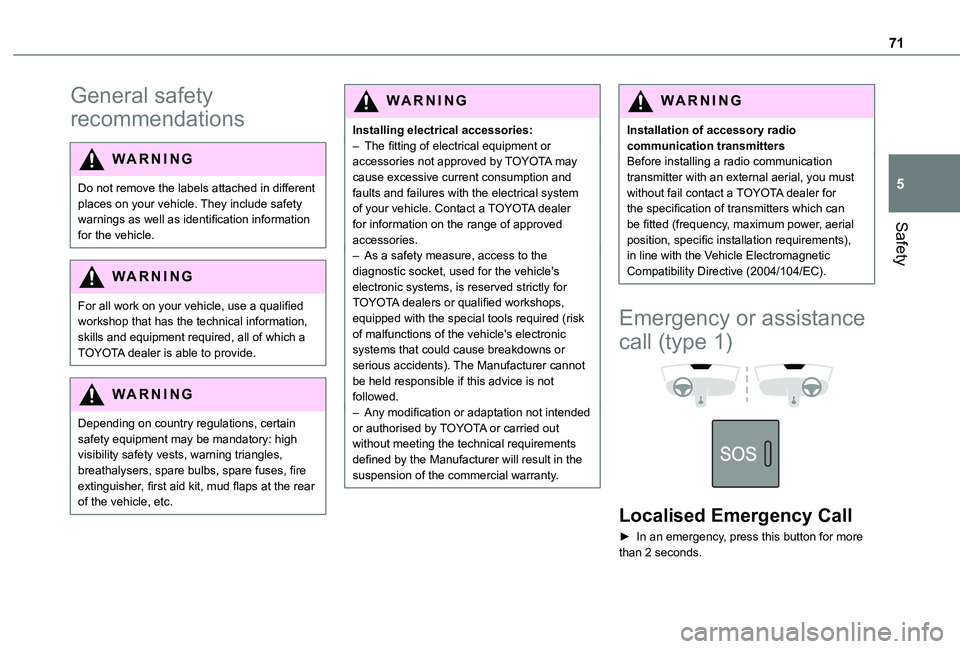
call (type 1)
Localised Emergency Call
► In an emergency, press this button for more
than 2 seconds.
Page 138 of 272
138
Using sensors located in the bumper, this system signals the proximity of obstacles (e.g. pedestrian, vehicle, tree, barrier) present in their field of detection.
Rear parking sensors
The system is switched on by engaging reverse gear, which is confirmed by an audible signal.The system is switched off when disengaging reverse gear.
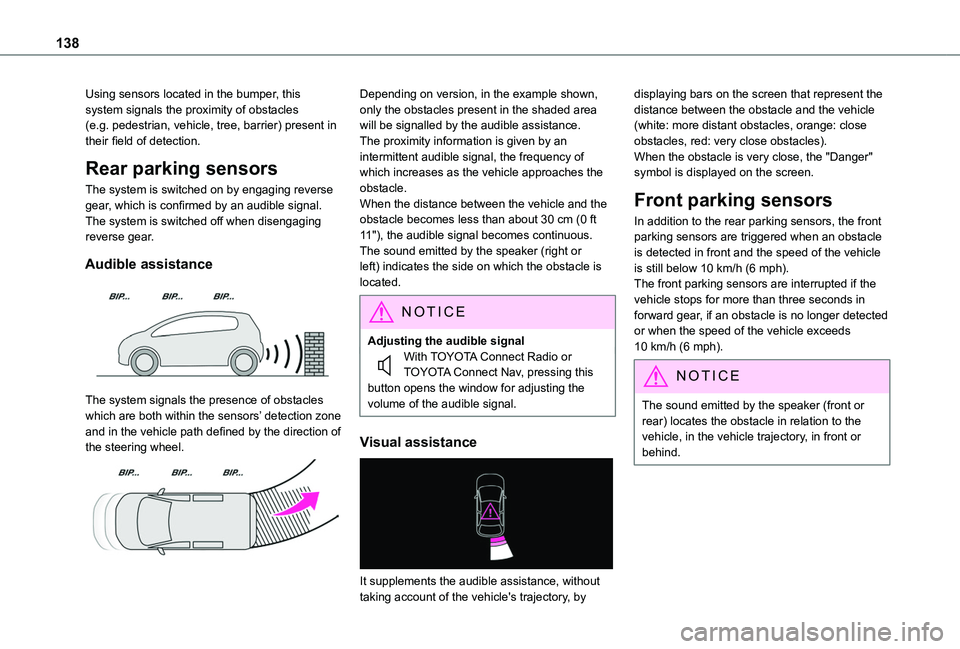
Audible assistance
The system signals the presence of obstacles which are both within the sensors’ detection zone and in the vehicle path defined by the direction of the steering wheel.
Depending on version, in the example shown, only the obstacles present in the shaded area will be signalled by the audible assistance.The proximity information is given by an intermittent audible signal, the frequency of which increases as the vehicle approaches the obstacle.When the distance between the vehicle and the obstacle becomes less than about 30 cm (0 ft 11"), the audible signal becomes continuous.The sound emitted by the speaker (right or left) indicates the side on which the obstacle is located.
NOTIC E
Adjusting the audible signalWith TOYOTA Connect Radio or TOYOTA Connect Nav, pressing this button opens the window for adjusting the volume of the audible signal.
Visual assistance
It supplements the audible assistance, without
taking account of the vehicle's trajectory, by
displaying bars on the screen that represent the distance between the obstacle and the vehicle (white: more distant obstacles, orange: close obstacles, red: very close obstacles).When the obstacle is very close, the "Danger" symbol is displayed on the screen.
Front parking sensors
In addition to the rear parking sensors, the front parking sensors are triggered when an obstacle is detected in front and the speed of the vehicle is still below 10 km/h (6 mph).The front parking sensors are interrupted if the vehicle stops for more than three seconds in forward gear, if an obstacle is no longer detected or when the speed of the vehicle exceeds 10 km/h (6 mph).
NOTIC E
The sound emitted by the speaker (front or rear) locates the obstacle in relation to the vehicle, in the vehicle trajectory, in front or behind.
Page 177 of 272
177
In the event of a breakdown
8
Fuse No.Rating (A)Functions
F110Wireless smartphone charger, interior electrochrome rear view mirror.
F415Horn.
F620Screenwash pump.
F71012 V socket (rear).
F1030Electric locks module.
F1310Telematics and radio controls.
F145Alarm, advanced telematic unit.
F193Trailer interface unit.
F235Generic trailer interface unit.
F275Additional heating.
F2920Audio system, touch screen.
Fuse No.Rating (A)Functions
F3115Audio system (as an accessory).
F321512 V socket (front).
F345Mirror control.
F365USB port.
Engine compartment fuses
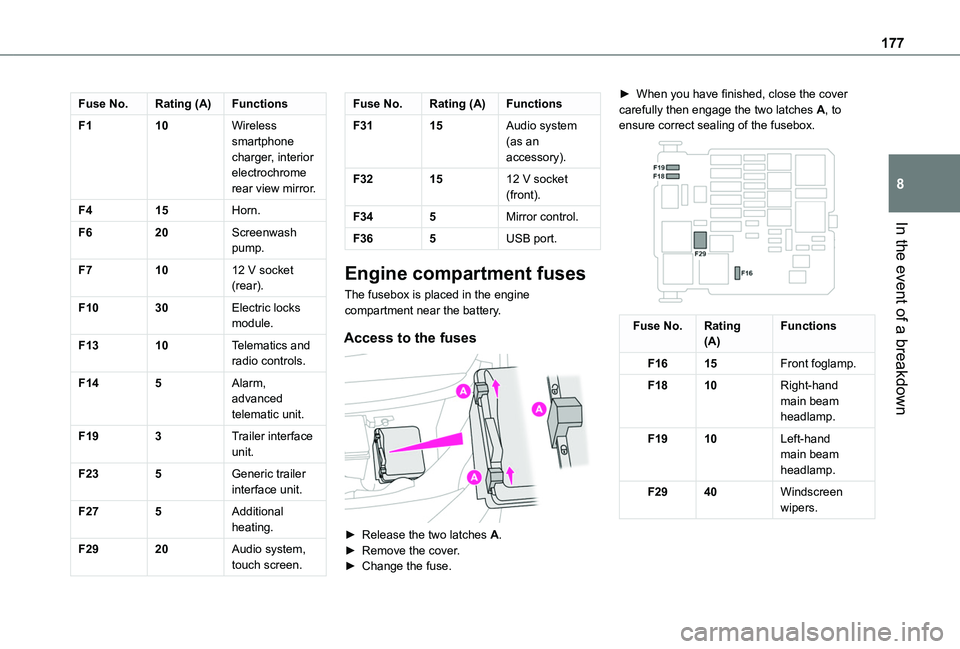
The fusebox is placed in the engine compartment near the battery.
Access to the fuses
► Release the two latches A.► Remove the cover.► Change the fuse.
► When you have finished, close the cover carefully then engage the two latches A, to ensure correct sealing of the fusebox.
Fuse No.Rating(A)Functions
F1615Front foglamp.
F1810Right-hand main beam headlamp.
F1910Left-hand main beam headlamp.
F2940Windscreen wipers.