2019 TOYOTA PROACE CITY VERSO start stop button
[x] Cancel search: start stop buttonPage 110 of 272
11 0
WARNI NG
Driving on flooded roadsBefore entering into a flooded area, it is strongly recommended that you deactivate the Stop & Start system.For more information on Driving recommendations, particularly on flooded roads, refer to the corresponding section.
Deactivation/Activation
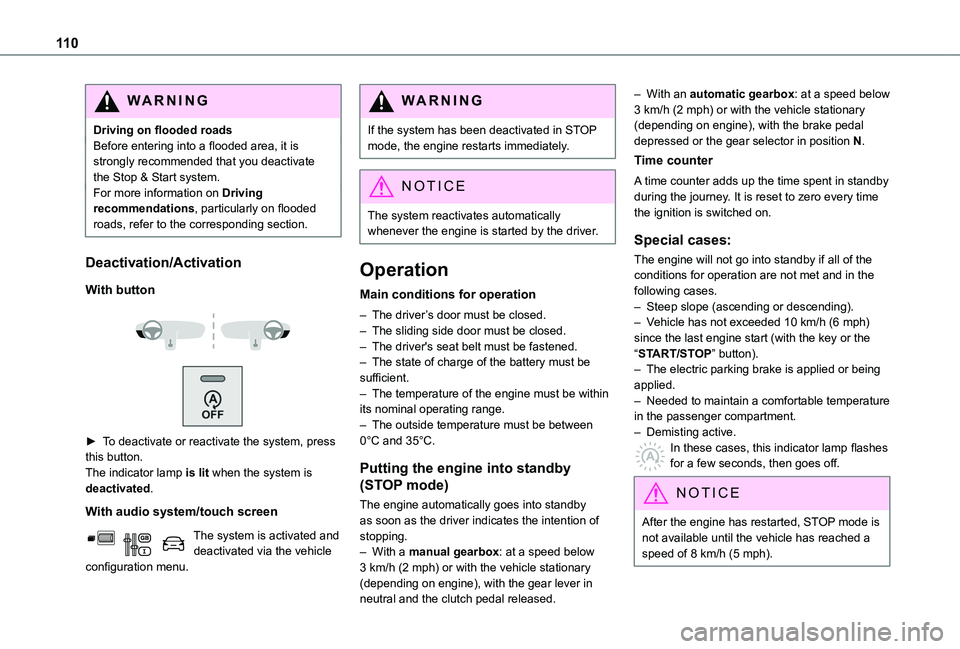
With button
► To deactivate or reactivate the system, press this button.The indicator lamp is lit when the system is deactivated.
With audio system/touch screen
The system is activated and deactivated via the vehicle configuration menu.
WARNI NG
If the system has been deactivated in STOP mode, the engine restarts immediately.
NOTIC E
The system reactivates automatically whenever the engine is started by the driver.
Operation
Main conditions for operation
– The driver’s door must be closed.– The sliding side door must be closed.– The driver's seat belt must be fastened.– The state of charge of the battery must be sufficient.– The temperature of the engine must be within its nominal operating range.– The outside temperature must be between 0°C and 35°C.
Putting the engine into standby
(STOP mode)
The engine automatically goes into standby as soon as the driver indicates the intention of stopping.– With a manual gearbox: at a speed below 3 km/h (2 mph) or with the vehicle stationary (depending on engine), with the gear lever in neutral and the clutch pedal released.
– With an automatic gearbox: at a speed below 3 km/h (2 mph) or with the vehicle stationary (depending on engine), with the brake pedal depressed or the gear selector in position N.
Time counter
A time counter adds up the time spent in standby during the journey. It is reset to zero every time the ignition is switched on.
Special cases:
The engine will not go into standby if all of the conditions for operation are not met and in the following cases.– Steep slope (ascending or descending).– Vehicle has not exceeded 10 km/h (6 mph) since the last engine start (with the key or the “START/STOP” button).– The electric parking brake is applied or being applied.– Needed to maintain a comfortable temperature in the passenger compartment.– Demisting active.
In these cases, this indicator lamp flashes for a few seconds, then goes off.
NOTIC E
After the engine has restarted, STOP mode is not available until the vehicle has reached a speed of 8 km/h (5 mph).
Page 111 of 272
111
Driving
6
NOTIC E
During parking manoeuvres, STOP mode is not available for a few seconds after coming out of reverse gear or turning the steering wheel.
Restarting the engine (START mode)
The engine automatically restarts as soon as the driver indicates the intention of moving off again.– With a manual gearbox: with the clutch pedal fully depressed.– With an automatic gearbox:• With the selector in position D or M: with the brake pedal released.• With the selector in position N and the brake pedal released: with the selector at D or M.• With the selector in position P and the brake pedal depressed: with the selector at R, N, D or M.
Special cases
The engine will restart automatically if all conditions for operation are met again and in the following case.– Speed of the vehicle exceeds 3 km/h (2 mph) (depending on the engine).In this case, this indicator lamp flashes for a few seconds, then goes off.
Malfunctions
Depending on the vehicle’s equipment:In the event of a system malfunction, this warning lamp flashes on the instrument panel.The warning lamp in this button flashes and a message appears, accompanied by an audible signal.Have the vehicle checked by a TOYOTA dealer or a qualified workshop.
The vehicle stalls in STOP mode
All of the instrument panel warning lamps come on if there is a fault.Depending on version, a warning message may also be displayed, prompting you to place the gear selector in position N and depress the brake pedal.► Switch off the ignition then start the engine again with the key or the "START/STOP" button.
WARNI NG
The Stop & Start system requires a 12 V battery of specific technology and specification.All work concerning the battery must be carried out only by a TOYOTA dealer or a qualified workshop.
Under-inflation detection
This system automatically checks the pressures of the tyres while driving.It compares the information given by the wheel speed sensors with reference values, which must be reinitialised every time the tyre pressures are adjusted or a wheel changed.The system triggers an alert as soon as it detects a drop in the inflation pressure of one or more tyres.
WARNI NG
Under-inflation detection does not replace the need for vigilance on the part of the driver.This system does not avoid the need to regularly check the tyre pressures (including the spare wheel) as well as before a long journey.Driving with under-inflated tyres, particularly in adverse conditions (heavy load, high speed, long journey):– worsens road-holding.– lengthens braking distances.– causes premature wear of the tyres.– increases fuel consumption.
Page 122 of 272
122
allow running at a constant speed and keeping an adequate safety distance.Remain vigilant when the cruise control is activated. If you hold one of the speed setting modification buttons, a very rapid change in the speed of your vehicle may occur.When descending a steep hill, the cruise control system cannot prevent the vehicle from exceeding the set speed. Brake if necessary to control the speed of your vehicle.On steep climbs or when towing, the set speed may not be reached or maintained.
NOTIC E
Exceeding the programmed speed settingYou can temporarily exceed the speed setting by pressing the accelerator pedal (the programmed speed flashes).To return to the speed setting, release the accelerator pedal (when the set speed is
reached again, the displayed speed stops flashing).
WARNI NG
Operating limitsNever use the system in the following situations:– in an urban area with the risk of
pedestrians crossing the road,
– in heavy traffic,– on winding or steep roads,– on slippery or flooded roads,– in unfavourable climatic conditions,– driving on a speed circuit,– driving on a rolling road,– use of snow chains, non-slip covers or studded tyres.
Programmable cruise
control
Refer to the General recommendations on the use of driving and manoeuvring aids and to Cruise control - particular recommendations.This system automatically keeps the vehicle’s speed at the cruise value programmed by the driver (speed setting), without using the accelerator pedal.The cruise control is switched on manually.It requires a minimum vehicle speed of 40 km/h (25 mph).
With a manual gearbox, third gear or higher must be engaged.With an automatic gearbox, mode D or second gear or higher in mode M must be engaged.
NOTIC E
The cruise control remains active after changing gear, regardless of the gearbox type, on engines fitted with Stop & Start.
NOTIC E
Switching off the ignition cancels any speed setting.
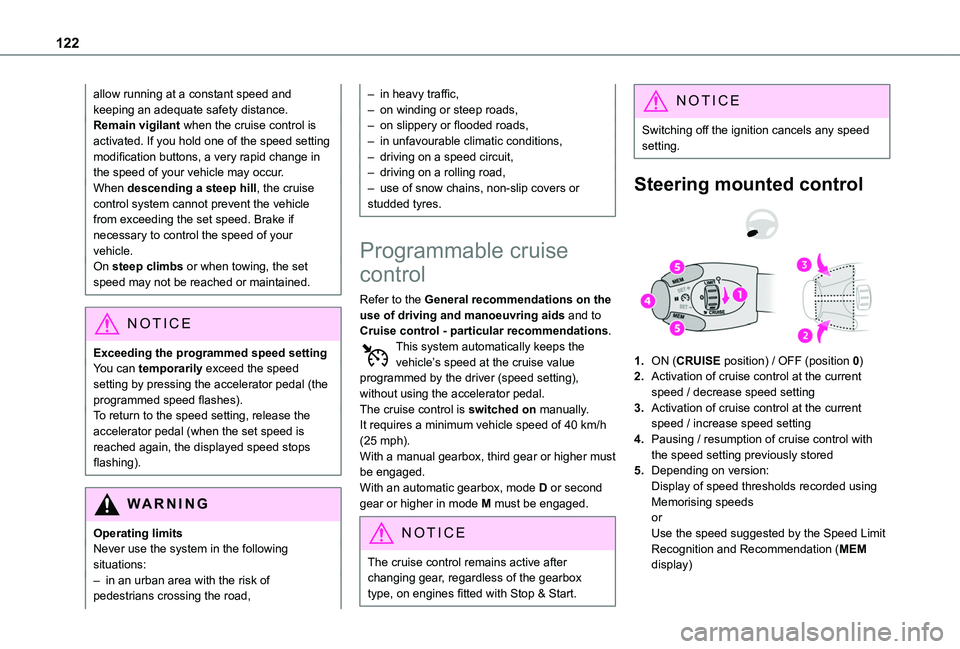
Steering mounted control
1.ON (CRUISE position) / OFF (position 0)
2.Activation of cruise control at the current speed / decrease speed setting
3.Activation of cruise control at the current speed / increase speed setting
4.Pausing / resumption of cruise control with the speed setting previously stored
5.Depending on version:Display of speed thresholds recorded using Memorising speedsorUse the speed suggested by the Speed Limit Recognition and Recommendation (MEM display)
Page 126 of 272
126
• press the electric parking brake control;► Press 4 to restart cruise control. Cruise control may have been paused automatically:• when the speed of the vehicle goes below 30 km/h (19 mph) with a manual gearbox;• when the speed of the engine goes below 1100 rpm with a manual gearbox;• by triggering of the ESC system.With a manual gearbox, the driver should press the accelerator pedal to move off, then above 30 km/h (19 mph), reactivate the system by pressing one of the buttons 2, 3 or 4.With an automatic gearbox, following braking of the vehicle bringing it to a complete stop, the system holds the vehicle stationary; the cruise control is paused. The driver should press the accelerator pedal to move off, then above 30 km/h (19 mph), reactivate the system by pressing one of the buttons 2, 3 or 4.If the driver takes no action following this immobilisation, the electric parking brake is applied automatically after about 5 minutes.
N OTIC E
Cruise control remains active after changing gear regardless of the gearbox type.
WARNI NG
When the driver attempts to reactivate cruise control which was paused, the message "Activation not possible, unsuitable
conditions" is briefly displayed if reactivation is not possible (safety conditions not met).
Modifying the programmed speed setting with the Speed Limit Recognition and Recommendation function
► Press 5 to accept the speed suggested by the function in the instrument panel, then press again to confirm.
WARNI NG
To prevent any sudden acceleration or deceleration of the vehicle, select a speed setting fairly close to the current speed of the vehicle.
Changing the inter-vehicle distance
► Press 6 to display the distance setting thresholds (“Distant”, “Normal”, “Close“), then press again to select a threshold.After a few seconds, the option is accepted and will be memorised when the ignition is switched off.
Temporarily exceeding the speed setting
► Press the accelerator pedal fully. Distance monitoring and cruise control are deactivated as long as acceleration is maintained. "Cruise control suspended" is displayed.
System deactivation
► Turn knob 1 upwards to the OFF position.
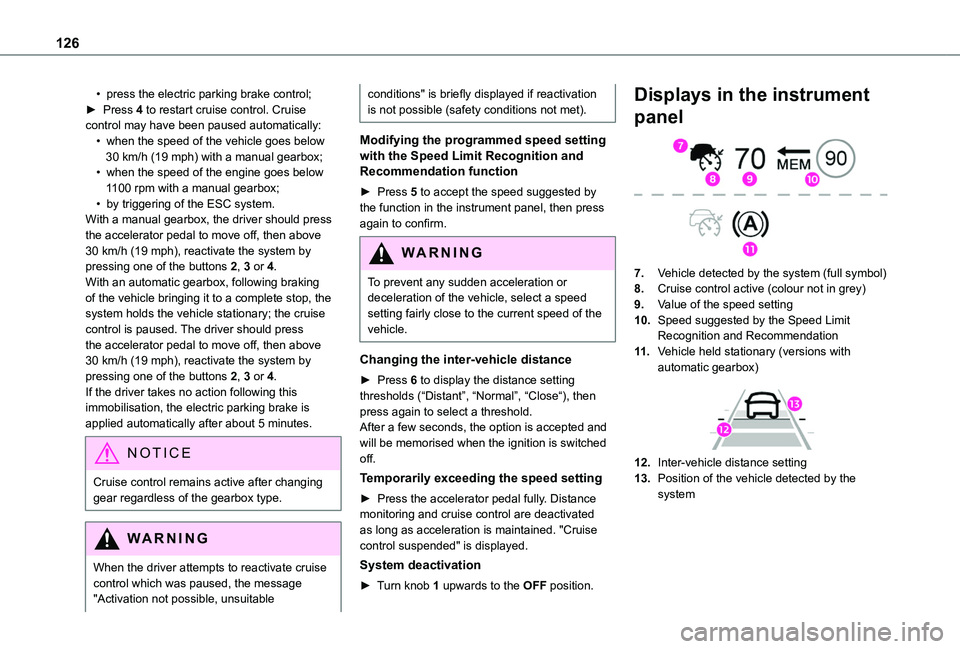
Displays in the instrument
panel
7.Vehicle detected by the system (full symbol)
8.Cruise control active (colour not in grey)
9.Value of the speed setting
10.Speed suggested by the Speed Limit Recognition and Recommendation
11 .Vehicle held stationary (versions with automatic gearbox)
12.Inter-vehicle distance setting
13.Position of the vehicle detected by the system
Page 160 of 272
160
Precautions for use
AdBlue® is a urea-based solution. This fluid is non-flammable, colourless and odourless (when kept in a cool place).In the event of contact with the skin, wash the affected area with soap and running water. In the event of contact with the eyes, immediately rinse the eyes with large amounts of water or with an eye wash solution for at least 15 minutes. Seek medical attention if you feel a persistent burning sensation or irritation.If swallowed, immediately wash out the mouth with clean water and then drink plenty of water.In certain conditions (high temperature, for example), the risk of release of ammonia cannot be excluded: do not inhale the fluid. Ammonia vapours have an irritant effect on mucous membranes (eyes, nose and throat).
WARNI NG
Store AdBlue® out of the reach of children, in its original container.
Procedure
Before starting the top-up procedure, ensure that the vehicle is parked on a flat and level surface.In wintry conditions, ensure that the temperature of the vehicle is above -11 °C. Otherwise the AdBlue® may be frozen and so cannot be poured into its tank. Park the vehicle in a warmer area
for a few hours to allow the top-up to be carried out.
WARNI NG
Never put the AdBlue® into the Diesel fuel tank.
WARNI NG
If any AdBlue® is splashed, or if there are any spillages on the bodywork, rinse immediately with cold water or wipe with a damp cloth.If the fluid has crystallised, clean it off using a sponge and hot water.
WARNI NG
Important: in the event of a top-up after a breakdown because of a lack of AdBlue, it is essential to wait around 5 minutes before switching on the ignition, without opening the driver’s door, unlocking the vehicle, introducing the key into the ignition switch, or introducing the key of the “Keyless Entry and Starting ” system into the passenger compartment.Switch on the ignition, then wait for 10 seconds before starting the engine.
► Switch off the ignition and remove the key from the switch to switch off the engine.
or► With Keyless Entry and Starting, press the "START/STOP" button to switch off the engine.
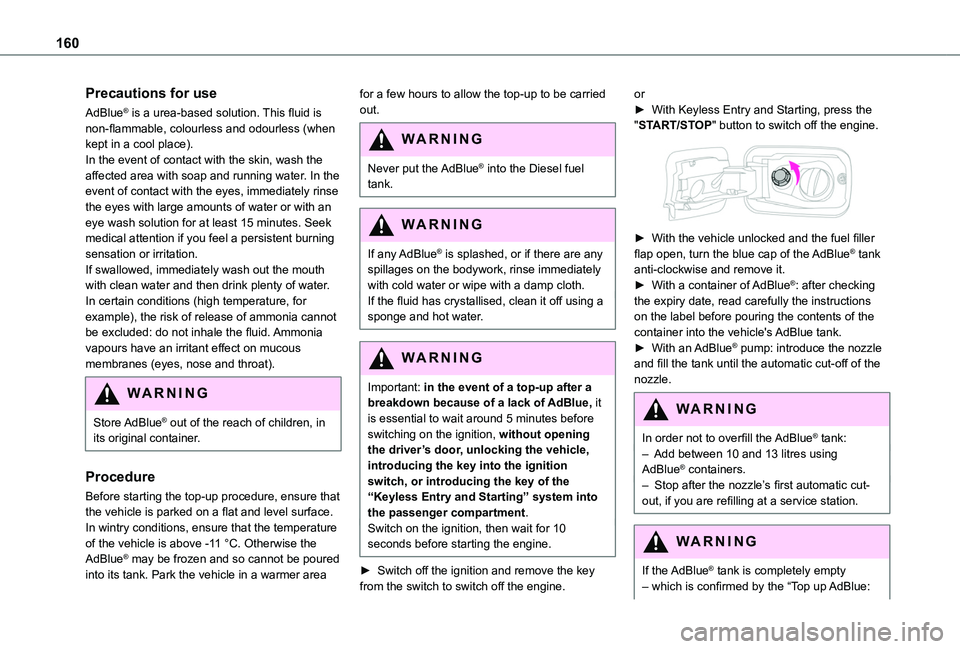
► With the vehicle unlocked and the fuel filler flap open, turn the blue cap of the AdBlue® tank anti-clockwise and remove it.► With a container of AdBlue®: after checking the expiry date, read carefully the instructions on the label before pouring the contents of the container into the vehicle's AdBlue tank.► With an AdBlue® pump: introduce the nozzle and fill the tank until the automatic cut-off of the nozzle.
WARNI NG
In order not to overfill the AdBlue® tank:– Add between 10 and 13 litres using AdBlue® containers.– Stop after the nozzle’s first automatic cut-out, if you are refilling at a service station.
WARNI NG
If the AdBlue® tank is completely empty – which is confirmed by the “Top up AdBlue:
Page 166 of 272
166
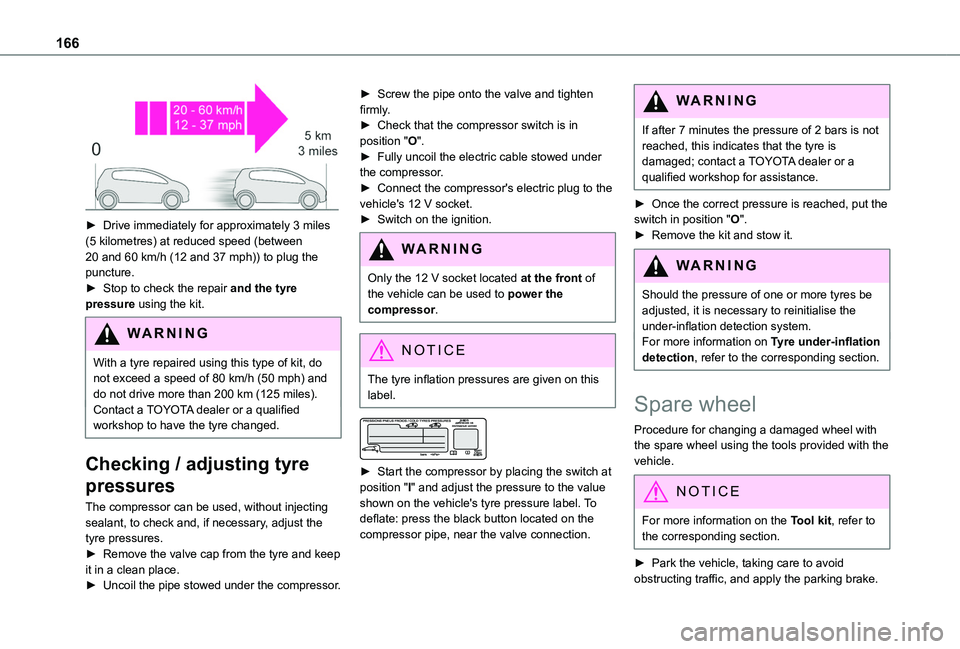
► Drive immediately for approximately 3 miles (5 kilometres) at reduced speed (between 20 and 60 km/h (12 and 37 mph)) to plug the puncture.► Stop to check the repair and the tyre pressure using the kit.
WARNI NG
With a tyre repaired using this type of kit, do not exceed a speed of 80 km/h (50 mph) and do not drive more than 200 km (125 miles).Contact a TOYOTA dealer or a qualified workshop to have the tyre changed.
Checking / adjusting tyre
pressures
The compressor can be used, without injecting sealant, to check and, if necessary, adjust the tyre pressures.► Remove the valve cap from the tyre and keep it in a clean place.► Uncoil the pipe stowed under the compressor.
► Screw the pipe onto the valve and tighten firmly.► Check that the compressor switch is in position "O".► Fully uncoil the electric cable stowed under the compressor.► Connect the compressor's electric plug to the vehicle's 12 V socket.► Switch on the ignition.
WARNI NG
Only the 12 V socket located at the front of the vehicle can be used to power the compressor.
NOTIC E
The tyre inflation pressures are given on this label.
► Start the compressor by placing the switch at position "I" and adjust the pressure to the value shown on the vehicle's tyre pressure label. To deflate: press the black button located on the compressor pipe, near the valve connection.
WARNI NG
If after 7 minutes the pressure of 2 bars is not reached, this indicates that the tyre is damaged; contact a TOYOTA dealer or a qualified workshop for assistance.
► Once the correct pressure is reached, put the switch in position "O".► Remove the kit and stow it.
WARNI NG
Should the pressure of one or more tyres be adjusted, it is necessary to reinitialise the under-inflation detection system.For more information on Tyre under-inflation detection, refer to the corresponding section.
Spare wheel
Procedure for changing a damaged wheel with
the spare wheel using the tools provided with the vehicle.
NOTIC E
For more information on the Tool kit, refer to the corresponding section.
► Park the vehicle, taking care to avoid obstructing traffic, and apply the parking brake.
Page 200 of 272
200
Consultation call
From the contextual menu, select "Switch" and validate to return to a call left on hold.Confirm with OK.
Directory
To access the directory, press and hold SRC/TEL.Select "Directory" to see the list of contacts.Confirm with OK.
To modify the contacts saved in the system, press MENU then select "Telephone" and confirm.Select "Directory management" and confirm.You can:– "Consult an entry",– "Delete an entry",– "Delete all entries".The system accesses the telephone's
contacts directory, depending on its compatibility, and while it is connected via Bluetooth.With certain telephones connected by Bluetooth you can send a contact to the directory of the audio system.Contacts imported in this way are saved in a permanent directory visible to all, whatever the telephone connected.
The menu for the directory is not accessible if it is empty.
Voice recognition
This function allows you to use your smartphone's voice recognition via the system.To start voice recognition, depending on the type of steering mounted controls:Make a long press on the end of the lighting control lever.ORPress this button.
NOTIC E
Voice recognition requires the use of a compatible smartphone first connected to the vehicle by Bluetooth.
Frequently asked
questions
The following information groups together the answers to the most frequently asked questions concerning your audio system.With the engine off, the audio system switches off after a few minutes of use.When the engine is switched off, the audio system operating time depends on the state of charge of the battery.
The switch-off is normal: the audio system switches to economy mode and switches off to avoid discharging the vehicle's battery.► Start the vehicle’s engine to increase the charge of the battery.The message "the audio system is overheated" is displayed onscreen.To protect the installation if the ambient temperature is too high, the audio system switches to an automatic thermal protection mode, in which the volume may be decreased or the CD player stopped.► Switch the audio system off for a few minutes to allow the system to cool.
Radio
There is a difference in sound quality between the different audio sources (radio, CD, etc.).For optimal listening quality, the audio settings (Volume, Bass, Treble, Ambience and Loudness) can be adjusted to different audio sources, resulting in audible differences when switching
between sources (radio, CD, etc.).► Check that the audio settings (Volume, Bass, Treble, Ambience and Loudness) are appropriate to the sources being listened to. We recommend setting the audio functions (Bass, Treble, Fr-Re balance and Le-Ri balance) to the middle position, setting the musical ambience to "None", setting loudness correction to "Active" in CD mode and "Inactive" in Radio mode.
Page 217 of 272
217
TOYOTA Connect Nav
12
TOYOTA Connect Nav
GPS navigation -
Applications - Multimedia
audio system - Bluetooth®
telephone
NOTIC E
The functions and settings described vary according to the vehicle version and configuration.
WARNI NG
For safety reasons and because they require sustained attention by the driver, the following operations must be carried out with the vehicle stationary and the ignition on:– Pairing the smartphone with the system in Bluetooth mode.– Using the smartphone.– Connection to the CarPlay®, MirrorLinkTM or Android Auto applications (certain applications interrupt their display while the vehicle is moving).– Watching a video (the video stops when the
vehicle starts to move again).– Changing the system settings and configuration.
NOTIC E
The system is protected in such a way that it will only operate in the vehicle.The Energy Economy Mode message is displayed when the system is about to enter the corresponding mode.
NOTIC E
System and map updates can be downloaded from the Brand’s website.The update procedure is also available on the website.
First steps
With the engine running, a press mutes the sound.With the ignition off, a press turns the system on.Increase or decrease the volume using the wheel or the "plus" or "minus" buttons (depending on the equipment).Use the menu buttons on either side of or below the touch screen for access to the menus, then press the virtual buttons in the touch screen.Depending on the model, use the "Source" or "Menu" buttons to access the rolling menus, then press the virtual buttons in the touch screen.Display the rolling menus at any time by pressing the screen briefly with three fingers.
All of the touch areas of the screen are white.Press the back arrow to go back a level.Press "OK" to confirm.
WARNI NG
The touch screen is of the "capacitive" type.To clean the screen, use a soft, non-abrasive cloth (e.g. spectacles cloth) with no additional product.
Do not use sharp objects on the screen.Do not touch the screen with wet hands.
Certain information is displayed permanently in the side bars or in the upper bar of the touch screen (depending on equipment):– Air conditioning status information (depending on version), and direct access to the corresponding menu.– Go directly to the audio source selection option, to view the list of radio stations (or list of titles depending on the source).– Go to the "Notifications" of messages, emails, map updates and, depending on the services, the navigation notifications.– Go to the settings for the touch screen and the digital instrument panel.Audio source selection (depending on equipment):– FM/DAB/AM radio stations (depending on equipment).– Telephone connected via Bluetooth and Bluetooth multimedia broadcast (streaming).