Page 410 of 568
4106-3. Do-it-yourself maintenance
PRIUS +_OM_OM47D30E_(EE)
WARNING
■Proper inflation is critical to save tire performance
Keep your tires properly inflated.
If the tires are not properly inflated, the following conditions may occur
which could lead to an accident resulting in death or serious injury:
● Excessive wear
● Uneven wear
● Poor handling
● Possibility of blowouts resulting from overheated tires
● Air leaking from between tire and wheel
● Wheel deformation and/or tire damage
● Greater possibility of tire damage while driving (due to road hazards,
expansion joints, sharp edges in the road, etc.)
NOTICE
■ When inspecting and adjusting tire inflation pressure
Be sure to put the tire valve caps back on.
If a valve cap is not installed, dirt or moisture may get into the valve and
cause an air leak, resulting in decreased tire inflation pressure.
Page 411 of 568

4116-3. Do-it-yourself maintenance
PRIUS +_OM_OM47D30E_(EE)
6
Maintenance and care
Wheels
When replacing wheels, care should be taken to ensure that they are
equivalent to those removed in load capacity, diameter, rim width and
inset
*.
Replacement wheels are available at any authorized Toyota retailer or
Toyota authorized repairer, or any reliable repairer.
*: Conventionally referred to as “offset”.
Toyota does not recommend using the following:
●Wheels of different sizes or types
●Used wheels
●Bent wheels that have been straightened
●Use only Toyota wheel nuts and wrenches designed for use with
your aluminum wheels.
●When rotating, repairing or changing your tires, check that the
wheel nuts are still tight after driving 1600 km (1000 miles).
●Be careful not to damage the aluminum wheels when using tire
chains.
●Use only Toyota genuine balance weights or equivalent and a plas-
tic or rubber hammer when balancing your wheels.
■When replacing wheels
The wheels of your vehicle are equipped with tire pressure warning valves
and transmitters that allow the tire pressure warning system to provide
advance warning in the event of a loss in tire inflation pressure. Whenever
wheels are replaced, tire pressure warning valves and transmitters must be
installed. (P. 394)
If a wheel is bent, cracked or heavily corroded, it should be
replaced. Otherwise, the tire may separate from the wheel or
cause a loss of handling control.
Wheel selection
Aluminum wheel precautions
Page 412 of 568

4126-3. Do-it-yourself maintenance
PRIUS +_OM_OM47D30E_(EE)
WARNING
■When replacing wheels
● Do not use wheels that are a different size from those recommended in the
Owner’s Manual, as this may result in a loss of handling control.
● Never use an inner tube in a leaking wheel which is designed for a tube-
less tire. Doing so may result in an accident, causing death or serious
injury.
■ When installing the wheel nuts
● Never use oil or grease on the wheel bolts or wheel nuts.
Oil and grease may cause the wheel nuts to be excessively tightened,
leading to bolt or disc wheel damage. In addition, the oil or grease can
cause the wheel nuts to loosen and the wheel may fall off, causing an acci-
dent and resulting in death or serious injury. Remove any oil or grease
from the wheel bolts or wheel nuts.
■ Use of defective wheels prohibited
Do not use cracked or deformed wheels.
Doing so could cause the tire to leak air during driving, possibly causing an
accident.
NOTICE
■ Replacing tire pressure warning valves and transmitters
● Because tire repair or replacement may affect the tire pressure warning
valves and transmitters, make sure to have tires serviced by any autho-
rized Toyota retailer or Toyota authorized repairer, or any reliable repairer
or other qualified service shop. In addition, make sure to purchase your
tire pressure warning valves and transmitters at any authorized Toyota
retailer or Toyota authorized repairer, or any reliable repairer.
● Ensure that only genuine Toyota wheels are used on your vehicle.
Tire pressure warning valves and transmitters may not work properly with
non-genuine wheels.
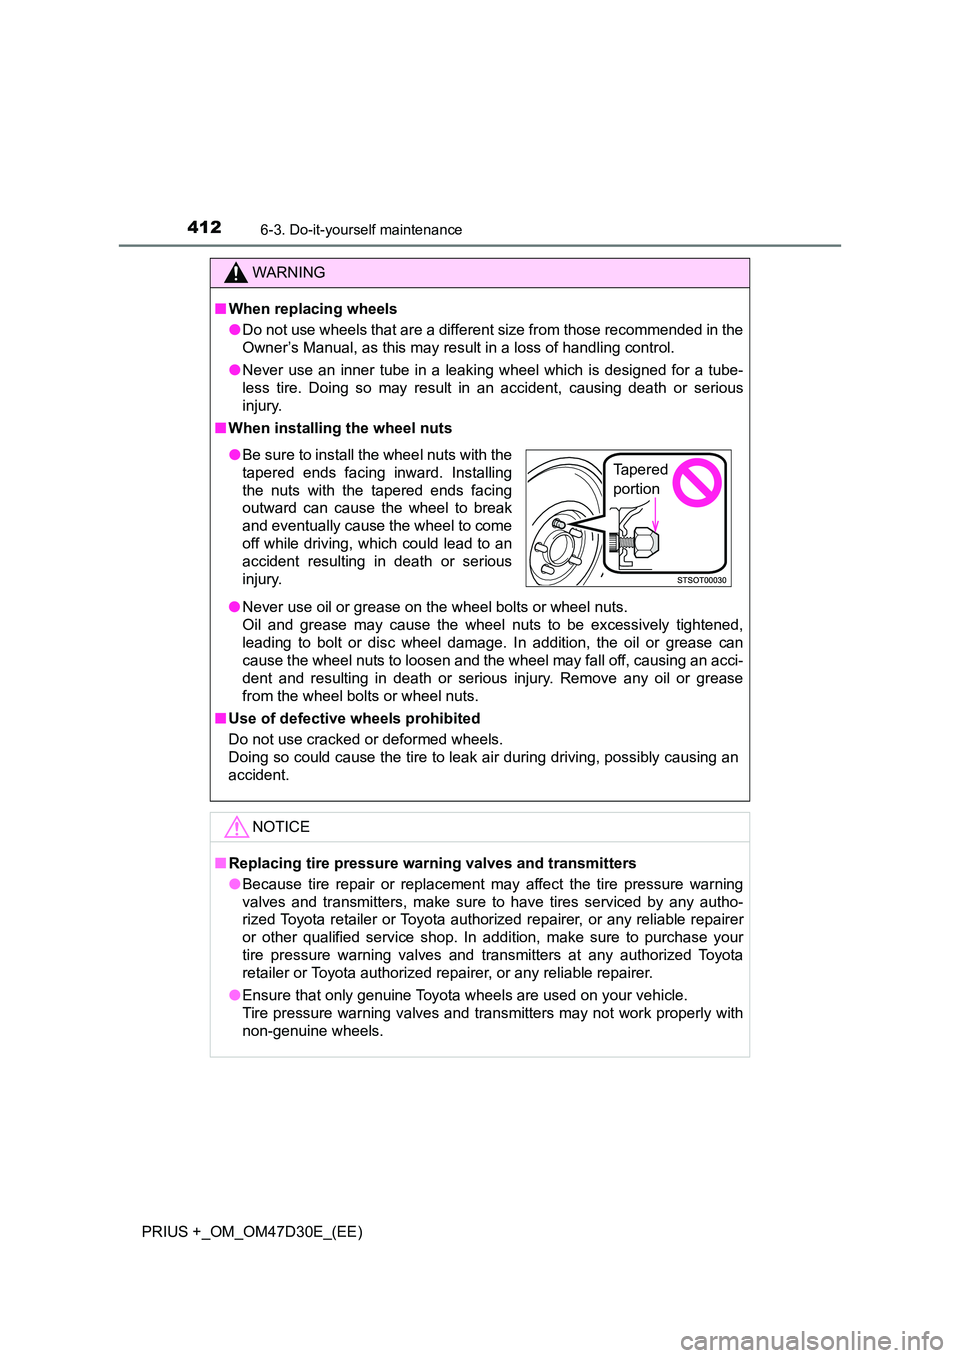
● Be sure to install the wheel nuts with the
tapered ends facing inward. Installing
the nuts with the tapered ends facing
outward can cause the wheel to break
and eventually cause the wheel to come
off while driving, which could lead to an
accident resulting in death or serious
injury.
Tapered
portion
Page 413 of 568
4136-3. Do-it-yourself maintenance
PRIUS +_OM_OM47D30E_(EE)
6
Maintenance and care
Air conditioning filter
Turn the power switch off.
Open the lower glove box and
remove the filter exchange
cover.
Remove the filter cover.
The air conditioning filter must be changed regularly to maintain
air conditioning efficiency.
Removal method
1
2
3
Left-hand drive vehiclesRight-hand drive vehicles
Page 414 of 568
4146-3. Do-it-yourself maintenance
PRIUS +_OM_OM47D30E_(EE)
Slide and pull out the filter.
Replace it with a new one.
The “ UP” marks shown on the fil-
ter should be pointing up.
When installing, reverse the steps listed.
■ Checking interval
Inspect and replace the air conditioning filter according to the maintenance
schedule. In dusty areas or areas with heavy traffic flow, early replacement
may be required. (For scheduled maintenance information, please refer to the
“Toyota Service Booklet” or “Toyota Warranty Booklet”.)
■ If air flow from the vents decreases dramatically
The filter may be clogged. Check the filter and replace if necessary.
4
NOTICE
■ To prevent damage to the system
When using the air conditioning system, make sure that a filter is always
installed.
5
Page 415 of 568
4156-3. Do-it-yourself maintenance
PRIUS +_OM_OM47D30E_(EE)
6
Maintenance and care
Wiper rubber replacement
■Front
Remove the stopper, lift the
wiper arm slightly upward, and
then slide the wiper blade to
remove it.
Slowly lower the wiper arm until it
contacts the windshield.
Slide off the wiper rubber.
Install the 2 metal plates from
the removed wiper rubber to the
replacement wiper rubber.
Install the metal plates so that the
cutouts are facing inward.
Replacing procedure
1
2
3
Page 416 of 568
4166-3. Do-it-yourself maintenance
PRIUS +_OM_OM47D30E_(EE)
When installing, insert the wiper
rubber in the direction opposite
that used during the removal
procedure until the wiper rubber
becomes locked and stops
moving.
Check the direction the wiper rub-
ber is facing before installing.
After installing the wiper rubber,
install the wiper blade to the wiper
arm and secure the stopper.
■
Rear
With the wiper extended,
remove the wiper rubber.
Install the 2 metal plates from the
removed wiper rubber to the
replacement wiper rubber so that
the cutouts are facing inward.
When installing, insert the wiper
rubber as shown in the illustra-
tion.
4
1
2
Page 417 of 568
4176-3. Do-it-yourself maintenance
PRIUS +_OM_OM47D30E_(EE)
6
Maintenance and care
Electronic key batter y
●Flathead screwdriver
●Lithium battery CR2032
Take out the mechanical key.
Remove the cover.
To prevent damage to the key,
cover the tip of the screwdriver with
a rag.
Remove the depleted battery.
When removing the cover, if the
battery cannot be seen due to the
electronic key module attaching to
the upper cover, remove the elec-
tronic key module from the cover
so that the battery is visible as
shown in the illustration.
Insert a new battery with the “+”
terminal facing up.
When installing, reverse the steps listed.
Replace the battery with a new one if it is depleted.
You will need the following items:
Replacing the battery
1
2
3
4