Page 4 of 207
Exterior Overview
1.Exterior lights ( Lights on page 55)
2. Door handles ( Using Exterior Door Handles on page 11)
3. Sunroof (optional) ( Sunroof on page 23)
4. Charge port ( Charging Instructions on page 149)
5. Autopilot cameras ( About Autopilot on page 82)
6. Exterior mirrors ( Mirrors on page 50)
7. Hood/Front trunk ( Front Trunk on page 18)
8. Radar sensor (hidden from view in the above image) ( About Autopilot on page 82)
9. Wheels and tires ( Wheels and Tires on page 180)
10. Rear view camera ( Rear View Camera on page 80 and About Autopilot on page 82)
11. Rear trunk/liftgate ( Rear Trunk on page 15)
12. Ultrasonic sensors ( Park Assist on page 71 and About Autopilot on page 82)
Exterior Overview
Overview3
Page 69 of 207

Note: If regenerative braking is aggressively
slowing Model S (such as when your foot is
completely off the accelerator pedal at
highway speeds), the brake lights turn on to
alert others that you are slowing down.Warning: In snowy or icy conditions
Model S may experience traction loss
during regenerative braking, particularly
when in the Standard setting and/or not
using winter tires. Tesla recommends
using the Low setting (see To Set the
Regenerative Braking Level on page 68)
in snowy or icy conditions to help
maintain vehicle stability.
The Energy app displays real-time feedback
on the amount of energy being gained by
regenerative braking. You can also display the
power meter on either side of the instrument
panel by choosing Energy using the scroll
button on the steering wheel (see Steering
Wheel on page 47).
The amount of energy fed back to the Battery using regenerative braking can depend on thecurrent state of the Battery and the charge
level setting that you are using. For example,
regenerative braking may be limited if the Battery is already fully charged or if the
ambient temperature is too cold.
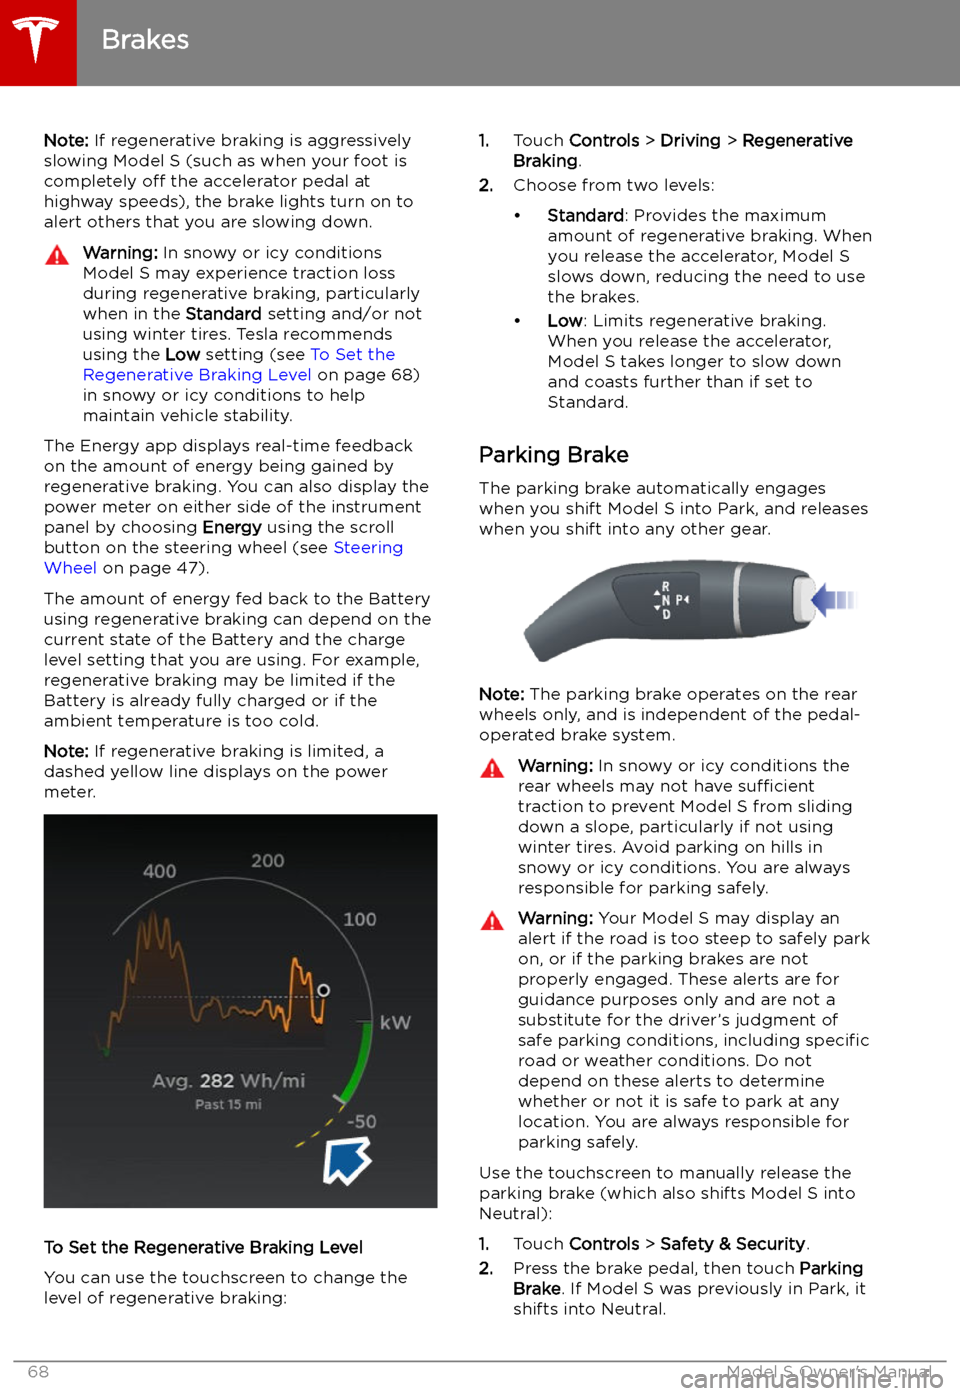
Note: If regenerative braking is limited, a
dashed yellow line displays on the power
meter.
To Set the Regenerative Braking Level
You can use the touchscreen to change the
level of regenerative braking:
1. Touch Controls > Driving > Regenerative
Braking .
2. Choose from two levels:
Page 158 of 207
Tire Care and Maintenance
Maintaining Tire Pressures
Keep tires in
Page 159 of 207
Checking and Adjusting Tire PressuresFollow these steps when tires are cold andModel S has been stationary for over three
hours:
1. Refer to the Tire and Loading Information
label located on the driver
Page 160 of 207
Punctured Tires
A puncture eventually causes the tire to lose pressure, which is why it is important to check
tire pressures frequently. Permanently repair
or replace punctured or damaged tires as
soon as possible.
Your tubeless tires may not leak when
penetrated, provided the object remains in the tire. If, however, you feel a sudden vibration or
ride disturbance while driving, or you suspect a tire is damaged, immediately reduce yourspeed. Drive slowly, while avoiding heavy
braking or sharp steering and, when safe to do so, stop the vehicle. Arrange to have Model S
transported to a Tesla Service Center, or to a nearby tire repair center.
Note: In some cases, you can temporarily
repair small tire punctures (under 6 mm) using
an optional tire repair kit available from Tesla.
This allows you to slowly drive Model S to Tesla or to a nearby tire repair facility.Warning: Do not drive with a punctured
tire, even if the puncture has not caused the tire to de
Page 161 of 207
Warning: Road holding is seriously
impaired if the tires are incorrectly
installed on the wheels.
Tire Pressure Monitoring
Each tire should be checked monthly when
cold and in
Page 163 of 207
Driving in Low Temperatures
Tire performance is reduced in low ambient
temperatures, resulting in reduced grip and an
increased susceptibility to damage from
impacts. Performance tires can temporarily
harden when cold, causing you to hear rotational noise for the first few kilometers
until the tires warm up.
Using Tire Chains Tesla has tested and approved Maggie Group
Trak Sport P217 tire chains to increase traction
in snowy conditions. These chains should only
be installed on rear 19" tires. Do not use chains on 21" tires or on front tires. The approved tire
chains can be purchased from Tesla.
When installing tire chains, follow the instructions and warnings provided by the tire
chain manufacturer. Mount them evenly and as
tight as possible.
When using tire chains:
Page 181 of 207
Wheels and Tires
Wheel Specifications (Factory)
Wheel TypeLocationSizeOffset
19"
Front8.0J x 191.575"
40 mmRear8.0J x 191.575"
40 mm21" - Silver (standard)Front8.5J x 211.575"
40 mm21" - Grey (standard)Rear8.5J x 211.575"
40 mm21" - Silver and Grey (optional) Performance
Plus vehiclesRear9.0J x 211.575"
40 mmLug Nut Torque129 lb. ft (175 Nm)Lug Nut Socket Size21 mmNote: For instructions on how to jack/lift Model S, see Jacking and Lifting on page 170.
Wheels and Tires
180Model S Owner