2019 Ram 2500 def
[x] Cancel search: defPage 90 of 696

88 GETTING TO KNOW YOUR VEHICLE
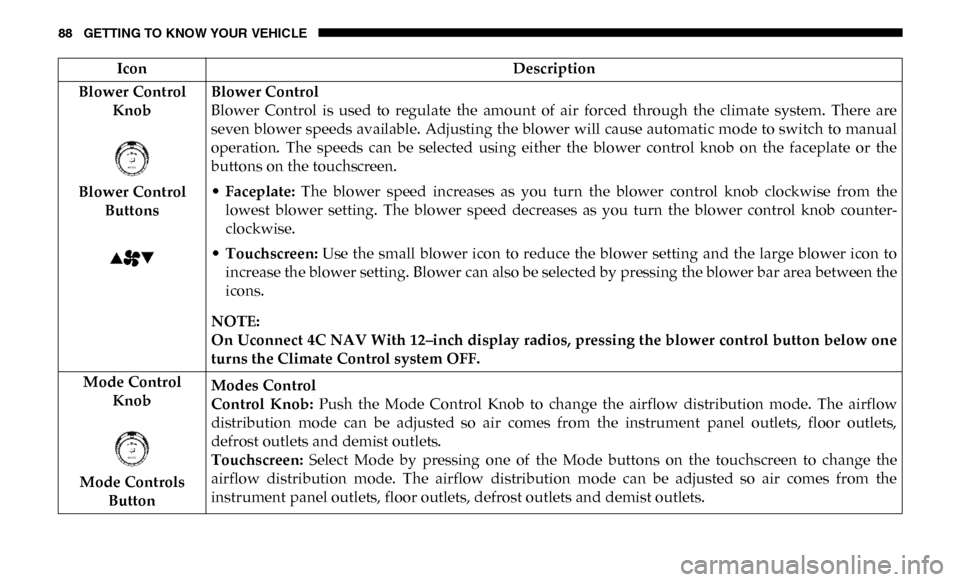
Blower Control Knob
Blower Control Buttons Blower Control
Blower Control is used to regulate the amount of air forced through the climate system. There are
seven blower speeds available. Adjusting the blower will cause automatic mode to switch to manual
operation. The speeds can be selected using either the blower control knob on the faceplate or the
buttons on the touchscreen.
•
Faceplate: The blower speed increases as you turn the blower control knob clockwise from the
lowest blower setting. The blower speed decreases as you turn the blower control knob counter -
clockwise.
• Touchscreen: Use the small blower icon to reduce the blower setting and the large blower icon to
increase the blower setting. Blower can also be selected by pressing the blower bar area between the
icons.
NOTE:
On Uconnect 4C NAV With 12–inch display radios, pressing the blower control button below one
turns the Climate Control system OFF.
Mode Control Knob
Mode Controls Button Modes Control
Control Knob:
Push the Mode Control Knob to change the airflow distribution mode. The airflow
distribution mode can be adjusted so air comes from the instrument panel outlets, floor outlets,
defrost outlets and demist outlets.
Touchscreen: Select Mode by pressing one of the Mode buttons on the touchscreen to change the
airflow distribution mode. The airflow distribution mode can be adjusted so air comes from the
instrument panel outlets, floor outlets, defrost outlets and demist outlets.
Icon
Description
Page 91 of 696

GETTING TO KNOW YOUR VEHICLE 89
Panel Mode Panel ModeAir comes from the outlets in the instrument panel. Each of these outlets can be individually adjusted
to direct the flow of air. The air vanes of the center outlets and outboard outlets can be moved up and
down or side to side to regulate airflow direction. There is a shut off wheel located below the air
vanes to shut off or adjust the amount of airflow from these outlets.
Bi-Level Mode Bi-Level Mode Air comes from the instrument panel outlets and floor outlets. A slight amount of air is directed
through the defrost and side window demister outlets.
NOTE:
Bi-Level mode is designed under comfort conditions to provide cooler air out of the panel outlets and
warmer air from the floor outlets.
Floor Mode Floor Mode Air comes from the floor outlets. A slight amount of air is directed through the defrost and side
window demister outlets.
Mix Mode Mix Mode
Air is directed through the floor, defrost, and side window demister outlets. This setting works best in
cold or snowy conditions that require extra heat to the windshield. This setting is good for
maintaining comfort while reducing moisture on the windshield.
Climate Control OFF Button
This button turns the Climate Control System off.
Icon
Description
2
Page 92 of 696

90 GETTING TO KNOW YOUR VEHICLE
Climate Control Functions
A/C (Air Conditioning)
The Air Conditioning (A/C) button allows the operator to
manually activate or deactivate the air conditioning system.
When the air conditioning system is turned on, cool dehu-
midified air will flow through the outlets into the cabin. For
improved fuel economy, press the A/C button to turn off the
air conditioning and manually adjust the blower and airflow
mode settings. Also, make sure to select only Panel, Bi-Level,
or Floor modes.
NOTE:
• For Manual Climate Controls, if the system is in Mix, Flooror Defrost Mode, the A/C can be turned off, but the A/C
system shall remain active to prevent fogging of the
windows.
• If fog or mist appears on the windshield or side glass, select Defrost mode, and increase blower speed if needed.
• If your air conditioning performance seems lower than expected, check the front of the A/C condenser (located in
front of the radiator), for an accumulation of dirt or insects.
Clean with a gentle water spray from the front of the radi -
ator and through the condenser. MAX A/C
MAX A/C sets the control for maximum cooling perfor
-
mance.
Press and release to toggle between MAX A/C and the prior
settings. The button illuminates when MAX A/C is on.
In MAX A/C, the blower level and mode position can be
adjusted to desired user settings. Pressing other settings will
cause the MAX A/C operation to switch to the selected
setting and MAX A/C to exit.
Recirculation
In cold weather, use of Recirculation mode may lead to
excessive window fogging. The Recirculation feature may be
unavailable (button on the touchscreen greyed out) if condi -
tions exist that could create fogging on the inside of the
windshield.
On systems with Manual Climate Controls, if equipped, the
Recirculation mode is not allowed in Defrost mode to
improve window clearing operation. Recirculation is
disabled automatically if this mode is selected. Attempting
to use Recirculation while in this mode causes the LED in the
control button to blink and then turns off.
Page 94 of 696

92 GETTING TO KNOW YOUR VEHICLE
Summer Operation
The engine cooling system must be protected with a
high-quality antifreeze coolant to provide proper corrosion
protection and to protect against engine overheating. OAT
coolant (conforming to MS.90032) is recommended.
Winter Operation
To ensure the best possible heater and defroster perfor-
mance, make sure the engine cooling system is functioning
properly and the proper amount, type, and concentration of
coolant is used. Use of the Air Recirculation mode during
Winter months is not recommended, because it may cause
window fogging.
Vacation/Storage
Before you store your vehicle, or keep it out of service (i.e.,
vacation) for two weeks or more, run the air conditioning
system at idle for about five minutes, in fresh air with the
blower setting on high. This will ensure adequate system
lubrication to minimize the possibility of compressor
damage when the system is started again. Window Fogging
Vehicle windows tend to fog on the inside in mild, rainy,
and/or humid weather. To clear the windows, select Defrost
or Mix mode and increase the front blower speed. Do not use
the Recirculation mode without A/C for long periods, as
fogging may occur.
CAUTION!
Failure to follow these cautions can cause damage to the
heating elements:
• Use care when washing the inside of the rear window. Do not use abrasive window cleaners on the interior
surface of the window. Use a soft cloth and a mild
washing solution, wiping parallel to the heating
elements. Labels can be peeled off after soaking with
warm water.
• Do not use scrapers, sharp instruments, or abrasive window cleaners on the interior surface of the window.
• Keep all objects a safe distance from the window.
Page 135 of 696

GETTING TO KNOW YOUR VEHICLE 133
Activation
The Dynamic Centerline feature can be activated through the
Uconnect settings by pressing the Cargo Camera soft button,
followed by the “Dynamic Centerline” soft button on the
touchscreen.
If the Dynamic Centerline feature is turned on, the overlay
will display anytime the Cargo Camera image is displayed.
Adjusting Centerline
Follow the steps below to manually adjust the centerline:
1. Press the “Adjust Centerline” soft button located in thebottom right corner of the Cargo Camera display.
2. Use the arrows on the bottom left corner of the Cargo Camera display to adjust the centerline horizontally or
vertically.
3. Once the desired position is achieved, press the “Accept” button to set the centerline to the newly specified position.
Deactivation
The Dynamic Centerline feature will automatically be deac
-
tivated whenever the Cargo Camera display is deactivated.
It can also be manually deactivated through the Uconnect
settings.
For further information, refer to “Surround View Camera” in
“Starting And Operating.”
Turning Cargo Camera On Or Off — With Uconnect 4C/
4C NAV
1. Press the “Controls” button located on the bottom of the Uconnect display.
2. Press the “Cargo Camera” button to turn the Cargo Camera system on.
NOTE:
Once initiated by the "Cargo Camera" button, the Cargo
Camera image will be displayed until the vehicle speed
remains below 8 mph (13 km/h) and the 10 second timer
runs out. The image may be deactivated by pressing the "X"
soft button, turning the ignition OFF, placing the gear
selector in PARK, or pressing the image defeat [X] button. On
deactivation, the previous selected screen will appear.
2
Page 174 of 696

172 GETTING TO KNOW YOUR INSTRUMENT PANEL
Stored Messages
Push and release the up or down arrow button until the
Messages Menu item is highlighted. This feature shows the
number of stored warning messages. Push and release the
right or left arrow buttons to cycle through stored messages.
Screen Setup Menu Item
Push and release the up or down arrow button until the
Screen Setup menu item is highlighted in the instrument
cluster display. Push and release the right arrow button to
enter the Screen Setup submenu. The Screen Setup feature
allows you to change what information is displayed in the
instrument cluster as well as the location that information is
displayed.
Current Gear
• Off (Default Setting)
• On
Odometer
• Unit Without Decimal (Default Setting)
• Unit With Decimal Favorite Menu
• Speedometer
• Vehicle Info
• Driver Assist (Show/Hide) — If Equipped
• Fuel Economy (Show/Hide)
• Trip Info (Show/Hide)
• Trailer Tow (Show/Hide)
• Audio (Show/Hide)
• Messages
• Screen Setup
• Commercial Settings — If Equipped
NOTE:
Menus with (Show/Hide) can push the
OK button to choose
whether to show or hide this menu in the instrument cluster
display.
Page 175 of 696

GETTING TO KNOW YOUR INSTRUMENT PANEL 173
Upper Left
• None
• Compass (Default Setting) — If Equipped
• Outside Temp — If Equipped
• Time
• Range To Empty
• Average MPG
• Current MPG
• Trip A Distance
• Trip B Distance
• Trailer Trip — If Equipped
• Trailer Brake — If Equipped
• Oil Pressure — If Equipped
• Coolant Temperature — If Equipped
• Oil Temperature — If Equipped
• Battery Voltage — If Equipped
• Transmission Temperature — If Equipped
• Oil Life — If Equipped• Exhaust Brake — If Equipped
• Turbo Boost — If Equipped
• Fuel Filter Life — If Equipped
Upper Center
• None
• Compass
• Outside Temp
• Time
• Range To Empty
• Average MPG
• Current MPG
• Trip A Distance
• Trip B Distance
• Trailer Trip
• Audio
• Speedometer (Default Setting)
• Menu Title
3
Page 176 of 696

174 GETTING TO KNOW YOUR INSTRUMENT PANEL
Upper Right
• None
• Compass — If Equipped
• Outside Temp (Default Setting) — If Equipped
• Time
• Range To Empty
• Average MPG
• Current MPG
• Trip A Distance
• Trip B Distance
• Trailer Trip — If Equipped
• Trailer Brake — If Equipped
• Oil Pressure — If Equipped
• Coolant Temperature — If Equipped
• Oil Temperature — If Equipped
• Battery Voltage — If Equipped• Transmission Temperature — If Equipped
• Oil Life — If Equipped
• Exhaust Brake — If Equipped
• Turbo Boost — If Equipped
• Fuel Filter Life — If Equipped
Left Side — If Equipped
• None
• Range
• Average MPG
• Menu Icon (Default Setting)
• Coolant Temperature
• Oil Temperature
• Transmission Temperature
• Oil Life
• Fuel Filter Life — If Equipped