2019 Peugeot 508 battery
[x] Cancel search: batteryPage 50 of 320

48
When selective unlocking is activated, the
electronic key must be close to the rear of
the vehicle.
The tailgate is not designed to hold a
bicycle carrier.
Closing the tailgate
F Lower the tailgate using the interior grips.
F R elease the grips and press down on the
outside of the tailgate to close it.
If the tailgate is not properly closed: In the event of a fault or difficulties felt in
manoeuvring the tailgate when opening
or closing it, have it quickly checked by a
PEUGEOT dealer or a qualified workshop
to stop this issue getting worse and so
as to not cause the tailgate to drop, and
serious injuries.
Back-up release
To manually unlock the boot in the event of a
battery or central locking failure.
Unlocking
F Fold the rear seats to gain access to the
lock from inside the boot.
F
I
nsert a small screwdriver into hole A of the
lock to unlock the tailgate.
F
M
ove the latch to the left.
Locking after closing
If the fault persists after closing again, the boot
will remain locked.In the event of a fault with the central
locking system, it is essential to
disconnect the battery to lock the boot and
so ensure complete locking of the vehicle.
F
Ra
ise the tailgate.
-
w
ith the engine running or
the vehicle moving (speed
below 6
mph (10
km/h)), this
warning lamp comes on and an
alert message is displayed in
the instrument panel for a few
seconds.
-
w
ith the vehicle moving (speed
above 6 mph (10
km/h)) , this
warning lamp comes on and an
alert message is displayed in
the instrument panel for a few
seconds, accompanied by an
audible signal.
Hands-free tailgate
The motorised tailgate must only be operated
with the vehicle stationary.
Check that there is enough space to
allow for the movement of the motorised
tailgate.
Access
Page 53 of 320

51
Manual operation
The tailgate can be manoeuvred by hand, even
with motorised operation activated.
The tailgate must be stationary.
When opening and closing a motorised tailgate
manually, there is no assistance from gas
struts. Resistance to opening and closing is
therefore entirely normal.Repeatedly opening and closing the
motorised tailgate can cause overheating
of its electric motor, after which opening
and closing will not be possible.
Allow at least 10 minutes for the electric
motor to cool down before operating the
tailgate again.
If you are unable to wait, operate it
manually.
Reinitialising the motorised
tailgate
This operation is necessary where there is no
movement – after detection of an obstacle,
connecting or recharging the battery, etc.
F
O
pen the tailgate manually, if necessary.
F
F
ully close the tailgate manually. If the problem persists, contact a PEUGEOT
dealer or qualified workshop.
Precautions in use
To avoid unwanted opening of the tailgate
when using the towing device:
-
d
eactivate the hands-free function in
advance in your vehicle's configuration
menu,
-
o
r remove the electronic key from the
recognition zone, with the tailgate
closed.
For more information on the To w i n g
device with retractable towball , refer to
the corresponding section.
In wintry conditions
In the event of an accumulation of snow
on the tailgate, clear the snow before
requesting motorised opening of the
tailgate.
The formation of ice can block the tailgate
and prevent its opening: wait until the ice
melts with the heating of the passenger
compartment.
When washing
When washing the vehicle in an automatic
car wash, do not forget to lock your vehicle
to avoid the risk of unexpected opening.
Recommendations related
to the hands-free function
(Hands-Free Tailgate Access)
If several kicking movements to operate the
tailgate have no effect, wait a few seconds
before trying again.
If it does not work, check that the electronic key
is not exposed to a source of electromagnetic
interference (smartphone, etc.).
The function may be deactivated or affected if
there is rain or snow.
The function may not work correctly with a
prosthetic leg.
In some circumstances, the tailgate may open
or close by itself, particularly if:
-
y
ou hitch or unhitch a trailer,
-
y
ou fit or remove a bicycle carrier,
-
y
ou load or unload bicycles to/from a bicycle
c a r r i e r,
- you place or lift something behind the vehicle,- an animal approaches the rear bumper,
- y ou are washing your vehicle,
-
y
our vehicle is being serviced,
-
y
ou are accessing the spare wheel
(depending on version).
To avoid such operating problems, keep the
electronic key away from the recognition zone
or deactivate the hands-free function.
2
Access
Page 55 of 320

53
Reinitialising the electric
windows
Following reconnection of the battery, the
safety anti-pinch function must be reinitialised.
The safety anti-pinch function is not active
during these operations.
For each window:
-
b
ring the window down completely,
then bring it back up. It will go up by a
few centimetres each time. Repeat the
operation until the window is fully closed,
-
c
ontinue to pull the switch for at least one
second after reaching the window closed
position. In the event of contact (pinching) during
operation of the windows, you must
reverse the movement of the window.
To
do this, press the switch concerned.
When operating the passenger electric
window switches, the driver must ensure
that nothing is preventing correct closing
of the windows.
The driver must ensure that the
passengers use the electric windows
c o r r e c t l y.
Be particularly aware of children when
operating the windows.
Be aware of passengers or other persons
present when closing the windows using
the electronic key or the "Keyless Entry
and Starting" system.
Before any change of or operation on the
battery, slightly lower the four windows.
Panoramic sunroof
The panoramic sunroof consists of a movable
glass that slides over the roof and a blind that
can be opened independently. Opening the roof
automatically opens the blind.
F
T
o operate the panoramic sunroof and its
blind, use the buttons in the roof console.
A. Sunroof blind control
B. Panoramic sunroof control
The sunroof or blind can be operated when the
ignition is turned on (if the battery is charged
enough), with the engine running, in STOP
mode of Stop & Start, and up to 45
seconds
after turning off the ignition of after locking the
vehicle.
2
Access
Page 57 of 320

55
You can close the sunroof and windows,
then also the blind, by pressing and
holding the door locking control. The
movement stops when you release the
locking control.
Closure of the blind is limited by the
position of the sunroof: the blind cannot go
further than the front of the movable glass.
During simultaneous movements of the
sunroof and blind, the blind automatically
stops or resumes movement depending on
the position of the roof.
Reinitialisation
Following reconnection of the battery or in
the event of a fault or jerky movement of the
sunroof or blind, the sunroof and blind must be
reinitialised:
F
C
heck that nothing is inter fering with the
sunroof or blind and that the seals are
clean.
F
W
ithin 5 seconds after the completion of
the sunroof movement followed by the
blind movement resulting in their complete
closing, press and hold the front part
of sunroof button B again for at least
5
seconds.
2
Access
Page 60 of 320

58
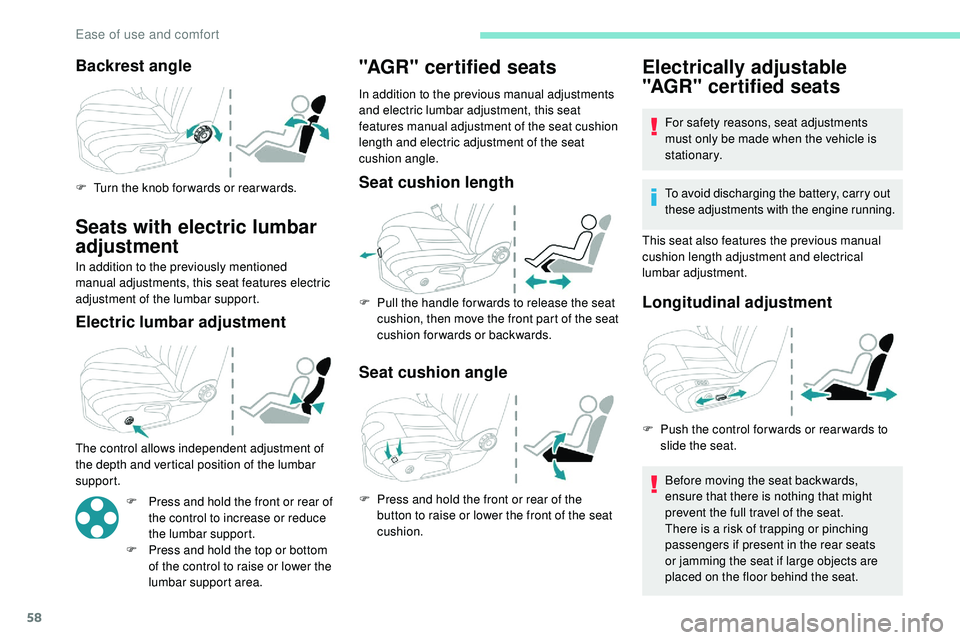
Backrest angle
F Turn the knob for wards or rear wards.
Seats with electric lumbar
adjustment
In addition to the previously mentioned
manual adjustments, this seat features electric
adjustment of the lumbar support.
Electric lumbar adjustment
The control allows independent adjustment of
the depth and vertical position of the lumbar
support.F
P
ress and hold the front or rear of
the control to increase or reduce
the lumbar support.
F
P
ress and hold the top or bottom
of the control to raise or lower the
lumbar support area.
"AGR" certified seats
In addition to the previous manual adjustments
and electric lumbar adjustment, this seat
features manual adjustment of the seat cushion
length and electric adjustment of the seat
cushion angle.
Seat cushion length
F Pull the handle for wards to release the seat cushion, then move the front part of the seat
cushion forwards or backwards.
Seat cushion angle
F Press and hold the front or rear of the button to raise or lower the front of the seat
cushion.
Electrically adjustable
"AGR" certified seats
For safety reasons, seat adjustments
must only be made when the vehicle is
stationary.
To avoid discharging the battery, carry out
these adjustments with the engine running.
This seat also features the previous manual
cushion length adjustment and electrical
lumbar adjustment.
Longitudinal adjustment
Before moving the seat backwards,
ensure that there is nothing that might
prevent the full travel of the seat.
There is a risk of trapping or pinching
passengers if present in the rear seats
or jamming the seat if large objects are
placed on the floor behind the seat.
F
P
ush the control for wards or rear wards to
slide the seat.
Ease of use and comfort
Page 72 of 320

70
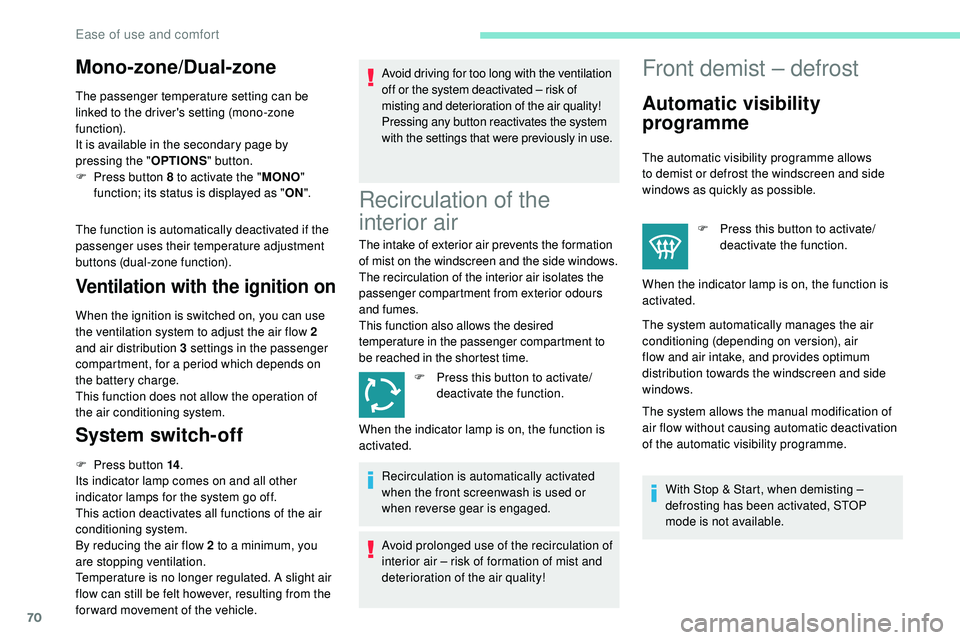
Mono-zone/Dual-zone
The passenger temperature setting can be
linked to the driver's setting (mono-zone
function).
It is available in the secondary page by
pressing the "OPTIONS" button.
F
P
ress button 8 to activate the " MONO"
function; its status is displayed as " ON".
The function is automatically deactivated if the
passenger uses their temperature adjustment
buttons (dual-zone function).
Ventilation with the ignition on
When the ignition is switched on, you can use
the ventilation system to adjust the air flow 2
and air distribution 3 settings in the passenger
compartment, for a period which depends on
the battery charge.
This function does not allow the operation of
the air conditioning system.
System switch-off
F Press button 14 .
Its indicator lamp comes on and all other
indicator lamps for the system go off.
This action deactivates all functions of the air
conditioning system.
By reducing the air flow 2 to a minimum, you
are stopping ventilation.
Temperature is no longer regulated. A slight air
flow can still be felt however, resulting from the
for ward movement of the vehicle. Avoid driving for too long with the ventilation
off or the system deactivated – risk of
misting and deterioration of the air quality!
Pressing any button reactivates the system
with the settings that were previously in use.
Recirculation of the
interior air
The intake of exterior air prevents the formation
of mist on the windscreen and the side windows.
The recirculation of the interior air isolates the
passenger compartment from exterior odours
and fumes.
This function also allows the desired
temperature in the passenger compartment to
be reached in the shortest time.
F
P
ress this button to activate/
deactivate the function.
Recirculation is automatically activated
when the front screenwash is used or
when reverse gear is engaged.
Avoid prolonged use of the recirculation of
interior air – risk of formation of mist and
deterioration of the air quality!
Front demist – defrost
Automatic visibility
programme
The automatic visibility programme allows
to demist or defrost the windscreen and side
windows as quickly as possible. F
P
ress this button to activate/
deactivate the function.
When the indicator lamp is on, the function is
activated.
The system automatically manages the air
conditioning (depending on version), air
flow and air intake, and provides optimum
distribution towards the windscreen and side
windows.
The system allows the manual modification of
air flow without causing automatic deactivation
of the automatic visibility programme.
With Stop & Start, when demisting –
defrosting has been activated, STOP
mode is not available.
When the indicator lamp is on, the function is
activated.
Ease of use and comfort
Page 75 of 320

73
OK
00 00
00 00
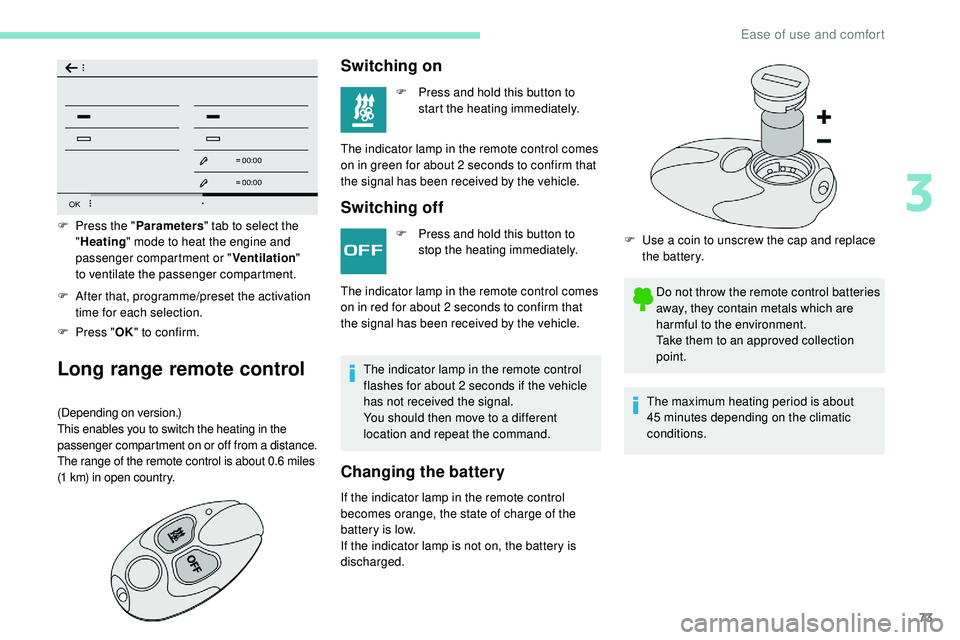
F After that, programme/preset the activation time for each selection.
F
P
ress " OK" to confirm.
Long range remote control
(Depending on version.)
This enables you to switch the heating in the
passenger compartment on or off from a distance.
The range of the remote control is about 0.6 miles
(1
km) in open country.
F Press the " Parameters" tab to select the
" Heating " mode to heat the engine and
passenger compartment or " Ventilation"
to
ventilate the passenger compartment.
Switching on
F Press and hold this button to start the heating immediately.
The indicator lamp in the remote control comes
on in green for about 2
seconds to confirm that
the signal has been received by the vehicle.
Switching off
F Press and hold this button to stop the heating immediately.
The indicator lamp in the remote control
flashes for about 2 seconds if the vehicle
has not received the signal.
You should then move to a different
location and repeat the command.
Changing the battery
The indicator lamp in the remote control comes
on in red for about 2 seconds to confirm that
the signal has been received by the vehicle.
If the indicator lamp in the remote control
becomes orange, the state of charge of the
battery is low.
If the indicator lamp is not on, the battery is
discharged. F
U
se a coin to unscrew the cap and replace
the battery.
Do not throw the remote control batteries
away, they contain metals which are
harmful to the environment.
Take them to an approved collection
point.
The maximum heating period is about
45
minutes depending on the climatic
conditions.
3
Ease of use and comfort
Page 76 of 320

74
The additional heating system is powered
by the fuel in the vehicle's fuel tank.
Before use, ensure that there is enough
fuel in the tank.
If the tank level is on reser ve, the system
cannot be used.
The ventilation is activated provided that
the battery is sufficiently charged.
The heating is activated provided that:
-
t
he battery is sufficiently charged,
-
t
he fuel level is adequate,
-
t
he engine has been started since the
previous heating cycle.
Always switch off the additional heating
while refuelling – Risk of fire or explosion! To avoid the risks of poisoning or
asphyxia, the programmable heating must
not be used, even for short periods, in a
closed environment such as a garage or
workshop which is not equipped with an
exhaust gas extraction system.
Do not park the vehicle on a flammable
sur face (dry grass, dead leaves, paper,
etc.) – Risk of fire!
Glazed sur faces such as the rear screen
or windscreen can become very hot in
places.
Never put objects on these sur faces;
never touch these sur faces – Risk of
burns!Front fittings
1.
Sun visor
2. Ticket holder
3. Illuminated glove box
4. Door pockets
Ease of use and comfort