2019 NISSAN TITAN ECO mode
[x] Cancel search: ECO modePage 106 of 682
If an adult occupant is in the seat but the
front passenger air bag status light is illu-
minated (indicating that the air bag is OFF),
it could be that the person is a small adult,
or is not sitting on the seat properly or not
using the seat belt properly.
If a child restraint must be used in the front
seat, the front passenger air bag status
light may or may not be illuminated, de-
pending on the size of the child and the
type of child restraint being used. Always
make sure that the child restraint is in-
stalled properly, the seat belt is used prop-
erly and the occupant is positioned prop-
erly.
If necessary, a NISSAN dealer can check
system operation by using a special tool.
Until you have confirmed with a dealer that
your air bag is working properly, reposition
the occupant or child restraint in a rear
seat (if so equipped). Do not use the front
seat or transport a child in the vehicle
(Single Cab and King Cab® Rear Seat Delete
models only).
The NISSAN Advanced Air Bag System and
front passenger air bag status light will
take a few seconds to register a change in
the front passenger seat status. For ex-
ample, if a large adult who is sitting in thefront passenger seat exits the vehicle, the
front passenger air bag status light will go
from OFF to ON for a few seconds and then
to OFF. This is normal system operation
and does not indicate a malfunction.
If a malfunction occurs in the front passen-
ger air bag system, the supplemental air
bag warning light
, located in the me-
ter and gauges area of the instrument
panel, will blink. Have the system checked. It
is recommended that you visit a NISSAN
dealer for this service.
Normal operation
In order for the occupant classification
sensor system to classif y the front passen-
ger based on weight, please follow the pre-
cautions and steps outlined below:
Precautions
∙ Make sure that there are no objects weighing over 2.2 lbs. (1 kg) hanging on
the seat or placed in the seatback
pocket.
∙ Make sure that a child restraint or other object is not pressing against the rear
of the seatback.
∙ Make sure that a rear passenger is not pushing or pulling on the back of the
front passenger seat. ∙ Make sure that the front passenger
seat or seatback is not forced back
against an object on the seat or floor
behind it.
∙ Make sure that there is no object placed under the front passenger seat.
Steps 1. Adjust the seat as outlined in the “Seats” section of this manual. Sit upright, lean-
ing against the seatback, and centered
on the seat cushion with your feet com-
fortably extended to the floor.
2. Make sure there are no objects on your lap.
3. Fasten the seat belt as outlined in the “Seat belts” section of this manual.
4. Remain in this position for 30 seconds allowing the system to classif y the
front passenger before the vehicle is
put into motion.
5. Ensure proper classification by check- ing the front passenger air bag status
light.
Safety—Seats, seat belts and supplemental restraint system1-65
Page 135 of 682
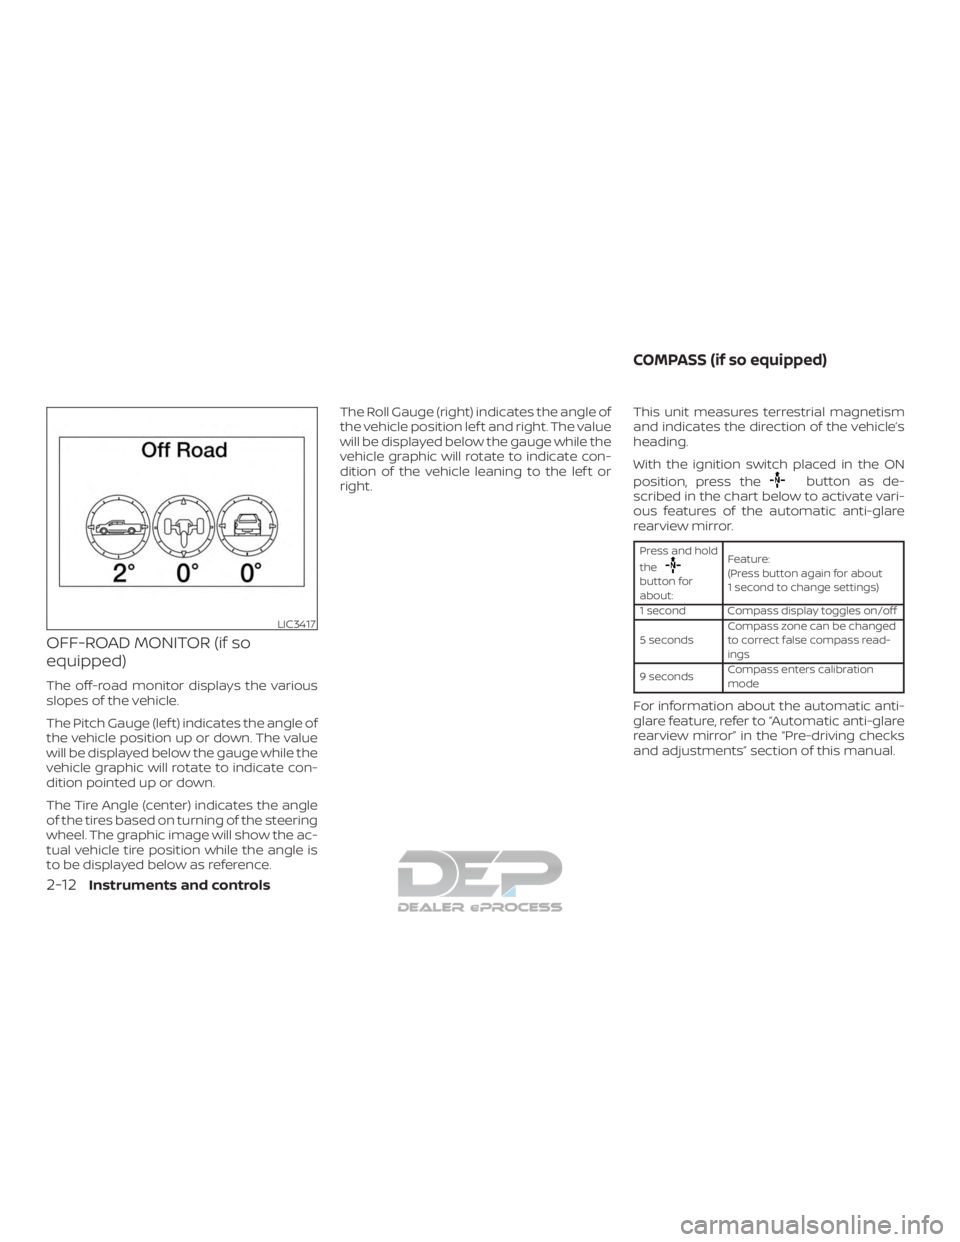
OFF-ROAD MONITOR (if so
equipped)
The off-road monitor displays the various
slopes of the vehicle.
The Pitch Gauge (lef t) indicates the angle of
the vehicle position up or down. The value
will be displayed below the gauge while the
vehicle graphic will rotate to indicate con-
dition pointed up or down.
The Tire Angle (center) indicates the angle
of the tires based on turning of the steering
wheel. The graphic image will show the ac-
tual vehicle tire position while the angle is
to be displayed below as reference.The Roll Gauge (right) indicates the angle of
the vehicle position lef t and right. The value
will be displayed below the gauge while the
vehicle graphic will rotate to indicate con-
dition of the vehicle leaning to the lef t or
right.
This unit measures terrestrial magnetism
and indicates the direction of the vehicle’s
heading.
With the ignition switch placed in the ON
position, press the
button as de-
scribed in the chart below to activate vari-
ous features of the automatic anti-glare
rearview mirror.
Press and hold
the
button for
about: Feature:
(Press button again for about
1 second to change settings)
1 second Compass display toggles on/off
5 seconds Compass zone can be changed
to correct false compass read-
ings
9 seconds Compass enters calibration
mode
For information about the automatic anti-
glare feature, refer to “Automatic anti-glare
rearview mirror” in the “Pre-driving checks
and adjustments” section of this manual.
LIC3417
COMPASS (if so equipped)
2-12Instruments and controls
Page 148 of 682

The MIL may stop blinking and come on
steady. Have the vehicle inspected. It is rec-
ommended that you visit a NISSAN dealer
for this service. You do not need to have
your vehicle towed to the dealer.
CAUTION
Continued vehicle operation without
having the emission control system
checked and repaired as necessary
could lead to poor driveability, reduced
fuel economy, and possible damage to
the emission control system.
Security indicator light
This light blinks whenever the ignition
switch is placed in the LOCK, OFF or ACC
position. This function indicates the secu-
rity system equipped on the vehicle is op-
erational.
For additional information, refer to “Security
systems” in this section.
Side light and headlightindicator light (green)
The side light and headlight indicator light
illuminates when the side light or headlight position is selected. For additional informa-
tion, refer to “Headlight switch” in this sec-
tion.
Slip indicator light
This indicator will blink when the Vehicle
Dynamic Control (VDC) system is operat-
ing, thus alerting that the vehicle is nearing
its traction limits. The road surface may be
slippery.
TOW mode ON indicator
light
This light comes on when the tow mode
function is on.
Turn signal/hazard indicator lights
The appropriate light flashes when the turn
signal switch is activated.
Both lights flash when the hazard switch is
turned on.
Vehicle Dynamic Control(VDC) OFF indicator light
This indicator light comes on when the
VDC OFF switch is pushed to off. This indi-
cates the VDC system is not operating. Push the VDC OFF switch again or restart
the engine and the system will operate
normally. For additional information, refer
to “Vehicle Dynamic Control (VDC) system”
in the “Starting and driving” section of this
manual.
The VDC light also comes on when you
place the ignition switch in the ON position.
The light will turn off af ter about 2 seconds
if the system is operational. If the light stays
on or comes on along with the
indi-
cator light while you are driving, have the
VDC system checked. It is recommended
that you visit a NISSAN dealer for this ser-
vice.
While the VDC system is operating, you
might feel a slight vibration or hear the sys-
tem working when starting the vehicle or
accelerating, but this is normal.
AUDIBLE REMINDERS
Brake pad wear warning
The disc brake pads have audible wear
warnings. When a disc brake pad requires
replacement, it makes a high pitched
scraping sound when the vehicle is in mo-
tion, whether or not the brake pedal is de-
pressed. Have the brakes checked as soon
as possible if the warning sound is heard.
Instruments and controls2-25
Page 150 of 682

HOW TO USE THE VEHICLE
INFORMATION DISPLAY
The vehicle information display can be
navigated using the ENTER and
but-
tons located on the steering wheel.
1. ENTER — press to select the vehicle in- formation menu items. Additionally, use
the UP/DOWN
function to navi-
gate the menu items
2.
— move LEFT/RIGHT to navigate
through the items in the vehicle infor-
mation display The ENTER button also controls audio
functions. For additional information, refer
to the separate NissanConnect® Owner’s
Manual.
STARTUP DISPLAY
When the vehicle is placed in the ON or ACC
(if so equipped) position, the vehicle infor-
mation display may display the following
screens:
∙ Home
∙ Off Road
∙ Auxiliary Gauges (if so equipped)
∙ DEF Level (if so equipped)
∙ Trip
∙ Fuel Economy
∙ Navigation (if so equipped)
∙ Audio
∙ Driving Aids (if so equipped)
∙ Tire Pressures
∙ Warning Confirmation
∙ Settings Warning Confirmation will only display if
there are any warnings present. For addi-
tional information, refer to “Vehicle infor-
mation display warnings and indicators” in
this section.
To control which items display in the ve-
hicle information display, refer to “Settings”
in this section.
SETTINGS
The setting mode allows you to change the
information displayed in the vehicle infor-
mation display:
∙ Driver Assistance (if so equipped)
∙ Meter Settings
∙ Vehicle Settings
∙ Towing Settings (if so equipped)
∙ Alarm (if so equipped)
∙ Maintenance
∙ Unit
∙ Language
∙ Factory Reset
LIC4099
Instruments and controls2-27
Page 161 of 682

Low Tire Pressure Error — Info
This warning appears when the low tire
pressure warning light in the meter illumi-
nates and low tire pressure is detected.
Press the ENTER button for information
about the low tire pressure. For additional
information, refer to “Low tire pressure
warning light” in this section and “Tire Pres-
sure Monitoring System (TPMS)” in the
“Starting and driving” section of this
manual.
Flat Tire
This warning appears when the low tire
pressure warning light in the meter illumi-
nates and one or more flat tires are de-
tected while driving.
Shipping Mode On Push Storage Fuse
This warning may appear if the extended
storage switch is not pushed in. When this
warning appears, push in the extended
storage switch to turn off the warning. For
additional information, refer to “Extended
storage switch” in this section.
Push brake and start button to drive
This indicator appears when the shif t lever
is in the P (Park) position.This indicator means that the engine will
start by pushing the ignition switch with
the brake pedal depressed. You can start
the engine from any position of the ignition
switch.
Remote Engine Start Mode (if so
equipped)
This warning appears in the vehicle infor-
mation display when the vehicle has been
started using the remote start function. To
start the vehicle, apply the brake and place
the ignition switch in the ON position.
Brightness indicator
This indicator appears when the vehicle
information display screen brightness is
being adjusted.
Low Outside Temperature
This warning appears if the outside tem-
perature is below 37°F (3°C). The tempera-
ture can be changed to display in Celsius or
Fahrenheit. For additional information, re-
fer to “Settings” in this section.
Shif t to Park
This warning illuminates when the ignition
switch is in the ACC or OFF position and the
shif t lever is not in the P (Park) position. Also,a chime sounds when the ignition switch is
in the ACC or OFF position.
If this warning illuminates, move the shif t
lever to the P (Park) position and start the
engine.
Low fuel Pressure: See Owner’s Manual
This warning appears when the fuel pres-
sure is low. Check the fuel level and refuel if
needed. If the warning remains illuminated,
have the system checked. It is recom-
mended that you visit a NISSAN dealer for
this service. For additional information, re-
fer to “Diesel fuel system” in the “Introduc-
tion” of the Titan Diesel Owner’s Manual.
CAUTION
Since the fuel pump is lubricated by the
fuel itself, prolonged driving with low
fuel levels may cause progressive dam-
age to the fuel pump. This may cause
the pump to fail.
Low Washer Fluid
This warning illuminates when the
windshield-washer fluid is at a low level.
Add windshield-washer fluid as necessary.
For additional information, refer to
“Windshield-washer fluid” in the “Do-it-
yourself ” section of this manual.
2-38Instruments and controls
Page 162 of 682

Cruise control indicator
This indicator shows the cruise control sys-
tem status.
For additional information, refer to “Cruise
control” in the “Starting and driving” section
of this manual.
4WD shif t indicators (if so equipped)
These indicators show which 4WD mode is
selected. For additional information, refer
to “Using 4–wheel drive (4WD)” in the “Start-
ing and driving” section of this manual.
FRT & RR tire size difference: See Own-
er’s Manual (if so equipped)
This warning may appear if there is a large
difference between the diameters of the
front and rear wheels. Pull off the road in a
safe area, with the engine idling. Check that
all the tire sizes are the same, that the tire
pressure is correct and that the tires are
not excessively worn. For additional infor-
mation, refer to “Wheels and tires” in the
“Technical and consumer information” of
this manual.
Push Ignition to OFF
Af ter the Push ignition to OFF warning illu-
minates, the warning will illuminate if theignition switch is placed in the ACC position
when the shif t lever is moved to the P (Park)
position.
To turn off the Push warning, place the ig-
nition switch in the ON position and then in
the LOCK position.
Headlight System Error: See Owner’s
Manual (if so equipped)
This warning appears when the LED head-
lights are not functioning properly.
If this warning appears, have your system
checked. It is recommended that you visit a
NISSAN dealer for this service.
Key ID Incorrect
This warning appears when the ignition
switch is placed from the OFF position and
the Intelligent Key is not recognized by the
system. You cannot start the engine with
an unregistered key.
For additional information, refer to “NISSAN
Intelligent Key®” in the “Pre-driving checks
and adjustments” section of this manual.
No Key Detected
This warning appears when the Intelligent
Key is lef t outside the vehicle with the igni-
tion switch in the ON position. Make sure
the Intelligent Key is inside the vehicle.
For additional information, refer to “NISSAN
Intelligent Key®” in the “Pre-driving checks
and adjustments” section of this manual.
Key System Error: See Owner’s Manual
Af ter the ignition switch is pushed to the
ON position, this light comes on for a period
of time and then turns off.
The Key System Error message warns of a
malfunction with the Intelligent Key sys-
tem. If the light comes on while the engine
is stopped, it may be impossible to start
the engine.
If the light comes on while the engine is
running, you can drive the vehicle. However,
in these cases, have the system checked. It
is recommended that you visit a NISSAN
dealer for this service.
Key Battery Low
This indicator illuminates when the Intelli-
gent Key battery is running out of power.
If this indicator illuminates, replace the bat-
tery with a new one. For additional infor-
mation, refer to “Battery replacement” in
the “Do-it-yourself ” section of this manual.
Instruments and controls2-39
Page 163 of 682
Power will turn off to save the battery
This message appears in the vehicle infor-
mation display af ter a period of time if the
ignition switch is in the ACC or the ON po-
sition and if the vehicle is in P (Park). For
additional information, refer to “Push-
button ignition switch positions” in the
“Starting and driving” section of this
manual.
Power turned off to save the battery
This warning appears af ter the ignition
switch is automatically turned off to save
the battery.
Reminder: Turn OFF Headlights
This warning appears when the headlights
are lef t in the ON position when exiting the
vehicle. Place the headlight switch in the
OFF or AUTO position. For additional infor-
mation, refer to “Headlight switch” in this
section.
4WD Error: See Owner’s Manual (if so
equipped)
This warning appears when the 4-wheel
drive system is not functioning properly
while the engine is running.Battery Voltage Low Charge Battery
This warning appears when the battery is
low and needs to be charged.
Maintenance indicators
When engine oil service is due, one or more
of these icons will appear automatically to
remind you. For additional information, re-
fer to “Engine oil” in the “Do-it-yourself ” sec-
tion of this manual.
These will also appear when the user-set
reminders are met. For additional informa-
tion, refer to “Vehicle information display” in
this section.
Parking Sensor Error: See Owner’s
Manual (if so equipped)
This warning illuminates when there is an
error with the system. For additional infor-
mation, refer to “Front and rear sonar sys-
tem” in the “Starting and driving” section of
this manual.
TPMS Error: See Owner’s Manual
This warning appears when there is an er-
ror with your TPMS. If this warning comes
on, have the system checked. It is recom-
mended that you visit a NISSAN dealer for
this service.4WD MODE SHIFTING (if so equipped)
This message appears when the vehicle is
shif ting into 4WD. For additional informa-
tion, refer to “Using 4–wheel drive (4WD)” in
the “Starting and driving” section of this
manual.
Loose Fuel Cap (if so equipped)
This warning appears when the fuel-filler
cap is not tightened correctly af ter the ve-
hicle has been refueled. For additional in-
formation, refer to “Fuel-filler door” in the
“Pre-driving checks and adjustments” sec-
tion of this manual.
Blind Spot Warning (BSW) and Rear
Cross Traffic Alert (RCTA) indicator (if so
equipped)
This indicator shows when the BSW and
RCTA systems are engaged.
For additional information, refer to “Blind
Spot Warning (BSW)” and “Rear Cross Traffic
Alert (RCTA)” in the “Starting and driving”
section of this manual.
Malfunction: See Owner’s Manual (if so
equipped)
This warning appears when one or more of
the following systems (if so equipped) is
not functioning properly:
2-40Instruments and controls
Page 186 of 682
∙ Use the E-lock system only in anemergency when it is not possible to
free a stuck vehicle even using 4LO.
Never use the E-Lock system on a slip-
pery road surface such as snow or ice
surface. Using the E-Lock system
when driving in these road conditions
may cause unexpected movement of
the vehicle during engine braking, ac-
celerating or turning, which may re-
sult in an accident and serious per-
sonal injury.
∙ Observe the above warnings. Other- wise, loss of normal steering control
may result. This may result in an acci-
dent and serious personal injury.
CAUTION
∙ Af ter using the E-Lock system, or dur-ing normal driving, turn the switch
OFF to prevent possible damage to
drivetrain components from ex-
tended use.
∙ When the E-Lock system is in opera- tion, turning the vehicle becomes dif-
ficult. This can be dangerous, espe-
cially at high speeds. Doing so could
damage drivetrain components. ∙ Do not operate the E-Lock system
when the vehicle is turning or when
one side wheel is rotating. Otherwise,
the drivetrain components could be
damaged.
∙ The E-Lock system operates only when the engine is running.
∙ In 4H mode, the E-Lock system does not operate when the E-Lock system
switch is turned to the ON position.
(The E-Lock system indicator light will
flash.)
∙ Avoid quick starts while the E-Lock system is in operation. Otherwise the
drivetrain components could be
damaged.
∙ Observe the above cautions. Other- wise, loss of normal steering may
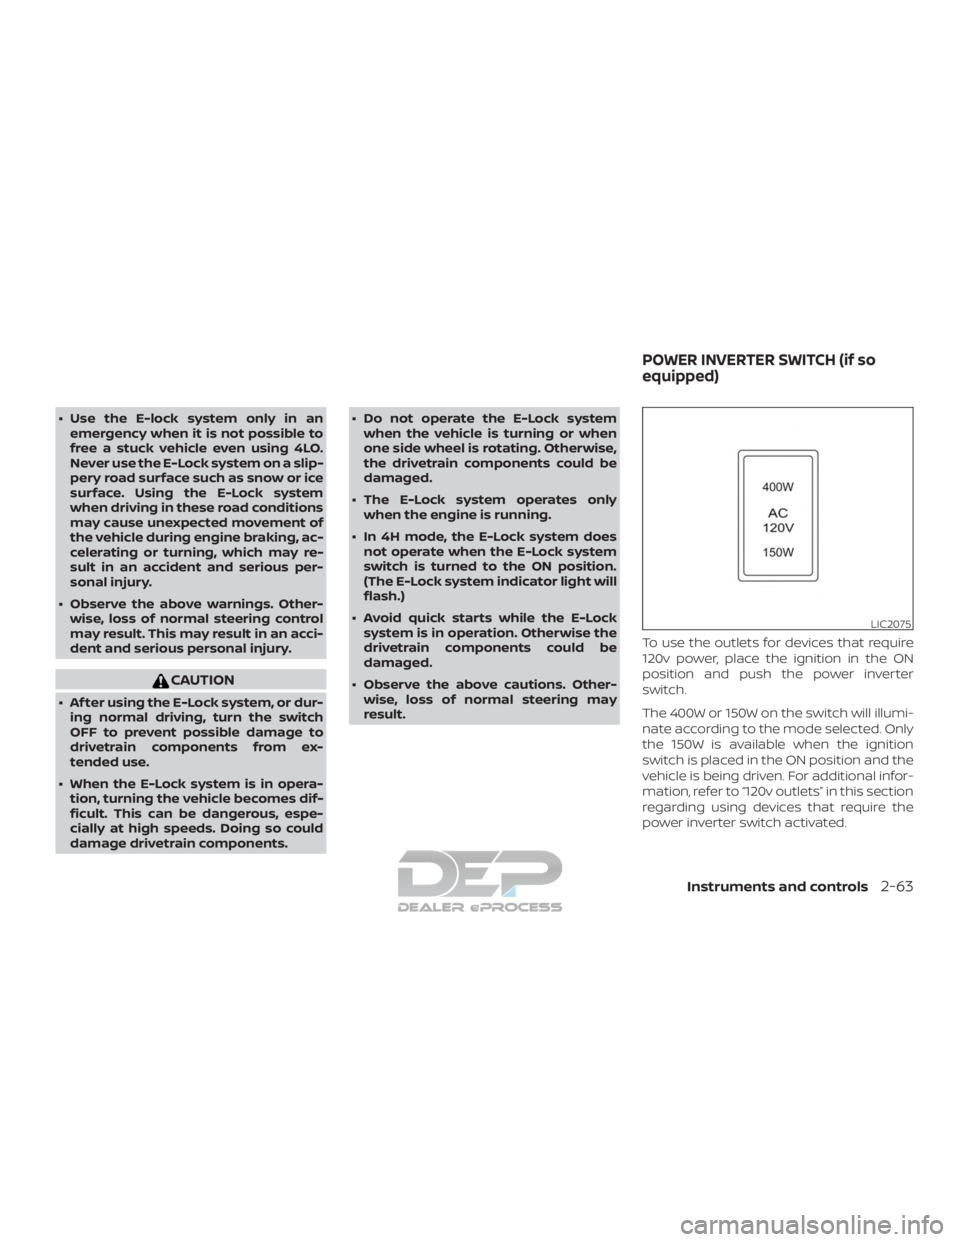
result. To use the outlets for devices that require
120v power, place the ignition in the ON
position and push the power inverter
switch.
The 400W or 150W on the switch will illumi-
nate according to the mode selected. Only
the 150W is available when the ignition
switch is placed in the ON position and the
vehicle is being driven. For additional infor-
mation, refer to “120v outlets” in this section
regarding using devices that require the
power inverter switch activated.
LIC2075
POWER INVERTER SWITCH (if so
equipped)
Instruments and controls2-63