2019 NISSAN TITAN horn
[x] Cancel search: hornPage 190 of 682
• There may be times when there is an
object or passenger in the rear seat(s)
but the audible alert does not sound.
For example, this may occur if the en-
gine is turned off and then on again in a
short period of time during a trip, or if
rear seat passengers enter or exit the
vehicle during a trip.
• The system does not directly detect
objects or passengers in the rear
seat(s). Instead, it can detect when a
rear door is opened and closed, indicat-
ing that there may be something in the
rear seat(s).
NOTE:
There may be times when the horn
sounds but there are no objects or pas-
sengers in the rear seat(s).
For additional information, refer to “Rear
Door Alert is activated” in this section.
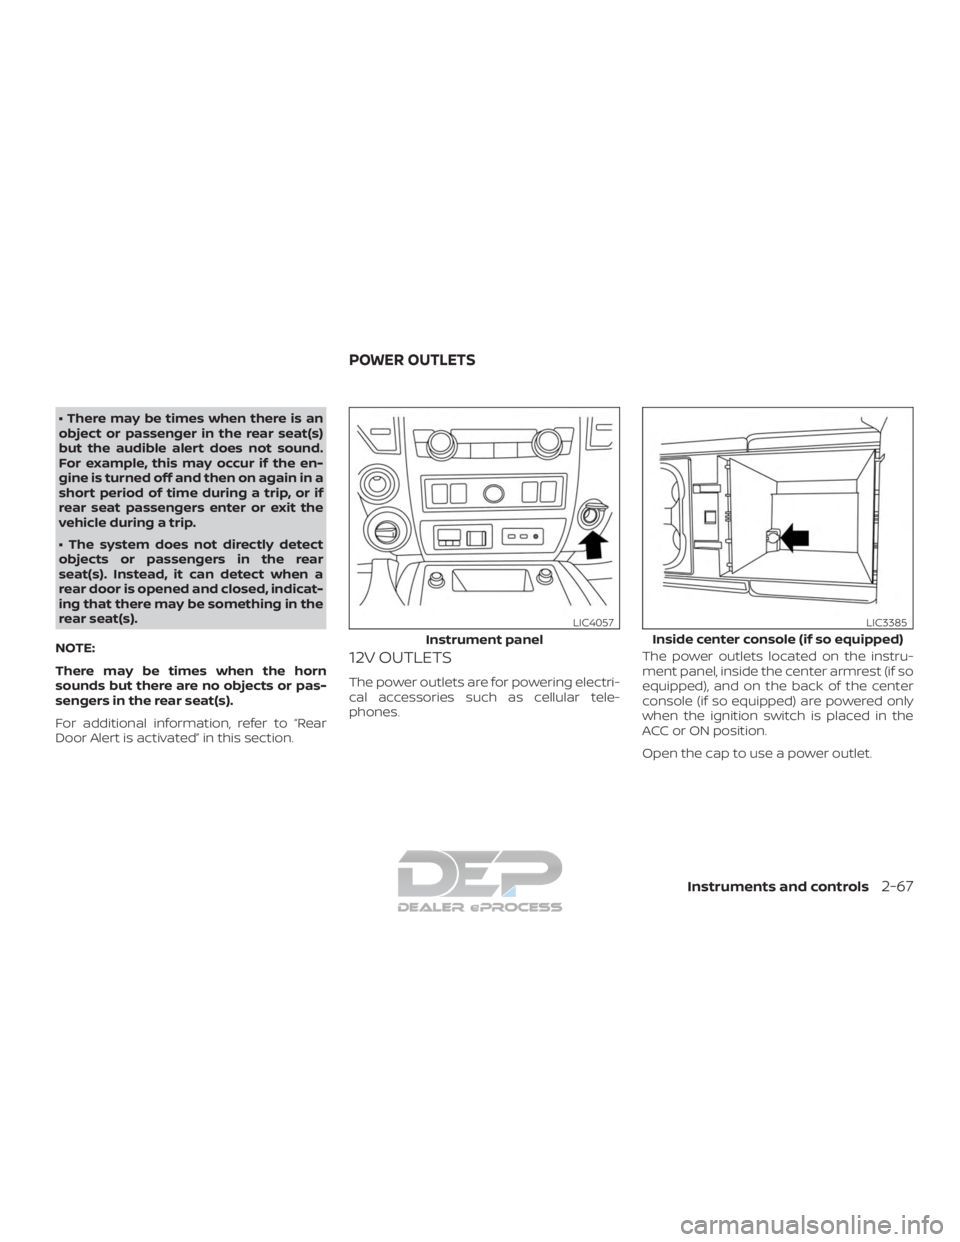
12V OUTLETS
The power outlets are for powering electri-
cal accessories such as cellular tele-
phones. The power outlets located on the instru-
ment panel, inside the center armrest (if so
equipped), and on the back of the center
console (if so equipped) are powered only
when the ignition switch is placed in the
ACC or ON position.
Open the cap to use a power outlet.
Instrument panel
LIC4057
Inside center console (if so equipped)
LIC3385
POWER OUTLETS
Instruments and controls2-67
Page 234 of 682
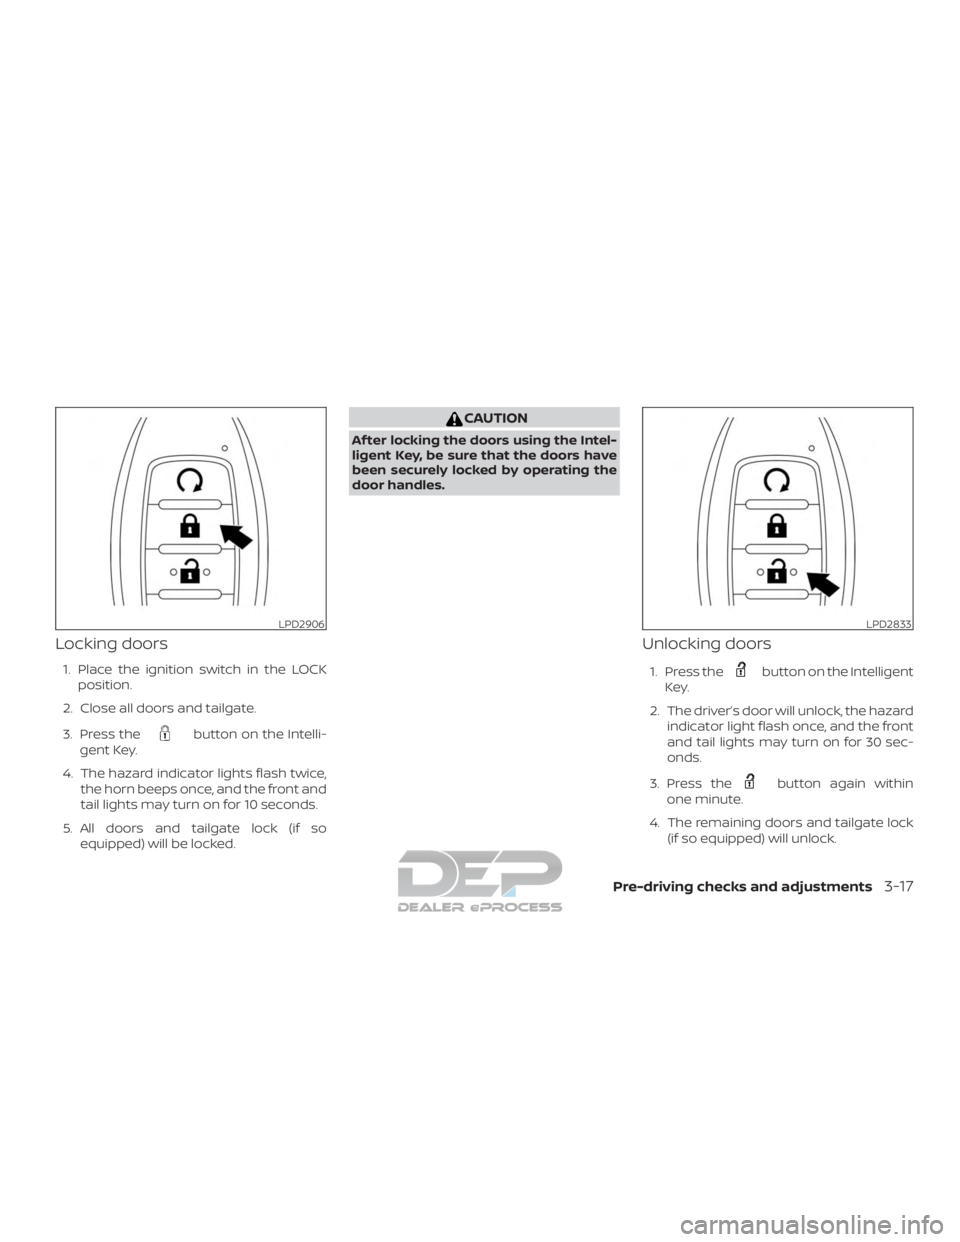
Locking doors
1. Place the ignition switch in the LOCKposition.
2. Close all doors and tailgate.
3. Press the
button on the Intelli-
gent Key.
4. The hazard indicator lights flash twice, the horn beeps once, and the front and
tail lights may turn on for 10 seconds.
5. All doors and tailgate lock (if so equipped) will be locked.
CAUTION
Af ter locking the doors using the Intel-
ligent Key, be sure that the doors have
been securely locked by operating the
door handles.
Unlocking doors
1. Press thebutton on the Intelligent
Key.
2. The driver’s door will unlock, the hazard indicator light flash once, and the front
and tail lights may turn on for 30 sec-
onds.
3. Press the
button again within
one minute.
4. The remaining doors and tailgate lock (if so equipped) will unlock.
LPD2906LPD2833
Pre-driving checks and adjustments3-17
Page 236 of 682
∙ The request switch (if so equipped) onthe driver’s door is pushed and the In-
telligent Key is in range of the door
handle.
Trailer light check (if so equipped)
This functionality allows the customer to
confirm trailer light operation, without the
need of a second person to press the brake
pedal or activate each turn signal light. The
trailer light check can be performed by the
Intelligent Key or through the Vehicle Set-
tings in the vehicle information display. For
additional information, refer to “Vehicle in-
formation display” in the “Instruments and
controls” section of this manual. To activate the trailer light check function
with your Intelligent Key, perform the fol-
lowing:
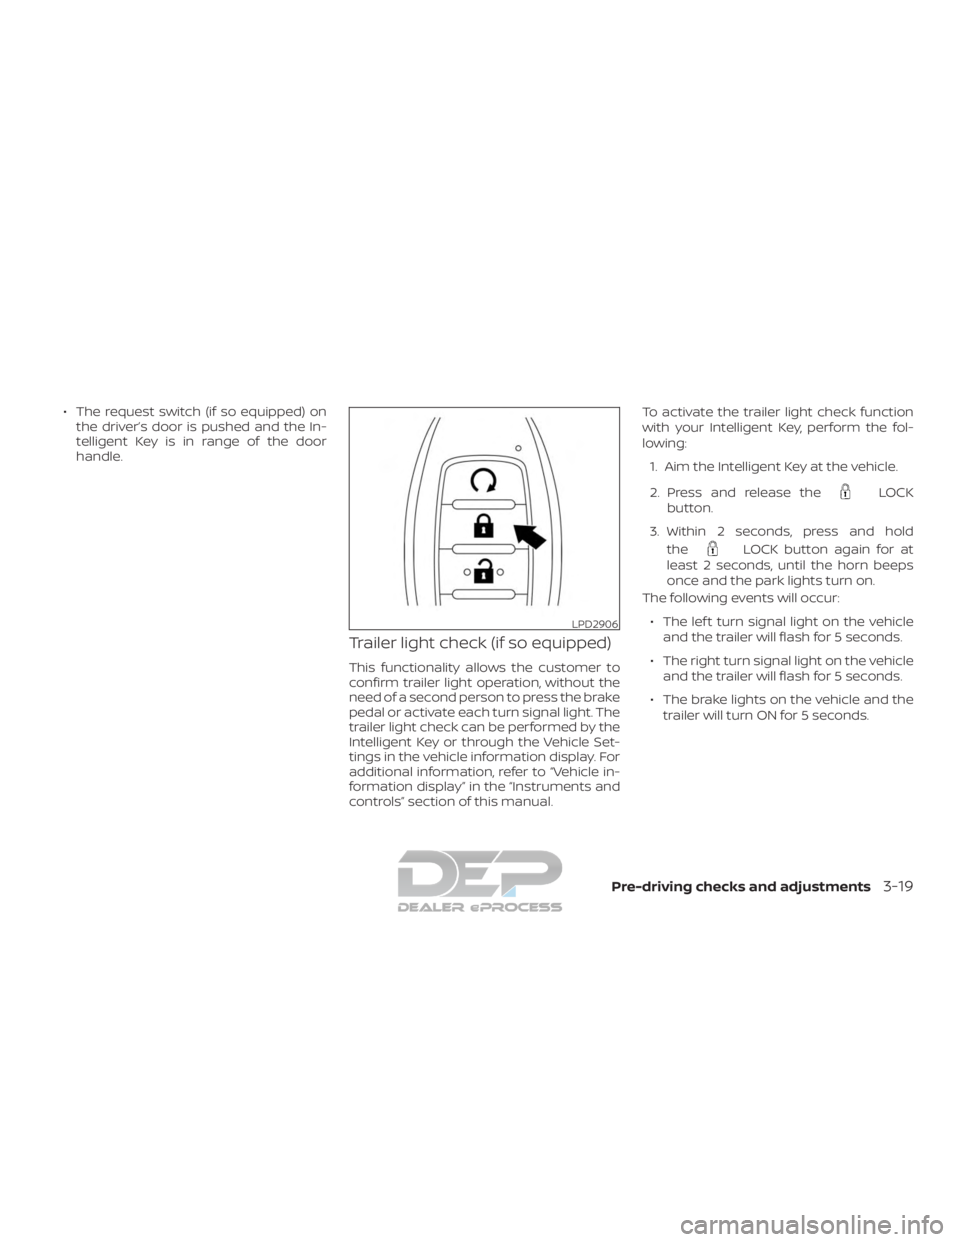
1. Aim the Intelligent Key at the vehicle.
2. Press and release the
LOCK
button.
3. Within 2 seconds, press and hold the
LOCK button again for at
least 2 seconds, until the horn beeps
once and the park lights turn on.
The following events will occur:
∙ The lef t turn signal light on the vehicle and the trailer will flash for 5 seconds.
∙ The right turn signal light on the vehicle and the trailer will flash for 5 seconds.
∙ The brake lights on the vehicle and the trailer will turn ON for 5 seconds.
LPD2906
Pre-driving checks and adjustments3-19
Page 237 of 682

NOTE:
If the ignition switch is in the OFF posi-
tion, the park lights will turn off af ter the
events above occur. If ignition switch is
in the ON position, lights will stay on for
45 seconds af ter trailer light check. If the
trailer lights do not work properly, check
the connections and bulbs. If the vehicle
lights do not turn on, check the bulbs. If
the trailer light check routine fails to
start, ensure the following vehicle condi-
tions:∙ The vehicle is NOT moving, 0 mph (0 km/h)
∙ Brake switch is NOT depressed
∙ Lef t or right flasher is OFF
∙ Trailer light check configuration is NOT disabled and available in the meter
towing settings
∙ The hazard switch is NOT turned ON
∙ The shif t position is fully in P (Park) posi- tion
∙ Vehicle is within Remote Keyless Entry range
Answer back horn feature
If desired, the answer back horn feature
can be deactivated using the Intelligent
Key. When it is deactivated and the
LOCK
button is pressed, the hazard
indicator lights flash twice. When the
UNLOCK
button is pressed, neither
the hazard indicator lights nor the horn
operates. NOTE:
If you change the answer back horn and
light flash feature with the Intelligent
Key while the ignition is in the ON posi-
tion, the vehicle information display
screen will show the previous mode. The
vehicle information display screen will
show the current mode af ter the ignition
switch has been cycled from the OFF to
the ON position. The vehicle information
display screen can also be used to
change the answer back horn mode. For
additional information refer to “Vehicle
information display ” in the “Instruments
and controls” section of this manual.
To deactivate:
Press and hold the
andbuttonsfor at least 2 seconds.
The hazard indicator lights will flash three
times to confirm that the answer back
horn feature has been deactivated.
To activate: Press and hold the
andbuttonsfor at least 2 seconds
once more.
The hazard indicator lights will flash once
and the horn will sound once to confirm
that the horn beep feature has been reac-
tivated.
LPD2878
3-20Pre-driving checks and adjustments
Page 238 of 682
Deactivating the horn beep feature does
not silence the horn if the alarm is trig-
gered.
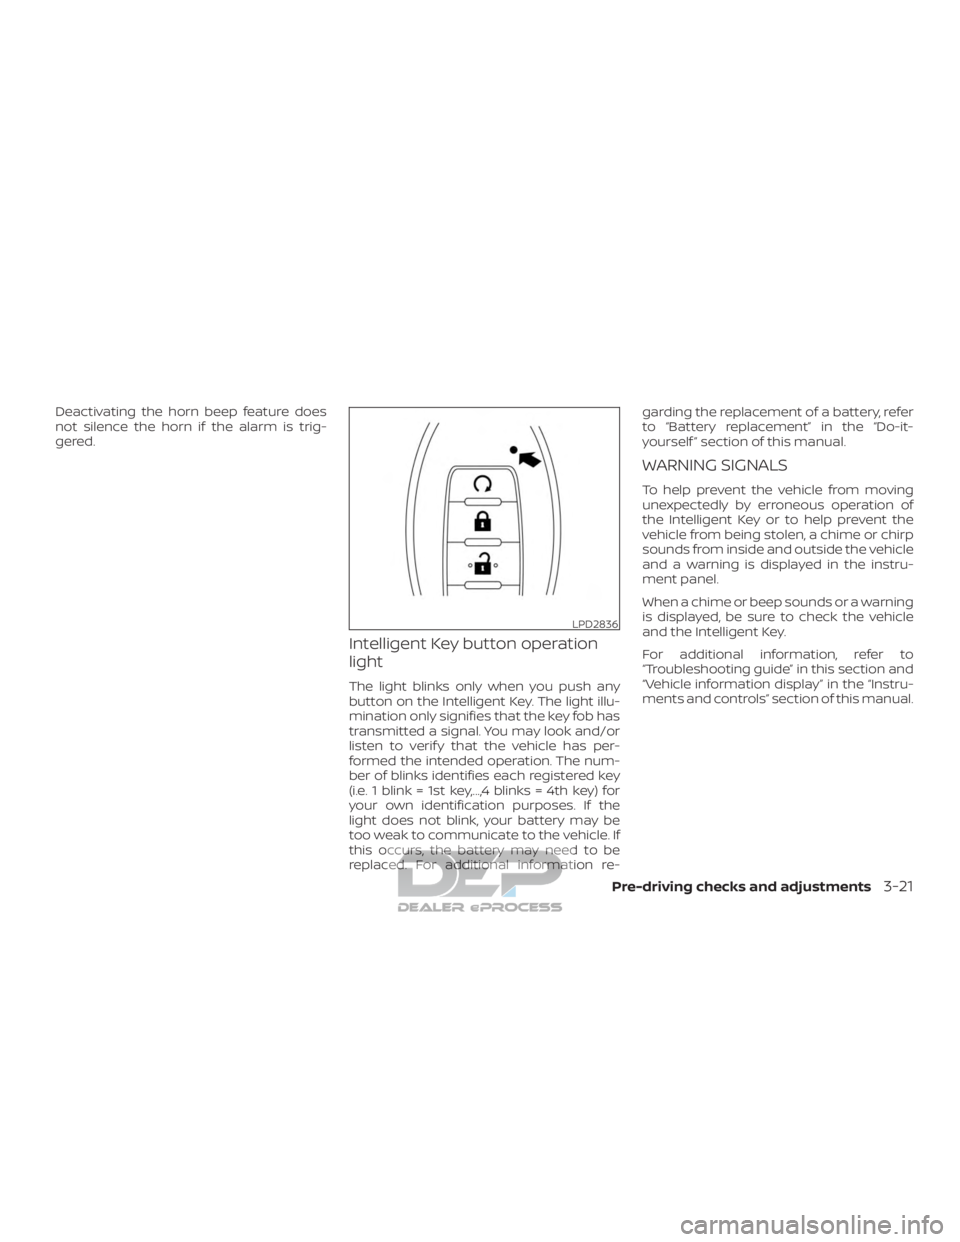
Intelligent Key button operation
light
The light blinks only when you push any
button on the Intelligent Key. The light illu-
mination only signifies that the key fob has
transmitted a signal. You may look and/or
listen to verif y that the vehicle has per-
formed the intended operation. The num-
ber of blinks identifies each registered key
(i.e. 1 blink = 1st key,...,4 blinks = 4th key) for
your own identification purposes. If the
light does not blink, your battery may be
too weak to communicate to the vehicle. If
this occurs, the battery may need to be
replaced. For additional information re-garding the replacement of a battery, refer
to “Battery replacement” in the “Do-it-
yourself ” section of this manual.
WARNING SIGNALS
To help prevent the vehicle from moving
unexpectedly by erroneous operation of
the Intelligent Key or to help prevent the
vehicle from being stolen, a chime or chirp
sounds from inside and outside the vehicle
and a warning is displayed in the instru-
ment panel.
When a chime or beep sounds or a warning
is displayed, be sure to check the vehicle
and the Intelligent Key.
For additional information, refer to
“Troubleshooting guide” in this section and
“Vehicle information display” in the “Instru-
ments and controls” section of this manual.
LPD2836
Pre-driving checks and adjustments3-21
Page 239 of 682
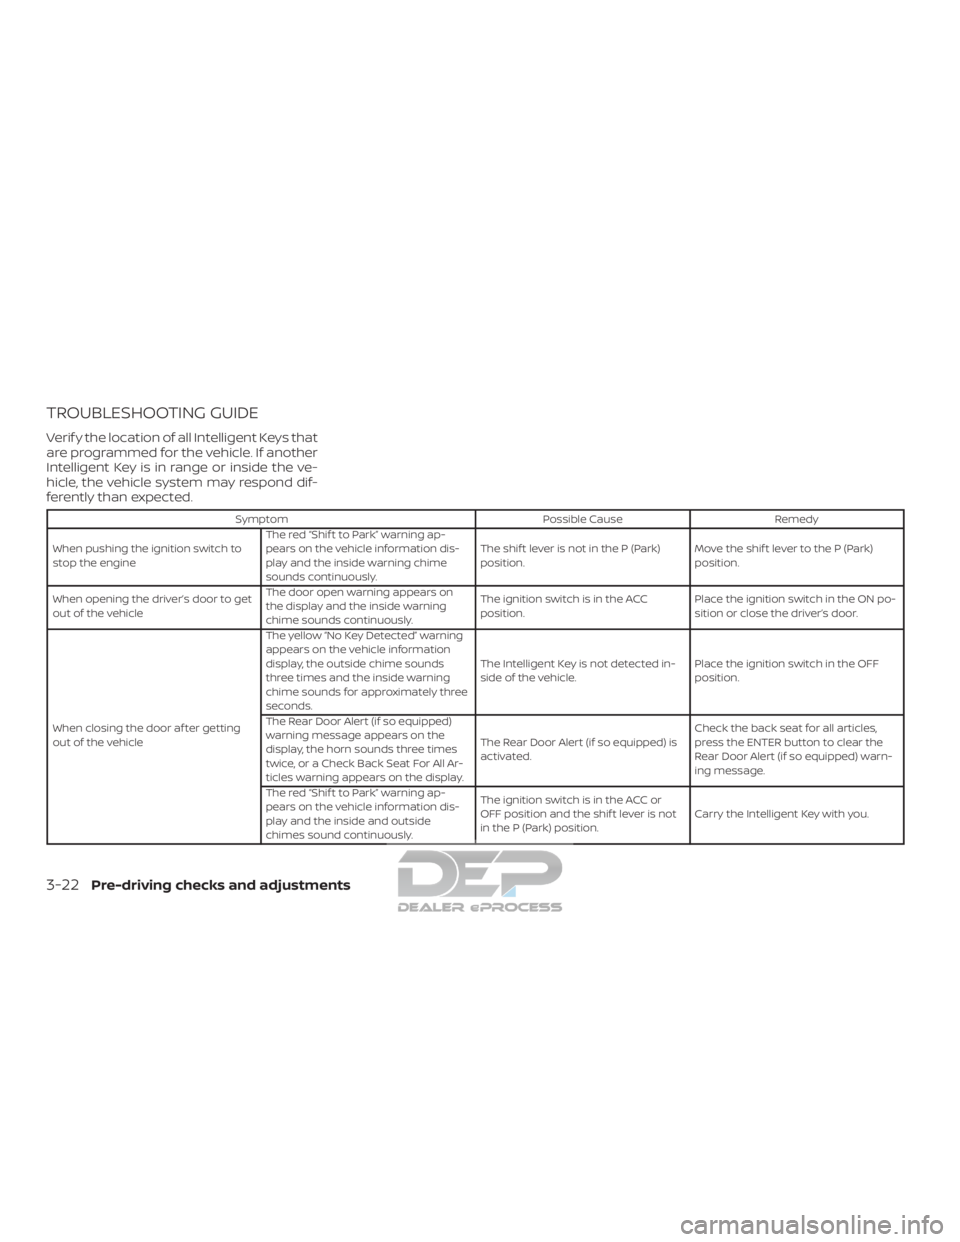
TROUBLESHOOTING GUIDE
Verif y the location of all Intelligent Keys that
are programmed for the vehicle. If another
Intelligent Key is in range or inside the ve-
hicle, the vehicle system may respond dif-
ferently than expected.
SymptomPossible CauseRemedy
When pushing the ignition switch to
stop the engine The red “Shif t to Park” warning ap-
pears on the vehicle information dis-
play and the inside warning chime
sounds continuously. The shif t lever is not in the P (Park)
position.
Move the shif t lever to the P (Park)
position.
When opening the driver’s door to get
out of the vehicle The door open warning appears on
the display and the inside warning
chime sounds continuously. The ignition switch is in the ACC
position.
Place the ignition switch in the ON po-
sition or close the driver’s door.
When closing the door af ter getting
out of the vehicle The yellow “No Key Detected” warning
appears on the vehicle information
display, the outside chime sounds
three times and the inside warning
chime sounds for approximately three
seconds.
The Intelligent Key is not detected in-
side of the vehicle.
Place the ignition switch in the OFF
position.
The Rear Door Alert (if so equipped)
warning message appears on the
display, the horn sounds three times
twice, or a Check Back Seat For All Ar-
ticles warning appears on the display. The Rear Door Alert (if so equipped) is
activated.
Check the back seat for all articles,
press the ENTER button to clear the
Rear Door Alert (if so equipped) warn-
ing message.
The red “Shif t to Park” warning ap-
pears on the vehicle information dis-
play and the inside and outside
chimes sound continuously. The ignition switch is in the ACC or
OFF position and the shif t lever is not
in the P (Park) position.
Carry the Intelligent Key with you.
3-22Pre-driving checks and adjustments
Page 359 of 682
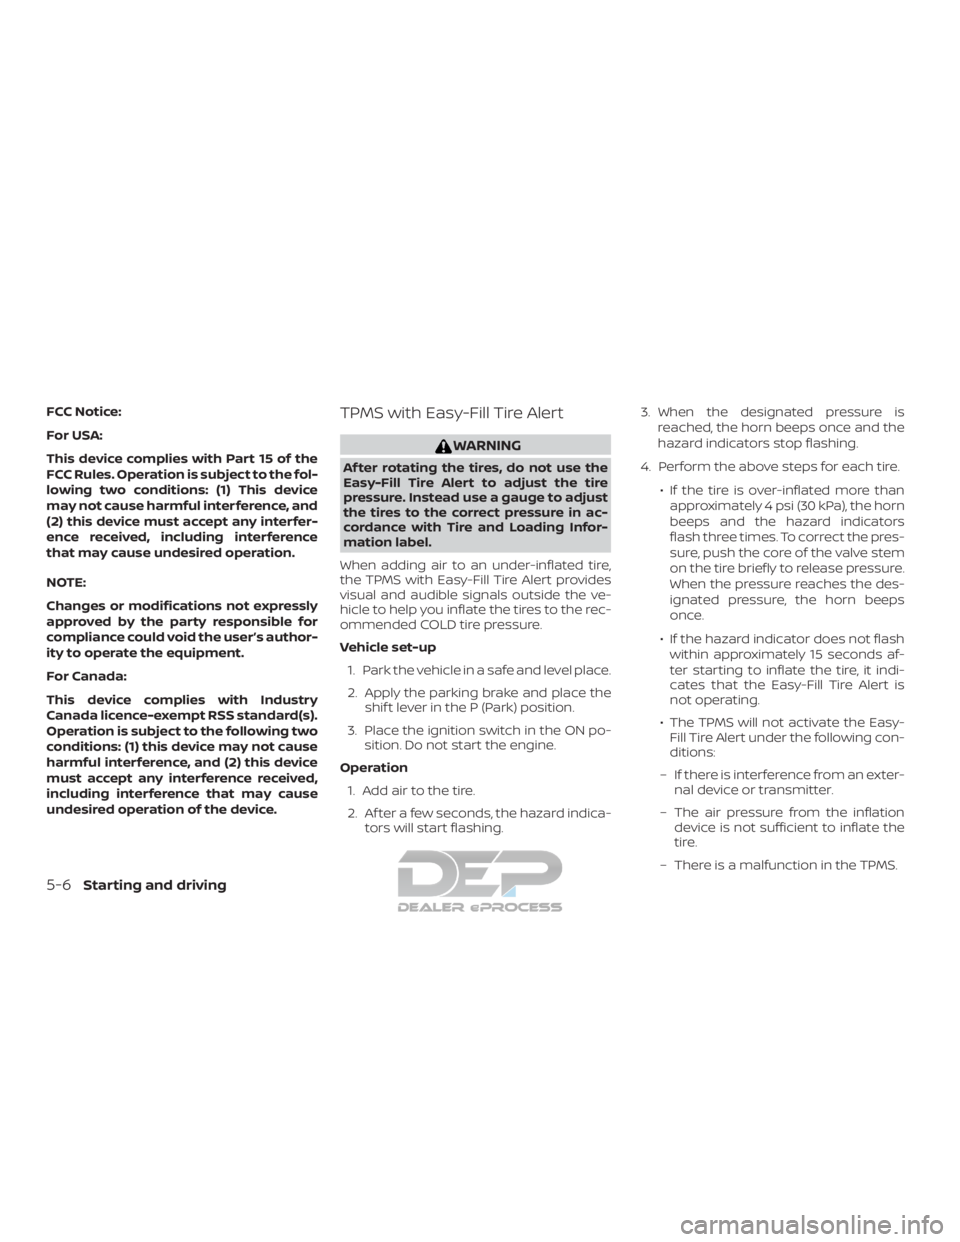
FCC Notice:
For USA:
This device complies with Part 15 of the
FCC Rules. Operation is subject to the fol-
lowing two conditions: (1) This device
may not cause harmful interference, and
(2) this device must accept any interfer-
ence received, including interference
that may cause undesired operation.
NOTE:
Changes or modifications not expressly
approved by the party responsible for
compliance could void the user’s author-
ity to operate the equipment.
For Canada:
This device complies with Industry
Canada licence-exempt RSS standard(s).
Operation is subject to the following two
conditions: (1) this device may not cause
harmful interference, and (2) this device
must accept any interference received,
including interference that may cause
undesired operation of the device.TPMS with Easy-Fill Tire Alert
WARNING
Af ter rotating the tires, do not use the
Easy-Fill Tire Alert to adjust the tire
pressure. Instead use a gauge to adjust
the tires to the correct pressure in ac-
cordance with Tire and Loading Infor-
mation label.
When adding air to an under-inflated tire,
the TPMS with Easy-Fill Tire Alert provides
visual and audible signals outside the ve-
hicle to help you inflate the tires to the rec-
ommended COLD tire pressure.
Vehicle set-up 1. Park the vehicle in a safe and level place.
2. Apply the parking brake and place the shif t lever in the P (Park) position.
3. Place the ignition switch in the ON po- sition. Do not start the engine.
Operation 1. Add air to the tire.
2. Af ter a few seconds, the hazard indica- tors will start flashing. 3. When the designated pressure is
reached, the horn beeps once and the
hazard indicators stop flashing.
4. Perform the above steps for each tire. ∙ If the tire is over-inflated more thanapproximately 4 psi (30 kPa), the horn
beeps and the hazard indicators
flash three times. To correct the pres-
sure, push the core of the valve stem
on the tire briefly to release pressure.
When the pressure reaches the des-
ignated pressure, the horn beeps
once.
∙ If the hazard indicator does not flash within approximately 15 seconds af-
ter starting to inflate the tire, it indi-
cates that the Easy-Fill Tire Alert is
not operating.
∙ The TPMS will not activate the Easy- Fill Tire Alert under the following con-
ditions:
– If there is interference from an exter- nal device or transmitter.
– The air pressure from the inflation device is not sufficient to inflate the
tire.
– There is a malfunction in the TPMS.
5-6Starting and driving
Page 360 of 682
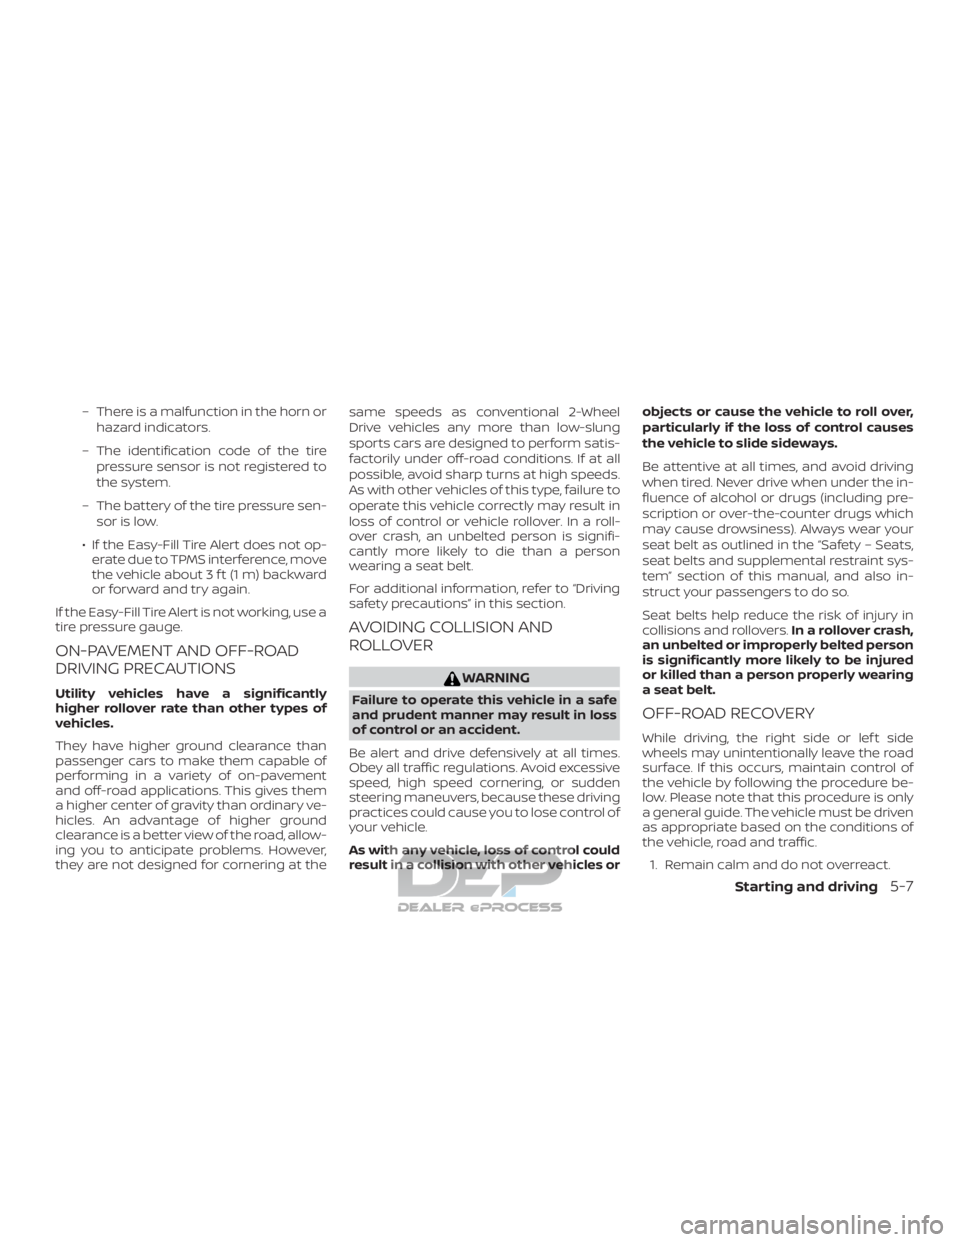
– There is a malfunction in the horn orhazard indicators.
– The identification code of the tire pressure sensor is not registered to
the system.
– The battery of the tire pressure sen- sor is low.
∙ If the Easy-Fill Tire Alert does not op- erate due to TPMS interference, move
the vehicle about 3 f t (1 m) backward
or forward and try again.
If the Easy-Fill Tire Alert is not working, use a
tire pressure gauge.
ON-PAVEMENT AND OFF-ROAD
DRIVING PRECAUTIONS
Utility vehicles have a significantly
higher rollover rate than other types of
vehicles.
They have higher ground clearance than
passenger cars to make them capable of
performing in a variety of on-pavement
and off-road applications. This gives them
a higher center of gravity than ordinary ve-
hicles. An advantage of higher ground
clearance is a better view of the road, allow-
ing you to anticipate problems. However,
they are not designed for cornering at the same speeds as conventional 2-Wheel
Drive vehicles any more than low-slung
sports cars are designed to perform satis-
factorily under off-road conditions. If at all
possible, avoid sharp turns at high speeds.
As with other vehicles of this type, failure to
operate this vehicle correctly may result in
loss of control or vehicle rollover. In a roll-
over crash, an unbelted person is signifi-
cantly more likely to die than a person
wearing a seat belt.
For additional information, refer to “Driving
safety precautions” in this section.
AVOIDING COLLISION AND
ROLLOVER
WARNING
Failure to operate this vehicle in a safe
and prudent manner may result in loss
of control or an accident.
Be alert and drive defensively at all times.
Obey all traffic regulations. Avoid excessive
speed, high speed cornering, or sudden
steering maneuvers, because these driving
practices could cause you to lose control of
your vehicle.
As with any vehicle, loss of control could
result in a collision with other vehicles or objects or cause the vehicle to roll over,
particularly if the loss of control causes
the vehicle to slide sideways.
Be attentive at all times, and avoid driving
when tired. Never drive when under the in-
fluence of alcohol or drugs (including pre-
scription or over-the-counter drugs which
may cause drowsiness). Always wear your
seat belt as outlined in the “Safety – Seats,
seat belts and supplemental restraint sys-
tem” section of this manual, and also in-
struct your passengers to do so.
Seat belts help reduce the risk of injury in
collisions and rollovers.
In a rollover crash,
an unbelted or improperly belted person
is significantly more likely to be injured
or killed than a person properly wearing
a seat belt.OFF-ROAD RECOVERY
While driving, the right side or lef t side
wheels may unintentionally leave the road
surface. If this occurs, maintain control of
the vehicle by following the procedure be-
low. Please note that this procedure is only
a general guide. The vehicle must be driven
as appropriate based on the conditions of
the vehicle, road and traffic.
1. Remain calm and do not overreact.
Starting and driving5-7