2019 NISSAN TITAN USB
[x] Cancel search: USBPage 314 of 682
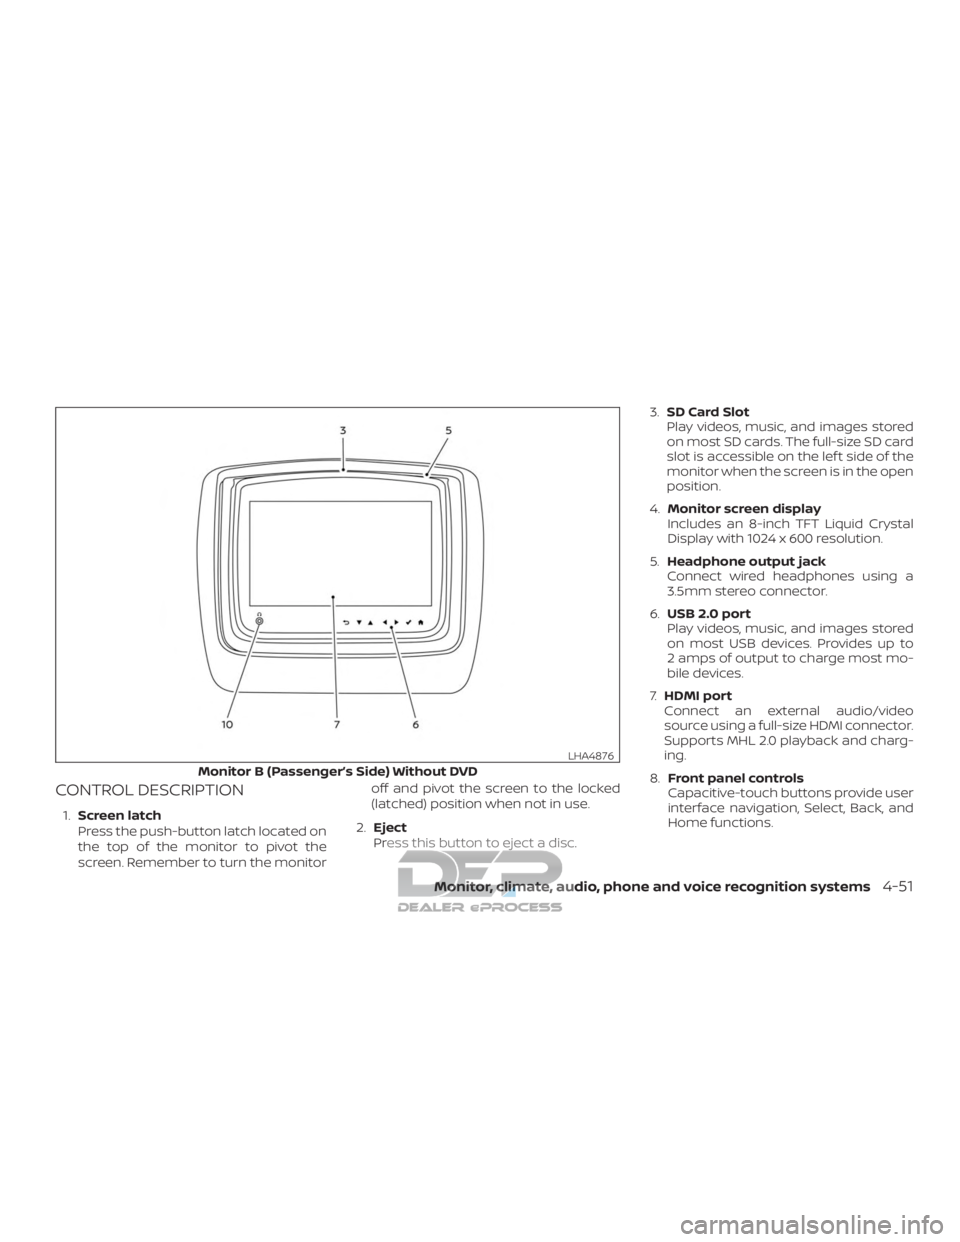
CONTROL DESCRIPTION
1.Screen latch
Press the push-button latch located on
the top of the monitor to pivot the
screen. Remember to turn the monitor off and pivot the screen to the locked
(latched) position when not in use.
2. Eject
Press this button to eject a disc. 3.
SD Card Slot
Play videos, music, and images stored
on most SD cards. The full-size SD card
slot is accessible on the lef t side of the
monitor when the screen is in the open
position.
4. Monitor screen display
Includes an 8-inch TFT Liquid Crystal
Display with 1024 x 600 resolution.
5. Headphone output jack
Connect wired headphones using a
3.5mm stereo connector.
6. USB 2.0 port
Play videos, music, and images stored
on most USB devices. Provides up to
2 amps of output to charge most mo-
bile devices.
7. HDMI port
Connect an external audio/video
source using a full-size HDMI connector.
Supports MHL 2.0 playback and charg-
ing.
8. Front panel controls
Capacitive-touch buttons provide user
interface navigation, Select, Back, and
Home functions.
Monitor B (Passenger’s Side) Without DVD
LHA4876
Monitor, climate, audio, phone and voice recognition systems4-51
Page 318 of 682
Headphone operation
Press the power button on the head-
phones to turn on and off the headphones.
The red LED will illuminate when the head-
phone is turned on. Set the select switch to
“A” or “B” for use with the “A” monitor or “B”
monitor respectively. Use the volume
thumb wheel to adjust the volume level for
the headphone audio.
NOTE:
If the headphones are accidentally lef t
on and system is powered off, a battery
saver feature will automatically turn off
the headphones af ter approximately
3 minutes.
CAUTION
∙ Always ensure that the batteries areinserted with the positive and nega-
tive terminals in the correct direction
as shown in the battery
compartment.
∙ Different types of batteries have dif- ferent characteristics. Do not mix dif-
ferent types. ∙ Do not mix old and new batteries. Mix-
ing old and new batteries will shorten
battery life and/or cause chemical
leaks from the old batteries.
∙ When batteries fail to function, re- place them immediately.
∙ Keep the batteries out of the reach of children. In case the batteries are ac-
cidentally swallowed, immediately
consult a doctor. Also, when disposing
of used batteries, please comply with
governmental regulations or environ-
mental public institution rules that
apply in your country/area.
∙ Remove the batteries if the head- phones are not used for a month or
longer.
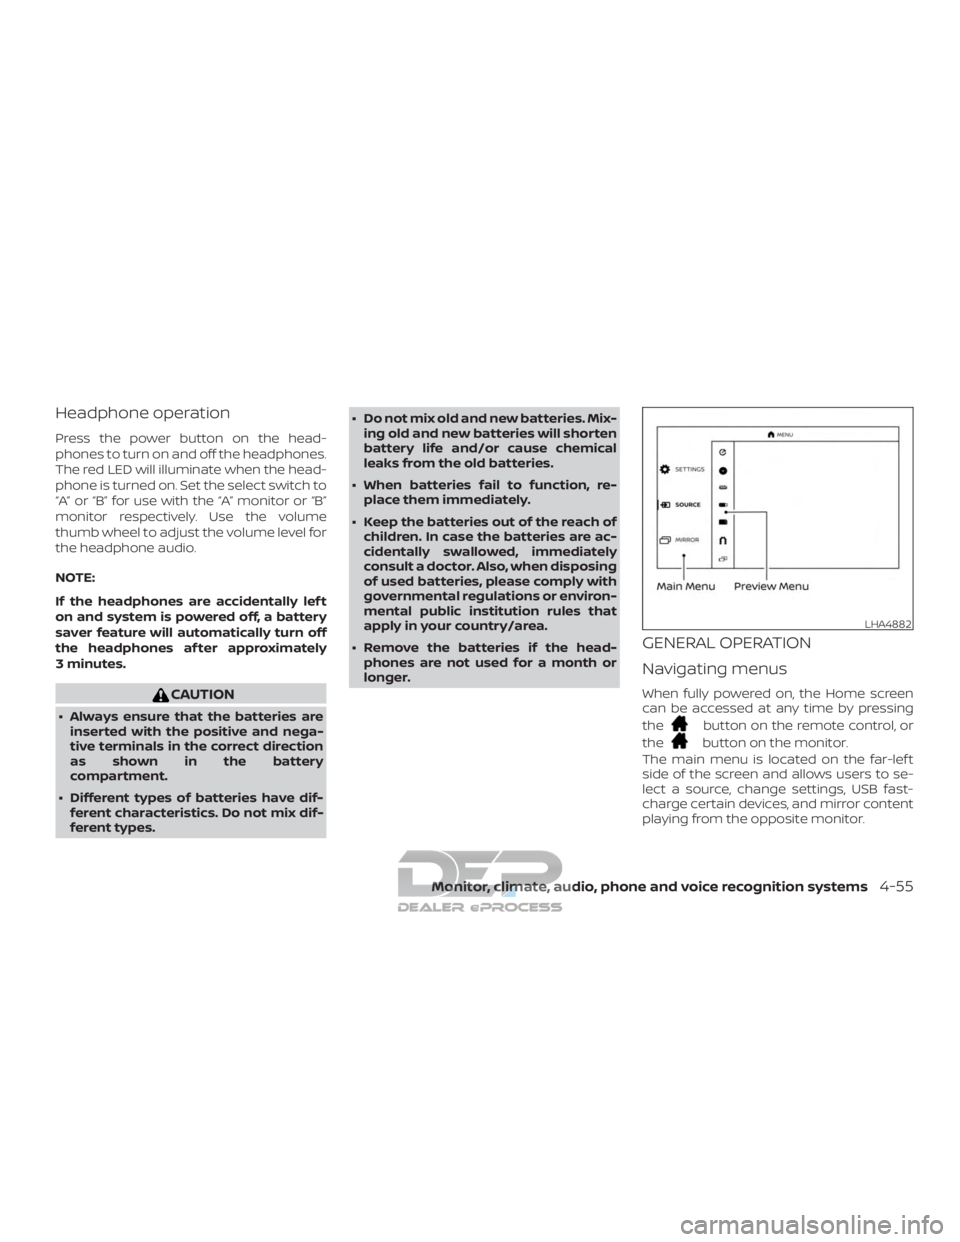
GENERAL OPERATION
Navigating menus
When fully powered on, the Home screen
can be accessed at any time by pressing
the
button on the remote control, or
the
button on the monitor.
The main menu is located on the far-lef t
side of the screen and allows users to se-
lect a source, change settings, USB fast-
charge certain devices, and mirror content
playing from the opposite monitor.
LHA4882
Monitor, climate, audio, phone and voice recognition systems4-55
Page 319 of 682
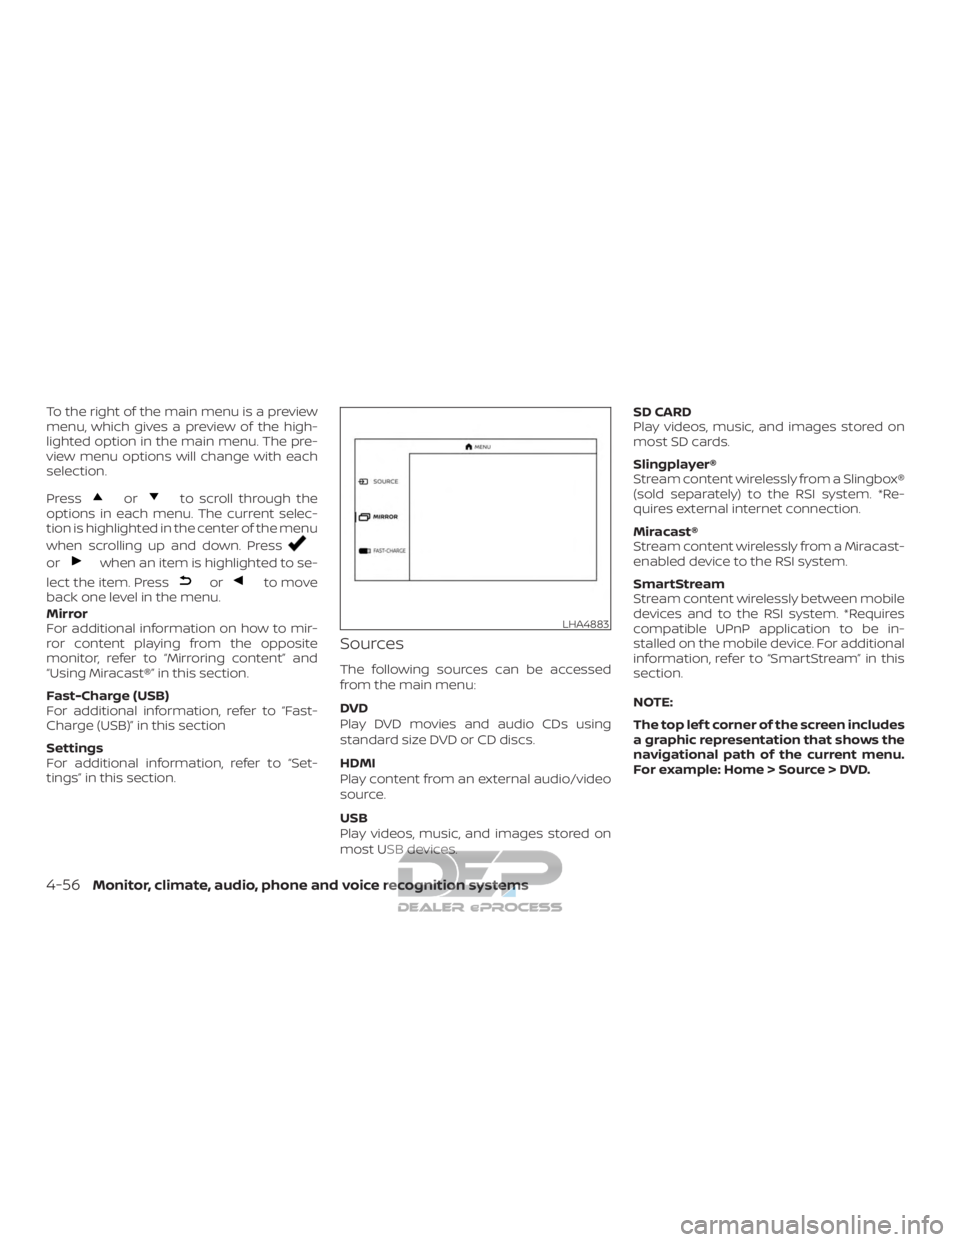
To the right of the main menu is a preview
menu, which gives a preview of the high-
lighted option in the main menu. The pre-
view menu options will change with each
selection.
Press
orto scroll through the
options in each menu. The current selec-
tion is highlighted in the center of the menu
when scrolling up and down. Press
orwhen an item is highlighted to se-
lect the item. Press
orto move
back one level in the menu.
Mirror
For additional information on how to mir-
ror content playing from the opposite
monitor, refer to “Mirroring content” and
“Using Miracast®” in this section.
Fast-Charge (USB)
For additional information, refer to “Fast-
Charge (USB)” in this section
Settings
For additional information, refer to “Set-
tings” in this section.
Sources
The following sources can be accessed
from the main menu:
DVD
Play DVD movies and audio CDs using
standard size DVD or CD discs.
HDMI
Play content from an external audio/video
source.
USB
Play videos, music, and images stored on
most USB devices. SD CARD
Play videos, music, and images stored on
most SD cards.
Slingplayer®
Stream content wirelessly from a Slingbox®
(sold separately) to the RSI system. *Re-
quires external internet connection.
Miracast®
Stream content wirelessly from a Miracast-
enabled device to the RSI system.
SmartStream
Stream content wirelessly between mobile
devices and to the RSI system. *Requires
compatible UPnP application to be in-
stalled on the mobile device. For additional
information, refer to “SmartStream” in this
section.
NOTE:
The top lef t corner of the screen includes
a graphic representation that shows the
navigational path of the current menu.
For example: Home > Source > DVD.
LHA4883
4-56Monitor, climate, audio, phone and voice recognition systems
Page 326 of 682
NOTE:
HDMI connected devices are indepen-
dent and must be controlled directly
from the source device.
MHL connection
The system also allows mobile devices
supporting Mobile High-Definition Link
(MHL) to be connected. An MHL-to-HDMI
cable is required (sold separately).
Mobile High-Definition Link (MHL) is an in-
dustry standard mobile audio/ video inter-
face that allows connection of smart-
phones, tablets, and other portable
consumer electronics devices to the sys-
tem. MHL transports high-quality uncom-
pressed audio and video from a mobile
source device to the system and at the
same time provides power to recharge the
device.
NOTE:
MHL connected devices are independent
and must be controlled directly from the
source device.
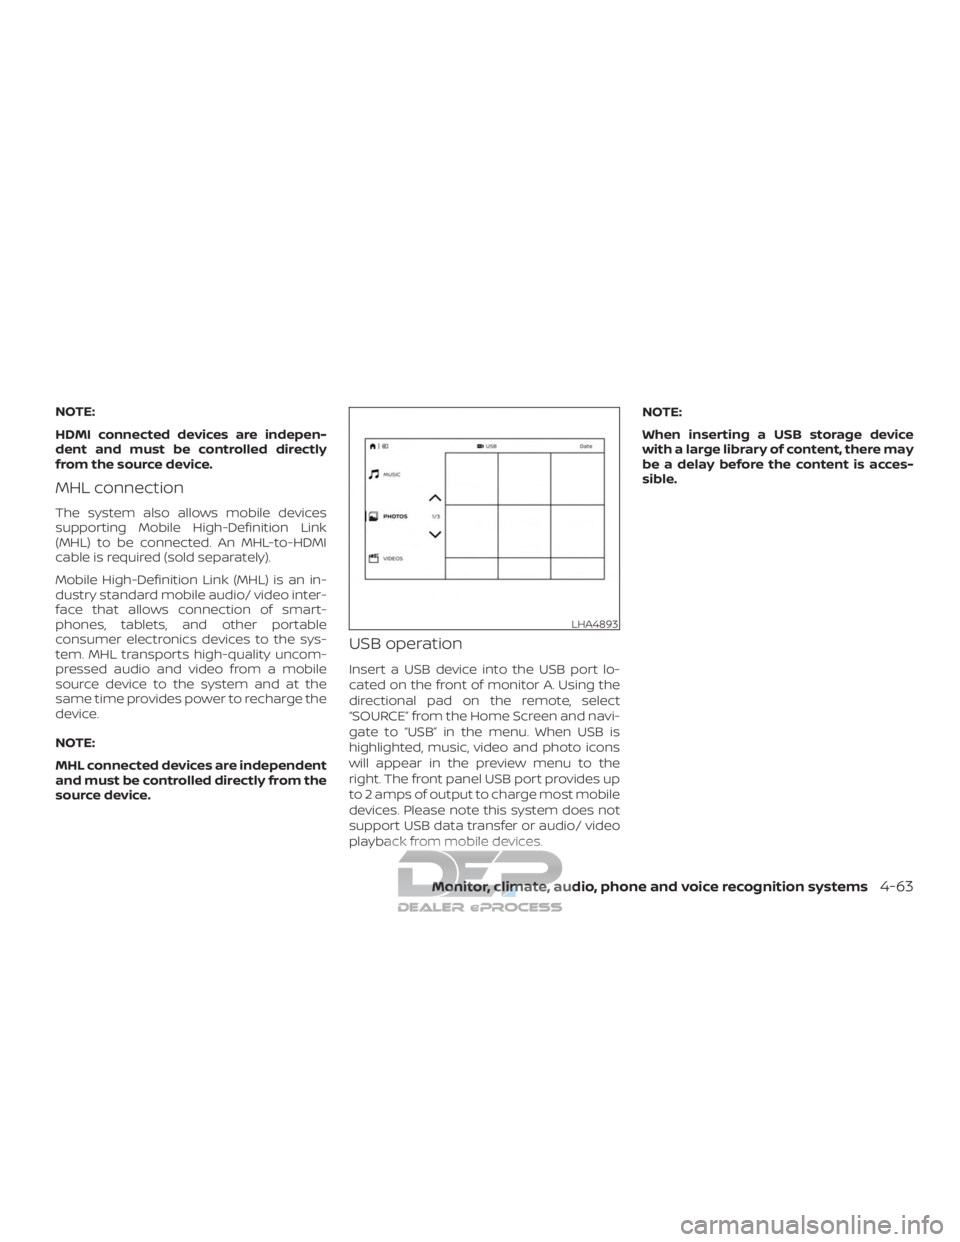
USB operation
Insert a USB device into the USB port lo-
cated on the front of monitor A. Using the
directional pad on the remote, select
“SOURCE” from the Home Screen and navi-
gate to “USB” in the menu. When USB is
highlighted, music, video and photo icons
will appear in the preview menu to the
right. The front panel USB port provides up
to 2 amps of output to charge most mobile
devices. Please note this system does not
support USB data transfer or audio/ video
playback from mobile devices.NOTE:
When inserting a USB storage device
with a large library of content, there may
be a delay before the content is acces-
sible.
LHA4893
Monitor, climate, audio, phone and voice recognition systems4-63
Page 327 of 682
Fast-Charge (USB)
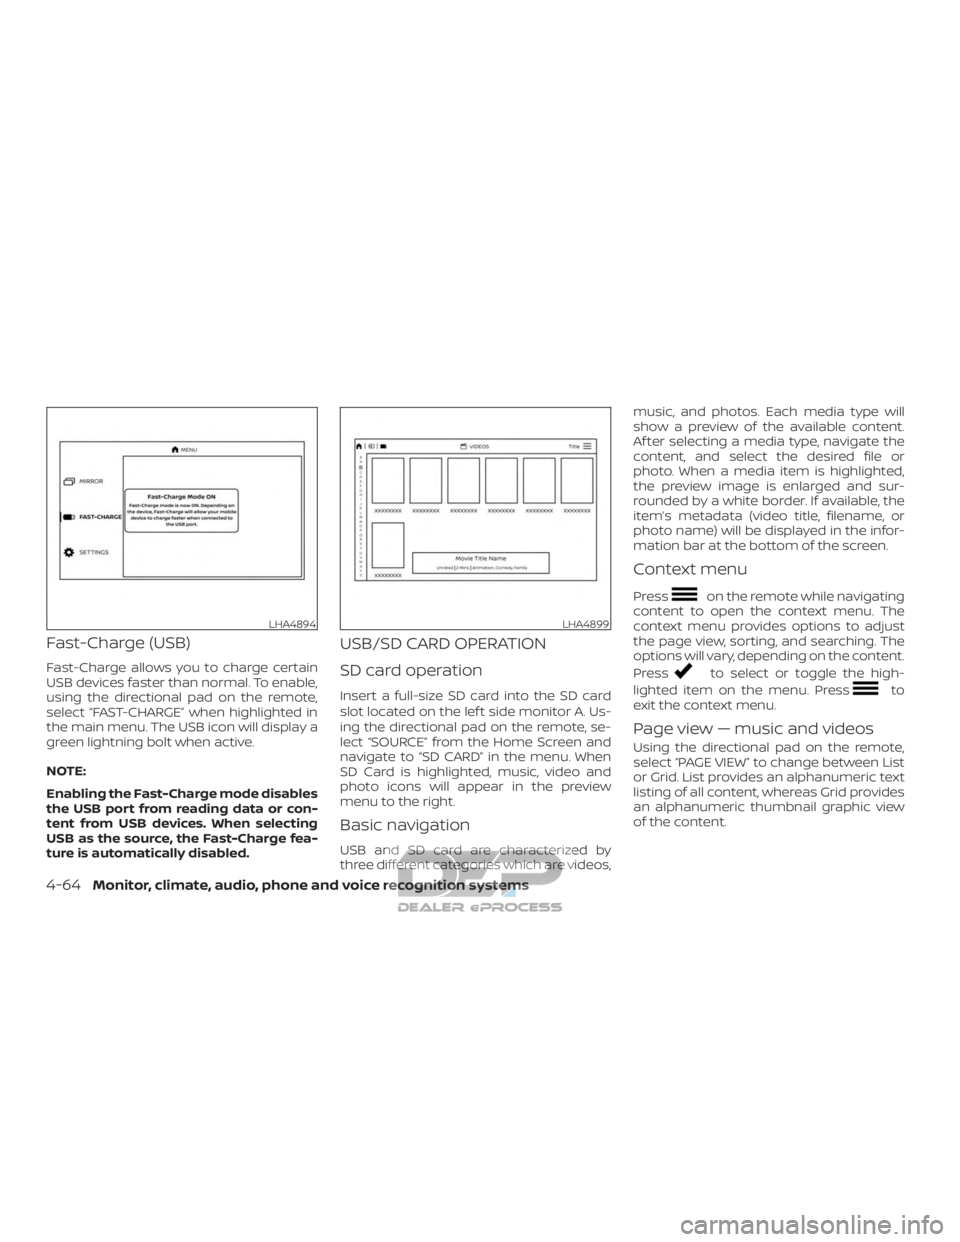
Fast-Charge allows you to charge certain
USB devices faster than normal. To enable,
using the directional pad on the remote,
select “FAST-CHARGE” when highlighted in
the main menu. The USB icon will display a
green lightning bolt when active.
NOTE:
Enabling the Fast-Charge mode disables
the USB port from reading data or con-
tent from USB devices. When selecting
USB as the source, the Fast-Charge fea-
ture is automatically disabled.
USB/SD CARD OPERATION
SD card operation
Insert a full-size SD card into the SD card
slot located on the lef t side monitor A. Us-
ing the directional pad on the remote, se-
lect “SOURCE” from the Home Screen and
navigate to “SD CARD” in the menu. When
SD Card is highlighted, music, video and
photo icons will appear in the preview
menu to the right.
Basic navigation
USB and SD card are characterized by
three different categories which are videos,music, and photos. Each media type will
show a preview of the available content.
Af ter selecting a media type, navigate the
content, and select the desired file or
photo. When a media item is highlighted,
the preview image is enlarged and sur-
rounded by a white border. If available, the
item’s metadata (video title, filename, or
photo name) will be displayed in the infor-
mation bar at the bottom of the screen.
Context menu
Presson the remote while navigating
content to open the context menu. The
context menu provides options to adjust
the page view, sorting, and searching. The
options will vary, depending on the content.
Press
to select or toggle the high-
lighted item on the menu. Press
to
exit the context menu.
Page view — music and videos
Using the directional pad on the remote,
select “PAGE VIEW ” to change between List
or Grid. List provides an alphanumeric text
listing of all content, whereas Grid provides
an alphanumeric thumbnail graphic view
of the content.
LHA4894LHA4899
4-64Monitor, climate, audio, phone and voice recognition systems
Page 329 of 682
USB/SD card video playback
controls
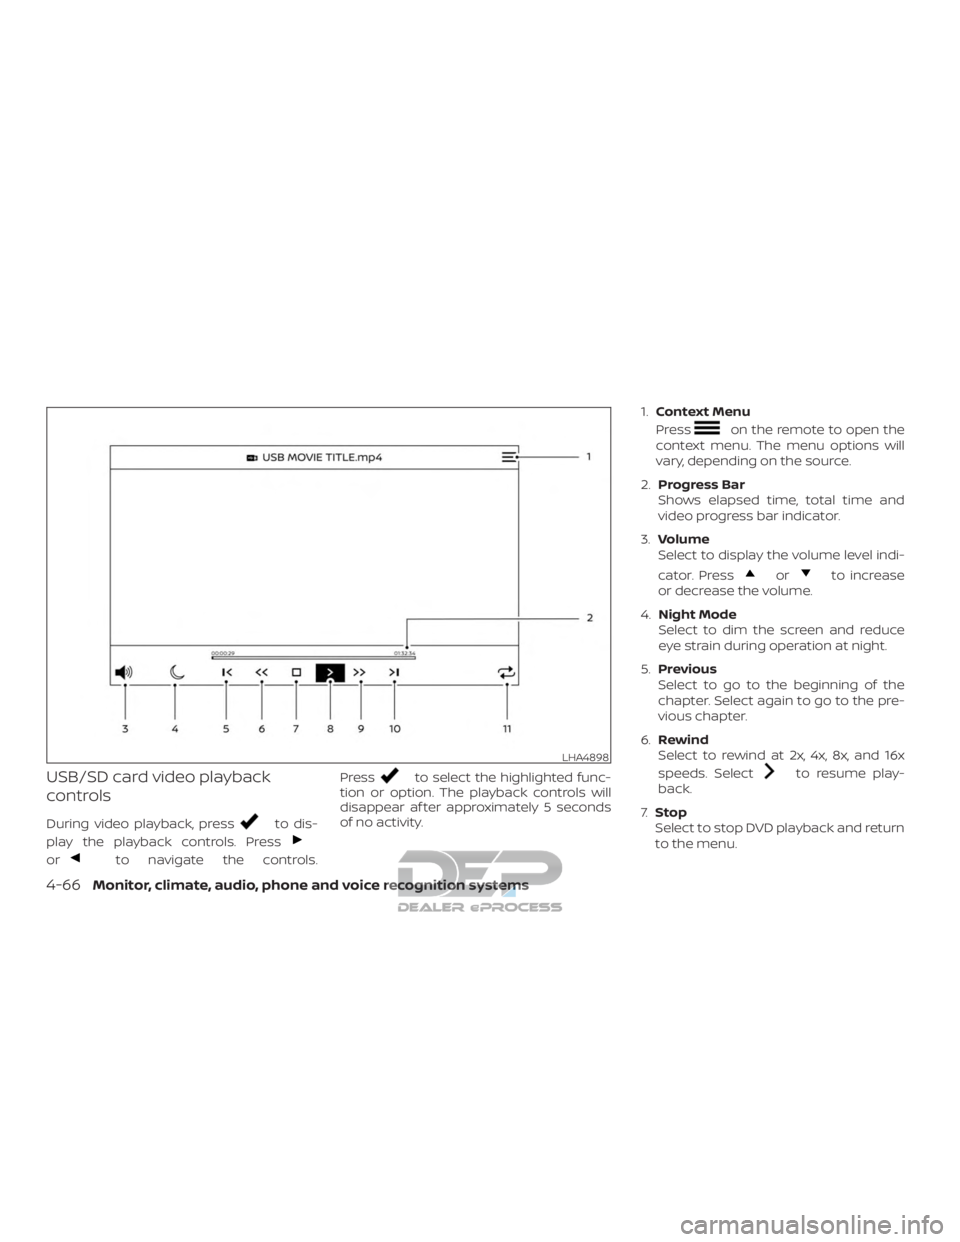
During video playback, pressto dis-
play the playback controls. Press
orto navigate the controls. Press
to select the highlighted func-
tion or option. The playback controls will
disappear af ter approximately 5 seconds
of no activity. 1.
Context Menu
Press
on the remote to open the
context menu. The menu options will
vary, depending on the source.
2. Progress Bar
Shows elapsed time, total time and
video progress bar indicator.
3. Volume
Select to display the volume level indi-
cator. Press
orto increase
or decrease the volume.
4. Night Mode
Select to dim the screen and reduce
eye strain during operation at night.
5. Previous
Select to go to the beginning of the
chapter. Select again to go to the pre-
vious chapter.
6. Rewind
Select to rewind at 2x, 4x, 8x, and 16x
speeds. Select
to resume play-
back.
7. Stop
Select to stop DVD playback and return
to the menu.
LHA4898
4-66Monitor, climate, audio, phone and voice recognition systems
Page 331 of 682
Playing music
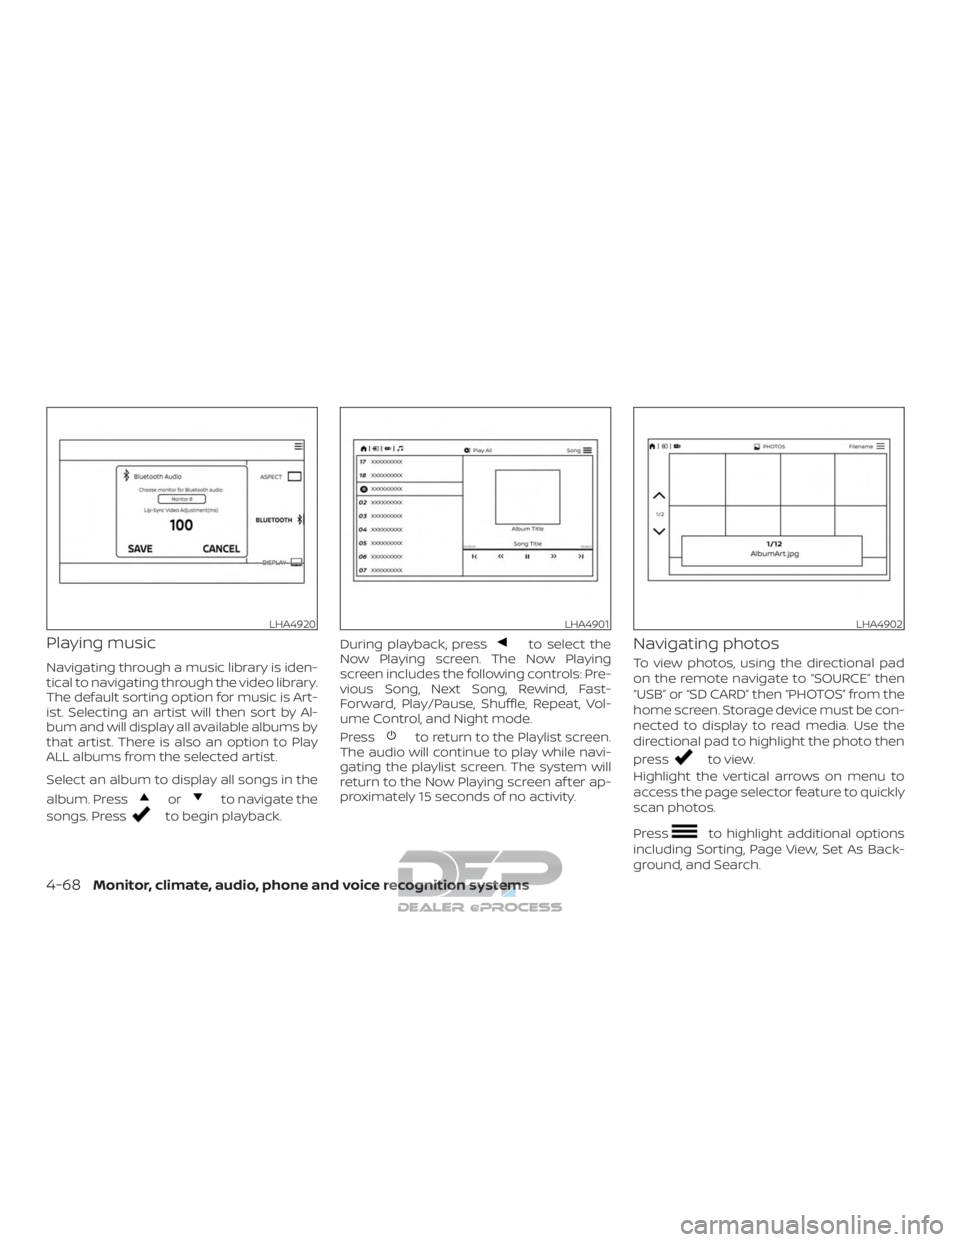
Navigating through a music library is iden-
tical to navigating through the video library.
The default sorting option for music is Art-
ist. Selecting an artist will then sort by Al-
bum and will display all available albums by
that artist. There is also an option to Play
ALL albums from the selected artist.
Select an album to display all songs in the
album. Press
orto navigate the
songs. Press
to begin playback. During playback, press
to select the
Now Playing screen. The Now Playing
screen includes the following controls: Pre-
vious Song, Next Song, Rewind, Fast-
Forward, Play/Pause, Shuffle, Repeat, Vol-
ume Control, and Night mode.
Press
to return to the Playlist screen.
The audio will continue to play while navi-
gating the playlist screen. The system will
return to the Now Playing screen af ter ap-
proximately 15 seconds of no activity.
Navigating photos
To view photos, using the directional pad
on the remote navigate to “SOURCE” then
“USB” or “SD CARD” then “PHOTOS” from the
home screen. Storage device must be con-
nected to display to read media. Use the
directional pad to highlight the photo then
press
to view.
Highlight the vertical arrows on menu to
access the page selector feature to quickly
scan photos.
Press
to highlight additional options
including Sorting, Page View, Set As Back-
ground, and Search.
LHA4920LHA4901LHA4902
4-68Monitor, climate, audio, phone and voice recognition systems
Page 338 of 682

Display
Adjust Brightness, Contrast, and Sharp-
ness settings.
Audio
Select the monitor to use for Bluetooth®
audio streaming and set the maximum
volume level when using wired head-
phones.
Advanced
Change the language of the GUI (Graphic
User Interface), reset the RSI system, and
update the sof tware.
Customize
Change the background image of the
home screen using content from an SD
card or USB storage device.
Parental
Set or change the password to limit DVD
content playback using parental control
based on the Motion Picture Association of
America (MPAA) ratings.
Bluetooth
Control Bluetooth® audio streaming
(On/Off ) and select from the available list of
paired devices.
Using Wi-Fi
Access Point
Access Point is used when connecting
other mobile devices to the RSI’s built-in
internal network. This mode allows the RSI
system to connect to devices "inside" the
vehicle, using an optional UPnP application
installed on a mobile device.
To change the SSID, navigate the keyboard
and enter the desired network name. Se-
lect Enter when complete. The default SSID
name is RSI-WiFi.To change the network password, navigate
the keyboard and enter the desired nu-
meric password. Select Enter when com-
plete. Select the Show Password check box
to display the current password. Select
Save to save the SSID and password.
Client Mode
Client Mode is used when connecting the
RSI system to an external network or to the
internet using a mobile hotspot. This mode
allows the RSI system to connect "outside"
the vehicle.
Enable Client mode by highlighting the Sta-
tus switch. The switch will turn green when
on. The RSI system will begin searching for
available wireless networks and display
them below. Navigate to the desired net-
work and pressto select it. Enter the
password (if necessary) to complete the
connection. The system will automatically
connect to the last connected network un-
til Client Mode is disabled.
NOTE:
Client mode will use data from the exter-
nal Wi-Fi connection. Use with care as
additional data is consumed when using
mobile device data plans.
LHA4912
Monitor, climate, audio, phone and voice recognition systems4-75