2019 NISSAN TITAN warning light
[x] Cancel search: warning lightPage 478 of 682
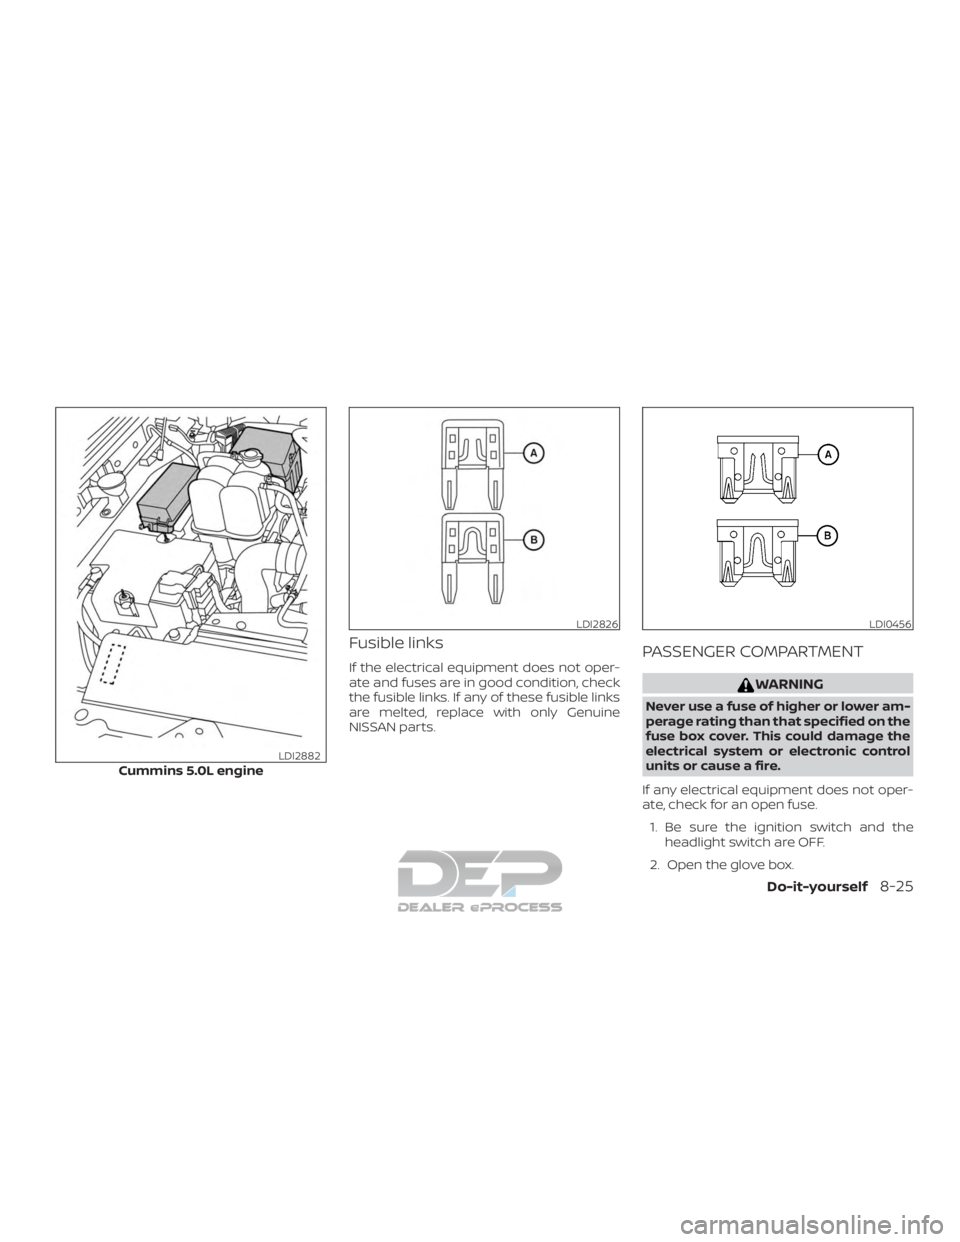
Fusible links
If the electrical equipment does not oper-
ate and fuses are in good condition, check
the fusible links. If any of these fusible links
are melted, replace with only Genuine
NISSAN parts.PASSENGER COMPARTMENT
WARNING
Never use a fuse of higher or lower am-
perage rating than that specified on the
fuse box cover. This could damage the
electrical system or electronic control
units or cause a fire.
If any electrical equipment does not oper-
ate, check for an open fuse. 1. Be sure the ignition switch and the headlight switch are OFF.
2. Open the glove box.
Cummins 5.0L engineLDI2882
LDI2826LDI0456
Do-it-yourself8-25
Page 488 of 682
If you have a flat tire, refer to “Flat tire” in
the “In case of emergency ” section of
this manual.
TIRE PRESSURE
Tire Pressure Monitoring System
(TPMS)
WARNING
Radio waves could adversely af-
fect electric medical equipment.
Those who use a pacemaker
should contact the electric medi-
cal equipment manufacturer for
the possible influences before
use.
This vehicle is equipped with the Tire
Pressure Monitoring System (TPMS).
It monitors tire pressure of all four
tires except the spare. When the low
tire pressure warning light is lit and
the “Tire Pressure Low - Add Air”
warning appears in the vehicle infor-
mation display, one or more of your
tires is significantly under-inflated. If
equipped, the system also displays
pressure of all tires (except the spare tire) on the display screen by send-
ing a signal from a sensor that is
installed in each wheel.
The TPMS will activate only when the
vehicle is driven at speeds above
16 mph (25 km/h). Also, this system
may not detect a sudden drop in tire
pressure (for example a flat tire while
driving).
For additional information, refer to
“Warning lights, indicator lights and
audible reminders” in the “Instru-
ments and controls” section, “Tire
Pressure Monitoring System (TPMS)”
in the “Starting and driving” section,
and “Flat tire” in the “In case of emer-
gency” section of this manual.
Tire inflation pressure
Check the tire pressures (including
the spare) of ten and always prior to
long distance trips. The recom-
mended tire pressure specifications
are shown on the F.M.V.S.S./C.M.V.S.S.
certification label or the Tire and
Loading Information label under the“Cold Tire Pressure” heading. The Tire
and Loading Information label is af-
fixed to the driver side center pillar.
Tire pressures should be checked
regularly because:
∙ Most tires naturally lose air over time.
∙ Tires can lose air suddenly when driven over potholes or other ob-
jects or if the vehicle strikes a
curb while parking.
The tire pressures should be
checked when the tires are cold. The
tires are considered COLD af ter the
vehicle has been parked for 3 or
more hours, or driven less than 1 mile
(1.6 km) at moderate speeds.
The TPMS with Easy-Fill Tire Alert
provides visual and audible signals
outside the vehicle for inflating tires
to the recommended COLD tire
pressure. For additional information,
refer to “TPMS with Easy-Fill Tire
Alert” in the “Starting and driving”
section of this manual.
WHEELS AND TIRES
Do-it-yourself8-35
Page 497 of 682
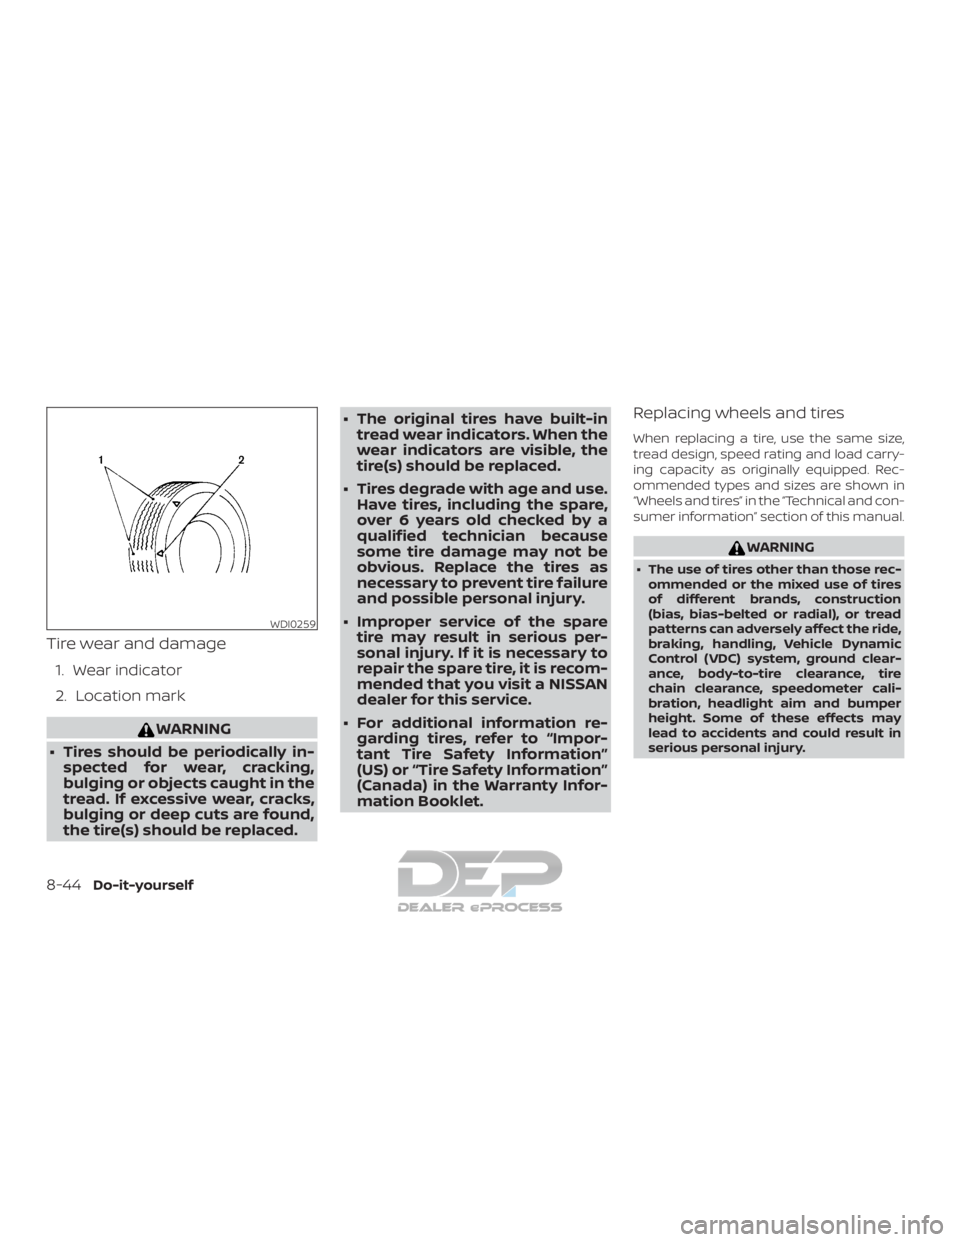
Tire wear and damage
1. Wear indicator
2. Location mark
WARNING
∙ Tires should be periodically in- spected for wear, cracking,
bulging or objects caught in the
tread. If excessive wear, cracks,
bulging or deep cuts are found,
the tire(s) should be replaced. ∙ The original tires have built-in
tread wear indicators. When the
wear indicators are visible, the
tire(s) should be replaced.
∙ Tires degrade with age and use. Have tires, including the spare,
over 6 years old checked by a
qualified technician because
some tire damage may not be
obvious. Replace the tires as
necessary to prevent tire failure
and possible personal injury.
∙ Improper service of the spare tire may result in serious per-
sonal injury. If it is necessary to
repair the spare tire, it is recom-
mended that you visit a NISSAN
dealer for this service.
∙ For additional information re- garding tires, refer to “Impor-
tant Tire Safety Information”
(US) or “Tire Safety Information”
(Canada) in the Warranty Infor-
mation Booklet.
Replacing wheels and tires
When replacing a tire, use the same size,
tread design, speed rating and load carry-
ing capacity as originally equipped. Rec-
ommended types and sizes are shown in
“Wheels and tires” in the “Technical and con-
sumer information” section of this manual.
WARNING
∙ The use of tires other than those rec-
ommended or the mixed use of tires
of different brands, construction
(bias, bias-belted or radial), or tread
patterns can adversely affect the ride,
braking, handling, Vehicle Dynamic
Control (VDC) system, ground clear-
ance, body-to-tire clearance, tire
chain clearance, speedometer cali-
bration, headlight aim and bumper
height. Some of these effects may
lead to accidents and could result in
serious personal injury.
WDI0259
8-44Do-it-yourself
Page 498 of 682

∙ If your vehicle was originallyequipped with four tires that were the
same size and you are only replacing
two of the four tires, install the new
tires on the rear axle. Placing new tires
on the front axle may cause loss of
vehicle control in some driving condi-
tions and cause an accident and per-
sonal injury.
∙ If the wheels are changed for any rea- son, always replace with wheels
which have the same off-set dimen-
sion. Wheels of a different off-set
could cause premature tire wear, de-
grade vehicle handling characteris-
tics, affect the VDC system and/or in-
terference with the brake discs. Such
interference can lead to decreased
braking efficiency and/or early brake
pad/shoe wear. For additional infor-
mation on wheel-off set dimensions,
refer to “Wheels and tires” in the
“Technical and consumer informa-
tion” section of this manual. ∙ When replacing a wheel without the
TPMS such as the spare tire, the TPMS
will not function and the low tire pres-
sure warning light will flash for ap-
proximately 1 minute. The light will re-
main on af ter 1 minute. Have your
tires replaced and/or TPMS system
reset as soon as possible. It is recom-
mended that you visit a NISSAN dealer
for this service.
∙ Replacing tires with those not origi- nally specified by NISSAN could affect
the proper operation of the TPMS.
∙ The TPMS sensor may be damaged if it is not handled correctly. Be careful
when handling the TPMS sensor.
∙ When replacing the TPMS sensor, the ID registration may be required. Con-
tact a NISSAN dealer for ID
registration.
∙ Do not use a valve stem cap that is not specified by NISSAN. The valve stem
cap may become stuck.
∙ Be sure that the valve stem caps are correctly fitted. Otherwise the valve
may be clogged up with dirt and
cause a malfunction or loss of
pressure. ∙ Do not install a damaged or deformed
wheel or tire even if it has been re-
paired. Such wheels or tires could
have structural damage and could fail
without warning.
∙ The use of retread tires is not recommended.
∙ For additional information regarding tires, refer to “Important Tire Safety
Information” (US) or “Tire Safety Infor-
mation” (Canada) in the Warranty In-
formation Booklet.
Four-wheel drive models
CAUTION
Always use tires of the same type, size,
brand, construction (bias, bias-belted
or radial), and tread pattern on all four
wheels. Failure to do so may result in a
circumference difference between tires
on the front and rear axles which will
cause excessive tire wear and may
damage the transmission, transfer case
and differential gears.
Do-it-yourself8-45
Page 505 of 682
Seats:Check seat position controls such
as seat adjusters, seatback recliner, etc., to
ensure they operate smoothly and all
latches lock securely in every position.
Check that the head restraints/headrests
move up and down smoothly and the locks
(if so equipped) hold securely in all latched
positions.
Seat belts: Check that all parts of the seat
belt system (for example, buckles, anchors,
adjusters and retractors) operate properly
and smoothly, and are installed securely.
Check the belt webbing for cuts, fraying,
wear or damage.
Steering wheel: Check for changes in the
steering system, such as excessive free-
play, hard steering or strange noises.
Warning lights and chimes: Make sure all
warning lights and chimes are operating
properly.
Windshield wiper and washer*: Check
that the wipers and washer operate prop-
erly and that the wipers do not streak.
Windshield defroster: Check that the air
comes out of the defroster outlets properly
and in sufficient quantity when operating
the heater or air conditioner.Under the hood and vehicle
The maintenance items listed here should
be checked periodically (for example, each
time you check the engine oil or refuel).
Battery* (for serviceable batteries):
Check the fluid level in each cell. The fluid
should be at the bottom of the filler open-
ing. Vehicles operated in high tempera-
tures or under severe conditions require
frequent checks of the battery fluid level.
NOTE:
Care should be taken to avoid situations
that can lead to potential battery dis-
charge and potential no-start conditions
such as:
1. Installation or extended use of elec-
tronic accessories that consume bat-
tery power when the engine is not
running (Phone chargers, GPS, DVD
players, etc.).
2. Vehicle is not driven regularly and/or
only driven short distances.
In these cases, the battery may need to
be charged to maintain battery health. Brake fluid level*:
Make sure that the brake
fluid level is between the MIN and MAX lines
on the reservoir.
Engine coolant level*: Check the coolant
level when the engine is cold.
Engine drive belts*: Make sure the drive
belts are not frayed, worn, cracked or oily.
Engine oil level*: Check the level af ter
parking the vehicle on a level surface with
the engine off. Wait more than 10 minutes
for the oil to drain back into the oil pan.
Exhaust system: Visually inspect the ex-
haust pipes, muffler and hangers for leaks,
cracks, deterioration and damage. Tighten
connections or replace parts as necessary.
For additional information, refer to “Exhaust
gas (carbon monoxide)” in the “Starting and
driving” section of this manual.
Fluid leaks: Check under the vehicle for
fuel, oil, water or other fluid leaks af ter the
vehicle has been parked for a while. Water
dripping from the air conditioner af ter use
is normal. If you should notice any leaks or if
fuel fumes are evident, check for the cause
and have it corrected immediately.
9-4Maintenance and schedules
Page 577 of 682
Trailer lights
CAUTION
When splicing into the vehicle electrical
system, a commercially available
power-type module/converter must be
used to provide power for all trailer
lighting. This unit uses the vehicle bat-
tery as a direct power source for all
trailer lights while using the vehicle tail
light, stop light and turn signal circuits
as a signal source. The
module/converter must draw no more
than 15 milliamps from the stop and tail
lamp circuits. Using a
module/converter that exceeds these
power requirements may damage the
vehicle’s electrical system. See a repu-
table trailer retailer to obtain the proper
equipment and to have it installed.
Trailer lights should comply with federal
and/or local regulations. For assistance in
hooking up trailer lights, it is recommended
that you contact a NISSAN dealer or repu-
table trailer retailer. Vehicles equipped with
the optional trailer tow package are
equipped with a 7-pin trailer harness con-
nector. If your trailer is equipped with a flat
4-pin connector, an adapter will be needed to connect the trailer lights to the vehicle.
Adapters are available at auto parts stores
and hitch retailers.Trailer brakes (if so equipped)
If your trailer is equipped with a braking
system, make sure it conforms to federal
and/or local regulations and that it is prop-
erly installed.
Vehicles equipped with a 7–pin trailer har-
ness connector are pre-wired for a trailer
brake controller. It is recommended that
you visit a NISSAN dealer for a trailer brake
adapter harness.
When towing a trailer load of 3,500 lbs.
(1587 kg) or more, trailers with a brake
system MUST be used.
However, most
states require a separate braking system
on trailers with a loaded weight above a
specific amount. Make sure the trailer
meets the local regulations and the regu-
lations where you plan to tow.
WARNING
The Gross Combined Weight Rating
(GCWR) must never exceed the vehicle
manufacturers recommendation.
Several types of braking systems are avail-
able. Surge Brakes -
The surge brake actuator is
mounted on the trailer tongue with a hy-
draulic line running to each trailer wheel.
Surge brakes are activated by the trailer
pushing against the hitch ball when the
tow vehicle is braking. Hydraulic surge
brakes are common on rental trailers and
some boat trailers. In this type of system,
there is no hydraulic or electric connection
for brake operation between the tow ve-
hicle and the trailer.
CAUTION
Your factory trailer brake control unit
will not activate surge-style trailer
brakes
Electric Trailer Brakes - Electric braking
systems are activated by an electronic sig-
nal sent from a trailer brake controller (spe-
cial brake-sensing module). If electric trailer
brakes are used, refer to “Electric trailer
brake controller" in this section.
Have a professional supplier of towing
equipment make sure the trailer brakes are
properly installed and demonstrate proper
brake function testing.
10-54Technical and consumer information
Page 583 of 682
∙ Check your hitch, trailer tire pressure,vehicle tire pressure, trailer light opera-
tion, and trailer wheel lug nuts every
time you attach a trailer to the vehicle.
∙ Be certain your rearview mirrors con- form to all federal, state or local regula-
tions. If not, install any mirrors required
for towing before driving the vehicle.
∙ Determine the overall height of the ve- hicle and trailer so the required clear-
ance is known.
Trailer towing tips
In order to gain skill and an understanding
of the vehicle’s behavior, you should prac-
tice turning, stopping and backing up in an
area which is free from traffic. Steering sta-
bility and braking performance will be
somewhat different than under normal
driving conditions.
∙ Always secure items in the trailer to pre- vent load shif t while driving.
∙ Lock the trailer hitch coupler with a pin or lock to prevent the coupler from in-
advertently becoming unlatched.
∙ Avoid abrupt starts, acceleration or stops.
∙ Avoid sharp turns or lane changes. ∙ Always drive your vehicle at a moderate
speed.
∙ When backing up, hold the bottom of the steering wheel with one hand. Move
your hand in the direction in which you
want the trailer to go. Make small cor-
rections and back up slowly. If possible,
have someone guide you when you are
backing up.
Always block the wheels on both vehicle
and trailer when parking. Parking on a
slope is not recommended; however, if you
must do so:
CAUTION
If you move the shif t selector to the P
(Park) position before blocking the
wheels and applying the parking brake,
transmission damage could occur.
1. Apply and hold the brake pedal.
2. Have someone place blocks on the downhill side of the vehicle and trailer
wheels.
3. Af ter the wheel blocks are in place, slowly release the brake pedal until the
blocks absorb the vehicle load.
4. Apply the parking brake. 5. Shif t the transmission into P (Park).
6. Make sure the
indicator light (if so
equipped) indicates the transfer case is
in 4H, 4LO, or 2H and that the ATP light is
off. If the
indicator light is flashing,
or the ATP light is ON, make sure the
transmission is in P (Park) (A/T) and
turn the 4WD switch to 2WD or 4H. For
additional information, refer to “Auto-
matic transmission park warning light”
in the “Instruments and controls” sec-
tion and “Using 4-wheel drive (4WD)” in
the “Starting and driving” section of this
manual.
7. Turn off the engine.
To drive away:
1. Start the vehicle.
2. Apply and hold the brake pedal.
3. Shif t the transmission into gear.
4. Release the parking brake.
5. Drive slowly until the vehicle and trailer are clear from the blocks.
6. Apply and hold the brake pedal.
7. Have someone retrieve and store the blocks.
10-60Technical and consumer information
Page 584 of 682
∙ While going downhill, the weight of thetrailer pushing on the tow vehicle may
decrease overall stability. Therefore, to
maintain adequate control, reduce your
speed and shif t to a lower gear. Avoid
long or repeated use of the brakes
when descending a hill, as this reduces
their effectiveness and could cause
overheating. Shif ting to a lower gear in-
stead provides “engine braking” and re-
duces the need to brake as frequently.
∙ If the engine coolant temperature rises to a high temperature, refer to “If your
vehicle overheats” in the “In case of
emergency” section of this owner’s
manual.
∙ Trailer towing requires more fuel than normal circumstances.
∙ Avoid towing a trailer for your vehicle’s first 500 miles (805 km).
∙ For the first 500 miles (805 km) that you do tow, do not drive over 50 mph
(80 km/h).
∙ Have your vehicle serviced more of ten than at intervals specified. For addi-
tional information, refer to “Mainte-
nance schedules” in the “Maintenance
and schedule” section of this manual. ∙ When making a turn, your trailer wheels
will be closer to the inside of the turn
than your vehicle wheels. To compen-
sate for this, make a larger than normal
turning radius during the turn.
∙ Crosswinds and rough roads will ad- versely affect vehicle/trailer handling,
possibly causing vehicle sway. When
being passed by larger vehicles, be pre-
pared for possible changes in cross-
winds that could affect vehicle han-
dling.
Trailer Sway Assist :
To minimize trailer sway, your vehicle may
apply braking to individual wheels based
on input from your vehicle sensors and ve-
hicle speed. Trailer sway control is a func-
tion of the Vehicle Dynamic Control (VDC)
system and is active when the VDC func-
tion is enabled.
CAUTION
If the VDC-OFF switch is on (meaning
VDC system OFF), the Trailer Sway As-
sist is also disabled When Trailer Sway Assist is in operation, the
VDC warning light blinks. When vehicle con-
trol is regained, VDC warning light will turn
OFF.
For additional information about the VDC
system, refer to “Vehicle Dynamic Control
(VDC) OFF switch” in the “Instruments and
controls” section and “Vehicle Dynamic
Control (VDC) system” in the “Starting and
driving” section of this manual.
If Trailer Sway Assist activates, do the fol-
lowing:
1. Take your foot off the accelerator pedal to allow the vehicle to coast and steer
as straight ahead as the road condi-
tions allow. This combination will help
stabilize the vehicle
CAUTION
Do not try to correct trailer sway by
steering or applying the brakes.
2. When the trailer sway stops, gently ap- ply the brakes and pull to the side of the
road in a safe area.
3. Try to rearrange the trailer load so it is balanced. For additional information,
refer to “Pre-towing tips” in this section.
Technical and consumer information10-61