2019 NISSAN PATHFINDER SV belt
[x] Cancel search: beltPage 279 of 476

∙ Failure to operate this vehicle cor-rectly could result in loss of control
and/or a rollover accident.
∙ Always use tires of the same type, size, brand, construction (bias, bias-
belted, or radial), and tread pattern on
all four wheels. Install tire chains on
the front wheels when driving on slip-
pery roads and drive carefully.
∙ Be sure to check the brakes immedi- ately af ter driving in mud or water. For
additional information, refer to “Brake
system” in this section.
∙ Avoid parking your vehicle on steep hills. If you get out of the vehicle and it
rolls forward, backward or sideways,
you could be injured.
∙ Whenever you drive off-road through sand, mud or water as deep as the
wheel hub, more frequent mainte-
nance may be required. For additional
information, refer to “Severe driving
conditions” in the “Maintenance and
schedules” section of this manual.
Page 283 of 476

∙ Make sure the area around the vehicle isclear.
∙ Check fluid levels such as engine oil, coolant, brake fluid, and windshield-
washer fluid as frequently as possible,
or at least whenever you refuel.
∙ Check that all windows and lights are clean.
∙ Visually inspect tires for their appear- ance and condition. Also check tires for
proper inflation.
∙ Check that all doors are closed.
∙ Position seat and adjust head restraints/headrests.
∙ Adjust inside and outside mirrors.
∙ Fasten seat belts and ask all passen- gers to do likewise.
∙ Check the operation of warning lights when the ignition switch is placed in the
ON position. For additional information,
refer to “Warning lights, indicator lights
and audible reminders” in the “Instru-
ments and controls” section of this
manual. 1. Apply the parking brake.
2. Move the shif t lever to P (Park) or N
(Neutral). P (Park) is recommended.
The starter is designed not to oper-
ate if the shif t lever is in any of the
driving positions.
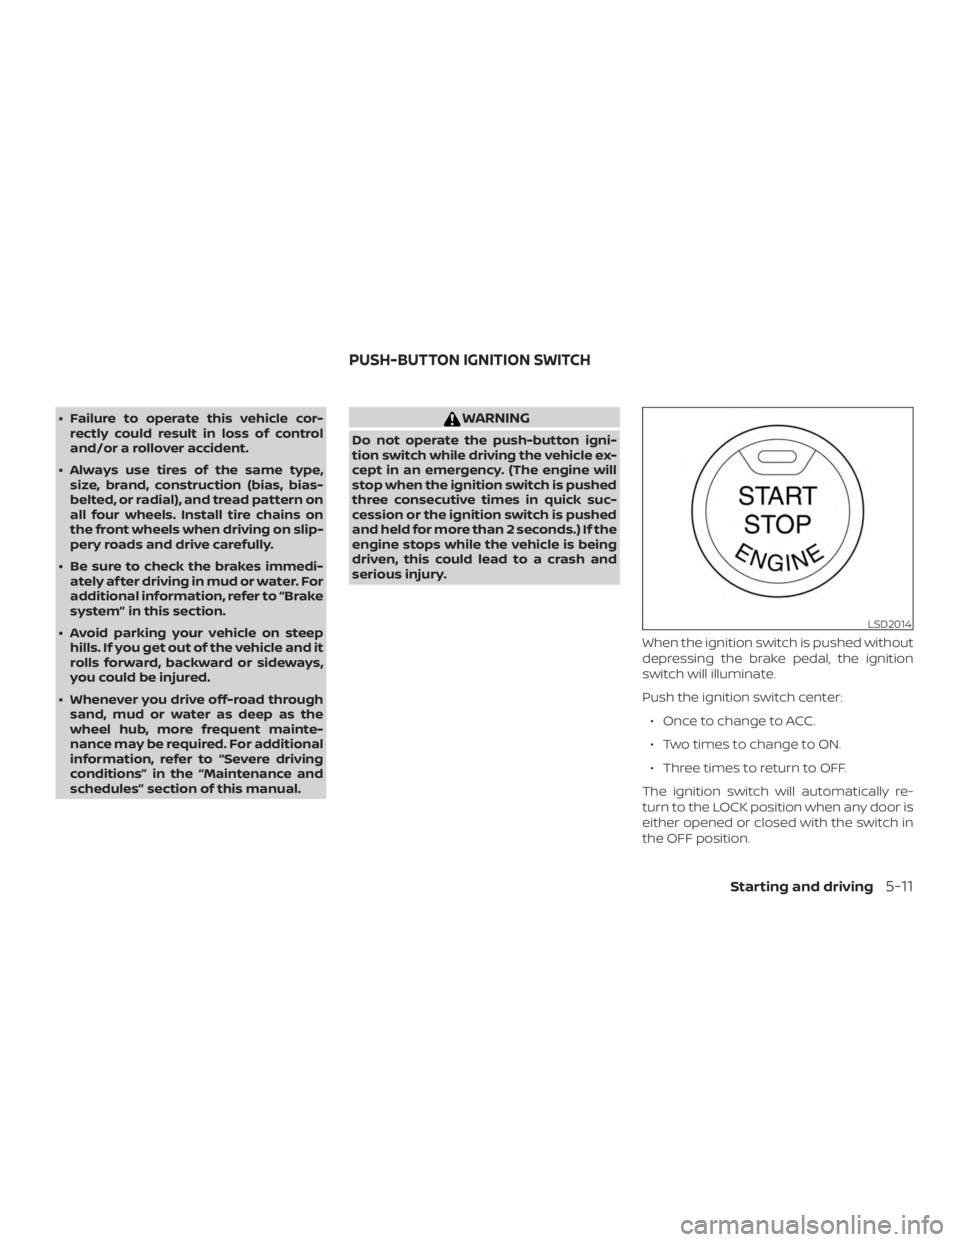
3. Push the ignition switch to the ON po- sition. Depress the brake pedal and
push the ignition switch to start the
engine.
To start the engine immediately, push
and release the ignition switch while
depressing the brake pedal with the
ignition switch in any position.
∙ If the engine is very hard to start in extremely cold weather or when re-
starting, depress the accelerator
pedal a little (approximately 1/3 to the
floor) and while holding, crank the en-
gine. Release the accelerator pedal
when the engine starts.
∙ If the engine is very hard to start be- cause it is flooded, depress the accel-
erator pedal all the way to the floor
and hold it. Push the ignition switch
to the ON position to start cranking
the engine. Af ter 5 or 6 seconds, stop
cranking by pushing the ignition switch to the LOCK position. Af ter
cranking the engine, release the ac-
celerator pedal. Crank the engine
with your foot off the accelerator
pedal by depressing the brake pedal
and pushing the ignition switch to
start the engine. If the engine starts,
but fails to run, repeat the above pro-
cedure.
Page 373 of 476

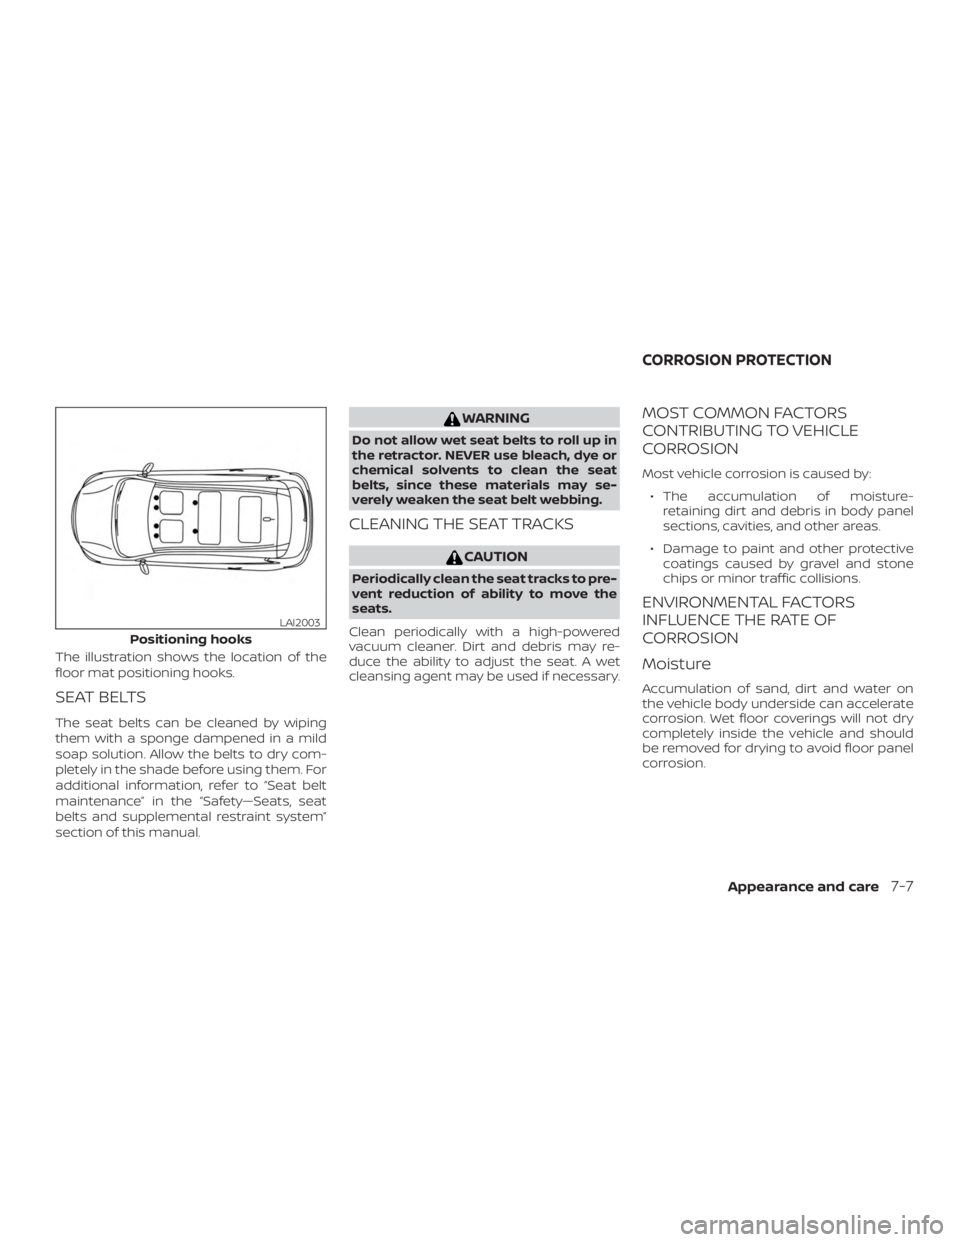
The illustration shows the location of the
floor mat positioning hooks.
SEAT BELTS
The seat belts can be cleaned by wiping
them with a sponge dampened in a mild
soap solution. Allow the belts to dry com-
pletely in the shade before using them. For
additional information, refer to “Seat belt
maintenance” in the “Safety—Seats, seat
belts and supplemental restraint system”
section of this manual.
Page 389 of 476

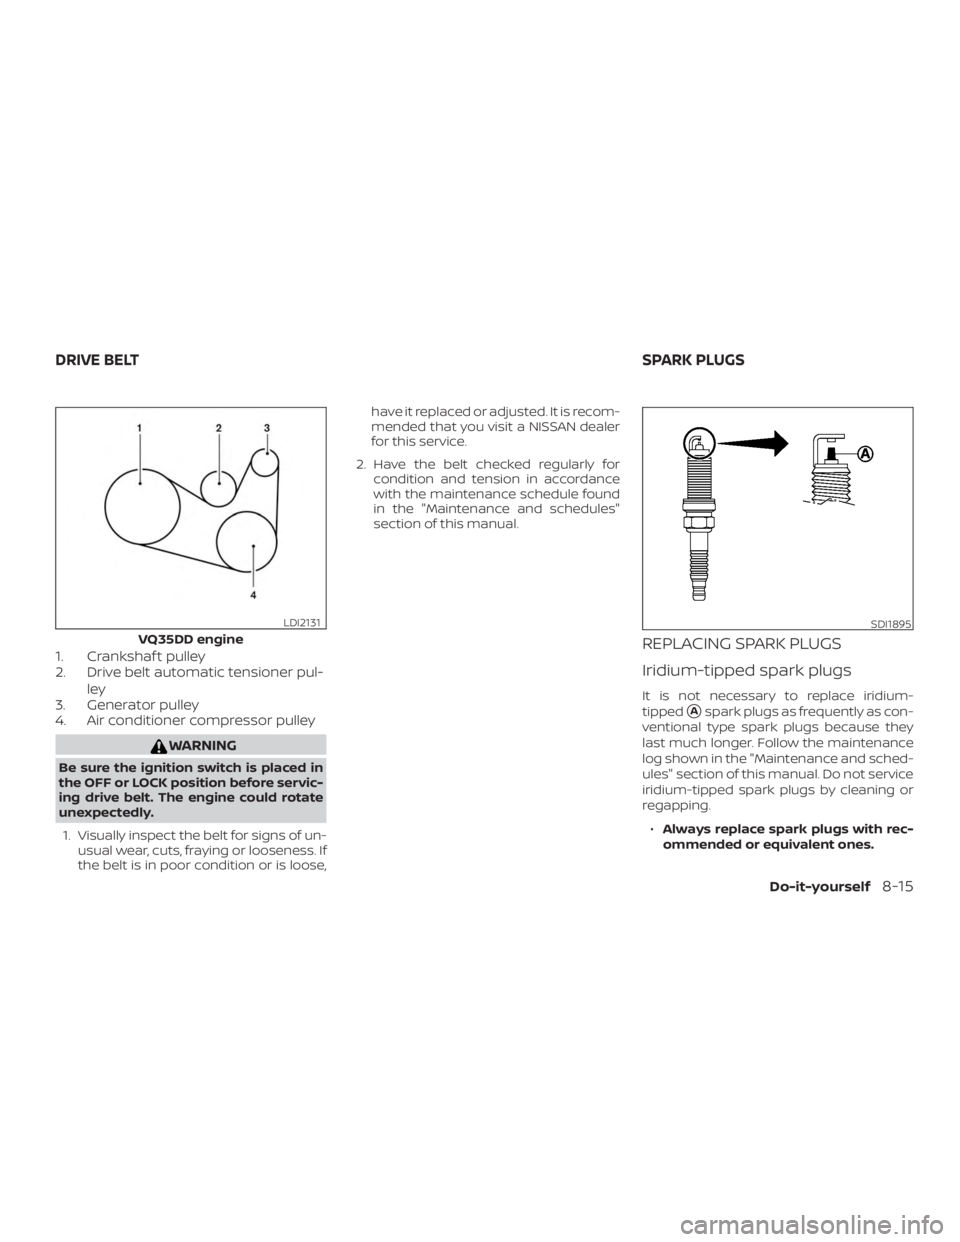
1. Crankshaf t pulley
2. Drive belt automatic tensioner pul-ley
3. Generator pulley
4. Air conditioner compressor pulley
Page 444 of 476

WARNING
∙ It is extremely dangerous to ride in a cargo area inside a ve-
hicle. In a collision, people riding
in these areas are more likely to
be seriously injured or killed.
∙ Do not allow people to ride in any area of your vehicle that is
not equipped with seats and
seat belts.
∙ Be sure everyone in your vehicle is in a seat and using a seat belt
properly.
TERMS
It is important to familiarize yourself
with the following terms before
loading your vehicle:
∙ Curb Weight (actual weight of your vehicle) - vehicle weight in-
cluding: standard and optional
equipment, fluids, emergency
tools, and spare tire assembly.
This weight does notinclude
passengers and cargo. ∙ GVW (Gross Vehicle Weight) - curb
weight plus the combined weight
of passengers and cargo.
∙ GVWR (Gross Vehicle Weight Rat- ing) - maximum total combined
weight of the unloaded vehicle,
passengers, luggage, hitch, trailer
tongue load and any other op-
tional equipment. This informa-
tion is located on the
F.M.V.S.S./C.M.V.S.S. certification
label.
∙ GAWR (Gross Axle Weight Rating) - maximum weight (load) limit
specified for the front or rear axle.
This information is located on the
F.M.V.S.S./C.M.V.S.S. certification
label.
∙ GCWR (Gross Combined Weight rating) - The maximum total
weight rating of the vehicle, pas-
sengers, cargo, and trailer. ∙ Vehicle Capacity Weight, Load
limit, Total load capacity - maxi-
mum total weight limit specified
of the load (passengers and
cargo) for the vehicle. This is the
maximum combined weight of
occupants and cargo that can be
loaded into the vehicle. If the ve-
hicle is used to tow a trailer, the
trailer tongue weight must be in-
cluded as part of the cargo load.
This information is located on the
Tire and Loading Information la-
bel.
∙ Cargo capacity - permissible weight of cargo, the subtracted
weight of occupants from the
load limit.
VEHICLE LOADING INFORMATION
10-14Technical and consumer information
Page 464 of 476

WARNING
A vehicle equipped with Four-Wheel
Drive (4WD) should never be tested us-
ing a two wheel dynamometer (such as
the dynamometers used by some
states for emissions testing), or similar
equipment. Make sure you inform the
test facility personnel that your vehicle
is equipped with 4WD before it is placed
on a dynamometer. Using the wrong
test equipment may result in transmis-
sion damage or unexpected vehicle
movement which could result in serious
vehicle damage or personal injury.
Due to legal requirements in some states
and Canadian Provinces, your vehicle may
be required to be in what is called the
“ready condition” for an
Inspection/Maintenance (I/M) test of the
emission control system.
The vehicle is set to the “ready condition”
when it is driven through certain driving
patterns. Usually, the ready condition can
be obtained by ordinary usage of the ve-
hicle. If a powertrain system component is re-
paired or the battery is disconnected, the
vehicle may be reset to a “not ready” condi-
tion. Before taking the I/M test, check the
vehicle’s inspection/maintenance test
readiness condition. Place the ignition
switch in the ON position without starting
the engine. If the Malfunction Indicator
Light (MIL) comes on steady for 20 seconds
and then blinks for 10 seconds, the I/M test
condition is “not ready”. If the MIL does not
blink af ter 20 seconds, the I/M test condi-
tion is “ready”. It is recommended that you
visit a NISSAN dealer to set the “ready con-
dition” or to prepare the vehicle for testing.
This vehicle is equipped with an Event Data
Recorder (EDR). The main purpose of an
EDR is to record, in certain crash or near
crash-like situations, such as an air bag
deployment or hitting a road obstacle, data
that will assist in understanding how a ve-
hicle’s systems performed. The EDR is de-
signed to record data related to vehicle dy-
namics and safety systems for a short
period of time, typically 30 seconds or less.
The EDR in this vehicle is designed to re-
cord such data as:
∙ How various systems in your vehicle were operating;
∙ Whether or not the driver and passen- ger safety belts were buckled/fastened;
∙ How far (if at all) the driver was depress- ing the accelerator and/or brake pedal;
and,
∙ How fast the vehicle was traveling.
∙ Sounds are not recorded.
READINESS FOR INSPECTION/
MAINTENANCE (I/M) TEST EVENT DATA RECORDERS (EDR)
10-34Technical and consumer information
Page 468 of 476

Compass.....................2-8
Console box ..................2-59
Console light ..................2-72
Continuously Variable Transmission
(CVT) .......................5-16
Continuously Variable Transmission
(CVT) fluid ..................8-10
Driving with Continuously Variable
Transmission (CVT) ............5-16
Controls Heater and air conditioner controls . .4-33
Coolant Capacities and recommended
fuel/lubricants...............10-2
Changing engine coolant .........8-5
Checking engine coolant level ......8-5
Engine coolant temperature gauge . .2-6
Corrosionprotection..............7-7
Cruisecontrol ..............5-41,5-41
Cupholders ..................2-60
D
Daytime Running Light System .......2-41
Defroster switch Rear window and outside mirror
defrosterswitch..............2-38
Dimensions and weights ..........10-10
Dimmer switch for instrument panel . . .2-42
Door locks ....................3-5
Drivebelt ....................8-15
Drive positioner, Automatic ......3-48,3-51
Driving Coldweatherdriving...........5-80 Driving with Continuously Variable
Transmission (CVT)
............5-16
Precautions when starting and
driving.....................5-2
Drivingthevehicle...............5-16
Dual panel moonroof .............2-68
Dual power moonroof ............2-68
E
E-CALL (SOS) SWITCH .............2-53
Economy - fuel .................5-67
Emergency engine shutoff .......5-13,6-2
Emission control information label . . . .10-12
Emission control system warranty . . . .10-32
Engine Before starting the engine ........5-15
Capacities and recommended
fuel/lubricants...............10-2
Changing engine coolant .........8-5
Changing engine oil ............8-6
Changing engine oil filter .........8-6
Checking engine coolant level ......8-5
Checking engine oil level .........8-6
Engine compartment check
locations...................8-3
Engine coolant temperature gauge . .2-6
Engine cooling system ..........8-4
Engine oil ...................8-6
Engine oil and oil filter
recommendation .............10-7
Engine oil viscosity .............10-7
Engine serial number ..........10-12
Engine specifications ...........10-9 Starting the engine
............5-15
Engine Block Heater ..............5-81
Engine coolant temperature gauge ....2-6
EventDatarecorders............10-34
Exhaust gas (Carbon monoxide) .......5-2
Explanation of maintenance items .....9-3
Explanation of scheduled maintenance
items .......................9-5
Extended storage switch ..........2-56
Eyeglasscase.................2-60
F
Flashers
(Seehazardwarningflasherswitch)....6-2
Flattire......................6-3
Floormatpositioningaid...........7-6
Fluid Brakefluid..................8-11
Capacities and recommended
fuel/lubricants...............10-2
Continuously Variable Transmission (CVT)
fluid......................8-10
Engine coolant ...............8-4
Engine oil ...................8-6
Powersteeringfluid............8-10
Windshield-washer fluid .........8-11
F.M.V.S.S. certification label .........10-12
F
oglightswitch................2-43
Front air bag system
(See supplemental restraint system) . . .1-60
Front-door pocket ...............2-57
Front power seat adjustment ........1-5
Frontseats....................1-2
11-2
Page 470 of 476

L
Labels Air conditioner specification label . . .10-13
C.M.V.S.S. certification label .......10-12
Emission control information label . .10-12
Engine serial number ..........10-12
F.M.V.S.S. certification label .......10-12
Tire and Loading Information label . .10-13
Vehicle identification number (VIN) . .10-11
Vehicle identification number (VIN)
plate.....................10-11
Warning labels (for SRS) ..........1-71
LATCH (Lower Anchors and Tethers for
CHildren)System............... .1-32
LED Daytime Running Lights (DRL) .....2-41
License plate Installing the license plate .......10-13
Liftgate .....................3-32
Liftgaterelease.................3-37
Light Airbagwarninglight........1-72, 2-16
Brakelight(Seestoplight)........8-25
Bulb check/instrument panel ......2-11
Bulb replacement .............8-25
Charge warning light ...........2-13
Console light ................2-72
ExteriorandInteriorlights........8-25
Foglights..................8-24
Foglightswitch..............2-43
Headlight and turn signal switch ....2-39
Headlightcontrolswitch.........2-39
Headlights .................8-24
Interiorlight.................2-71
Lightbulbs.................8-24 Low tire pressure warning light
.....2-13
Low windshield-washer fluid warning
light......................2-30
Passenger air bag and status light . . .1-63
Personal lights ...............2-72
Security indicator light ..........2-18
Spotlights(Seemaplight)........2-72
Warning/indicator lights and audible
reminders ...............2 -11, 2-16
Lights......................8-24 Maplights..................2-72
Lock Child safety rear door lock ........3-7
Door locks ..................3-5
Gloveboxlock...............2-59
Liftgaterelease...............3-37
Power door locks ............3-6,3-7
Loose fuel cap warning ...........2-30
Lowfuelwarninglight.........2-15,2-29
Low tire pressure warning light .......2-13
Low windshield-washer fluid warning
light........................2-30
Luggage hook .................2-63
Luggage rack (see roof rack) ........2-64
Luggage
(See vehicle loading information) .....10-14
M
Maintenance General maintenance ...........9-3
Insidethevehicle..............9-4
Maintenance precautions .........8-2
Outsidethevehicle.............9-3
Seat belt maintenance ..........1-27 Under the hood and vehicle
.......9-4
Maintenance log ................9-13
Maintenance requirements ..........9-2
Maintenance schedules ............9-7
Maintenance under severe operation
conditions....................9-12
Malfunctionindicatorlight..........2-17
Manual front seat adjustment ........1-3
Maplights................... .2-72
Map pocket ...................2-57
Memory Seat ...............3 -48, 3-51
Meters and gauges ...............2-4
Instrument brightness control .....2-42
Mirror Automatic anti-glare inside mirror . .3-46
Outsidemirrors ..............3-47
Rearview ..................3-45
Vanitymirror................3-45
Mirrors......................3-45
Moonroof .................2-68,7-5
Moving Object Detection (MOD) ......4-27
N
NissanConnect® Owner's Manual ......4-2
NISSAN Intelligent Key® .........
3-2,3-21
NISSAN Vehicle Immobilizer
System ..................2-34, 5-14
O
Octane rating (See fuel octane rating) . .10-6
Odometer ....................2-5
11-4