2019 NISSAN PATHFINDER headrest
[x] Cancel search: headrestPage 74 of 476

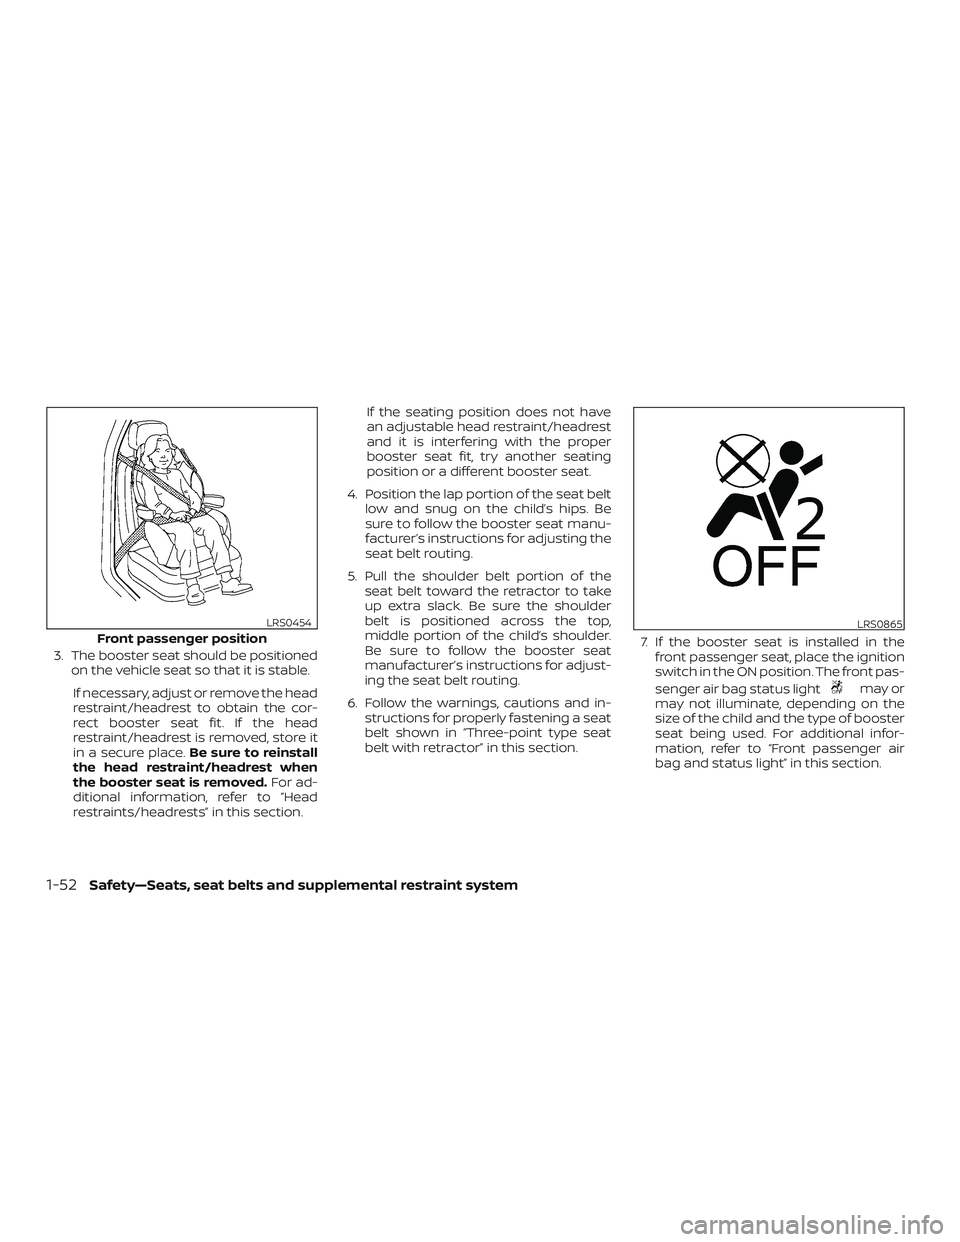
3. The booster seat should be positionedon the vehicle seat so that it is stable.
If necessary, adjust or remove the head
restraint/headrest to obtain the cor-
rect booster seat fit. If the head
restraint/headrest is removed, store it
in a secure place. Be sure to reinstall
the head restraint/headrest when
the booster seat is removed. For ad-
ditional information, refer to “Head
restraints/headrests” in this section. If the seating position does not have
an adjustable head restraint/headrest
and it is interfering with the proper
booster seat fit, try another seating
position or a different booster seat.
4. Position the lap portion of the seat belt low and snug on the child’s hips. Be
sure to follow the booster seat manu-
facturer’s instructions for adjusting the
seat belt routing.
5. Pull the shoulder belt portion of the seat belt toward the retractor to take
up extra slack. Be sure the shoulder
belt is positioned across the top,
middle portion of the child’s shoulder.
Be sure to follow the booster seat
manufacturer’s instructions for adjust-
ing the seat belt routing.
6. Follow the warnings, cautions and in- structions for properly fastening a seat
belt shown in “Three-point type seat
belt with retractor” in this section. 7. If the booster seat is installed in the
front passenger seat, place the ignition
switch in the ON position. The front pas-
senger air bag status light
may or
may not illuminate, depending on the
size of the child and the type of booster
seat being used. For additional infor-
mation, refer to “Front passenger air
bag and status light” in this section.
Front passenger position
LRS0454LRS0865
1-52Safety—Seats, seat belts and supplemental restraint system
Page 83 of 476

WARNING
To ensure proper operation of the pas-
senger’s NISSAN Advanced Air Bag Sys-
tem, please observe the following
items.
∙ Do not allow a passenger in the rearbench seats to push or pull on the
seatback pocket.
∙ Do not place heavy loads heavier than 9.1 lbs. (4 kg) on the seatback, head
restraint/headrest or in the seatback
pocket.
∙ Make sure that there is nothing press- ing against the rear of the seatback,
such as a child restraint installed in
the rear seat or an object stored on
the floor.
∙ Make sure that there is no object placed under the front passenger
seat.
∙ Make sure that there is no object placed between the seat cushion and
center console or between the seat
cushion and the door. ∙ If a forward-facing child restraint is
installed in the front passenger seat,
do not position the front passenger
seat so the child restraint contacts the
instrument panel. If the child restraint
does contact the instrument panel,
the system may determine the seat is
occupied and the passenger air bag
may deploy in a collision. Also the
front passenger air bag status light
may not illuminate. For additional in-
formation about installing and using
child restraints, refer to “Child re-
straints” in this section.
∙ Confirm the operating condition with the front passenger air bag status
light.
∙ If you notice that the front passenger air bag status light is not operating as
described in this section, get the oc-
cupant classification system checked.
It is recommended that you visit a
NISSAN dealer for this service.
∙ Until you have confirmed with a dealer that your passenger seat occu-
pant classification system is working
properly, position the occupants in
the rear seating positions. ∙ Do not position the front passenger
seat so it contacts the rear seat. If the
front seat does contact the rear seat,
the air bag system may determine a
sensor malfunction has occurred and
the front passenger air bag status
light may illuminate and the supple-
mental air bag warning light may
flash.
This vehicle is equipped with the NISSAN
Advanced Air Bag System for the driver and
front passenger seats. This system is de-
signed to meet certification requirements
under U.S. regulations. It is also permitted in
Canada. However, all of the information,
cautions and warnings in this manual
still apply and must be followed.
The driver supplemental front-impact air
bag is located in the center of the steering
wheel. The front passenger supplemental
front-impact air bag is mounted in the
dashboard above the glove box. The front
air bags are designed to inflate in higher
severity frontal collisions, although they
may inflate if the forces in another type of
collision are similar to those of a higher
severity frontal impact. They may not in-
flate in certain frontal collisions. Vehicle
Safety—Seats, seat belts and supplemental restraint system1-61
Page 153 of 476

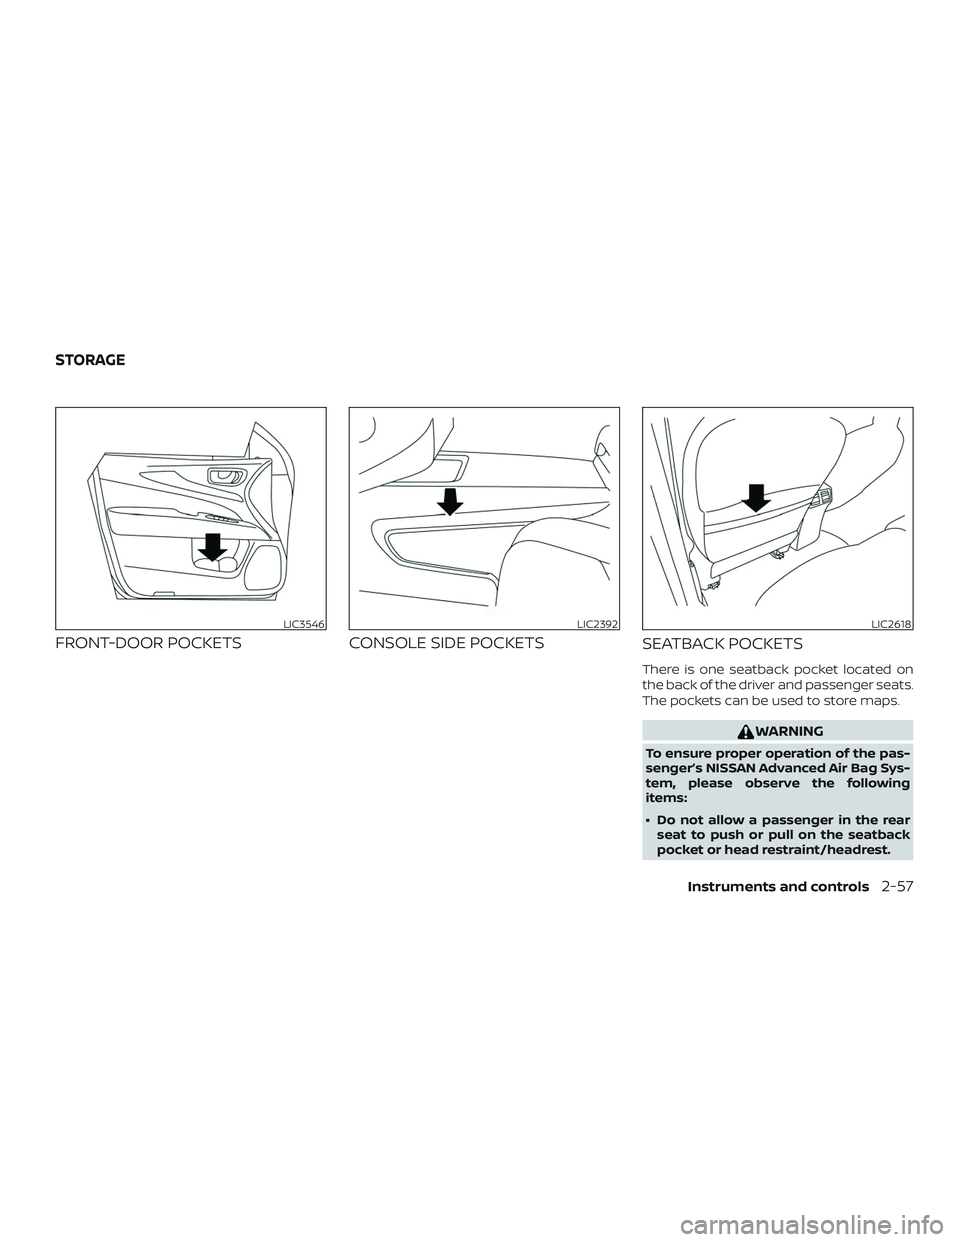
FRONT-DOOR POCKETSCONSOLE SIDE POCKETS
SEATBACK POCKETS
There is one seatback pocket located on
the back of the driver and passenger seats.
The pockets can be used to store maps.
WARNING
To ensure proper operation of the pas-
senger’s NISSAN Advanced Air Bag Sys-
tem, please observe the following
items:
∙ Do not allow a passenger in the rear
seat to push or pull on the seatback
pocket or head restraint/headrest.
LIC3546LIC2392LIC2618
STORAGE
Instruments and controls2-57
Page 154 of 476

∙ Do not place heavy loads heavier than9.1 lbs. (4 kg) on the seatback, head
restraint/headrest or in the seatback
pocket.
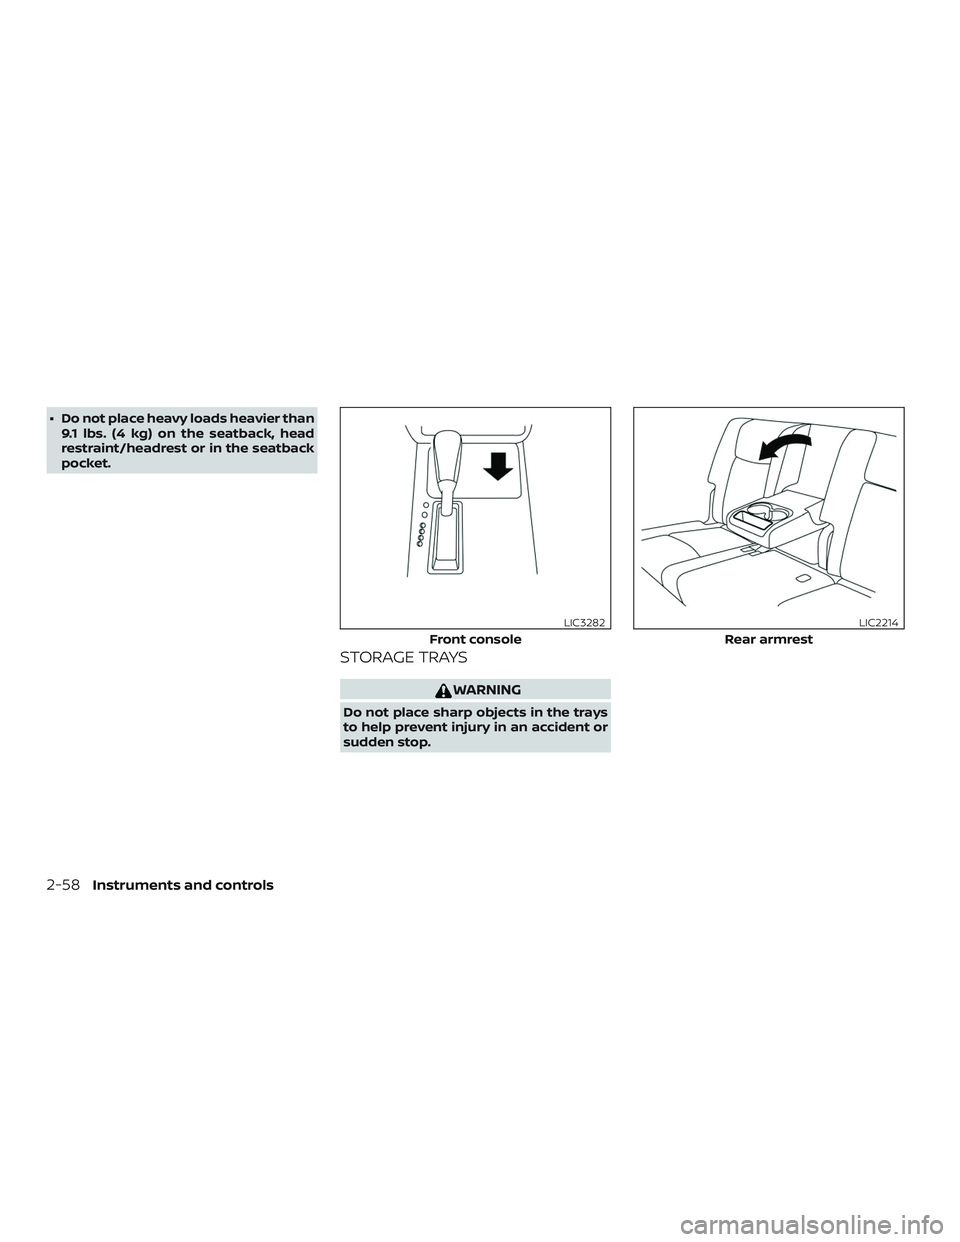
STORAGE TRAYS
WARNING
Do not place sharp objects in the trays
to help prevent injury in an accident or
sudden stop.
Front console
LIC3282
Rear armrest
LIC2214
2-58Instruments and controls
Page 283 of 476

∙ Make sure the area around the vehicle isclear.
∙ Check fluid levels such as engine oil, coolant, brake fluid, and windshield-
washer fluid as frequently as possible,
or at least whenever you refuel.
∙ Check that all windows and lights are clean.
∙ Visually inspect tires for their appear- ance and condition. Also check tires for
proper inflation.
∙ Check that all doors are closed.
∙ Position seat and adjust head restraints/headrests.
∙ Adjust inside and outside mirrors.
∙ Fasten seat belts and ask all passen- gers to do likewise.
∙ Check the operation of warning lights when the ignition switch is placed in the
ON position. For additional information,
refer to “Warning lights, indicator lights
and audible reminders” in the “Instru-
ments and controls” section of this
manual. 1. Apply the parking brake.
2. Move the shif t lever to P (Park) or N
(Neutral). P (Park) is recommended.
The starter is designed not to oper-
ate if the shif t lever is in any of the
driving positions.
3. Push the ignition switch to the ON po- sition. Depress the brake pedal and
push the ignition switch to start the
engine.
To start the engine immediately, push
and release the ignition switch while
depressing the brake pedal with the
ignition switch in any position.
∙ If the engine is very hard to start in extremely cold weather or when re-
starting, depress the accelerator
pedal a little (approximately 1/3 to the
floor) and while holding, crank the en-
gine. Release the accelerator pedal
when the engine starts.
∙ If the engine is very hard to start be- cause it is flooded, depress the accel-
erator pedal all the way to the floor
and hold it. Push the ignition switch
to the ON position to start cranking
the engine. Af ter 5 or 6 seconds, stop
cranking by pushing the ignition switch to the LOCK position. Af ter
cranking the engine, release the ac-
celerator pedal. Crank the engine
with your foot off the accelerator
pedal by depressing the brake pedal
and pushing the ignition switch to
start the engine. If the engine starts,
but fails to run, repeat the above pro-
cedure.
CAUTION
Do not operate the starter for more
than 15 seconds at a time. If the engine
does not start, push the ignition switch
to the OFF position and wait 10 seconds
before cranking again, otherwise the
starter could be damaged.
4. Warm-up:
Allow the engine to idle for at least
30 seconds af ter starting. Do not race
the engine while warming it up. Drive at
a moderate speed for a short distance
first, especially in cold weather. In cold
weather, keep the engine running for a
minimum of 2 to 3 minutes before
shutting it off. Starting and stopping
the engine over a short period of time
may make the vehicle more difficult to
start.
BEFORE STARTING THE ENGINE STARTING THE ENGINE
Starting and driving5-15
Page 418 of 476

Inside the vehicle
The maintenance items listed here should
be checked on a regular basis, such as
when performing scheduled maintenance,
cleaning the vehicle, etc.
Accelerator pedal:Check the pedal for
smooth operation and make sure the
pedal does not catch or require uneven
effort. Keep the floor mat away from the
pedal.
Brake pedal: Check the pedal for smooth
operation. If the brake pedal suddenly goes
down further than normal, the pedal feels
spongy or the vehicle seems to take longer
to stop, have your vehicle checked imme-
diately. It is recommended that you visit a
NISSAN dealer for this service. Keep the
floor mat away from the pedal.
Brakes: Check that the brakes do not pull
the vehicle to one side when applied.
Continuously Variable Transmission
(CVT) P (Park) position mechanism: On a
fairly steep hill check that the vehicle is held
securely with the shif t lever in the P (Park)
position without applying any brakes.
Parking brake: Check the parking brake
operation regularly. The vehicle should be
securely held on a fairly steep hill with only the parking brake applied. If the parking
brake needs adjustment, it is recom-
mended that you visit a NISSAN dealer for
this service.
Seats:
Check seat position controls such
as seat adjusters, seatback recliner, etc., to
ensure they operate smoothly and all
latches lock securely in every position.
Check that the head restraints/headrests
move up and down smoothly and the locks
(if so equipped) hold securely in all latched
positions.
Seat belts: Check that all parts of the seat
belt system (for example, buckles, anchors,
adjusters and retractors) operate properly
and smoothly, and are installed securely.
Check the belt webbing for cuts, fraying,
wear or damage.
Steering wheel: Check for changes in the
steering system, such as excessive free
play, hard steering or strange noises.
Warning lights and chimes: Make sure all
warning lights and chimes are operating
properly.
Windshield defroster: Check that the air
comes out of the defroster outlets properly
and in sufficient quantity when operating
the heater or air conditioner. Windshield wiper and washer*:
Check
that the wipers and washer operate prop-
erly and that the wipers do not streak.
Under the hood and vehicle
The maintenance items listed here should
be checked periodically (for example, each
time you check the engine oil or refuel).
Battery* (for maintenance free batter-
ies): This vehicle is equipped with a sealed
maintenance free battery. It is recom-
mended that you visit a NISSAN dealer for
service.
NOTE:
Care should be taken to avoid situations
that can lead to potential battery dis-
charge and potential no-start conditions
such as:
1. Installation or extended use of elec-
tronic accessories that consume bat-
tery power when the engine is not
running (Phone chargers, GPS, DVD
players, etc.).
2. Vehicle is not driven regularly and/or
only driven short distances.
In these cases, the battery may need to
be charged to maintain battery health.
9-4Maintenance and schedules
Page 469 of 476

FuelCapacities and recommended
fuel/lubricants...............10-2
Fuel economy ...............5-67
Fuel-filler door and cap ..........3-39
Fuel gauge ..................2-7
Fueloctanerating.............10-6
Fuel recommendation ..........10-4
Loose fuel cap warning .........2-30
Fuelefficientdrivingtips...........5-66
Fuel-filler door .................3-39
Fuel gauge ....................2-7
Fuses .......................8-19
Fusiblelinks...................8-20
G
Garage door opener, HomeLink® Universal
Transceiver .........2-73,2-74,2-76,2-77
Gascap.....................3-39
Gauge Engine coolant temperature gauge . .2-6
Fuel gauge ..................2-7
Odometer ..................2-5
Speedometer ..............2-4,2-5
Tachometer .................2-6
Trip odometer .............2-4,2-5
General maintenance .............9-3
Glovebox....................2-59
Gloveboxlock.................2-59
H
Hazard warning flasher switch ........6-2Headlight and turn signal switch
......2-39
Headlightcontrolswitch...........2-39
Headlights ...................8-24
Headrestraints.................1-12
Heated 2nd row seat switches .......2-46
Heatedseats..................2-44
Heated seat switches ............2-45
Heated steering wheel switch ....2-47,2-48
Heater Heater and air conditioner controls . .4-33
Heater operation .............4-34
Hill descent control switch .........2-49
Hill descent control system .........5-78
Hill start assist system ............5-78
HomeLink® Universal
Transceiver .........2 -73, 2-74, 2-76, 2-77
Hood .......................3-32
Hook Luggage hook ...............2-63
Horn.......................2-43
I
Ignition switch Push-button ignition switch .......5-11
Immobilizer system ...........2-34,5-14
Important vehicle information label . . .10-12
In-cabinmicrofilter..............8-16
Increasing fuel economy ...........5-67
Indicator lights and audible reminders
(See warning/indicator lights and audible
reminders) .................2 -11, 2-16
Inside automatic anti-glare mirror .....3-46
Instrument brightness control .......2-42
Instrument panel .............0-6,2-2 Instrument panel dimmer switch
.....2-42
Intelligent 4x4 (I-4x4) .............5-67
Intelligent Around View Monitor .......4-11
Intelligent Cruise Control (ICC) .......5-43
Intelligent Key system Key operating range .........3-9,3-22
Key operation ................3-11
Mechanical key ...............3-3
Remote keyless entry
operation ...............
3-14,3-22
Troubleshooting guide .......3-18,3-27
Warning signals ...........3-18,3-27
Interiorlight...................2-71
ISOFIX child restraints .............1-32
J
Jumpstarting..............6-10, 8-14
K
Key........................ .3-2
Key fob battery replacement ........8-22
Keyless entry With Intelligent Key system
(See Intelligent Key system) ....3-14,3-22
Keys NISSAN Intelligent Key® .......3-2,3-21
NISSAN Vehicle Immobilizer System
keys......................3-4
11-3