Page 141 of 444

∙ Heavy loading of the cross bars hasthe potential to affect the vehicle sta-
bility and handling during sudden or
unusual handling maneuvers.
∙ Roof rack cross bars should be evenly distributed.
∙ Do not exceed maximum roof rack cross bars load capacity.
∙ Properly secure all cargo with ropes or straps to help prevent it from sliding
or shif ting. In a sudden stop or colli-
sion, unsecured cargo could cause
personal injury.
Installing Crossbars (if so
equipped)
WARNING
∙ It is recommended that you have theroof rack crossbars installed by a
NISSAN dealer.
∙ Removal and re-installation of cross- bars requires purchase of new M6
bolts (T99R1 5RL0A-S1) or the re-
application of thread-locking adhe-
sive such as LOCTITE® , 242® , or
equivalent. ∙ Do not attempt to adjust fasteners on
the underside of the end supports.
Fasteners are pre-adjusted to the
proper torque requirement by the
manufacturer.
∙ Protect the painted area on the ve- hicle roof under the crossbars by plac-
ing a piece of cloth under the cross
bars to prevent scratch damage.
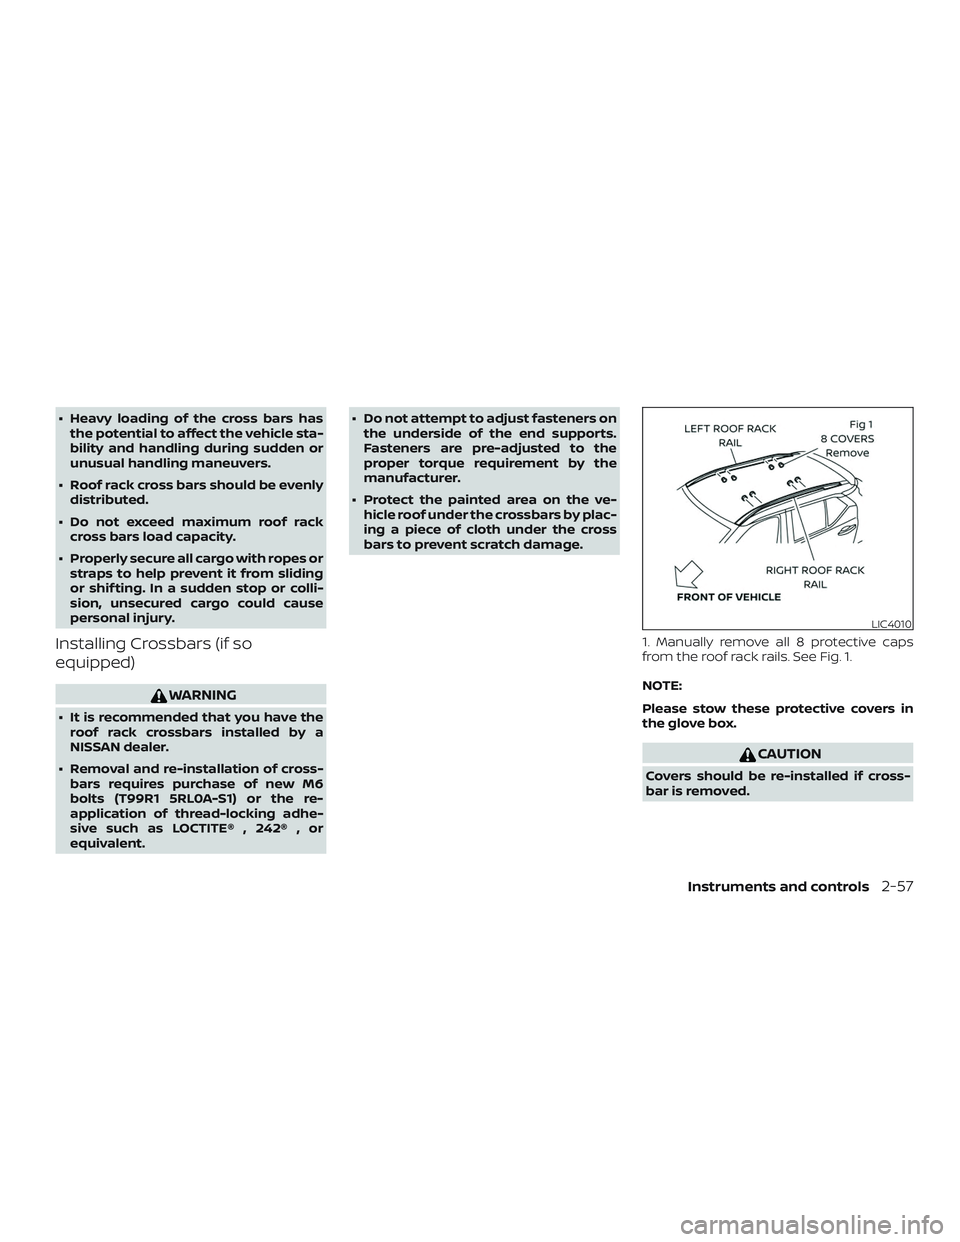
1. Manually remove all 8 protective caps
from the roof rack rails. See Fig. 1.
NOTE:
Please stow these protective covers in
the glove box.
CAUTION
Covers should be re-installed if cross-
bar is removed.
LIC4010
Instruments and controls2-57
Page 142 of 444
2. Identif y the FRONT(A)& REAR (B)cross-
bar assembly in the kit.
NOTE:
REAR Crossbar is shorter in length com-
pared to the FRONT Crossbar 3. Identif y markings on bottom side of
crossbar end supports.
NOTE:
∙ FL is FRONT Crossbar Driver Side.
∙ FR is FRONT Crossbar Passenger Side
∙ RL is REAR Crossbar Driver Side.
∙ RR is REAR Crossbar Passenger Side. When assembled, the Arrow on the bot-
tom side of the crossbar end support
always points towards the front of the
vehicle. 4. Position FRONT crossbar onto lef t and
right roof rack rail; and adjust right support
in and out until it fits securely into position.
See Fig. 4.
LIC4011LIC4012LIC4013
2-58Instruments and controls
Page 390 of 444

Spare tire (TEMPORARY USE ONLY
spare tire)
When replacing a wheel without the TPMS
such as the spare tire, the TPMS will not
function.
Observe the following precautions if the
TEMPORARY USE ONLY spare tire must be
used. Otherwise, your vehicle could be
damaged or involved in an accident:
WARNING
∙ The spare tire should be used foremergency use only. It should be re-
placed with the standard tire at the
first opportunity to avoid possible tire
or differential damage.
∙ Drive carefully while the TEMPORARY USE ONLY spare tire is installed. Avoid
sharp turns and abrupt braking while
driving.
∙ Periodically check spare tire inflation pressure. Always keep the pressure of
the TEMPORARY USE ONLY spare tire
at 420 kPa, 4.2 bar (60 psi). ∙ With the TEMPORARY USE ONLY spare
tire installed do not drive the vehicle
at speeds faster than 50 mph
(80 km/h).
∙ When driving on roads covered with snow or ice, the TEMPORARY USE
ONLY spare tire should be used on the
rear wheels and the original tire used
on the front wheels (drive wheels).
∙ Tire tread of the TEMPORARY USE ONLY spare tire will wear at a faster
rate than the standard tire. Replace
the spare tire as soon as the tread
wear indicators appear.
∙ Do not use the spare tire on other vehicles.
∙ Do not use more than one spare tire at the same time.
∙ Do not tow a trailer when the TEMPO- RARY USE ONLY spare tire is installed.
CAUTION
∙ Do not use tire chains on a TEMPO-RARY USE ONLY spare tire. Tire chains
will not fit properly and may cause
damage to the vehicle.
∙ Because the TEMPORARY USE ONLY spare tire is smaller than the original
tire, ground clearance is reduced. To
avoid damage to the vehicle, do not
drive over obstacles. Also, do not drive
the vehicle through an automatic car
wash since it may get caught.
8-38Do-it-yourself