Page 171 of 444

1. Pull the hood lock release handle�A
located below the driver side instru-
ment panel. The hood will spring up
slightly.
2. Push the lever
�Bat the front of the
hood to the side as illustrated with your
fingertips and raise the hood
�C.
3. Remove the support rod and insert it into the slot
�D.
4. When closing the hood, reset the sup- port rod to its original position.
5. When closing the hood, return the sup- port rod to its original position, lower the hood slowly and drop the hood
from the height of 8 to 12 in (20 to
30 cm). This allows proper engage-
ment of the hood latch.
WARNING
∙ Make sure the hood is completely
closed and latched before driving.
Failure to do so could cause the hood
to fly open and result in an accident.
∙ If you see steam or smoke coming from the engine compartment, to
avoid injury do not open the hood.
WARNING
∙ Always be sure the lif tgate has beenclosed securely to prevent it from
opening while driving.
∙ Do not drive with the lif tgate open. This could allow dangerous exhaust
gases to be drawn into the vehicle. For
additional information, refer to “Ex-
haust gas (carbon monoxide)” in the
“Starting and driving” section of this
manual.
∙ Do not leave children or adults who would normally require the assis-
tance of others alone in your vehicle.
Pets should also not be lef t alone.
They could accidently injure them-
selves or others through inadvertent
operation of the vehicle. Also, on hot,
sunny days, temperatures in a closed
vehicle could quickly become high
enough to cause severe or possibly
fatal injuries to people or animals.
∙ Always be sure that hands and feet are clear of the door frame to avoid
injury while closing the lif tgate.
LPD2494
HOOD LIFTGATE
Pre-driving checks and adjustments3-21
Page 173 of 444

OPENING THE LIFTGATE
To open the lif tgate use the following op-
erations:∙ Release the mechanical key from the Intelligent Key and insert the key into
the key cylinder on the lif tgate (if so
equipped) to unlock. Then push the lif t-
gate opener switch and pull up on the
lif tgate.
∙ Push the
button on the Intelligent
Key. Then push the lif tgate opener
switch and pull up on the lif tgate. ∙ With the Intelligent Key in range, push
the lif tgate request switch (if so
equipped) and pull up on the lif tgate.
CLOSING THE LIFTGATE
WARNING
∙ Do not shut the lif tgate with one handand the other hand remaining on the
lif tgate or vehicle body. Doing so may
lead to your hand becoming trapped
and could result in an injury.
∙ When closing the lif tgate, do not place your hands near the edge of the lif t-
gate. Always be sure to close the lif t-
gate from the outside.
∙ Af ter closing the lif tgate, be sure to check that it has been closed securely.
If the lif tgate opens while the vehicle
is being driven this could result in a
serious accident.
To close the lif tgate, pull down until it se-
curely locks.
SECONDARY LIFTGATE UNLOCK
Follow the following steps to unlock the
lif tgate when the battery is discharged.
NOTE:
It is recommended that you visit a
NISSAN dealer as soon as possible for
inspection.
Unlocking the lif tgate:
LPD2476LPD2604
Pre-driving checks and adjustments3-23
Page 174 of 444
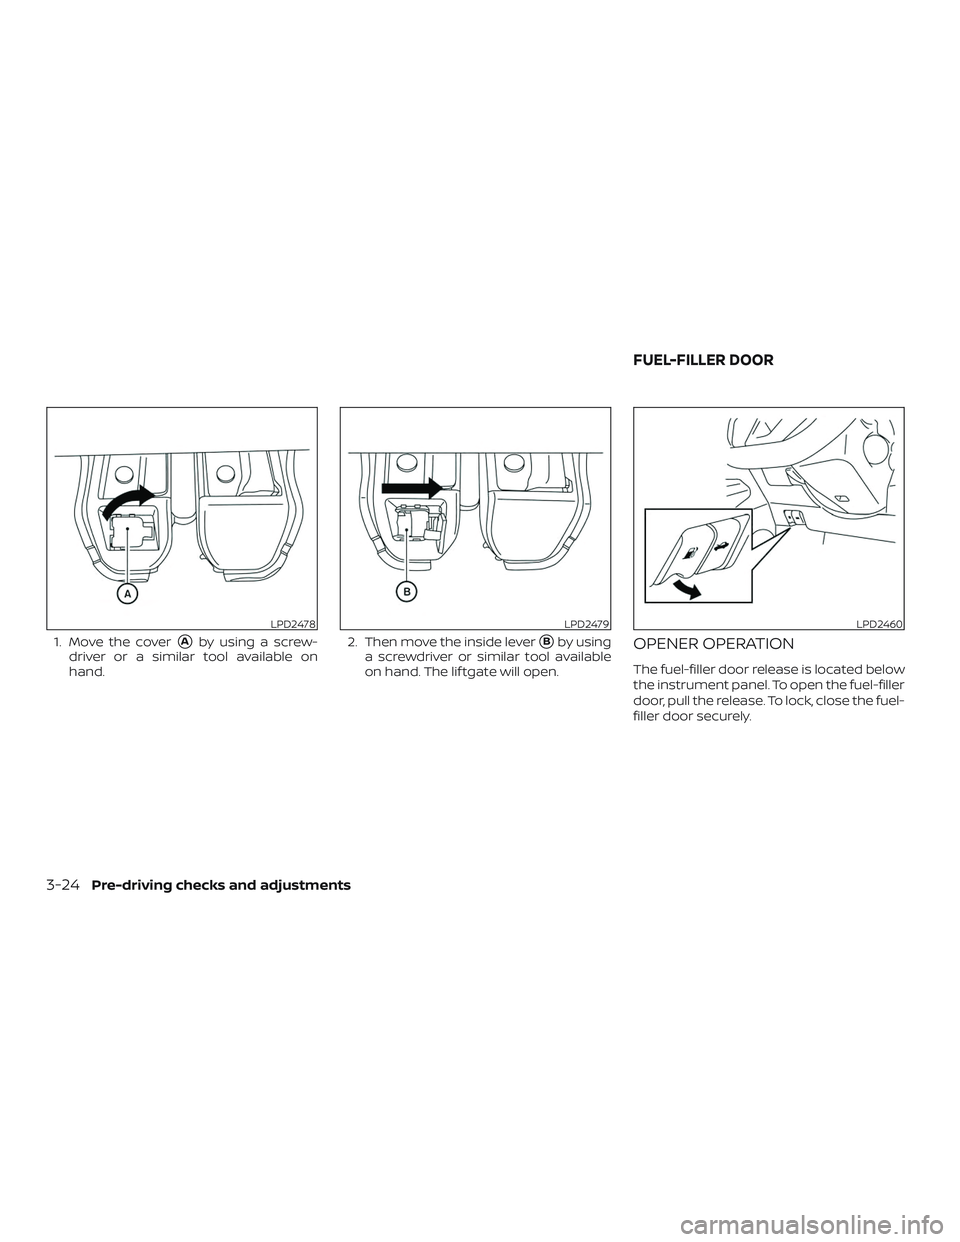
1. Move the cover�Aby using a screw-
driver or a similar tool available on
hand. 2. Then move the inside lever�Bby using
a screwdriver or similar tool available
on hand. The lif tgate will open.OPENER OPERATION
The fuel-filler door release is located below
the instrument panel. To open the fuel-filler
door, pull the release. To lock, close the fuel-
filler door securely.
LPD2478LPD2479LPD2460
FUEL-FILLER DOOR
3-24Pre-driving checks and adjustments
Page 176 of 444

To remove the fuel-filler cap:1. Turn the fuel-filler cap counterclock- wise to remove.
2. Loop the tether strap around the hook
�1while refueling.
To install the fuel-filler cap: 1. Insert the fuel-filler cap straight into the fuel-filler tube.
2. Turn the fuel-filler cap clockwise until a single click is heard.
WARNING
∙ Do not adjust the steering wheel whiledriving. You could lose control of your
vehicle and cause an accident.
∙ Do not adjust the steering wheel any closer to you than is necessary for
proper steering operation and com-
fort. The driver’s air bag inflates with
great force. If you are unrestrained,
leaning forward, sitting sideways or
out of position in any way, you are at
greater risk of injury or death in a
crash. You may also receive serious or
fatal injuries from the air bag if you
are up against it when it inflates. Al-
ways sit back against the seatback
and as far away as practical from the
steering wheel. Always use the seat
belts.
MANUAL OPERATION
Tilt and telescopic operation
Pull the lock lever�1down:
∙ Adjust the steering wheel up or down in direction
�2to the desired position.
∙ Adjust the steering wheel forward or backward in direction
�3to the desired
position.
Push the lock lever
�1up firmly to lock the
steering wheel in place.
LCE2260LPD2448
STEERING WHEEL
3-26Pre-driving checks and adjustments
Page 177 of 444
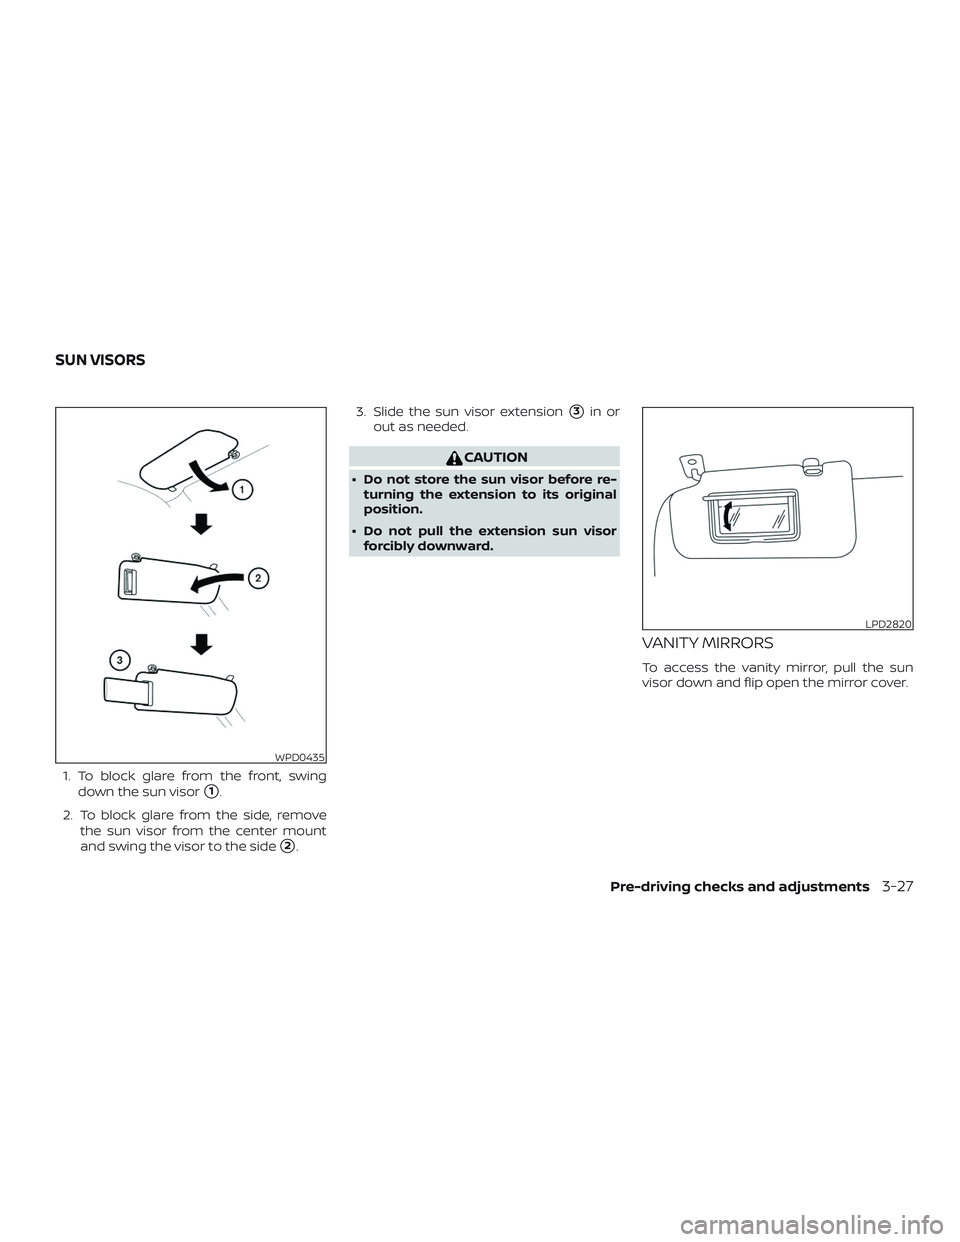
1. To block glare from the front, swingdown the sun visor
�1.
2. To block glare from the side, remove the sun visor from the center mount
and swing the visor to the side
�2. 3. Slide the sun visor extension
�3in or
out as needed.
CAUTION
∙ Do not store the sun visor before re- turning the extension to its original
position.
∙ Do not pull the extension sun visor forcibly downward.
VANITY MIRRORS
To access the vanity mirror, pull the sun
visor down and flip open the mirror cover.
WPD0435
LPD2820
SUN VISORS
Pre-driving checks and adjustments3-27
Page 186 of 444

Menu itemResult
Settings Touch to change the following settings.
Connections Touch this key to select either Bluetooth® phone, Bluetooth® audio or USB audio options. For additional
information, refer to “USB connections screen” and “Bluetooth® connections screen” in this section.
Phone For additional information, refer to “Bluetooth® Hands-Free Phone System” in this section.
Sound For additional information, refer to “Audio system” in this section.
Volume & Beeps For additional information, refer to “Volume & beeps” in this section.
Clock Touch this key to adjust clock settings.
On-screen Clock Touch to toggle ON or OFF the clock display on the upper right corner of the display screen.
Clock Format Touch to set the clock to 12–hour or 24–hour format.
Daylight Savings Time Touch to adjust the daylight savings time to on or off.
Set Clock Manually Touch to adjust the clock manually; then touch to change between AM and PM, the hour and the
minutes.
System Voice For additional information, refer to “Settings” in this section.
Camera Touch this key to change the camera settings.
Others Touch this key to select and/or adjust various functions of this system. A screen with additional options
will appear.
Display Touch this key to toggle the display off or to adjust the appearance of the display. For additional
information, refer to “Adjusting the screen” in this section.
Language Touch this key to change the language on the display.
OSS Licenses Touch this key to display sof tware licensing information.
Return All Settings To Default Touch this key to return all settings to default and to clear the memory.
4-6Monitor, climate, audio, phone and voice recognition systems
Page 201 of 444

Backing up behind a projecting
object
The position�Cis shown farther than the
position
�Bin the display. However, the po-
sition
�Cis actually at the same distance as
the position
�A. The vehicle may hit the object when backing up to the position
�A
if the object projects over the actual back-
ing up course.
HOW TO PARK WITH PREDICTED
COURSE LINES
WARNING
∙ If the tires are replaced with different
sized tires, the predicted course lines
may be displayed incorrectly.
∙ On a snow-covered or slippery road, there may be a difference between
the predicted course line and the ac-
tual course line.
∙ If the battery is disconnected or be- comes discharged, the predicted
course lines may be displayed incor-
rectly. If this occurs, please perform
the following procedures:
– Turn the steering wheel from lock to lock while the engine is running.
– Drive the vehicle on a straight road for more than 5 minutes.
∙ When the steering wheel is turned with the ignition switch in the ON po-
sition, the predicted course lines may
be displayed incorrectly. 1. Visually check that the parking space is
safe before parking your vehicle.
2. The rear view of the vehicle is displayed on the screen
�Awhen the shif t lever is
moved to the R (Reverse) position.
LHA5052LHA5043
Monitor, climate, audio, phone and voice recognition systems4-21
Page 209 of 444

MOD SYSTEM LIMITATIONS
WARNING
Listed below are the system limitations
for MOD. Failure to operate the vehicle
in accordance with these system limita-
tions could result in serious injury or
death.
∙ Do not use the MOD system whentowing a trailer. The system may not
function properly.
∙ Excessive noise (for example, audio system volume or open vehicle win-
dow) will interfere with the chime
sound, and it may not be heard.
∙ The MOD system performance will be limited according to environmental
conditions and surrounding objects
such as:
– When there is low contrast be- tween background and the moving
objects.
– When there is a blinking source of light.
– When strong light such as another vehicle’s headlight or sunlight is
present. – When camera orientation is not in
its usual position, such as when a
mirror is folded.
– When there is dirt, water drops or snow on the camera lens.
– When the position of the moving objects in the display is not
changed.
∙ The MOD system might detect flowing water droplets on the camera lens,
white smoke from the muffler, mov-
ing shadows, etc.
∙ The MOD system may not function properly depending on the speed, di-
rection, distance or shape of the mov-
ing objects.
∙ If your vehicle sustains damage to the parts where the camera is installed,
leaving it misaligned or bent, the
sensing zone may be altered and the
MOD system may not detect objects
properly.
∙ When the temperature is extremely high or low, the screen may not dis-
play objects clearly. This is not a
malfunction. NOTE:
The blue MOD icon will change to orange
if one of the following has occurred
∙ When the system is malfunctioning.
∙ When the component temperature reaches a high level (icon will blink).
∙ When the RearView camera has de- tected a blockage (icon will blink).
If the icon light continues to illuminate
orange, have the MOD system checked. It
is recommended that you visit a NISSAN
dealer for this service.
Monitor, climate, audio, phone and voice recognition systems4-29